phone call

Life’s full of twists and turns, and it’s always better to be prepared for the unexpected. One essential but often overlooked aspect of readiness is having a solid communication plan in place for when a crisis strikes. Whether it’s a natural disaster, a medical emergency, or just one of those Murphy’s Law days, having a plan can make all the difference in keeping you and your loved ones on the same page.

Understanding Crisis Communication

Think about that time when the power went out, and you didn’t know if it was a local blackout or something more serious. A good communication plan can clear up that confusion. Who or where are you going to get information from? Who do you need to communicate information to? And what is the best way to communicate that information?

Here’s a recent example for you (Sept 2023): Our neighborhood recently was put under a ‘stay indoors’ order due to a criminal at large situation (no harm done – was just precautionary in the end), but because of social media laws and safety reasons, they could not post it online other than on a very small select online platforms. Unless you receive regular notifications from those pages, by the time word spread, the order had been lifted. After the fact, I was shown a local newspaper whom has an App (shout out to Cochrane Now!) that you can specifically select what types of notifications/alerts to receive up to date news. Had I had the app I would have received notification quicker.

Now, I’m sure we’ve all faced some crazy situations in our lives. Remember that time your kid got lost at the amusement park? Or there was a tornado warning, or a flood? Crises come in all shapes and sizes, and it’s important to identify the risks you might face so you can respond appropriately.

Creating a Crisis Communication Team

Let’s talk teamwork. In my family, we’ve all got our roles. I am the organizer, my husband is the runner, and my kids have assignments to deal with pets, grab-and-go bags, etc. Who’s who in your household? Designate your roles and responsibilities in advance.

And don’t forget to pick a spokesperson! It’s much easier to have one person relay information to worried friends or relatives than having everyone calling and texting different information to different people.

If you are single, or live alone, you can still have a team!

Developing Key Messages

Do you remember that time when a little one scraped their knee and wouldn’t stop crying? What did you say to calm them down? Simple, soothing words. The same goes for crisis communication. Craft messages in advance that are simple, easy to understand and address the immediate concerns.

Sample Scenario: Your area is under a severe weather warning, and a hurricane is headed your way…

Key Message 1: Safety First: “Hey, our top priority is your safety. Please stay indoors, away from windows, and in the most secure part of the house. We’ve got plenty of supplies, and we’ll ride this storm out together.”

Key Message 2: Status Update: Keep your radio or communication source on for updates. Remember to charge your phones and stay connected. “As of now, the hurricane is expected to make landfall within the next 12 hours. We’re closely monitoring the situation and will keep you updated.”

Key Message 3: Emergency Contacts: “Here are the emergency contacts we have handy to reach whom we need when we need”:

  • Local Emergency Services: [Phone Number]
  • Out-of-town Relative: [Relative’s Name and Phone Number]
  • Neighbors: [Neighbor’s Names and Contact Info]
  • In-Case-of-Emergency (ICE) Contacts in Your Phones: [ICE Contact Names and Numbers]

Key Message 4: Family Reassurance: “Kids, we know this can be scary, but we’re here with you. We’ve prepared for this, and we’re going to stay safe together. We’ve got board games, snacks, and your favorite stories to keep us entertained.”

Key Message 5: Evacuation Plan (if applicable): “In case the situation worsens and we need to evacuate, we have a plan in place. We’ll pack our essentials, secure the house, and head to [Evacuation Location]. If that changes, all of us will know.”

Key Message 6: Post-Storm Check-In: “After the storm passes, we’ll conduct a safety check before anyone ventures outside. Please wait for the all-clear signal before moving around. We’re in this for the long haul, and your safety is our priority.”

These key messages provide crucial information, reassure family members, and ensure everyone is on the same page during a hurricane. Remember to adapt your messages to fit the specific crisis you’re facing, and always keep them clear and concise.

Communication Channels

Nowadays, we’ve got a multitude of ways to stay connected: phones, social media, and good old-fashioned face-to-face communication. Make a list of all the tools you can use and establish an emergency contact list. That way, you won’t be scrambling for numbers when you need them most.

Here’s a list of common communication channels to consider including in your household crisis communication plan:

  1. Phone Calls: Make sure everyone in your household has a list of important phone numbers.
  2. Text Messaging (SMS)
  3. Social Media: Social media platforms like Facebook, Twitter, and Instagram can be used to update friends and family about your status during a crisis. You can also follow local emergency services’ accounts for updates.
  4. Email
  5. Two-Way Radios/Walkie-Talkies: In some cases, walkie-talkies can be handy for communicating within your household or with neighbors over short distances.
  6. Emergency Alert Systems: Sign up for local emergency alert systems and apps. Here in Alberta it is the AEA (Alberta Emergency Alert app).
  7. Group Messaging Apps: Apps like WhatsApp, or Facebook Messenger
  8. Landline Phones: If you have a landline phone, it can be more reliable during power outages.
  9. In-Person Communication: Don’t forget about face-to-face communication. Establish a meeting point within your household where family members can gather to discuss the situation.
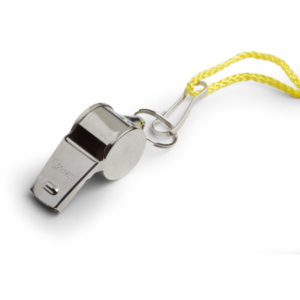
  10. Emergency Whistle or Signal: In case you need to communicate over short distances without technology, consider having an emergency whistle or signal system.

Building a Crisis Communication Plan

Imagine you’re preparing for a camping trip. You wouldn’t head out without a tent and some snacks, right? Similarly, don’t go into a crisis without a plan. Create a step-by-step guide for different types of crises, and put together a crisis communication kit. Practice makes perfect, so run some drills with your family to make sure everyone knows the plan.

Let’s take a closer look at building a step-by-step crisis communication plan:

  1. Identify the Crisis Scenarios: Start by identifying the different types of crises your household may face. These can include natural disasters (e.g., hurricanes, earthquakes, floods, wildfires,), medical emergencies, power outages, or personal crises (e.g., a family member goes missing).
  2. Assess the Risks: Once you’ve identified potential crises, assess the risks associated with each scenario. Consider the severity of the crisis, its likelihood, and the potential impact on your household. Prioritize them based on their potential impact.
    • Develop Key Messages: Craft clear, concise, and empathetic key messages for each crisis scenario. These messages should address immediate concerns, provide guidance, and convey empathy and reassurance. For example:
      • Safety First: “Our top priority is your safety. Stay indoors and stay safe.”
      • Status Update: “We’re monitoring the situation closely and will keep you updated.”
      • Emergency Contacts: “Here are the essential contacts you need to have handy.”
  3. Select Communication Channels: Determine which communication channels (see above) you’ll use for each type of crisis.
  4. Prepare an Emergency Contact List
  5. 72 Hour Kits
  6. Drills and Practice: Conduct regular drills with your household members to ensure everyone understands their roles and the plan’s procedures.
  7. Regularly Update the Plan: Keep your crisis communication plan up-to-date. Review it annually or whenever there are changes in your household, such as new family members or updated contact information.
  8. Emergency Protocols: In addition to communication, establish emergency protocols for other aspects of crisis management, such as evacuation routes, first aid procedures, and accessing emergency supplies.
  9. Seek Professional Help: If your household includes individuals with specific medical needs or disabilities, ensure your communication plan addresses their unique requirements.
  10. Post-Crisis Evaluation

Remember that a crisis communication plan should be adaptable to different situations and continually refined based on your experiences and changing circumstances. The goal is to ensure the safety and well-being of your household members while effectively managing communication during challenging times.

Staying Informed

You’ve got your plan in place, but what if things change? Keep an eye on the news and alerts. During the pandemic I was glued to the news reports to know when it was safe to venture out. Staying informed is a key part of crisis communication.

Post-Crisis Evaluation

Once the dust settles, it’s time for some reflection. Did your communication plan work as expected? Identify what went well and what could be improved. Remember, a good plan is a dynamic one, so update it for future readiness.

Having a communication plan can keep heads cool and stress levels under control when chaos strikes. So, take some time to put together your plan, involve your family, and remember that it’s all about keeping everyone safe and sound. You’ve got this!


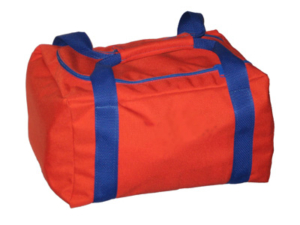
emergency kit to store in the vehicles


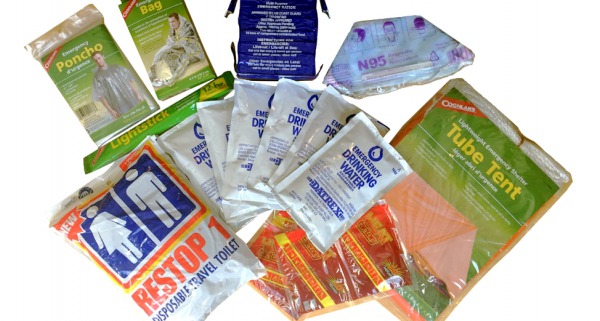
72 hour kitThe Role of 72-Hour Kits

What exactly are 72-hour kits, and why are they so important? They can also be referred to as “bug out kits” or “grab-and-go bags”. These kits are carefully assembled collections of items designed to sustain you and your family for up to 72 hours in the event of an emergency. But why 72 hours, you ask?

The 72-hour timeframe is not arbitrary; it’s based on the idea that during the initial aftermath of an emergency or disaster, it can take up to three days for first responders and relief agencies to establish order, set up logistics and provide assistance. In those hours, your 72-hour kit can become your lifeline, ensuring you have the necessary supplies to weather the storm, both figuratively and literally.

Example: Imagine a situation where a major storm knocks out power and makes roads impassable in your neighborhood. In such scenarios, your 72-hour kit offers a sense of security and self-reliance. It provides you with shelter, sustenance, and the tools needed to address immediate medical concerns. In essence, it’s your insurance policy for a smoother transition through the initial phases of an emergency.

Who Needs One?

Now, let’s address a common question: “Who should have a 72-hour kit?” The answer is remarkably straightforward: everyone should. Emergencies are indiscriminate; they don’t differentiate between urban, suburban, or rural settings, nor do they consider one’s occupation or lifestyle. In essence, these kits serve as a safety net, a wise investment in your well-being regardless of where you reside or your daily routines.

Customizing Your Kit

Think about your unique family. If you have infants or elderly family members, consider specialized supplies like baby formula or prescription medications. Those with food allergies or medical conditions might require specific items in their kits to help out with individual situations.

  • Food: When it comes to food, opt for non-perishable items like canned goods (don’t forget the can opener!), energy bars, emergency ration bars, or dried fruits. Remember, these should be items you and your family are willing to eat.  So test things out before hand. Example: hand a ration bar around the table before supper one night and take everyone’s feedback.
  • Water: You want to aim for a minimum 1200 calories per day per person. Ensure your kit contains emergency water rations per person. Then pack water extender items,  such as a portable stove to boil water, a pack of water purification tablets, and items such as a LifeStraw water filtration straw or a fully portable water filtration system to extend your ability to create further safe drinking water.

PRO TIP: Remember, this is not a ‘holiday in paradise’ packing list – you will not be able to pack everything you would normally like to eat and drink for 72 hours in a survival kit.  You might be thinking, “how can I have all this in a grab and go kit?” The reality is you cannot have everything. Your packing here for survival in an emergency situation. The goal is to get through it, not enjoy restaurant quality steak every night.

  • Clothing and Gear: Depending on your climate, pack appropriate clothing and footwear. Don’t forget essentials like blankets  (like compact emergency bags), gloves, hats and sturdy shoes. A reliable multi-tool or Swiss Army knife can be invaluable.

I have three children (all boys), and keeping them in the right size clothes is challenging. My 72 hour kit  focuses on having underwear and socks, and a couple too-big t-shirts (better than too small I think!), plus toothbrushes, toothpaste, deodorant and a pack of wipes. In a grab-and-go pinch I personally like the idea of having fresh underwear daily (maybe that’s just me?) for everyone, even if they do not have clean pants daily! It’s the little things right?

Customizing Continued:

  • Communication: Include a battery-powered radio or a hand-crank model to stay informed.
  • Lighting: Flashlights with extra batteries, candles, and waterproof matches are also idea for providing light during power outages.
  • Documents: Make copies of essential documents like IDs, passports, and insurance policies and put them in the kit today!
  • Cash and Spare Keys: Stash some cash in small denominations. You never know when ATMs might be inaccessible. Spare keys to your home and vehicles can also be handy.
  • Entertainment: Maintaining morale by including some form of entertainment like a deck of cards or a favorite book. A pair of dice can provide plenty of fun with a little imagination.
  • Pets: Don’t forget your furry family members. Ensure you have their 72 hour kit with some food, water, leashes, and any necessary medications. Their comfort and well-being matter too – especially in an emergency. You don’t want to have to split your ration with your puppy when you are both starving.

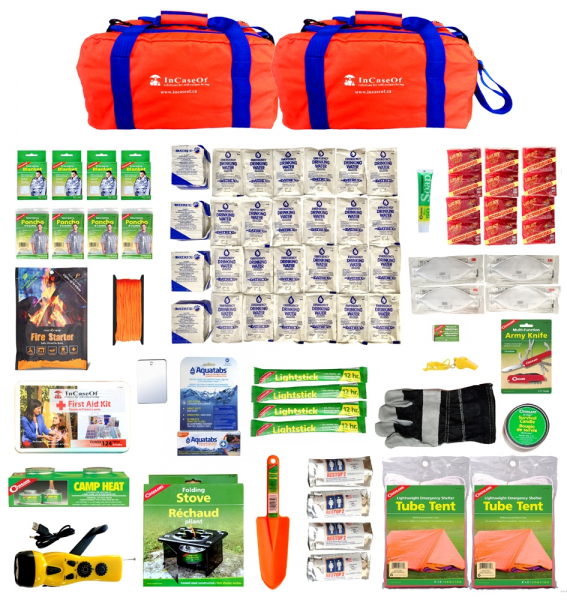
Want to save your time? We done all the research and have created some meticulously curated 72 Hour Kits to choose from! Check out these 2 or 4 person deluxe kits, and these 2 or 4 person basic kits. We also have upgrade kits to adapt the kit for additional family members.

Maintaining and Updating Your Kit

Having a well-prepared 72-hour kit is fantastic, but it’s not a set-it-and-forget-it situation. Regular maintenance is key to ensuring your kit remains reliable.

Expiration Dates: Check the expiration dates on food and medication. This ensures your supplies are safe to consume when an emergency arises.

Rotation: Periodically rotate food items and batteries to prevent them from becoming unusable. A good rule of thumb is to review your kit yearly or when the seasons change (winter to summer, summer to winter).

Seasonal Adjustments: Be mindful of the changing seasons. Swap out clothing and gear as needed to match the weather conditions. If you live in an area with harsh winters, consider including items like hand warmers and thermal blankets. Have clothing and gear lists based on the seasons to allow for ease of adjusting your kit. Or if possible, create a winter add-on kit that sits beside your 72 hour kit, that you would only need to grab in that season.

Accessibility: Ensure your kit is easily accessible. Everyone in your household should know where it’s stored, and it should be within quick reach. If you have multiple family members, you might even consider creating individual kits for each person. Use the opportunity to teach the children how to manage their own kits.

Training: Familiarize yourself and your family with the contents of your kit. Know how to use items like the first aid supplies and the hand-crank radio. Practice your emergency plan regularly to ensure everyone knows what to do in case of an evacuation. You can have some really funny family nights going through your kit.

Sample 72 Hour Kit Checklist

*This can be part of your shelter-at-home storage, or have a grab and go plan.

Water:

  • Three gallons per person (1 gallon per day)
    • Hauling that much water in a grab and go emergency is not necessarily realistic. This would be an opportunity to make a plan based on various scenarios that could occur. Ex: Suzy’s job is to grab as much of the stored water jugs as possible before departure. Or, every kit contains a life straw and water purification tablets, knowing that your evacuation destination is near a river.
  • Water purification tablets or a portable filter

Food:

  • Canned goods (soup, veggies, fruits)
  • Energy bars or granola bars
  • Emergency ration bars
  • Dried fruits and nuts
  • Peanut or almond butter
  • Canned tuna or chicken
  • Ready-to-eat meals (MREs or freeze-dried)
  • Instant oatmeal or cereal

First Aid:

  • First aid kit with bandages, antiseptic wipes, and tape
  • Prescription meds (if needed)
  • Pain relievers (e.g., aspirin, ibuprofen)
  • Tweezers, scissors, thermometer
  • Specific personal medical supplies or equipment

Shelter/Warmth:

  • Blankets or sleeping bags or emergency blankets (for space)
  • Warm clothing (layers)
  • Rain poncho or waterproof jacket
  • Tarp or emergency shelter
  • Hand warmers

Communication:

  • Battery-powered/hand-crank radio
  • Extra batteries/phone charger/power bank
  • Whistle or signaling device
  • Notepad and pen

Light:

  • Flashlight with extra batteries
  • Headlamp (hands-free)
  • Glow sticks or candles

Personal Hygiene:

  • Toothbrush and toothpaste
  • Soap and hand sanitizer
  • Moist towelettes or baby wipes
  • Toilet paper
  • Feminine hygiene products (if needed)
  • Travel sized shampoo and conditioner

Documents/Cash:

  • Copies of IDs, passports, insurance (in waterproof container)
  • Cash in small denominations
  • Spare keys (home, vehicles)

Entertainment/Comfort:

  • Deck of cards or small games
  • Favorite book or magazine
  • Comfort items for children (toys, stuffed animals)

Pets (if applicable):

  • Pet food and water
  • Leash or harness
  • Pet carrier or crate
  • Medications, vaccination records for pets

Being prepared is not about fear; it’s about confidence in the face of uncertainty. By investing in a 72-hour kit and keeping it up to date, you’re taking a proactive step toward ensuring the safety and well-being of your family during emergencies. Let us help you! Stay safe, stay prepared!

Freeze dried strawberries, bananas and peas

The two popular methods of freeze-drying and dehydration have gained widespread recognition for their ability to extend the shelf life of various food products. In this article, we’ll delve into the intriguing world of food preservation, in particular the differences between freeze-drying and dehydration.

The Basics of Freeze-Drying and Dehydration

Let’s start with the basics. Freeze-drying and dehydration are both methods used to remove moisture from food, thereby preventing spoilage. But how do they work?

Freeze-Drying:

Freeze-drying, also known as lyophilization, is a sophisticated and gentle food preservation method. Here’s how it works:

  1. Freezing: The process begins by freezing the food at extremely low temperatures. This step solidifies the water content within the food, turning it into ice.
  2. Sublimation: Once frozen, the food is placed in a vacuum chamber, where the pressure is lowered significantly. Under these conditions, a fascinating phenomenon called sublimation occurs. Instead of melting into a liquid, the ice within the food directly transitions into a vapor. This process effectively removes the water content while preserving the food’s structure and nutrients.
  3. Drying: The vapor is then collected and removed, leaving behind freeze-dried food with minimal moisture content. This low moisture level inhibits the growth of microorganisms, making the food resistant to spoilage.

Freeze-drying’s advantage lies in its ability to preserve the food’s original shape, color, flavor, and nutritional content. The gentle process ensures that delicate fruits, vegetables, and even dairy products maintain their quality and integrity.

Dehydrating: The Traditional Approach

Dehydration, also known as air drying, sun drying, or simply drying, is a more traditional food preservation method:

  1. Heat and Airflow: Dehydration involves exposing the food to heat and airflow. This combination encourages the evaporation of moisture from the food.
  2. Moisture Removal: As the food loses moisture, it becomes less susceptible to spoilage, as most microorganisms require water to thrive.

Dehydration is a simpler and less energy-intensive process compared to freeze-drying, making it more accessible for home use. However, it’s important to note that the higher temperatures involved in dehydration can lead to some loss of flavor, color, and nutrients in the food. Consequently, while dehydration is effective, it may result in some alterations in the food’s characteristics.


Shelf Life

Both freeze-drying and dehydration excel in extending the shelf life of foods by reducing their moisture content. This reduction in moisture is a crucial factor because it limits the availability of water for microbial growth and enzymatic reactions that cause spoilage. Here’s a closer look at the shelf life of products preserved using these methods:

  • Freeze-Dried Shelf Life: Freeze-dried foods typically have an impressive shelf life. Depending on the specific product and packaging, they can last anywhere up to 30+ years. The extended shelf life is due to the minimal moisture content remaining in the food, which effectively inhibits the growth of bacteria, yeasts, and molds.
  • Dehydration Shelf Life: Dehydrated foods also enjoy a substantial increase in shelf life compared to their fresh counterparts. However, they generally have a shorter shelf life compared to freeze-dried foods. Dehydrated products can last for several months up to a 10 years or more, depending on factors such as moisture content, storage conditions, and packaging.

Storage Conditions

  • Freeze-Dried Food Storage: Freeze-dried foods are often packaged in moisture-resistant containers, such as vacuum-sealed pouches or cans. These containers help protect the food from moisture in the environment. To maximize shelf life, it’s important to store freeze-dried products in a cool, dark, and dry place. Avoid exposure to heat, humidity, and direct sunlight. Properly stored freeze-dried foods can maintain their quality for an long, long time.
  • Dehydrated Food Storage: Dehydrated foods are typically packaged in airtight containers, such as vacuum-sealed bags or jars. While they have a longer shelf life compared to fresh foods, they are not as moisture-resistant as freeze-dried products. To preserve the quality of dehydrated foods, store them in a cool, dry place away from direct sunlight. Proper packaging and storage can help prevent moisture absorption and lock in the product’s shelf life.

Choosing the Right Preservation Method

When selecting between freeze-drying and dehydration, it’s important to consider your specific storage capabilities and needs.

  • Freeze-dried foods often require less protective packaging and are more forgiving when it comes to storage conditions, making them suitable for long-term storage in various settings.
  • Dehydrated foods, while still effective for extending shelf life, may require more attention to packaging and storage to maintain their quality over time.

Rehydration

The usability of preserved foods is a critical aspect to consider, especially when it comes to preparing and enjoying meals. Aka, how easy is it to transform preserved foods back into their original, palatable forms?

Rehydration Process
  • Freeze-Dried Foods: Rehydrating freeze-dried foods is a quick, straightforward and hassle-free process. Most freeze-dried items can be revitalized in mere minutes by simply adding hot water, allowing them to absorb the liquid and regain their original texture, flavor, and appearance. The simplicity of this method makes freeze-dried foods an excellent choice for quick, on-the-go meals, backpacking, and emergency food supplies.
  • Dehydrated Foods: Rehydrating dehydrated foods is also relatively simple, but it can vary depending on the type of food and the intended use. Common rehydration methods for dehydrated foods include soaking in hot water, simmering, or cooking in soups and stews. While these methods are effective, they may require a bit more time and attention than rehydrating freeze-dried foods.
Taste and Appearance After Rehydration
  • Freeze-Dried Foods: When freeze-dried foods are rehydrated, they retain much of their original taste, texture, and appearance. Fruits still have their natural sweetness and shape, vegetables maintain their crispness, and meats maintain their tenderness. This preservation of freshness makes freeze-dried foods suitable for snacking, camping, and situations where you want the food to closely resemble its fresh counterpart.
  • Dehydrated Foods: Dehydrated foods, when rehydrated, may not always fully recover their original texture. Some may become softer or have slight changes in flavor. However, the adaptability of dehydrated foods shines when incorporated into recipes that already have a lot of water/moisture content or require longer cooking times. Dehydrated foods readily absorb flavors from broths, sauces, and seasonings, making them a versatile ingredient in various dishes, such as soups, casseroles, and stir-fries.

Culinary Applications: Convenience vs. Creativity

  • Freeze-Dried Foods: Freeze-dried foods are known for their convenience and are often used as standalone snacks (some freeze dried apple slices in your kids lunch), added into smoothies, or as toppings for cereals and desserts. They are also popular for quick, no-cook meals during outdoor activities. The convenience factor makes freeze-dried foods a preferred choice for hikers, campers and outdoor lovers who want lightweight, quick and easy-to-prepare meals.
  • Dehydrated Foods: Dehydrated foods, while still suitable for outdoor adventures, shine in creative culinary applications. They can add flavor and nutrition to a wide array of recipes. Dehydrated vegetables, for example, are excellent for enhancing the flavor of soups, while dehydrated fruits can be rehydrated and baked into muffins or added to oatmeal. Their versatility allows home cooks to experiment with flavors and textures.

Weight and Portability

For backpackers and travelers, the weight of food is a critical consideration. Freeze-dried foods have the upper hand here, as they are much more lightweight and easy to carry than their dehydrated counterparts. This advantage can make a significant difference when packing for extended outdoor adventures.

Cost Considerations

Cost can be a significant factor when choosing between these preservation methods. Dehydrated products are often more budget-friendly due to their simpler processing requirements. Freeze-dried foods are sometimes pricier as they have more steps to go through to get to the final product, yet offer superior flavor, texture, and nutritional benefits.

To Recap:

Pros of Freeze-Drying

  1. Preservation of nutrients
  2. Retained flavor, texture, and shape
  3. Long shelf life
  4. Lightweight and portable
  5. Quick rehydration or even edible without rehydration
  6. Minimal food waste or spoilage

Cons of Freeze-Drying:

  1. Cost
  2. Energy-intensive
  3. Complexity for home use

Pros of Dehydrating Food:

  1. Extended shelf life
  2. Portability
  3. Versatility in cooking
  4. Minimal / less expensive equipment required

Cons of Dehydrating Food:

  1. Texture and flavor changes
  2. Nutrient loss
  3. Increased rehydration time
  4. Minimal weight reduction

Conclusion

In the world of food preservation, both freeze-drying and dehydration have their unique strengths and applications. Your choice between these methods should depend on your specific needs, whether it’s for home use, outdoor adventures, or long-term storage. It’s essential to appreciate the significance of both techniques in ensuring we have access to delicious and nutritious meals throughout the year.

Give us a shout if you have any questions about either of these methods. BridenAcademy@bridensolutions.ca

bandage on a scraped knee

Picture this: You’re on a picturesque hiking trail looking deep into the beauty of a canyon, the sun is shining, the water is the most beautiful blue you’ve ever laid eyes on, and the crisp mountain air fills your lungs. It’s a perfect day for an adventure. But wait, you trip and fall down! That’s where first aid for hikers comes into play. I’m here to share some tips to ensure your outdoor escapades stay fun and safe.Fossil Falls Kananaskis

#1: First Aid Kit – have one with you!

#2: Bear Spray (if applicable in your hiking zone)

#3: Emergency kit – just in case!

#4: Know before you go: read trail reports, check weather reports, carry maps, tell someone where you’re going and when you expect to return, etc.

The Essentials of Hiking First Aid

Let’s start with the basics. When you hit the trail, you’re stepping into an unpredictable environment, even if you’ve been there before.. Weather can change in an instant, and injuries can happen to even the most experienced hikers. Preventing mishaps is important, so always plan ahead.

  • I remember one time when I didn’t check the weather forecast before heading out, and I got caught in a surprise rainstorm. Lesson learned: preparation is key.

Get yourself a reliable hiking first aid kit. Think of it as your trusty sidekick. Customize it to suit your specific needs, but don’t forget essentials like bandages, antiseptic wipes, pain relievers, and blister treatment. (See below for a suggested itemized list)

Common Hiking Injuries and Ailments

Now, let’s talk about the common injuries and ailments you might encounter out there.

  • Cuts, scrapes, and abrasions happen to the best of us. Clean it up, cover it, and prevent infection. A small injury can quickly become a big problem if left untreated.
  • Sprains and strains can cramp your style. Remember the RICE protocol: Rest, Ice, Compression, Elevation. I carry ankle and knee braces, tensors, and even hiking poles to cover my sprain bases.
  • Blisters – oh, the bane of hikers’ existence. Prevention is key here. Properly fitted shoes and moisture-wicking socks can work wonders, plus pre-wrapping or taping areas prone to them. But if you do get a blister, treat it early to avoid misery on the trail. Cover it with a bandage or moleskin. Cut a piece of moleskin into a doughnut shape and place the pad so that it encircles and protects the blister.
  • Heat-related illnesses are no joke. Stay hydrated, wear appropriate hats/clothing, and monitor your time in direct sunlight.  Recognize the signs of heat-related issues: heavy sweating, nausea, headaches, dizziness, clammy skin, and/or irregular pulse.
  • Hypothermia and frostbite are risks in colder climates. Living in Alberta, Canada we do have some experience with winter conditions. Layering is important. Recognizing the symptoms and knowing how to rewarm yourself or a fellow hiker is crucial if you choose to be hiking out in the winter conditions. This is where an All Weather Emergency Heat Retention Bag comes into play. Yes, say that fast 5 times!

First Aid Scenarios:

Let’s dive into some real-world scenarios to see how first aid plays out.

Example 1: Dehydration and Heat Exhaustion

Imagine you’re hiking on a sweltering summer day, and yourLifestraw Water filter drinking straw buddy starts feeling dizzy and weak. It might be dehydration or heat exhaustion.

Action: Give them water, find shade, and cool them down. The key is to act swiftly and avoid the dreaded heatstroke. Continue to communicate, assess your hiking situation and whether you need to seek further assistance. Water sometimes can run low/out and we try to ration it. Consider hiking with a life straw or another form of water filtration system to extend your water abilities in times of need.

Example 2: Ankle Sprain  You’re exploring uneven terrain, and you twist your ankle.

Action: Immobilize it and elevate it if possible. Use your one-time use ice pack, tensor bandage or ankle brace. Take some pain killers if needed. Rest and assess whether your group can help you down or if search and rescue or any other help needs to be contacted.

First Aid/Emergency Kit items for Hiking:

gauze on a scrape

  • Antiseptic wipes
  • Antibacterial ointment
  • Band-aids of varying sizes
  • Gauze pads
  • Medical adhesive tape
  • Mole skin or other blister tape/treatment
  • Pain medication
  • After Bite
  • Allergy medication
  • Tweezers
  • Safety pins
  • Cotton Swab/Q-tip
  • Disposable gloves and/or mask
  • Sanitizer/soap
  • Triangular cravat bandage
  • Rolled gauze
  • Tensor wrap
  • Knee/ankle braces
  • Prescription medications
  • Sunscreen/Bug spray
  • Throat lozenges
  • Electrolytes (specifically for hot days)

Tools and Supplies

Remember, it’s not about expecting the worst but being ready for it. The responsibility of hikers is to respect the wilderness and be prepared for whatever it throws our way.

Stay safe out there, and may your hiking adventures be filled with breathtaking views and memorable moments, rather than unexpected mishaps!

Briden Academy

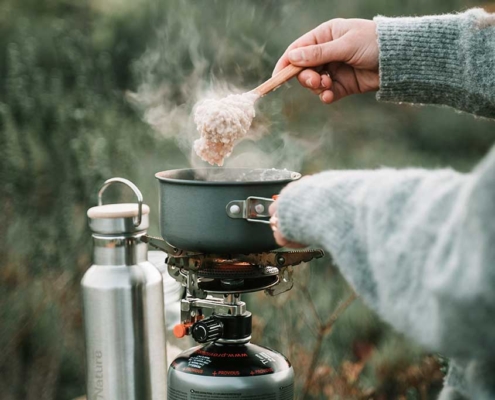
If you’re anything like me, you know that being prepared for any situation is important. One aspect of preparedness that often gets overlooked is portable cooking. Whether you’re an avid camper, a disaster-prep pro, or just looking for ways to cook on the go, this article is here to help.

Briden Academy

Understanding the Need for Portable Cooking

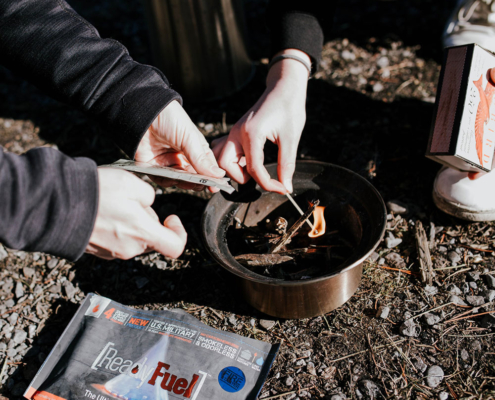
Picture this: You’re out in the wilderness on a camping trip, and it starts pouring rain, soaking all of your wood. Or maybe you’re stuck in a power outage during a winter storm, and your oven is just a fancy metal box. This is where portable cooking becomes your stomach’s best friend.

In my early days of camping I learned the hard way that a box of granola bars can only take you so far. Having a portable cooking solution not only means you can enjoy a hot meal even in adverse conditions, but it’s also a morale booster. There’s something incredibly comforting about a warm meal when everything else seems uncertain.

Types of Portable Heating Solutions

Now, let’s dive in: What are the options for portable heating solutions, you ask?

Camp Stoves and Burners: These are the go-to for many campers. They come in all shapes and sizes, and the fuel options are varied. I remember one particularly camping trip when my trusty propane stove saved the day (due to a fire ban in this case). A cup of hot cocoa never tasted so good!

Solar Ovens and Cookers: These are perfect for the eco-conscious and those seeking a longer-term solution. You might think that solar cooking is too sci-fi, but it’s surprisingly efficient. I can’t say I’ve tried this way yet but I read that someone baked a batch of cookies using nothing but sunshine. It must have felt like a little taste of the future.

Portable Electric Cookers: For those who want the convenience of electric cooking, there are battery-powered or plug-in options. During a power outage or no-power locations, electric can be a little tricky – unless of course you have a generator or battery operated options.

Selecting the Right Portable Cooking Solution

  • Choosing the right heating solution is a bit like picking the perfect outfit for the day. It should fit your needs, style, and budget. Are you a weekend warrior or a hardcore prepper? Consider your situation and what works best for you.
  • I started with a simple camp stove and worked my way up as I gained more experience and needed a bit more firepower (pun intended). Remember, your cooking solution is an investment in your comfort and well-being during emergencies and adventures alike.

Let me tell you about a few of the products that Briden Solutions can offer you in regard to Camp Stoves & Burners. If you click the below links, you can read a great description of each, and how they work:

  1. Basic: Metal Folding Stove
  2. Camp Heat for folding stove
  3. Kelly Kettle Hobo Stove 
  4. Kelly Kettle Base Camp
  5. Jetboil Minimo Stove 
  6. Jetboil – fuel – varying sizes
  7. www.bridensolutions.ca/tools-and-gear/heat-and-fire Also feel free to click on this link in order to see our entire collection of heating products.

Essential Cooking Accessories

Cooking on the go isn’t just about the stove itself; it’s also about having the right tools for the job. It’s the little things that count:

Take some time to decide what you require at your side when it comes to your cooking plan. I have fond memories of my mom’s multiple bins of kitchen gear, organized just so for our family camping trips. She wanted to have everything to make her family cooking efficient and easy for her!

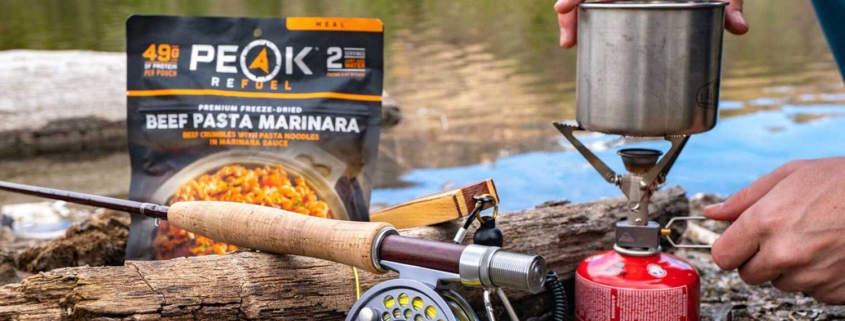
Cooking Tip: Planning is your best friend here. Prepping meals in advance and storing them in vacuum-sealed bags or check out these pre-made meals: Peak, Mountain House, Nutristore or  Backpackers Pantry  It not only saves time but also precious fuel or energy.

Briden Academy

Maintenance and Care of Portable Cooking Equipment

Let us discuss looking after your gear. By following these instructions, you can ensure that your equipment remains in excellent condition, ready to serve you when you need it most.

1. Inspection and Cleaning:
  • Make it a habit to inspect your cooking equipment before and after each use.
  • After each use, clean your cooking gear meticulously. Use warm, soapy water and a non-abrasive sponge or cloth to remove all traces of food, grease, and residue.
  • Allow your gear to air dry completely before storing it. This helps prevent the growth of mold and mildew.
  • For metal equipment, apply a thin coat of food-grade oil to prevent rust formation. Ensure it’s completely dry before storing.
2. Proper Storage:
  • Always store your gear when it’s clean and dry. Moisture can lead to rust and corrosion, which can compromise the equipment’s functionality.
  • Store each piece of your cooking equipment separately, or use dividers to prevent them from scratching or damaging each other.
  • Avoid storing your gear in extreme temperatures, whether it’s excessively hot or freezing cold. Temperature fluctuations can affect some materials.
3. Equipment-Specific Tips:
  • For camping stoves, clean the burner and fuel lines as instructed in manual to ensure efficient and safe operation. Check for clogs, tight connections, and leaks.
  • Non-stick cookware requires special attention. Avoid using metal utensils that can scratch the coating, and always follow the manufacturer’s recommendations for cleaning and maintenance.
  • Keep your utensils and cutlery in good condition by washing them promptly after use and avoiding exposure to moisture.
4. Periodic Maintenance:
  • Over time, parts of your cooking equipment may wear out or become damaged. Keep an eye on items like gaskets, seals, and O-rings, and replace them as needed to maintain safety and functionality.
  • Some equipment, like camping stoves with moving parts, may benefit from occasional lubrication. Consult the user manual for guidance.

By following these detailed instructions you can extend its lifespan and ensure that it remains dependable during your camping trips or in emergency situations. Remember that proper maintenance not only preserves your gear but also contributes to your overall safety and enjoyment in the great outdoors.

So, there you have it—your crash course in portable cooking solutions. Whether you’re a camping enthusiast, a prepper, or just someone who likes to be prepared for whatever life throws your way, having the right heating gear can be a game-changer. Remember, it’s not just about surviving; it’s about thriving, one hot meal at a time. Stay safe, stay prepared, and stay well-fed on your adventures and in emergencies. Happy cooking!

kitchen pantry

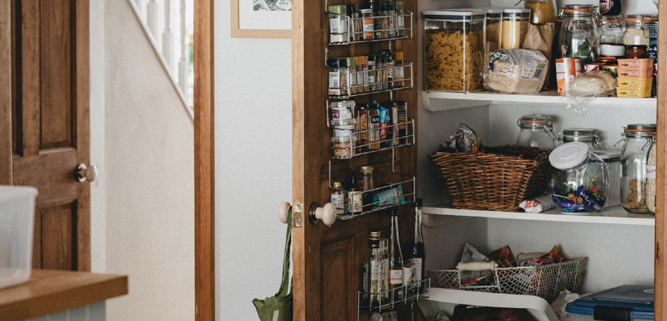
In uncertain times having a well-rounded pantry can be a lifesaver for your home. Stocking up on the right food staples can ensure that you and your loved ones have enough to eat when the unexpected happens. In this article, we’ll dive into  pantry essentials, giving you advice on 7 must-have pantry food staple.

Rice: A Versatile Pantry Champion

Rice is like the superhero of pantry staples. It’s versatile, easy to store, allergy friendly and has an impressively long shelf life. Whether you’re whipping up a stir-fry, or have a picky eater who just likes rice; rice has your back as a valuable source of carbohydrate. Also consider premade rice meals by Peak, or Nutristore to give you more ideas!

Noodles & Grains: Quick and Satisfying

Noodles and grains are perfect for those days when you need a quick, comforting meal. They come in all shapes and sizes, and the best part is that they last a long time in your pantry. Short list includes items like: Macaroni, Spaghetti, Quinoa, Oats, Wheat, and Amaranth.

Vegetables and Fruits: A Nutrient Boost

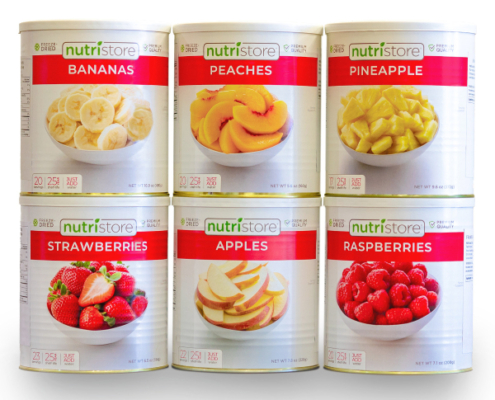
Vegetables and fruits are packed with essential nutrients. They’re like a little burst of sunshine in your pantry, ready to be used in a variety of recipes. Of course you can extend their shelf life with freeze dried or dehydrated options, which you can find here. Freeze dried options also give you the benefit of having less spoilage in your fridge when you forget its there.

Proteins: Your Emergency Protein Fix

Get your math brains working for a moment: The Canada Food Guide suggests that we need a minimum of 0.8grams of protein per body weight kilogram or 0.36grams per pound. So lets pretend that I weigh 130lbs (59kg). That would equal 47grams of protein, which is the equivalent to 7-8eggs, or 1 large chicken breast.   Another calculation I found on the CanadianLiving.com site suggests protein should be approximately 20% of your daily diet. For example: if you consume 1800 calories a day, you would make 360 calories protein based. Of course, your age, daily movement/athletics, etc. factor in also.

Really though, you need protein in your diet to help your body repair cells and make new ones. Protein is also important for growth and development in children, teens, and pregnant women (in case any of these people are in your household). Stock up on canned beans, fish, and meats to keep your energy levels up during tough times. Check out this line of freeze-dried meat and egg options as well.

6 pack of freeze dried meats

Milk: Marvelous Milk

If you have a favorite cereal, soup, or recipe that calls for milk, I highly recommend keeping some powdered milk onskim powerdered milk In Case Of hand! There are so many times when we run out of fresh milk and its not convenient to make a quick run to the grocery store. Powdered milk has a 20 year sealed shelf life. So it will always be there, ready when you need it.

Cooking Oils: The Secret Non-Stick Weapon

Cooking oils are essential for frying, sautéing, and baking. Make sure to choose the right ones for your pantry, and store them properly to extend their shelf life. How do you ask? For longer shelf life, keep it cool in a cabinet or dark place. Cooking oils deteriorate and lose nutritional value more quickly when exposed to light. Some oil brands package their products in dark bottles to preserve their freshness for longer.

Flour and Baking Essentials: Get Your Bake On

food storage items sealed in the pantry

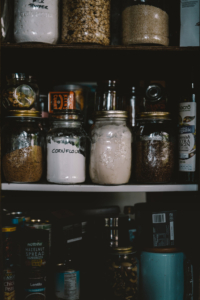
Flour & Sugar seem to be the backbone of many recipes. Having it on hand can open up a world of baking possibilities, from bread to cookies and everything in between. Of course the other essentials include items like baking soda, baking powder, coconut, cocoa, salt, seasonings of choice, etc. These can all turn a simple meal into a culinary delight!

Don’t forget to read through your favorite recipes and consider what ingredients are important to have on hand for your specific family. If your a family that loves ketchup, better have a few extra on hand.

So there you have it, our list of 7 pantry food staples for families.

A few tips before we go:
  1. Store food items you normally eat and enjoy
  2. Rotate through your pantry and storage needs so items do not expire (even with 10+ year shelf lives it’s still possible for them to expire!)
  3. Create a recipe book or a food plan for “in case of emergencies” as to not have to scramble in using your well prepped pantry. Trial run these recipes in good times so you know what your family loves, so you can stock more of those favorites.

Remember, having a well-stocked pantry isn’t just about preparing for the worst—it’s also about peace of mind and being ready for whatever life throws your way. Start building up your pantry today, and keep it growing little by little. Then you can rest easy knowing that you’re taking care of your family’s future, one meal at a time. Stay safe and prepared!

Reach out with any questions or comments: BridenAcademy@bridensolutions.ca

Briden Academy

You never know when Mother Nature might decide to throw a curveball your way, or when circumstances might take a wild turn. That’s why having an emergency shelter is important—you might not need it every day, but when you do, it can save the day!

Why Bother with an Emergency Shelter Kit?

Okay, let’s be real for a second. When I first started thinking about preparing for emergencies, I was more interested in weekend hikes than doomsday scenarios. But then, during one of those adventures, I got caught in a sudden downpour with nothing but a soggy pack and a leaky poncho. It made me realize that life can throw surprises at you when you least expect it. And that’s why having a well-thought-out emergency shelter kit is a game-changer.
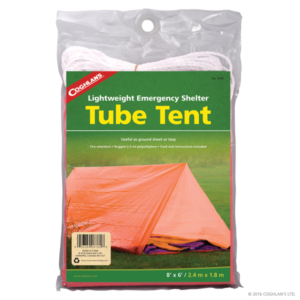

So, what exactly is an emergency shelter kit? It’s a collection of essential items that can keep you safe and comfortable when things go south. Whether you’re stranded in the wilderness, dealing with a power outage, or facing a natural disaster, your shelter kit has you covered – literally! *Modify to fit your needs: a wilderness kit will differ from a grab and go kit and a shelf-in-place kit.

The Must-Have Gear

Coghlans tube tent

Here’s what your emergency shelter kit could include:

1. Shelter Options: You’ll want something to protect you from the elements. Toss in a hammock, umbrella, a tent, a tarp, extra ponchos or even some emergency blankets. In addition, have a plan of locations to take shelter at.

  • For example if you’re not stranded in the woods your plan may include extended family or a neighbors home, a favorite campsite, the family cabin, or a neighborhood church building. The more details you have with your emergency kit the better. If you are in the woods, be able to “set up camp” in a pinch.
  • Check out this other blog of ours here about wilderness shelters & survival.

2. Sleeping Gear: Ever tried sleeping on a cold, hard surface? It’s no fun. Sleeping bags/blankets, sleeping pads or a cot and a pillow can make all the difference. Your local camping store is a great resource for this.

3. Clothing: A full outfit, extra layers, rain gear, and sturdy footwear. Depending on the size of your kit, you may want multiple types of footwear (like rubber boots or sandals).

4. Tools and Equipment: A trusty multi-tool, some rope and duct tape can save you in a pinch.

emergency mirror to call for help

5. Lighting and Communication: Flashlights with extra batteries are a lifesaver. Don’t forget a whistle and a signal mirror—they’re tiny but mighty when you need help.

6. First Aid and Hygiene: Accidents happen. A first aid kit comes in handy. Toss in some personal hygiene items and sanitation supplies just in case!

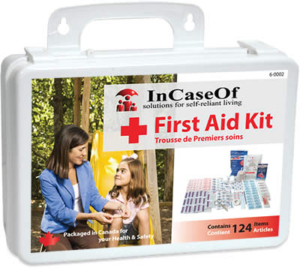
124 piece First Aid Kit

Customize and Maintain Your Kit

Now, here’s the thing—your shelter kit should fit your needs. Consider your family size, where you live, and what kind of emergencies are more likely in your area. And for the love of all things preparedness, check your kit regularly. Replace expired items, clothes too small, and make sure it’s easy to grab in a hurry.

PRO TIP: Consider having a packing list of those items that you use regularly that you need to grab that cannot be kept in your kit full time.

Being prepared can make all the difference when things get tough. So, take action now, create your emergency shelter kit, and rest easy knowing that you’ve got your superhero cape ready to go when you need it most.

Stay safe out there friends and if you have questions, don’t hesitate to reach out to our team via the contact information below!

using soap to wash your hands for sanitation

When disaster strikes, one thing that often gets overlooked in the chaos is food safety and sanitation. I’m here to share some down-to-earth tips on how to keep your grub safe during tough times.

First things first, let’s talk about why this matters. In emergency situations we all still need to eat. In fact, having a meal will likely calm your nerves and bring you and your loved ones some comfort in the stressful moment. However, your food can be a sneaky little troublemaker. It can easily become a source of foodborne illnesses if you’re not careful.

Getting Prepared Beforehand

Here are some tips for getting prepared:

  • Properly label and rotate your food supplies.
  • Keep an eye on temperature, especially if you’ve got perishables.
      • A hot tub of mayo isn’t what you want on your sandwich during a power outage!
  • Water: Have clean water and sanitation on your emergency checklist (ex: water storage, water purification tablets or water filtration systems). Without clean water to wash your hands and food, even the best food safety practices won’t save the day.
  • Plan It Out: Include food safety in your emergency preparedness plan. Think of the hand washing songs – pick your favorite, and make sure to properly wash your hands often.
  • In your emergency kit, keep soap, hand-sanitizer, and clean towels or paper towel available to properly dry.

Safe Food Handling 101

When it’s time to get cooking, don’t forget these basics:

  • Wash those hands! Seriously, it’s a game-changer. Use hand sanitizers and disposable gloves when needed.
  • Cook things thoroughly and follow minimum temperature guidelines.
      • Under cooked chicken is a big no-no.
  • Cross-Contamination Caution: Keep raw and cooked foods apart, and clean your kitchen gear properly.
  • Dispose of spoiled food properly, (throw away, bury or burn) and don’t take chances.

Emergency Cooking

During an emergency, things can get a bit stressful, so here are a few tips:

  • If your power goes out, monitor your fridge and freezer temps. Know when to say goodbye to perishables. Use what you can quickly. When in doubt, throw it out.
  • Consider alternative cooking options in your emergency kit, such as a campfire, a camp stove, or a BBQ.
  • Don’t waste food. Make meal plans based on what you have and cook smaller meals more often.. Every bite counts.
  • If you’re in a temporary shelter, know where your food is coming from and keep your surroundings clean.

After the Storm

When the worst is over, it’s time to clean up and recover. Sanitize your cooking and storage areas, restock your supplies, and reflect on what worked and what didn’t. There is so much to be learned from past experience if we just take the time to debrief.

There’s your friendly reminder that food safety and sanitation should be on your radar during emergencies. It’s not something to take lightly, but with a little know-how, you can protect yourself and your loved ones from unnecessary troubles. Stay safe and stay clean!

Aquadrum 250g water filter with power pump

In emergency preparedness, few considerations are as pivotal as water storage. Water is a fundamental necessity for human survival, and as such, having a dependable supply during times of crisis should be non-negotiable. Today we will look at five pivotal mistakes that individuals commonly make when it comes to emergency water storage.

Mistake #1: Neglecting Water QuantityPuravai emergency drinking water

The human body is highly dependent on water, with the average person requiring a substantial daily intake for hydration and basic physiological functions. In emergency situations, you may need to plan for more water consumption due to increased physical activity, stress, or extreme temperatures.

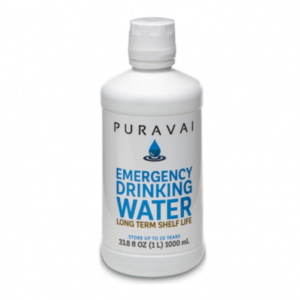
Therefore, it’s a good practice to store at least one gallon (about 3.8 liters) of water per person per day for a minimum of three days in your emergency water supply. This accounts for your drinking needs (2 liters), cooking (1 liter), and limited hygiene needs (the rest).

Consider your household, whether there be anyone requiring increased water needs, and of course also consider your beloved household pets if you have them.

Mistake #2: Choosing Improper Containers

The integrity of water storage containers is important in maintaining water quality. Unsuitable materials can lead to chemical leaching or the penetration of contaminants, rendering stored water unsafe for consumption.

Be sure to discern the appropriate materials for long-term water storage and to avoid those materials that may compromise water quality. For example, you do not want to store water in old used chemical containers from the local car wash. Make sure you are using food grade plastic BPA free containers. Proper water storage container suggestions and ideas can be found here.

Mistake #3: Skipping Water Treatment

Water treatment, often-overlooked stands as the third critical mistake to avoid. Simply storing water is insufficient; one must also ensure its purity and safety. Neglecting water treatment methods can result in microbial contamination and waterborne diseases.

As such, individuals must familiarize themselves with proper water purification and treatment techniques, ensuring potable water. A simple water purification tablet can be quite helpful in many emergency situations. For longer term water requirements, there are also multiple options to filter your water.

Mistake #4: Storing Water in Inadequate Locations

The fourth error in emergency water storage pertains to the selection of inadequate storage locations. Placing water containers in suboptimal environments exposes stored water to contaminates and can compromise the integrity of the water supply. It is suggested NOT to store water in direct sunlight, next to chemicals or contaminants, in unsanitary conditions, or directly on concrete floors (best raised on a pallet or box). The chemicals in the floor can transfer through to your water storage if you store a water container directly on a cement floor.

Mistake #5: Failing to Rotate Water Supplies

The fifth mistake is the failure to rotate water supplies. It is suggested that:

  1. Commercially Bottled Water: Sealed, commercially bottled water typically has a 1 – 2 year shelf life if stored in a cool, dark, and dry place away from direct sunlight and extreme temperatures. However, it is good practice to check the expiration date on the bottles.
  2. Tap Water: If you’re storing tap water in clean, food-grade containers, it can be stored for about 12- 18 months without significant degradation in quality, assuming it has been properly treated and stored in a sanitary manner. It’s ideal to rotate stored tap water every 6 months to ensure freshness.
  3. Filtered or Purified Water: Water that has been filtered or purified using methods such as reverse osmosis or distillation can have a longer shelf life often up to 2 years or more, when stored correctly.

Water Rotation Pro-Tip: To ensure the freshness and quality of stored water, consider a rotation schedule that’s easy to remember. Add this task into the calendar beside something that happens yearly. May I suggest connecting it with something like your mom’s birthday or maybe Halloween. Use and replace stored water every 6 months to 1 year, even if it has been properly stored, then you can feel at peace that your water is still fresh and ready for use in the case of an emergency.

In conclusion, water is undeniably the elixir of life, even more so in times of crisis. Therefore, I’d ask everyone to be vigilant in their emergency preparedness endeavors by avoiding these five water mistakes. Neglecting water quantity, choosing improper containers, skipping water treatment, storing water in inadequate locations, and failing to rotate water supplies are errors that can add unfortunate stress to your situation when that’s the exact opposite of what you need.

light on the wall

Hey there, folks! When it comes to emergency preparedness, we often talk about stockpiling food, water, and even first aid supplies. But there’s one aspect that’s often overlooked until the lights go out – literally. That’s right, I’m talking about lighting! In this article, I want to shed some light on how to choose the right light sources for your family’s emergency preparedness needs.

The Darkness Dilemma

Picture this: It’s the dead of night, and the power’s out. Your kids are scared (maybe you are too), and you’re trying to figure out how to navigate through the pitch-black house. It’s moments like these that make you realize that maybe you don’t know where the flashlights are, or there isn’t any batteries left to run them. So let’s dive into some preparedness ideas!

little boy who is surprised

Flashlights: Your Trusty Sidekick

Flashlights are like the Swiss Army knives of emergency lighting. I don’t know about you, but in our home we have probably a dozen because they’re like the measuring tape – I can never find one when I need one! I have them strategically placed throughout our home. When choosing one, look for those with a sturdy build and a reliable battery life.

Lanterns: Lighting Up the Nightlantern providing light

Lanterns can light up a room like no other. I’ve got battery-powered lanterns we keep in our camping gear. But hey, maybe solar-powered or propane lanterns are the ones for you.  Solar lanterns are eco-friendly, and propane lanterns can keep going as long as you have fuel. The brighter the better when the lights are out.

Headlamps: Hands-Free Heroes

Headlamps are great for those times when you need both hands free. Whether you’re fixing a leaky pipe in the basement, or reading a book to your kids during a power outage, they’re a game-changer. Look for ones with adjustable brightness settings and comfy straps because comfort leads to less stress which is key in the midst of an emergency.

Batteries and Power Management: The Unsung Heroes

I’ve learned the hard way – batteries are like gold during emergencies. Stock up on various types like AA, AAA, and D. It’s best to check all your devices because the ones you need will murphy’s law be the ones you don’t have! And don’t forget about rechargeable batteries and solar chargers to extend your capabilities. Save power by using LED lights and dimming options, and you’ll make those batteries last longer.

Another nifty option is to have battery phone banks charged and handy for your cell phones, because personally I use my phone flashlight on a regular basis and rely on it often. If we have no power, we have no cell phone charger, and that battery pack will feel like a miracle in those types of moments.

Fire and Flame-Based Lighting: Old School, but Still Cool

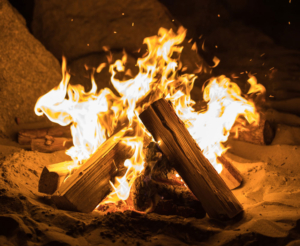
There’s something comforting about the soft glow of candles or the flickering flames of a torch. They’re not the brightest, but they sure add ambiance. Just be careful, folks – fire and emergencies can be a risky mix. Always use them with caution and far away from any fuel sources or flammable materials. Alternatively, you may have a fireplace in your home or even outdoors. Depending on the circumstances, it also provides another light source – and heat as an added bonus.

Solar-Powered Lights: A Bright Idea

Solar-powered lights are like a gift from the sun. They charge during the day and shine all night long. Stick some in your garden for perimeter lighting, and you’ll have a well-lit and secure space during emergencies. Just make sure they get enough sunlight during the day and aren’t blocked by other objects around them.

Emergency Lighting Planning: Shine a Light on It

Plan ahead, my friends! Identify key locations for your light sources, like bedrooms, living areas, garages, and even your backyard. Ensure everyone in the family knows where to find the lights when things go dark. Might I suggest keeping light sources near or in your 72 hour kit and with your important documents box (or folder- however you store yours). And if you have little ones, involve them in your emergency lighting drills. It can be a fun and educational experience when done with the right tone.

Safe, reliable light illumination lightstick

Light the Way

So there you have it, folks – a crash course in light source options for your preparedness needs. Having the right lights at the right time can make all the difference during an emergency. So, get your lighting gear together, and shine on through those dark times! Stay safe, stay prepared, and stay bright!