Briden Academy

Preparing for a camping trip involves more than just grabbing a tent and sleeping bag. To ensure a comfortable and enjoyable outdoor experience, it’s essential to pack the right gear. Whether you’re a seasoned camper or new to the great outdoors, this comprehensive checklist will help you gather all the essential equipment for your next adventure.

1. Shelter and Sleeping Gear:

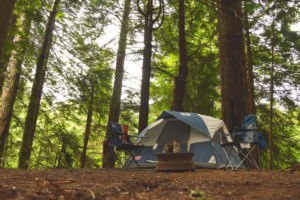
  • Tent: Choose a tent suitable for your group size and camping conditions.
  • Ground tarp or footprint: Protect your tent floor from abrasion and moisture.
  • Sleeping bag: Select a bag appropriate for the expected temperature range.
  • Sleeping pad or air mattress: Provide insulation and cushioning for a comfortable night’s sleep.
  • Pillow or stuff sack filled with clothes: Add extra comfort to your sleeping setup.

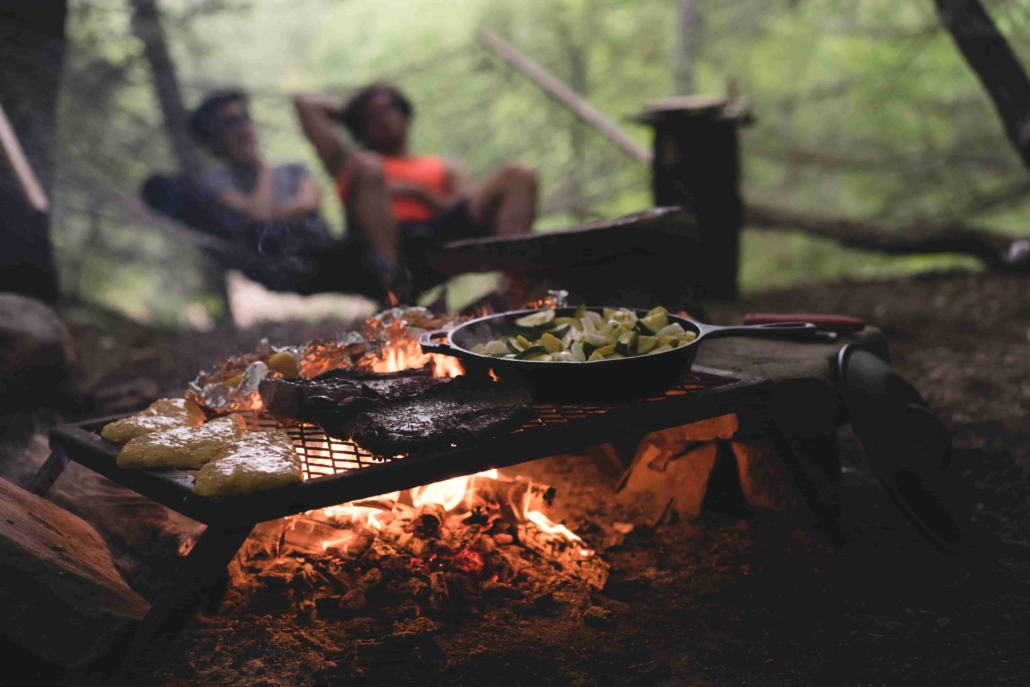
2. Cooking and Food Preparation:

*This obviously varies whether you are backpacking versus site camping

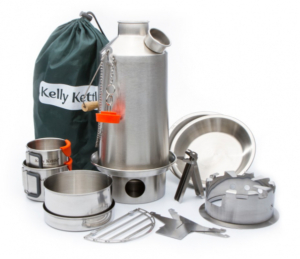
  • Camp stove or portable grill: Choose a stove that suits your cooking needs and fuel preferences.
  • Fuel: Pack enough fuel for the duration of your trip.
  • Cookware: Include pots, pans, utensils, and a cutting board for meal preparation.
  • Cooler: Keep perishable food and beverages cold with a reliable cooler.
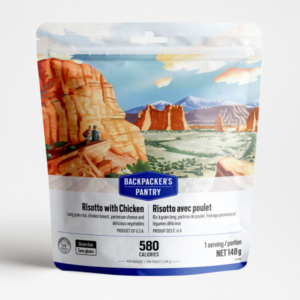
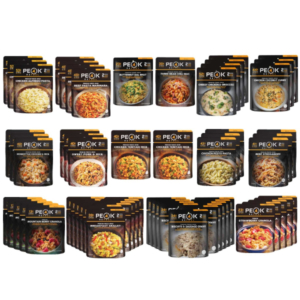
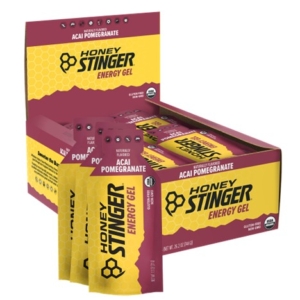
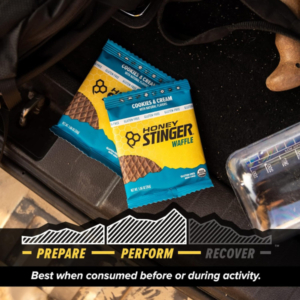
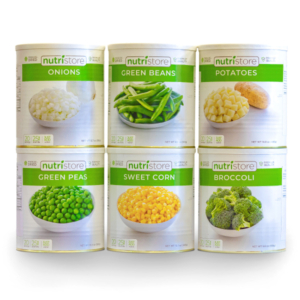
    • If backpacking, freeze dried meals like these are an excellent light weight option

1 month peak refuel pouches kit

  • Food: Plan and pack meals and snacks suitable for your camping itinerary.
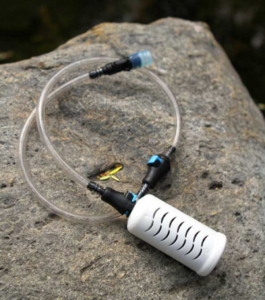
  • Water containers: Carry an ample supply of water for drinking, cooking, and cleaning.

XStream water filter straw for the outdoors

3. Clothing and Footwear:

  • Moisture-wicking clothing: Pack layers suitable for the expected weather conditions.
  • Insulating layers: Include fleece jackets, down vests, or wool sweaters for chilly evenings.
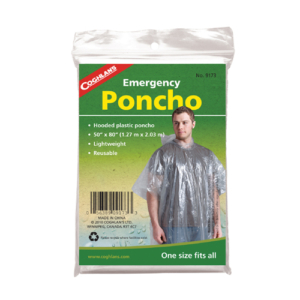
  • Rain gear: Stay dry with a waterproof jacket, pants, and footwear.
    • If backpacking, garbage bags double as rain gear, or these small light weight rain ponchos are great to throw in your pack.

emergency poncho pocket size

  • Sturdy hiking boots or shoes: Provide support and traction for outdoor exploration.
  • Extra socks and underwear: Keep your feet and body dry and comfortable.

4. Navigation and Safety:

  • Map and compass or GPS device: Navigate your way through the wilderness with confidence.
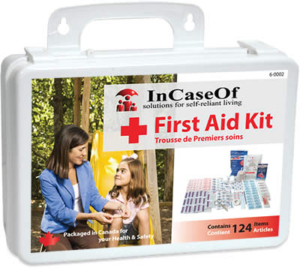
  • First aid kit: Treat minor injuries and ailments with essential medical supplies.

124 piece First Aid Kit

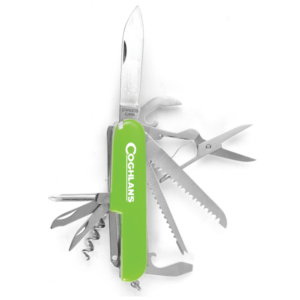
  • Multi-tool or knife: Perform a variety of tasks, from food prep to gear repair.

green pocket knife

  • Headlamp or flashlight: Illuminate your campsite and navigate in low-light conditions.
  • Whistle: Signal for help in case of emergency.
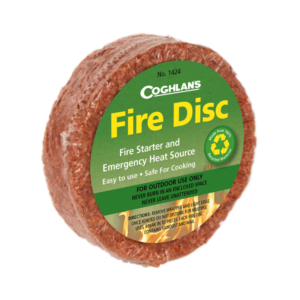
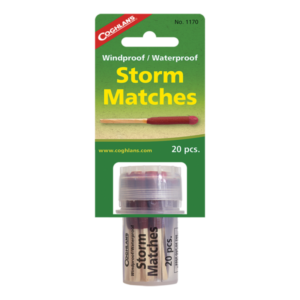
  • Fire-starting supplies: Bring matches, lighters, and fire starters to build and maintain campfires safely.

fire starter and emergency heat sourceWindproof, waterproof matches 20 pcs

5. Personal Items:

  • Sun protection: Pack sunscreen, sunglasses, and a wide-brimmed hat to shield yourself from UV rays.
  • Insect repellent: Ward off mosquitoes, ticks, and other pesky bugs.
  • Toiletries: Include essentials such as toothbrush, toothpaste, soap, and hand sanitizer.
  • Personal medications: Ensure you have an ample supply of any prescription medications you may need.
  • Camping chair or portable seating: Relax and enjoy the outdoors in comfort.

camping trip

6. Miscellaneous Items:

  • Backpack or daypack: Carry essentials for day hikes or excursions away from camp.
  • Campsite entertainment: Bring books, games, or musical instruments for leisure time around the campfire.
  • Trash bags: Leave no trace by packing out all trash and waste.
  • Camera or smartphone: Capture memories of your outdoor adventures with photos and videos.

Hammocks in the campsite, family camping

Pro Tip: I have a spreadsheet that I print off prior to every camping trip, broken into categories, to ensure when we as a family go camping we have everything we need!

Conclusion: By following your own personal gear checklist, you’ll be well-equipped for your next camping trip. Remember to tailor your packing list based on the specific destination, activities, and duration of your adventure. With the right gear in tow, you can relax and enjoy all that nature has to offer on your outdoor getaway.


Based out of Colorado since 2001, Honey Stinger is a brand that produces energy snacks. We carry their energy gels, waffles, and chews! They use honey as a natural sweetener and source of energy in their products. This is popular among athletes and outdoor enthusiasts for sustained energy during endurance activities.

They are Gluten Free, Organic, and some are dairy free (check ingredients per item). These are excellent products for hikers, for athletes, or even a quick snack for energy during a long day at the office!

Chews

Honey Stinger Chews: Check out our website for current flavors available.

Honey Stinger Energy Chews provide a quick energy source that your body can easily break down. More than 1,000 pro and college teams plus a generation of endurance athletes prepare, perform and recover with Honey Stinger to help achieve their performance goals and feel better along the way. They are formulated specifically for health-conscious individuals and athletes seeking a great tasting energy snack. These bite-sized chews include 70% RDA of Vitamin C and natural energy from honey.

Stinger Organic Energy Chews

Gels

Honey Stinger Energy Gels provide fuel that’s readily available to maintain energy levels.

Gels may be consumed straight from the packet before or during activity, spread on toast, stirred into a drink, or anyway you would like. All flavors mix well with water to make a natural energy drink.

They are optimized for efficient fueling during athletic efforts. Gels provide instant, honey-powered energy that lasts, which delays muscle fatigue and gives your body the power to achieve your goals.

Waffles

With no artificial sweeteners, colors, or preservatives, Honey Stinger energy waffles sweeten the burn to push through any challenge.

Honey Stinger Waffles are the perfect snack to help you prepare and perform for all activities. The energy in waffles is released immediately and absorbed at a steady rate, which delays muscle fatigue and gives your body the power to achieve your goals.

For years, similar waffles have been sold on street corners throughout Europe and eaten by professional cyclists, so they decided to create our own by sandwiching honey between two thin waffles.

Happy training, or hiking, or whatever reason you enjoy these tasty snacks. Join the Hive!

big dipper at night

What Should I Cook While Camping?

Campfire cooking adds a flavorful dimension to outdoor adventures. From hearty breakfasts to savory dinners, here’s a guide to tantalizing campfire recipes and essential safety tips.

Breakfast Delights:

Start your day with mouthwatering campfire breakfasts. Whip up classic favorites like:

  • Campfire Breakfast Burritos: Fill tortillas with scrambled eggs, cheese, sausage, and veggies. Wrap in foil and heat over the fire for a hearty morning meal.
  • Dutch Oven Pancakes: Pour pancake batter into a greased Dutch oven and cook over hot coals until golden brown. Serve with maple syrup and fresh berries for a sweet treat.
  • Campfire Omelets: Beat eggs with your favorite fillings such as cheese, bell peppers, onions, and ham. Cook in a greased skillet over the fire until fluffy and cooked through.
  • French Toast Sticks: Dip bread slices in a mixture of beaten eggs, milk, and cinnamon. Cook on a greased griddle or skillet over the flames until golden brown.
  • Breakfast Hash: Combine diced potatoes, onions, bell peppers, and sausage in a cast iron skillet. Cook over the fire until potatoes are tender and crispy, then top with fried or poached eggs.

Peak Refuel Breakfast Skillet

Lunchtime Eats:

Keep hunger at bay with satisfying campfire lunches. Try these easy and delicious options:

  • Grilled Cheese Sandwiches: Butter bread slices and fill with cheese. Cook in a cast iron skillet over the fire until golden and gooey.
  • Campfire Quesadillas: Layer tortillas with cheese, cooked chicken, beans, and salsa. Toast in a skillet over the flames until crispy and melted.
  • Campfire Tacos: Fill taco shells or tortillas with seasoned ground beef or chicken, lettuce, cheese, salsa, and sour cream. Heat in foil packets or on a grill grate over the fire until warm and crispy.
  • Foil Packet Veggie Packs: Toss your favorite vegetables such as zucchini, bell peppers, mushrooms, and onions with olive oil, garlic, and herbs. Seal in foil packets and cook over the coals until tender.
  • Campfire Pizzas: Top English muffins, tortillas, or pre-made pizza dough with pizza sauce, cheese, and your favorite toppings. Cook on a cast iron skillet or grill grate until cheese is melted and bubbly.

Dinner Delights:

End your day with flavorful campfire dinners. Impress your fellow campers with these crowd-pleasing dishes:

  • Foil Packet Hobo Dinners: Create individual foil packets filled with seasoned meat, potatoes, carrots, and onions. Cook over hot coals until tender and delicious.
  • One-Pot Campfire Chili: Simmer ground beef, beans, tomatoes, and spices in a Dutch oven over the fire for a hearty and satisfying meal.
  • Campfire BBQ Chicken: Grill chicken thighs or breasts over the fire, basting with your favorite BBQ sauce until cooked through and caramelized.
  • Foil Packet Salmon: Season salmon fillets with lemon, garlic, and herbs. Wrap in foil with sliced vegetables and cook over the coals until fish is flaky and vegetables are tender.
  • Stuffed Bell Peppers: Fill bell peppers with a mixture of cooked rice, ground beef or turkey, onions, tomatoes, and cheese. Wrap in foil and cook over the fire until peppers are soft and filling is heated through.
Roasting over the fire
Dessert Delicacies:

No camping trip is complete without a sweet treat by the fire. Indulge in these delectable campfire desserts:

  • S’mores: Sandwich chocolate and marshmallows between graham crackers and roast over the fire until gooey and golden brown.
  • Campfire Banana Boats: Slit bananas lengthwise and stuff with chocolate chips and marshmallows. Wrap in foil and heat until melted and gooey.
  • Campfire Apple Crisp: Slice apples and toss with cinnamon and sugar. Top with a mixture of oats, flour, brown sugar, and butter. Wrap in foil and cook until apples are tender and topping is crispy.
  • Grilled Pineapple with Honey: Slice fresh pineapple into rings and brush with honey. Grill over the fire until caramelized and golden brown.

Safety Tips:

Before you embark on your culinary adventure, remember these essential safety tips:

  • Choose the Right Cooking Surface: Use a stable and level cooking surface away from flammable materials. Opt for designated fire pits or campfire rings whenever possible.
  • Keep a Fire Extinguisher Handy: Have a fire extinguisher, bucket of water, or sand nearby for quick extinguishing in case of emergencies.
  • Supervise the Fire: Never leave a campfire unattended, and always fully extinguish it before leaving or going to sleep.
  • Practice Safe Food Handling: Ensure meats are cooked thoroughly to prevent foodborne illness, and keep perishable foods chilled in a cooler until ready to cook.
  • Respect Wildlife: Store food securely to prevent attracting wildlife to your campsite, and follow Leave No Trace principles to minimize your impact on the environment.

By following these campfire cooking tips and safety guidelines, you can enjoy delicious meals and unforgettable outdoor experiences while staying safe and responsible in the great outdoors. Happy camping!

PS. Check out our website for ready made freeze dried meal cans and pouches to simplify your cooking experience even more!

Trail butter apple slices and flavors

In the world of outdoor adventures and emergency preparedness, having a reliable and nutritious energy source is helpful. Enter Trail Butter, a versatile and power-packed energy food that caters to the needs of outdoor enthusiasts and those preparing for unforeseen emergencies.

Trail Butter: Origin Story

Jeff & Brad Boggess are brothers, and the founders of Trail Butter. Jeff in particular is a bike enthusiast and set out to bike ride his epic 8,900 mile bike tour from Germany to California, by way of Europe, Northern Africa and the United States (with a boat ride across the Atlantic). He found he was trying to fit into his bags large and bulky energy foods (nut butters & trail mix for example) and it was taking up precious space in his already limited cargo room.

At this point it was decided to combine his snacks into one, and Trail (mix) + (nut) Butter = Trail Butter was born! He joined forces with his brother Brad, and we now have the joy of enjoying this tasty all natural energy packed food during our adventures.

That Was Interesting! Tell Me More:

Nutrient-Dense:

Trail Butter is crafted from a blend of high-quality nuts, seeds, and other wholesome ingredients. Packed with essential nutrients, such as protein, healthy fats, and fiber, Trail Butter provides a sustained release of energy, making it an ideal fuel for extended outdoor activities like hiking, biking, and camping.

Convenient and Portable:

One of the key advantages of Trail Butter lies in its convenience and portability. It is packaged in easy-to-carry pouches, which are also conveniently small in size. It is a mess-free and compact energy source that fits seamlessly into backpacks, pockets, or kits. Its user-friendly design ensures quick and hassle-free consumption on the go.

Versatility:

Whether you need a quick energy boost on a challenging trail or a reliable source of sustenance during a crisis, it can be consumed directly, used as an ingredient in a recipe, spread on crackers, or added to other foods. Its adaptability makes it suitable for various situations.

Stable in Different Temperatures:

For outdoor enthusiasts who face diverse weather conditions, Trail Butter is a reliable companion. Resistant to temperature fluctuations, the product remains stable in both hot and cold environments. This quality ensures that you can count on this tasty pouch to deliver energy regardless of the challenges Mother Nature throws your way.

Shelf Life for Emergency Preparedness:

Trail Butter has a typical unopened shelf life of approximately 1 year. Though not as long as some products, but with some monitoring of best before dates, this is a great addition to your on-the-go snacks. This feature ensures that you have a nutritious energy source ready whenever the need arises.

Yummy Flavors: Subject to Change – See Website for up to date flavors! 
  • Maple syrup & sea salt nut butter, and
  • Salted brownie peanut butter nut butter.
  • These come in a convenient 32 gram pouches!

To Conclude:

Trail Butter emerges as a top-tier energy food and proves to be a reliable companion for individuals venturing into the great outdoors or preparing for unexpected situations. Consider adding this to your repertoire, and experience the sustained energy and nutritional benefits it brings to your adventures.

family cooking a meal together, learning how to cook

In times of emergencies, such as natural disasters or unforeseen crises, the availability of conventional cooking supplies may be limited. However, with a bit of resourcefulness and creativity, it’s possible to create nourishing meals using minimal ingredients and tools. This article explores various emergency food hacks to help you make the most of what you have during challenging situations.

Maximizing Shelf-Stable Staples:

  • Utilize long-lasting staples such as freeze dried fruits and vegetables, rice, pasta, and dried legumes as the foundation of your meals. Briden Solutions has numerous options – check it out!
  • Create hearty stews or one-pot dishes by combining beans, vegetables, and grains.
  • Try pre-made meals – whether in a pouch (5 year shelf life), or in a can (up to 30 years unopened).

Improvise with Non-Perishables:

  • Get creative with non-perishable items like canned or freeze dried meat, fish, or vegetables. Make a list of recipes or meals that you can make with what is in your non-perishable stock.
  • For example: transform canned tuna or salmon into a makeshift meal with pantry items like pickles, and mayonnaise.
  • One-pan wonders: cook an entire meal, such as chili in a single pan to simplify cleanup on top of it

Make the Most of Condiments:

  • Condiments can add flavor and variety to simple dishes. Keep the basics (ketchup, mustard, mayo for example) in your storage.
  • Combine soy sauce, vinegar, and sugar for a makeshift stir-fry sauce or use ketchup and spices to create a flavorful marinade for proteins.

DIY Baking:

  • No oven? No problem!
      • Use a thick-bottomed pan to simulate baking right on your stovetop. Place a wire rack or trivet inside the pan, and put your baking dish on top. Cover the pan with a lid to trap heat.
  • No rolling pin? No problem!
      • Use a clean, smooth bottle or a tall glass to roll out dough.
  • No baking powder? No problem!
      • Mix 1/4 teaspoon of baking soda with 1/2 teaspoon of cream of tartar as a substitute for baking powder.
  • No eggs? No problem!
      • Applesauce or Mashed Banana: Substitute 1/4 cup of unsweetened applesauce or mashed banana for one egg in recipes.
      • Yogurt or Buttermilk: Use 1/4 cup of yogurt or buttermilk for each egg.
  • No buttermilk? No problem!
      • Add 1 tablespoon of vinegar or lemon juice to a cup of milk as a substitute for buttermilk.
  • No vanilla? No problem!
      • Use maple syrup, almond extract, or even a bit of coffee as a substitute for vanilla extract.

Here’s a few more baking hacks, just for fun!

  • Cold butter? No problem!
      • Grate cold butter using a cheese grater to quickly bring it to room temperature.
  • Brown sugar hard? No problem!
      • Microwave hardened brown sugar with a damp paper towel for a few seconds to soften it.
  • Separate your eggs with ease!
      • Crack eggs into a slotted spoon, allowing the egg whites to separate through the slots while retaining the yolk.

Roasting over the fire

Outdoor Cooking Techniques:

  • Explore outdoor cooking methods, such as grilling or using a portable camping stove, to prepare meals when indoor resources are limited.
  • Many people love BBQ, if this is you, be sure to have spare fuel handy!
  • Campfire cooking options:
      • Cooking with a stick
      • Dutch oven
      • Foil wrapped food
      • Tripod
      • Burying food in the coals
      • Grilling

Foraging for Flavor:

  • If safe and possible, explore foraging for edible wild plants or fruits to supplement your meals.
  • Learn about local edible plants in your area beforehand to ensure safety and avoid toxic plants.
      • Field guides & local experts can help you educate yourself further in safety while foraging.

dandelions

Kitchen Tools:

  • On the go: stock a mess kit to supply all of the items necessary for you to cook comfortably on the go. The running joke in preparedness world is “don’t forget your can opener”!
  • These tools can enhance your ability to prepare a variety of meals with limited resources. Think about what it is you use the most and what you would want and need in an emergency.
      • Chef’s Knife: A high-quality chef’s knife is indispensable for chopping, slicing, and dicing. It’s the workhorse of the kitchen.

What type of kitchen knife should I have?:

I spoke with Cory, from our “Cooking With Cory” videos, and he told me that you do not have to spend a fortune on a knife, as long as its sharp, and fits your hand/grip. He also explained to me that a serrated knife vs a straight edge have different purposes.

For example: I watched him chop onions, and asked him if he cries every time. He explained to me that keeping the onions in the fridge (think the concept of viscosity), and using a sharp, straight edge knife minimizes the release of whatever enzyme is within the onion.

      • Cutting Board: A durable cutting board provides a safe and stable surface for food preparation. Look for one that is easy to clean and won’t damage your knives.
      • Spoon and Spatula Set: Spoons and spatulas for stirring, flipping, and serving.
      • Saucepan(s) with Lid: Essential for boiling, simmering, and preparing sauces. Look for a durable and heat-conductive material.
      • Mixing Bowls: Durable mixing bowls in various sizes are essential for combining and preparing ingredients. Choose bowls made of stainless steel, glass, or durable plastic.
      • Meat Thermometer: Ensure accurate cooking temperatures, especially for meat, with a meat thermometer. It’s crucial for food safety and achieving the desired level of doneness.
      • Oven Mitts: Protect your hands from burns when handling hot pots, pans, and baking sheets.

cutting board with various food items on it ready to cook

Community Cooking:

  • Pool resources and collaborate with neighbors or community members to share ingredients and cooking tools.
      • When I see this type of suggestion, to me this suggests that we need to have positive relationships with our neighbors and community, so that if “push comes to shove”, we can help one another out during a challenging time.
  • Community kitchens can help everyone make the most of the available resources and ensure that everyone is well-fed during challenging times.
Conclusion:

In times of crisis, resourceful cooking becomes a valuable skill. By incorporating these emergency food hacks, you can turn limited ingredients and tools into satisfying meals that provide comfort and nourishment during difficult situations. Stay resilient, stay prepared, and keep your creativity alive in the kitchen even when faced with unexpected challenges.

Freeze-dried meals have gained immense popularity in recent years to outdoor enthusiasts, emergency preparedness, and busy individuals looking for quick and easy meal options. As the demand for these freeze-dried products continues to rise, a key decision emerges for consumers: premade meals or individual ingredients?

In this article, we’ll explore the advantages and disadvantages of both options to help you make an informed choice. The inspiration behind this article is our new line of Nutristore meals we carry!

Premade Freeze-Dried Meals

Advantages:
  1. Convenience: Perhaps the most significant advantage of premade freeze-dried meals is the convenience they offer. Designed for quick preparation, these meals require minimal effort and can be ready to eat in a matter of minutes. This makes them ideal for camping trips, backpacking, or any situation where time and resources are limited.
  2. Portion Control: Premade meal pouches are often portioned to meet the dietary needs of an individual or a group. The Nutristore line, you scoop an amount out, whether into a bowl or into a bag in your pack.
  3. Variety: Manufacturers of premade freeze-dried meals strive to offer a diverse range of flavors and cuisines. This variety can be appealing to those who enjoy trying different dishes without the need for extensive meal planning or ingredient sourcing.
Disadvantages:
  1. Limited Customization: One of the main drawbacks of premade freeze-dried meals is the limited ability to customize them according to personal taste preferences or dietary restrictions. If you have specific requirements or allergies, finding a suitable premade option can be challenging.
  2. Cost: While premade meals offer convenience, they can be more expensive than purchasing individual freeze-dried ingredients. I can’t say I have done the math on this to confirm in regard to Nutristore, but cost of all food is definitely high in 2023!

Individual Freeze-Dried Ingredients

Advantages:
  1. Customization: When opting for individual freeze-dried ingredients, you have the freedom to customize your meals to suit your taste and dietary preferences. This is beneficial for those with allergies, sensitivities, or specific dietary requirements.
  2. Cost-Effective: Buying individual freeze-dried ingredients can be more cost-effective than purchasing premade meals. This can be true when buying in bulk, as it allows for better control over portion sizes and reduces packaging costs.
  3. Long-Term Storage: Individual freeze-dried ingredients typically have a longer shelf life than premade meals. This can be advantageous for individuals who want to stock up on staples for emergency preparedness or those who prefer to buy in larger quantities.
Disadvantages:
  1. Time and Effort: The primary drawback of using individual freeze-dried ingredients is the time and effort required for meal preparation. Planning, measuring, and combining ingredients can be time-consuming. Individual ingredients necessitates the need for an array of cooking utensils, pots, or stoves.
Conclusion

Ultimately, this choice depends on your specific needs, preferences, and the context in which you plan to use these products. If the convenience of quick and easy meals is what you value quick, premade meals might be the ideal solution. If you enjoy the freedom to customize your meals, have specific dietary requirements, or are looking for a more cost-effective option, individual freeze-dried ingredients offer a compelling alternative.

For me personally, I am completely intrigued by pre-made meal choices! Takes the stress out. However, I appreciate the need for individual ingredients, especially for some of my picky eaters whom I live with.

When it comes to outdoor adventures, one brand has become synonymous with convenient, delicious, nourishing, and allergy friendly meals—Mountain House. Renowned for its extensive product line, Mountain House has been a trailblazer in the world of freeze-dried and dehydrated meals. Let’s explore the taste of adventure that Mountain House offers. Click here to peruse the variety of choices we carry!

A Legacy of Excellence: Origin Story

Founded in Oregon in 1968, Mountain House has spent over five decades perfecting the art of creating lightweight, easy-to-prepare, and satisfying meals for adventurers. Originally focused on serving the needs of the United States military, the brand has since expanded to become a staple for outdoor enthusiasts on their journeys.

Freeze-Dried Brilliance:

At the heart of Mountain House’s success lies the innovative freeze-drying process. This technique involves removing moisture from the ingredients without compromising flavor, texture, or nutritional value. The result is a lightweight, shelf-stable meal that retains its original taste and nutritional goodness.

Diverse Menu Options:

Mountain House offers an array of meal options to suit preferences and dietary needs.  Popular choices include Beef Stroganoff, Chicken Teriyaki with Rice, and Biscuits and Gravy for a comforting start to the day. With vegetarian, gluten-free, and dairy-free options available, Mountain House ensures there’s something for everyone around the campfire.

Convenience at its Core:

Lightweight and easy to pack, these meals require minimal preparation—just add hot water, wait a few minutes, and enjoy a piping hot, flavorful dish. This simplicity makes Mountain House an ideal choice for outdoor enthusiasts who prioritize efficiency without compromising on taste.

Emergency Preparedness:

Beyond catering to outdoor adventures, Mountain House has earned a reputation as a go-to for emergency preparedness. Their long shelf life and compact packaging make them a reliable choice for individuals and families preparing for unexpected situations. Having a stash of Mountain House meals ensures preparedness with nourishing and familiar flavors.

Conclusion:

Mountain House stands as a testament to the marriage of culinary excellence and outdoor adventure. They offer a product line with a diverse menu of flavors and allergen friendly choices. As you embark on your next journey, consider bringing along the taste of adventure with Mountain House—a brand that understands the true essence of savoring life in the great outdoors.

Have you tried Mountain House pouches? Email us your favorite flavor, and what you purchase them for at BridenAcademy@BridenSolutions.ca

Alpen fuel flavors 6 pack

Gluten Free & Vegetarian Breakfasts in 6 allergen friendly flavors! I wanted to share these because as a mom of a celiac, these are so incredible. For camping, backpacking, generic traveling, or a grab and go breakfast, these are easy and delicious.

Kelly Kettle Basecamp kit

If you are backpacking or backcountry camping, consider the JetBoil or Kelly Kettle to cook with!

Alpen Fuel’s Origin Story:

Shaun and Emily Durkee, the owners of Alpen Fuel, started Alpen Fuel in 2018 as a side hustle while Shaun worked his day job as a manufacturing engineer for an optics company in Bozeman, Montana. At first, they stocked an online store with many different backcountry food products from cottage brands. In June of 2020, Shaun was laid off from his job as a result of the economic downturn surrounding COVID-19.

After being laid off, they pursued their passion by launching four flavors of high octane breakfast granola in the fall of 2020. Since then, we added two new breakfast flavors and quickly outgrew our rented kitchen space. They now have a 2300 sq. ft. manufacturing facility, and Alpen Fuel products are sold in over 60 locations throughout the United States and Canada, including us at Briden Solutions!

Alpen fuel flavors 6 pack

Check out these two videos by our very own Billy testing 2 of the flavors:


raspberries in the woods

Surviving in the wilderness requires not only finding shelter and water but also sourcing food. Knowing how to forage and hunt for sustenance is a helpful skill. In this article, we’ll explore various methods and specific examples to help you procure food in the wild.

Edible Plants:dandelions

Many wild plants are safe to eat, while others can be toxic. Learning to identify edible plants is essential for foraging. Some common examples include:

  • Wild Berries: Blueberries, blackberries, raspberries, and strawberries. They are easy to identify and rich in nutrients.
  • Dandelions: Dandelion leaves and roots are edible and can provide essential vitamins and minerals.
  • Cattails: These plants offer edible shoots, roots, and pollen. The shoots are a great source of carbohydrates, while the pollen can be used as a protein-rich supplement.


Insects:

Insects are a reliable source of protein in the wild. Some safe-to-eat insects include:

  • Grasshoppers: These insects are plentiful in many wilderness regions and can be roasted for a crunchy, protein-packed snack.
  • Ants: Ants can be collected and consumed for their protein content.
  • Earthworms: These are a good source of protein and can be found in moist soil.
    • Note: I would have to be at a very low point in my survival to resort to insect consumption. (I imagine Simba in the Lion King when he moves away from Pride Rock – “slimy yet satisying”). However, I do appreciate knowing that it is technically safe to do should I ever find myself in a situation where foraging to save my life was necessary!

Fishing:

If you have access to a water source, fishing can provide a consistent food source. Techniques to catch fishfishing include:

  • Improvised Fishing Gear: Craft a fishing pole using a long, flexible branch, fishing line, and hooks made from thorns or bone.
  • Traps: Construct fish traps using rocks to create a barrier, forcing fish into a confined area for easy catching.
  • Consider putting basic supplies in your emergency kit or pack: fishing line and a hook.
    • Do not forget to pack your patience!

Small Game Hunting:

Hunting small game animals is a valuable survival skill. Common animals to hunt include:

  • Squirrels: Use a sling or improvised bow and arrow for hunting squirrels (or rabbits).
  • Birds: Birds can be snared using simple traps or hunted with a slingshot.

Trapping:

Setting traps can provide a passive way to secure food. Examples include:

  • Deadfall Traps: These are heavy objects that crush the prey when triggered (ex: bumping the stick and the rock pile falls)
  • Snare Traps: Create snares with loops of cordage to catch animals as they pass through. (My son and his friend did this with a rope over a gopher hole in our campsite this past year, and I kid you not, it actually worked!)
  • Pitfall Traps: Dig a hole and cover with foliage. The concept is the animal would fall into the hole.

Water Purification:XStream water filter straw for the outdoors

Cooking:

Should you find yourself in the wilderness by choice, cooking food with a JetBoil or Kelly Kettle are excellent food sources. Be sure to have matches (and other applicable camping gear, like a knife) to more easily cook. Also, consider premade meal pouches and bars or snacks to avoid the need to forage for those bugs and other food sources.

In a wilderness survival scenario, knowing how to source food is important for your well-being. Remember to always be cautious when foraging and hunting, as misidentification or improper preparation can lead to illness. Consider reading books on food sources in your area, plant identification books, or other resources to educate yourself. With practice and knowledge, you can become proficient in sourcing food in the wild and increase your chances of surviving in challenging situations.

Backpackers Pantry

When you are deep in the wilderness, far from the comforts of your kitchen, Backpacker’s Pantry gourmet food pouches comes to the rescue with a range of delicious dehydrated meal options. Lets continue and learn the history of the company, what experts have to say, and even watch a video of our own Billy sampling some in the great outdoors.

History

In 1951, a group of Girl Scouts went on a torturous camping trip with heavy canned food, supplies and a long mountain trek. The troop leader went home inspired and was motivated to create a lighter, more manageable, just-add-water option for their outdoor adventurers. She succeeded in that mission, and Dri-Lite Foods became the first adventure food on the market. Anne Benedict started dehydrating meals in her garage, but quickly realized a growing demand for lightweight meals for camping. Twenty years later, her small outdoor company was purchased by Ronald Smith. With the help of a small but dedicated team, Ronald transformed the Girl Scouts’ inspired idea into one of the world’s foremost producers of freeze-dried meals. In the 1970s Dri-Lite Foods was renamed Backpacker’s Pantry.

A Culinary Journey in the Wild

Backpacker’s Pantry offers a diverse menu of dehydrated meals that cater to a variety of tastes and dietary needs. Gluten free, Vegetarian, and Vegan options are available. From breakfast to dinner to dessert, the product line we carry (subject to change from time of article written Nov 2023) includes:

Breakfast Favorite:

  1. Cinnamon Apple Oats & Quinoa cereal (Gluten Free)

Lunch and Dinner Options:

  1. Pad Thai (Gluten Free) (Vegan)
  2. Stroganoff Sauce
  3. Three Cheese Mac & Cheese
  4. Mashed Potatoes with Gravy & Beef
  5. Risotto with Chicken (Gluten Free)
  6. Santa Fe Style Rice & Beans with Chicken (Gluten Free) 
  7. Three Sisters Southwest Quinoa & Beans (Vegan)
  8. Fettuccini Alfredo with Chicken
  9. Vegetable Lasagna (Vegetarian)
  10. Shepherds Potato Stew with Beef (Gluten Free)
  11. Cuban Coconut Rice and Black Beans (Gluten Free) (Vegan)

Desserts:

  1. Creme Brule
  2. Dark Chocolate Mousse
  3. Blueberry Peach Crisp (Vegetarian)

What Outdoor Enthusiasts Say:

Backpacker’s Pantry has earned a reputation for its great taste and convenience among outdoor enthusiasts, hikers, campers, and backpackers, starting with our very own Billy:

“The Pad Thai is a must-try! It’s like a restaurant-quality meal in the wilderness.”

“I love how easy it is to prepare these meals. Just add hot water, and you’ve got a delicious, hot dinner.”

“The variety of flavors and dietary options make Backpacker’s Pantry a versatile choice for different preferences and needs.”

“The desserts are a sweet treat after a long day of hiking.”

When To Use Backpacker’s Pantry

  1. Camping: Whether you’re car camping or backpacking into the backcountry, these dehydrated meals are convenient, lightweight, and easy to prepare. They provide a hot and satisfying meal at your campsite.
  2. Hiking and Backpacking: Backpacker’s Pantry is a favorite choice among hikers and backpackers who need nourishing meals that are lightweight and space-efficient. Just add hot water, and you’re good to go.
  3. Travel: If you’re exploring remote areas where food options may be limited, these meals are a handy choice to ensure you have satisfying and flavorful meals during your adventure.
  4. Emergency Preparedness: Backpacker’s Pantry can also be part of your emergency kit. In case of natural disasters or other emergencies, having these meals on hand ensures you have a supply of nourishing food that requires minimal preparation.
Conclusion:

Backpacker’s Pantry is more than just camp food; it’s a gourmet adventure in the great outdoors. With a range of flavors and the convenience of easy preparation, these dehydrated meals have become a go-to choice for those seeking quality dining experiences while on their outdoor journeys. Whether you’re a seasoned backpacker or a first-time camper, Backpacker’s Pantry is your ticket to savoring a taste of home, even in the wildest of settings. So, pack your bags, lace up your hiking boots, and get ready to embark on a culinary adventure with Backpacker’s Pantry.