hiking

Stay Safe in the Wilderness:

Before we get into some written tips, I wanted to share something I discovered in preparation for this blog post. The SAR Alberta (Search and Rescue Alberta) website introduced me to a new app they have called “Adventure Smart”. Below is a short youtube video explaining what it is, but this amazing app is a way to create and plan your wilderness hikes and adventures with added safety. You add an emergency contact, your location, your start and end time, etc, so in case you do not return when you’re supposed to, SAR has some details to begin their search with to find you.

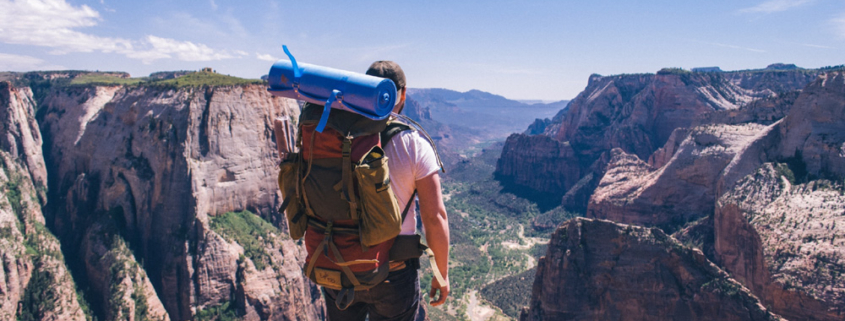
Venturing into the wilderness offers numerous opportunities for adventure and exploration, but it also comes with risks. In remote and rugged environments, access to medical help may be limited, making it important to be prepared to handle medical emergencies effectively. Let’s explore essential wilderness first aid tips to help you stay safe and respond confidently to emergencies in the great outdoors.

1. Prioritize Safety:

Before heading into any outdoor adventure, prioritize safety by familiarizing yourself with the area, assessing potential hazards, and planning accordingly. Share your itinerary with someone reliable, carry essential safety gear, and know how to use it effectively (this is where this new Adventure Smart app comes in perfectly handy).

Real-life Example: During a hiking trip in a remote mountain range, a group of friends encountered unexpected severe weather conditions. They had previously shared their itinerary with family members and were equipped with emergency shelters and extra layers of clothing. By prioritizing safety and following their preparedness plan, they were able to take shelter until the storm passed, avoiding exposure-related injuries.

Kananaskis lakes map

2. Be Prepared:

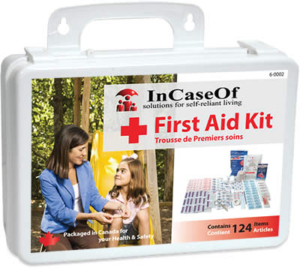
Pack a well-stocked wilderness first aid kit containing essential supplies such as bandages, gauze, adhesive tape, antiseptic wipes, tweezers, scissors, pain relievers, and any necessary personal medications. Additionally, consider including items specific to your planned activities, such as blister treatment, splints, and/or tourniquets.

Real-life Example: During a backpacking trip, a hiker sustained a minor laceration while navigating a rocky trail. His companions quickly accessed the first aid kit, cleaned the wound, and applied a sterile dressing to prevent infection. The hiker was able to continue the journey with minimal disruption, thanks to the well-prepared first aid kit.

gauze on a scrape

3. Assess the Situation:

In the event of an injury or medical emergency, take a moment to assess the situation calmly and methodically. The acronym STOP: Stop, Think, Observe, Plan…then Act guides you through safe survival.

Determine the severity of the injury, assess the victim’s condition, and prioritize treatment based on the circumstances of your surroundings and position.

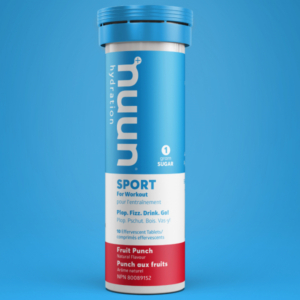
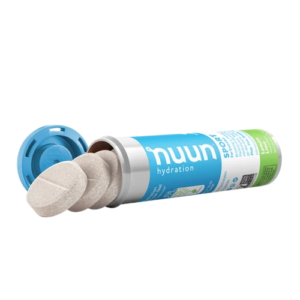
Real-life Example: While camping in a remote wilderness area, a camper experienced symptoms of heat exhaustion, including dizziness and nausea. His companions recognized the signs of heat-related illness and immediately moved him to a shaded area, provided water and electrolytes, and cooled him down with wet towels. Their prompt assessment and intervention prevented the situation from escalating into a more serious medical emergency.

Lemon nuun electrolyte tablets showing

4. Treat Injuries Appropriately:

Administer basic first aid to stabilize the victim and prevent further injury.

This may include:

  • cleaning and dressing wounds
  • immobilizing fractures or sprains
  • controlling bleeding
  • providing pain relief

Remember to consider environmental factors such as temperature, weather conditions, and terrain when treating injuries.

Real-life Example: During a backcountry skiing expedition, a skier fell and sustained a suspected ankle fracture. His companions quickly improvised a splint using ski poles and extra clothing to immobilize the injured limb before carefully assisting him back to camp. Their swift and appropriate first aid measures helped minimize discomfort and further injury during the evacuation process.

skiing on the trails

Skiis

5. Know How to Signal for Help:

If medical assistance is needed, know how to signal for help effectively. If you have no phone service, or communication device to contact help, use visual signals such as waving brightly colored clothing or using a signaling mirror to attract attention. Additionally, use auditory signals such as blowing a whistle in a series of three blasts to signal distress.

Real-life Example: While on a backpacking trip in a remote forest, a hiker became disoriented and lost his way on the trail. Unable to find his bearings, he used a whistle to signal for help, producing three loud blasts at regular intervals. His signal was eventually heard by nearby hikers who were able to assist him in finding his way back to the trailhead.

6. Stay Calm and Reassure the Victim:

Maintain a calm and reassuring demeanor when providing first aid to the victim. Your confidence and reassurance can help keep the victim calm and cooperative, which is essential for effective treatment and recovery.

Real-life Example: While camping in a wilderness area, a camper experienced an allergic reaction to a bee sting, causing difficulty breathing and panic. His companions remained calm, reassured him, and administered his prescribed medication while waiting for emergency responders to arrive. Their calm and composed response helped alleviate the victim’s anxiety and ensured prompt medical attention.

lily from the garden

7. Be Prepared to Evacuate:

In some situations, evacuating the victim may be necessary to provide advanced medical care, or to relocate to a safer location. Be prepared to initiate an evacuation plan if the victim’s condition worsens or if you are unable to effectively manage the situation with the resources available. This is a contradiction to “stay in place”, and only applicable if you confidently know your location to continue moving.

Real-life Example: During a mountaineering expedition, a climber suffered a severe altitude sickness at high altitude, experiencing symptoms of confusion and disorientation. His climbing partners recognized the seriousness of the situation and initiated a rapid descent to lower elevation, where they could access medical assistance. Their quick thinking and decisive action saved the climber’s life and prevented further complications.

8. Seek Additional Training:

Consider obtaining formal training in wilderness first aid from reputable organizations. These courses provide valuable hands-on training in wilderness-specific first aid techniques and scenarios, empowering you to respond effectively to emergencies in remote settings.

Real-life Example: A group of outdoor enthusiasts enrolled in a wilderness first aid course to expand their knowledge and skills in managing medical emergencies in remote environments. During a subsequent backpacking trip, they encountered a fellow hiker with a dislocated shoulder and were able to confidently assess the injury and perform a successful relocation procedure, thanks to their training.

CPR First aid class

Conclusion:

By following these wilderness first aid tips and being prepared for emergencies, you can enjoy outdoor adventures with greater confidence and safety. Remember that prevention is the best medicine, so take steps to minimize risks and be proactive in addressing potential hazards. With proper preparation and knowledge, you can navigate the wilderness with peace of mind, knowing that you are equipped to handle whatever challenges may arise.


rope work out

Physical fitness can be an important asset during an emergency. Being physically prepared not only enhances your ability to handle challenging situations but also improves overall resilience and well-being. In this article, we’ll explore fitness routines that would benefit us on a regular basis, specifically tailored to improve strength, agility, and overall physical preparedness for any scenario.

1. Strength Training:

  • Building strength is essential for handling the physical demands of emergency situations. Incorporate exercises such as squats, deadlifts, and push-ups into your routine to develop functional strength that translates to real-world tasks.
  • Focus on compound movements that engage multiple muscle groups simultaneously, mimicking the demands of lifting, carrying, and moving heavy objects.

2. Agility and Mobility Workouts:

  • Agility and mobility are vital components of physical preparedness, allowing you to move quickly and efficiently in dynamic environments.
  • Include exercises that improve agility, such as agility ladder drills, shuttle runs, and lateral movements.
  • Additionally, prioritize mobility exercises like dynamic stretching, yoga, and foam rolling to maintain flexibility and prevent injuries, ensuring that you can navigate obstacles and terrain with ease.

3. Cardiovascular Endurance for Stamina:

  • Cardiovascular endurance is important for maintaining stamina and energy levels during prolonged
    Triathlon swimming

    Swimming

    emergencies or physically demanding tasks.

  • Incorporate aerobic exercises such as running, cycling, swimming, or high-intensity interval training (HIIT) into your routine to improve heart health, lung capacity, and overall endurance.
  • Aim for a balance of  cardio and interval training to build both aerobic and anaerobic fitness.

4. Functional Fitness for Real-World Tasks:

  • Focus on functional fitness exercises that simulate the movements and activities you may encounter in emergency situations.
  • This includes carrying heavy loads, climbing stairs or obstacles, lifting and moving objects, and performing tasks under physical duress.
  • Incorporate functional movements like farmer’s carries, sandbag lifts, tire flips, and rope climbs to develop practical strength and conditioning that translates directly to emergency scenarios.

5. Mental Resilience and Stress Management:

  • In addition to physical fitness, prioritize mental resilience and stress management techniques to enhancemeditation, quiet overall preparedness.
  • Incorporate mindfulness practices such as meditation, deep breathing exercises, and visualization techniques to cultivate a calm and focused mindset in challenging situations.
  • Mental resilience is just as important as physical strength in navigating emergencies with confidence and composure.

6. Consistency and Adaptability:

  • Consistency is key to seeing progress in your fitness and preparedness efforts. Establish a regular workout routine and commit to sticking with it, even during times of relative calm.
  • Additionally, remain adaptable and open to modifying your workouts based on changing circumstances or priorities.
  • Your fitness routine should evolve alongside your preparedness plans to ensure you’re adequately equipped for any scenario.

By incorporating these tailored fitness routines into your regimen, you can enhance your physical preparedness and resilience for whatever challenges may arise. Remember, emergency fitness isn’t just about looking good; it’s about being ready to handle whatever life throws your way with strength, agility, and confidence. Start today and invest in your physical preparedness for a safer, stronger tomorrow.

washing your hands with clean water

In the realm of emergency preparedness, the often underestimated link between hygiene and health plays a great role in safeguarding well-being. Maintaining proper sanitation practices is not only crucial for preventing the spread of diseases but also fundamental for overall health and resilience in times of crisis. This article explores the connection between hygiene and health, emphasizing the importance of sanitation preparedness for individuals and communities alike.

Understanding the Link: Hygiene as a Health Defenderusing soap to wash your hands for sanitation

Hygiene is the first line of defense against various illnesses, serving as a shield that safeguards health during emergencies. Proper handwashing, waste disposal, and personal cleanliness contribute significantly to preventing the spread of infectious diseases, making hygiene a cornerstone of health maintenance.

Consider this personal opinion: We want clean water to drink, in fact, dare I say we expect clean water to drink. Washing our hands is an important component of preventing germs and bacteria from spreading to others. The same way I expect clean water, is the same way I expect to be able to be out in public and feel safe from germs and bacteria being spread from lack of proper hygiene.

Water

Access to clean water is integral to maintaining health standards, especially in the face of unforeseen events. Water is our life force. Firstly, we are made up of a significant amount of water. Secondly, water is sustenance, and water is a way to clean our bodies, or in some cases our wounds.

Consider your home water storage. See some of our articles about storing water and how to go about doing it.

Water storage and also water purification options are available to us all, such as the Life Straw or AquaBrick filtration systems:

Lifestraw Water filter drinking strawSagan life aquabrick water filter

Hygiene Practices in Emergency Situations

During emergencies, such as natural disasters or pandemics, maintaining hygiene becomes more challenging yet more critical than ever.

  • Good hygiene practices, such as covering the mouth and nose when coughing or sneezing, contribute to the prevention of airborne diseases. This is particularly important in mitigating the spread of respiratory infections like the flu or common cold.
  • Most illnesses, including respiratory and gastrointestinal infections, are often spread through contaminated hands.
  • Washing hands before handling food, cooking meat thoroughly, and avoiding cross-contamination, reduces the risk of foodborne illnesses. These practices contribute to gastrointestinal health and prevent illnesses such as food poisoning.

preparing vegetables for a healthy meal

Community-Based Sanitation Programs: Strengthening Resilience

Engaging in community-based sanitation programs fosters a collective commitment to hygiene and health. These initiatives include educating communities on proper waste management, promoting hygiene practices, and ensuring access to clean water sources, collectively enhancing the overall health resilience of the population.

Some people do service projects to provide hygiene kits to those less fortunate. After you’ve created your own kit, consider paying it forward.

  • Personal Hygiene Kits: Building a comprehensive personal hygiene kit, including essentials like hand sanitizers, soap, and sanitation supplies, empowers individuals to uphold hygiene standards even in challenging circumstances.

The Role of Education: Empowering Communities for Health

Knowledge is a powerful tool in promoting hygiene and health. Educational campaigns that emphasize the importance of sanitation practices, proper handwashing techniques, and waste disposal methods contribute to creating informed and health-conscious communities.

Alberta Health has an entire page dedicated to Hygiene Education. In fact, they even have a mock escape-room available to test your knowledge. How fun! Here is the link.

Conclusion:

The intricate connection between hygiene and health underscores the significance of sanitation preparedness in any comprehensive emergency plan. From individual practices to community-wide initiatives, prioritizing hygiene not only prevents the spread of diseases but also strengthens the overall health resilience of communities. As we navigate an unpredictable world, recognizing the symbiotic relationship between hygiene and health becomes a cornerstone of effective emergency preparedness, ensuring that communities can withstand and recover from unexpected challenges. Stay informed, stay hygienic, and stay healthy.

aloe vera

Alternative medicine and a holistic approach is important to know and understand. If you find yourself lost in the wilderness, or simply want a more natural solution to assist your healing, this article explores the use of herbal remedies to support first aid. I am a believer that both medical and holistic approaches are important in different situations.

Note: We are providing some alternative options to supporting first aid, and to only use such remedies after your own education and research

Harnessing the Power of 4 Herbal Remedies:

Wound Care with Calendula:
  • Benefits: Calendula possesses anti-inflammatory and antimicrobial properties.
  • Application: Create a poultice or infused oil to cleanse and promote healing for minor cuts, scrapes, and burns.
  • Personal experience: 2 of my children were birthed under the care of a midwife (team), and calendula was a staple in the healing kit post birth. Compared to my first born, I noticed a difference in my healing.
Arnica for Bruises and Sprains:
  • Benefits: Arnica is known for its anti-bruising and anti-inflammatory effects.
  • Application: Prepare an arnica salve or compress to alleviate bruising and reduce swelling associated with sprains.
  • In a health food store Arnica also comes in naturopathic dissolving “beads” to melt under the tongue.
Aloe Vera for Burns:
  • Benefits: Aloe Vera offers soothing and cooling properties.
  • Application: Extract the gel from the leaves and apply it to burns for instant relief and accelerated healing.
  • Many people grow Aloe Vera plants at home, and also products can be purchased at the story containing aloe. We keep a bottle of Aloe Vera gel along side our sunscreen in the summer.

Chamomile for Digestive Issues:
  • Benefits: Chamomile has calming and digestive properties.
  • Application: Brew chamomile tea to ease nausea, indigestion, and gastrointestinal discomfort.

First Aid Essentials with Herbal Alternatives:

Herbal Antiseptic Spray:
  • Ingredients: Thyme, lavender, and tea tree essential oils.
  • Application: Mix oils with water in a spray bottle for a natural antiseptic to cleanse wounds.
  • Another option is Silver (in a spray) carried in your first aid kit as a natural antiseptic.
Peppermint Oil for Headaches:
  • Application: Dilute peppermint oil (per essential oil instructions) and apply to temples for headache relief, or inhale for a refreshing pick-me-up.
  • If you are lucky enough to find peppermint in the great outdoors, you may also chew the leaves.

Activated Charcoal Poultice:
  • Benefits: Activated charcoal can absorb toxins and reduce inflammation.
  • Application: Create a poultice to draw out toxins from insect bites, stings, or infected wounds.
      • If you have ever seen those foot absorption pads advertised to detox your body, they are typically made with this same charcoal. Throw a few in your first aid kit in case of bites or stings!
Echinacea Tincture for Immune Support:
  • Benefits: Echinacea is known for its immune-boosting properties.
  • Application: Take echinacea tincture to support the immune system during stressful situations. Can also be found in pill form at the health food store or in some pharmacy’s.

Preparing an Herbal First Aid Kit:

Essential Oils:

There are hundreds of oils, and combinations of oils. Here we will just name a few:

Lavender Oil: Antiseptic, anti-inflammatory, calming.
Uses: Wound care, burns, insect bites, stress relief.

Tea Tree Oil: Antimicrobial, antiseptic, antifungal.
Uses: Disinfecting cuts, treating fungal infections, insect bites.

Peppermint Oil: Analgesic, anti-inflammatory, cooling.
Uses: Headaches, muscle aches, nausea, insect repellent.

Eucalyptus Oil: Decongestant, antiseptic, expectorant.
Uses: Respiratory issues, insect bites, muscle pain.

Chamomile Oil: Anti-inflammatory, calming, analgesic.
Uses: Skin irritation, anxiety, sleep aid.

Frankincense Oil: Anti-inflammatory, antimicrobial, calming.
Uses: Wound healing, inflammation, stress relief.

Lemon Oil: Antiseptic, antibacterial, uplifting.
Uses: Disinfecting, uplifting mood, nausea.

Clove Oil: Analgesic, antimicrobial, anti-inflammatory.
Uses: Toothache, pain relief, insect bites.

Ginger Oil: Analgesic, anti-inflammatory, digestive.
Uses: Nausea, muscle pain, digestive issues.

Tips for Using Essential Oils in First Aid:
  • Dilution: Essential oils are potent, so always dilute them with a carrier oil (like coconut or jojoba oil) before applying to the skin.
  • Patch Test: Perform a patch test before applying essential oils to a larger area to check for any allergic reactions.
  • Inhalation: Inhaling the aroma of essential oils can have therapeutic effects. You can use a diffuser or inhale directly from the bottle.
  • Consultation: If you have specific health concerns or are pregnant, consult with a healthcare professional before using essential oils.
  • Storage: Keep essential oils in dark glass bottles in a cool, dark place to preserve their potency.

Conclusion:

In emergency situations, the integration of herbal remedies into your first aid approach can provide effective and natural solutions. While it’s necessary to seek professional medical assistance when available, having knowledge of herbal alternatives empowers individuals to address immediate health needs with accessible and sustainable resources. By incorporating herbal remedies into your emergency preparedness plan, you can enhance your ability to respond effectively to a range of health issues, fostering a holistic and resilient approach to well-being.

72 hour kit 4 person deluxe

We sell a line of 72 hour kits, catering to fit 2 or 4 people, with the ability to customize to fit 3 or 5 people sized families, etc. When you receive this kit, a good portion of the product will have the Coghlan name on it. Below you will find a short origin story about this company. First, lets just refresh our minds as to the importance of a 72 hour kit.

Pro Tip: My family of 5, which includes a son whom is a celiac, we have adjusted our kit not to include the Datrex bars because he is unable to eat them. Without a way to avoid cross contamination whilst rehydrating the bars, we replaced them with a suitable alternative for our family.

car kit to store in the vehicles in case of an emergency 72 hour

72 Hour Kit

A 72-hour kit, also known as a “grab-and-go-bag” or “emergency kit,” is a collection of essential items and supplies designed to sustain an individual or a family for approximately 72 hours in the aftermath of an emergency or disaster. Here are several reasons why having a 72-hour kit is important:

  • Immediate Response to Emergencies: Having a 72-hour kit ensures that you have the necessary supplies to meet your basic needs until help arrives or normal services are restored.
  • Self-Sufficiency during Evacuation: In situations where evacuation is necessary, having a ready-to-go kit allows you to quickly leave your home with essential items, ensuring you are self-sufficient during the initial phase of evacuation.
  • Unforeseen Circumstances: Emergencies and disasters can strike unexpectedly, leaving individuals and families with little time to gather essentials. Having a pre-made kit minimizes the stress and uncertainty during such situations, providing a sense of security and readiness, and can also alleviate the stress on available resources supporting evacuees.
  • Customized to Specific Needs: Take into account factors such as dietary restrictions, medical conditions, and climate considerations. Ensure that your kit is tailored to the unique requirements of each person or family.
  • Peace of Mind: Knowing that you have a well-prepared emergency kit gives you peace of mind. It reduces anxiety and allows you to focus on immediate priorities during a crisis, knowing that you have the essentials needed for survival readily available.

Coghlan’s Origin Story:

In 1959, Canadian Norm Coghlan was working downtown Winnipeg as a repairman for Coleman camp stoves and lanterns. He saw an opportunity and created the camp stove toaster. He added them as an item in his store, and quickly discovered they were a hot demand product. Toasting toast while camping was a real delight! This became the purpose of the Coghlan company: to figure out how to make camping easier and more enjoyable whilst in the outdoors.

Embarking on outdoor adventures is a pursuit of joy and self-discovery, and having the right gear can make all the difference. Coghlan’s boasts a rich history of providing outdoor enthusiasts with reliable and durable camping gear. With decades of experience, the brand has become synonymous with quality, earning the trust of campers, hikers, and adventurers worldwide.

Preparedness:

Our 72 hour kits carry these Coghlan specific items (depending on whether you order a Basic or Deluxe kit).

Of course, there are plenty of trusted brands out there! For instance we also stock items such as these in our kits:

In times of crisis, every minute counts, and the thoughtful design of our kits align seamlessly with the urgency in emergency situations. Happy prepping!

Deciding when to call 911

Knowing when and how to contact 9-1-1 and when to contact the authorities is a daunting task sometimes. 9-1-1 is ingrained in our consciousness, but understanding when to dial it versus reaching out to local authorities is a decision that requires thoughtful consideration during a stressful situation. This article explores what constitutes an emergency, how to determine the severity of a situation, and whether it’s advisable to call even when uncertain.

Before we begin: If you do not have programmed into your phone or written on your emergency contact list the phone number of your local authorities (ex: for me that is the Cochrane RCMP dispatch), pause and do that now. :)

Understanding 9-1-1:

Origin:

The concept of a single, easy-to-remember emergency number originated in the 1960s. The Federal Communications Commission (FCC) recommended the use of 9-1-1 as a nationwide emergency number, and in 1968, the first 9-1-1 call was made in Haleyville, Alabama. Over time the 9-1-1 system gained widespread adoption, becoming the primary means for individuals to request assistance during emergencies across North America and other countries.

Rule: Dial 9-1-1 when there is an immediate threat to life, property, or public safety.

  • Examples include accidents with injuries, violent crimes in progress, or medical emergencies.
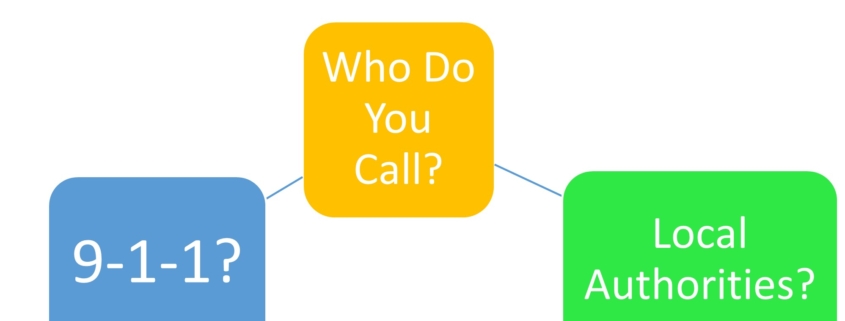
Reporting Crimes & Medical Emergencies:

If a crime or accident has occurred but is not an immediate threat, contact your local authorities’ non-emergency line.

“Not an immediate threat” refers to situations where there is no imminent danger to life, property, or public safety, and a prompt emergency response is not required. These are scenarios that, while concerning or inconvenient, do not pose an immediate risk that demands urgent intervention. Here are some examples to illustrate “not an immediate threat”:

  • Non-Violent Disputes: Arguments or disputes that do not involve physical violence or the threat of immediate harm.
  • Minor Traffic Accidents without Injuries: Fender-benders or minor traffic accidents where there are no visible injuries and the vehicles are not blocking traffic may
  • Noise Complaints: Loud parties or disturbances that are disruptive but do not involve violence or pose an immediate risk to safety.
  • Property Crimes that Have Already Occurred: Crimes such as vandalism or theft that have already taken place and do not present an ongoing threat.
  • Non-Urgent Medical Situations: Non-urgent medical issues or situations where medical attention is needed but not urgently but could seek medical advice via a medical practitioner or a hospital.

It’s important to use discretion and consider the context of each situation. If there is any doubt about whether a situation constitutes an immediate threat, it is advisable to err on the side of caution and call 9-1-1.

Determining an Emergency:

  • Assess the level of immediate danger. If anyone’s life or well-being is at risk, call 9-1-1
  • Assess how quickly a situation requires intervention
  • Evaluate the nature of the incident. Is it a crime in progress, a medical emergency, or a situation that could escalate rapidly?
Conclusion:

Knowing when to call 9-1-1 versus reaching out to local authorities is a responsibility we all share. By understanding the nature of emergencies and calling for help, we contribute to the effective functioning of emergency response systems. Make informed decisions about when and how to seek help! Be safe

self defense

Cultivating self-defense skills and being equipped with the right tools can be instrumental in ensuring one’s well-being. Whether navigating urban environments or venturing into the great outdoors, understanding self-defense principles and having the appropriate know-how can provide a sense of security. In this article, we’ll explore practical strategies and essential equipment to enhance your personal preparedness.

Before I continue, I would like to state a disclaimer that the definition of self defense is: “a set of actions or strategies taken by an individual to protect oneself from harm, aggression, or potential danger”. The key being to protect oneself. By no means do I suggest or support instigating an altercation. I do however fully support the learning of necessary skills!

Knowledge is Power: Self-Defense Basics

  • Start by understanding basic self-defense principles:
      • Situational awareness: be aware of your surroundings. Limit distractions (like excessive phone use) when walking in public spaces. Three parts of situational awareness include perception (be aware), comprehension (think about what you see), and projection (consider the possible outcomes of what you are seeing).journey of a thousand miles begins with a single step
      • De-escalation techniques: Should you find yourself in a heated situation, here are some basic considerations.
            • Active Listening
            • Empathize
            • Stay Calm
            • Body Language (ex: avoid crossing your arms, maintain distance)
            • Clarify and summarize what you’re hearing
            • Set boundaries
      • Trust your instincts: If something feels wrong or off, trust your instincts. Remove yourself from the situation calmly and quietly.
      • Enroll in self-defense classes to learn practical skills like striking, blocking, and grappling. Many communities offer classes tailored to various skill levels.

Self-Defense Gadgets and Technology

  • Safety Apps: Explore smartphone built in apps and other apps designed for personal safety. These apps often include features like real-time location sharing, emergency alerts, and quick access to local authorities.
  • Wearable Safety Devices: Consider wearable devices with built-in safety features, such as panic buttons or automatic distress signal transmission.

Home Security Measures

  • Personalized Home Defense Plans: Develop a home defense strategy with family members, including safe zones, communication methods, and emergency procedures. This may include alarms or cameras depending on your preferences.

Canadian Wildlife:

Wildlife Awareness and Avoidance:

  • Understand the wildlife in the area where you’re exploring. Research the types of animals present and their behaviors to better anticipate potential encounters.
    • For example: When I am in Kananaskis Country, I am aware and as prepared as I can be to encounter bears, cats (the big kinds), moose, and depending on the time of year (mating season) other animals. I am aware of what season it is because that can affect the behavior of animals that are having their babies, or preparing for the winter. And, I am aware of the bug of choice that year. This year of 2023 in particular was a heavy tick year, so we took special precautions to check for them after each excursion.
  • Observe wildlife from a safe distance. Avoid approaching animals too closely, especially those with young or displaying defensive behaviors.
  • Store food securely to avoid attracting wildlife to your campsite. Use bear canisters or bear bags, and follow local guidelines for food storage.
  • Store food securely during a picnic and do not leave it unattended.

Personal Safety Measures:

  • Travel in Groups: When possible, travel in groups. Larger groups are often perceived as more intimidating to wildlife, and there’s increased safety in numbers.
  • Make Noise: Make noise while hiking, especially in areas known for bear or cougar presence. This alerts wildlife to your presence, reducing the likelihood of surprise encounters. Have a whistle, an airhorn and/or a flare in your pack.
  • Carry Bear Spray: In regions with bear populations, carry bear spray and know how to use it. It can be effective in deterring bears and other aggressive wildlife.

Here is a video made by Alberta Parks about how to use Bear Spray. I have been hiking for a decade, and have never encountered a bear, but still faithfully carry my spray in hopes I will never need it. I like to watch videos such as this one to re-educate myself regularly.

Navigation and Emergency Preparedness:

  • Navigation Skills: Develop strong navigation skills to avoid getting lost. Carry a map, compass, and/or GPS device, and familiarize yourself with the terrain.
  • Emergency Communication: Carry a fully charged cell phone or satellite communication device for emergencies. Inform someone of your itinerary and expected return time.
  • First Aid Knowledge: Learn basic first aid skills, including how to treat injuries common in outdoor settings. Carry a well-stocked first aid kit.

Campsite Security:

  • Select a Safe Campsite: Choose campsites with safety in mind, including proximity to water sources, visibility, and avoiding areas with signs of recent wildlife activity.
  • Secure Sleeping Area: Use proper storage for food and scented items. Tents and sleeping areas should be set up away from potential wildlife pathways.
  • Campfire Safety: Follow Leave No Trace principles and practice responsible campfire safety. Keep a safe distance from tents, avoid leaving food residues, and fully extinguish fires.

Self-defense at home and in nature requires a combination of knowledge, preparation, and practical skills. By understanding the environment, adopting responsible practices, and having the right tools, you can enjoy outdoor activities with an increased sense of safety and confidence. Remember, personal safety is an ongoing journey, and staying vigilant and well-prepared contributes to a safer and more secure lifestyle.

rope work out

Are you ready for any emergency or disaster that might come your way? Whether it’s a natural disaster, power outage, or unforeseen crisis, being prepared is helpful. Welcome to “Mastering Preparedness: A 30-Day Home Prepper Bootcamp,” a challenge to transform your home into a fortress of self-sufficiency and resilience.

The path to preparedness might seem daunting, but we’ve designed this bootcamp to be accessible and engaging. Each day’s activity is carefully crafted to ensure you make measurable progress while learning new skills and reinforcing old ones. Whether you’re a seasoned prepper or new to the concept, this bootcamp is your opportunity to fine-tune your preparedness efforts and elevate your level of readiness.

Are you up for the challenge? Let’s begin!

Have a notebook and/or a binder with loose-leaf to make notes and track progress, plus please feel free to peruse the Academy for related articles from day to day!

Week 1: Food and Water

Day 1: Take an inventory of your current food and water supplies. Make a list of what you have and their expiration dates.

Day 2: Research and create a basic emergency food supply plan. Calculate the amount of food your household needs for one week and make a shopping list.

Day 3: Go grocery shopping for your emergency food supply. Focus on non-perishable items like canned goods, freeze dried or dehydrated foods, and grains. We have you covered here!

Day 4: Purchase a water purification system or additional water storage containers. Ensure you have at least 2-4 liters of water per person per day for a week.

Day 5: Create a water purification plan. Learn how to use water purification tablets or filters effectively.

Day 6: Research and prepare a list of recipes that can be made from your emergency food supply. Include cooking instructions.

Day 7: Organize your food and water supplies in a dedicated storage area, keeping the oldest items up front for easy rotation.

Week 2: Shelter and Warmth

Day 8: Assess your home for potential shelter and heating needs during an emergency. Identify weak points and drafty areas.

Day 9: Make a list of necessary shelter and warmth supplies such as blankets, sleeping bags, or a portable heater.

Day 10: Purchase or gather the shelter and warmth supplies you identified, if lacking.

Day 11: Create an emergency heating plan, including safe use of any heating devices.

Day 12: Practice setting up a temporary shelter or insulation in your home, such as a tent or tarp.

Day 13: Learn how to start a fire safely, both indoors (if you have a fireplace) and outdoors.

Day 14: Review your emergency heating and shelter plans with your household members.

Roasting over the fire

Week 3: First Aid and Health

Day 15: Check your first aid kit for expiration dates and restock any missing items.

Day 16: Sign up for a basic first aid and CPR course or review your existing skills.

Day 17: Create a list of essential medications for your family and check their expiration dates.

Day 18: Refill any necessary prescriptions and purchase over-the-counter medications for common ailments.

Day 19: Learn basic home remedies and herbal remedies for common health issues.

Day 20: Organize your medical supplies and first aid kit in a clearly marked and accessible container.

124 piece First Aid Kit

Day 21: Teach your household members basic first aid skills and ensure they know where the first aid supplies are located.

Week 4: Communication and Security

Day 22: Establish a communication plan with family or household members during an emergency. Ensure everyone has a list of emergency contacts, or access to them.

Day 23: Invest in a battery-operated or hand-crank emergency radio for staying informed during power outages.

Day 24: Create a list of important documents and gather them in a waterproof container.

Day 25: Practice safe firearm storage and handling if you have them. Make sure appropriate licenses or permits are in place.

Day 26: Set up a neighborhood watch or community emergency response group. Alternatively, have a conversation with neighbors about an emergency response plan.

Day 27: Develop a security plan for your home and review it with your household members.

Day 28: Revisit your overall preparedness plan and make any necessary adjustments.

Day 29: Conduct a emergency drill to test your preparedness efforts.

Day 30: Reflect on your progress over the past 30 days and create a long-term preparedness plan to continue improving your readiness.

Triathlon finish


CONGRATULATIONS! You did it! Feel free to reach out to BridenAcademy@bridensolutions.ca and tell us all about your experience going through the challenge. We would love to hear how it went!

124 piece First Aid Kit

The Importance of First Aid and Medical Preparedness

Knowledge of first aid equips you with the ability to administer life-saving care in critical situations, such as heart attacks, severe bleeding, or choking incidents. Effective first aid can stabilize a person’s condition and prevent it from worsening before professional medical assistance arrives.

Education: Enroll in a certified first aid and CPR course to learn the fundamentals of life-saving techniques. Regularly refresh your knowledge through updates and practice. Below are a mention of some of the fundamental life-saving techniques learned in a certified first aid and CPR course:

CPR training

First Aid Training

  • Cardiopulmonary Resuscitation (CPR): CPR is a technique used to maintain blood flow and provide oxygen to a person whose heart has stopped beating. It involves chest compressions and rescue breaths.
  • Heimlich Maneuver: The Heimlich maneuver, also known as abdominal thrusts, is used to dislodge an object blocking a person’s airway. It’s used to help someone who is choking.
  • AED (Automated External Defibrillator) Use: AEDs are devices that can deliver an electric shock to restore a normal heart rhythm in the case of sudden cardiac arrest. Know how to use an AED with proper training
  • Bleeding Control: Learn how to control severe bleeding. Applying direct pressure, elevating the injured area, and using tourniquets (as a last resort) can help prevent excessive blood loss.
  • Recovery Position: The recovery position is used for individuals who are unconscious but breathing. It helps keep their airway clear and minimizes the risk of aspiration.

More First Aid

gauze on a scrape

  • Rescue Breathing: Rescue breathing is used when someone is not breathing but has a pulse. It involves providing breaths to the person to ensure they receive oxygen.
  • Recognition of Stroke Signs: Recognize the signs of a stroke, such as sudden numbness, confusion, trouble speaking, or severe headache.
  • Assessment of Unconsciousness: Learn how to assess if a person is unconscious and not breathing.
  • Managing Anaphylaxis: Anaphylaxis is a severe allergic reaction that can be life-threatening. Know how to use an epinephrine auto-injector (an epi-pen).
  • Basic Wound Care: Proper wound care includes cleaning wounds, applying antiseptic, and covering them with sterile dressings to prevent infection.
  • Recognizing Heart Attack Symptoms: Symptoms of a heart attack include chest pain, shortness of breath, and radiating pain in the arms or jaw.
  • Child and Infant CPR: Know how to perform CPR on children and infants as their needs and techniques differ from those used on adults.
  • Defusing Choking in Infants and Children: Know how to respond to choking in infants and children, as their airways are smaller and more easily obstructed.
  • Spinal Injury Stabilization: Learn how to minimize movement and stabilize a person’s neck and spine when there is a potential spinal injury.

Essential First Aid Preparedness:

  • First Aid Kits: Prepare well-organized first aid kits for your home, car, workplace, and outdoor adventures. Ensure they contain essential supplies like bandages, antiseptics, gauze, scissors, and pain relievers.

124 piece First Aid Kit

  • Emergency Contact List: Maintain an updated list of emergency contacts, including local hospitals, doctors, and poison control centers. Keep this list easily accessible.
  • Medications: Regularly check the expiration dates of medications and replenish your supply. Consider the medical needs of family members or dependents, including medications, medical equipment, and emergency plans tailored to their conditions.
  • Sanitation and Hygiene: Stock sanitation and hygiene supplies, such as soap, disinfectants, and waste disposal materials, to maintain clean and safe environments during crises.

Medical Preparedness for Various Scenarios

  • Natural Disasters: Understand the medical risks associated with natural disasters like hurricanes, earthquakes, or wildfires. Plan for these scenarios by having extra supplies and knowing how to provide first aid in crisis conditions.
  • Pandemics: In light of recent global health challenges, having knowledge of infection control, quarantine measures, and telemedicine can be invaluable in pandemic situations.
  • Outdoor Adventures: If you enjoy outdoor activities, equip yourself with wilderness first aid skills. This specialized knowledge can prove vital in remote areas where professional medical help may be distant.
  • Home Accidents: Be ready for common home accidents. Ensure that your home is well-stocked with first aid supplies and that family members know how to use them.
Conclusion

First aid and medical preparedness are not only skills but also a mindset. Be ready to provide assistance in times of crisis. Educate yourself, maintain well-equipped first aid kits, and plan for emergency scenarios. You can significantly improve your ability to respond effectively when the unexpected occurs. Remember, the knowledge and resources you have today could be the difference between life and death in the future.

nuun hydration electrolyte tablets

Understanding Electrolytes – The Science Behind Them

Electrolytes are minerals that serve as electrically charged ions in the human body. These ions play a role in various bodily functions. During emergency situations their importance becomes particularly evident. The primary electrolytes include sodium, potassium, calcium, magnesium, chloride, and bicarbonate. Each of these minerals contributes to specific processes vital for our well-being:

  • Sodium is for maintaining fluid balance in and around our cells. It helps control blood pressure and aids in nerve transmission.
  • Potassium is for regulating heart rhythm, muscle contractions, and nerve signals. It helps counterbalance the effects of sodium.
  • Calcium supports bones and teeth but also muscle function, blood clotting, and nerve transmission.
  • Magnesium participates in over 300 biochemical reactions in the body, including muscle and nerve function, blood glucose control, and bone health.
  • Chloride is an important component of stomach acid and aiding in digestion. It also plays a role in maintaining proper pH levels in the body.
  • Bicarbonate functions as a buffer to maintain the body’s pH level, helping to prevent excessive acidity or alkalinity.

In normal circumstances, the body maintains a balance of these electrolytes, aiding optimal health and well-being. During emergencies, this balance can be disrupted due to various factors such as increased physical activity, exposure to extreme weather conditions, limited access to clean water, and restricted access to nutritious food. This disruption can lead to dehydration and electrolyte imbalances.

Given the role that electrolytes play in the body’s normal functioning (especially in times of stress and hardship) it becomes important to replenish and maintain these minerals balance. This is where products like Nuun electrolyte tablets can be invaluable, as they provide a practical and portable means of addressing these needs.

Dehydration and Electrolyte Imbalance in Emergencies

The factors contributing to dehydration or electrolyte imbalance can include:

  • Limited access to clean water
  • Physical exertion and stress
  • Unpredictable weather conditions
  • Limited access to fresh food.
  • Limited medical resources

Nuun Electrolyte Tablets: A Solution for Emergency Preparedness

Nuun, a popular brand known for its electrolyte tablets, offers a convenient and effective solution for maintaining hydration and electrolyte balance in emergencies. These tablets are designed to dissolve quickly in water, providing a portable and easily storable source of electrolytes. Here’s why Nuun electrolyte tablets are a valuable asset in emergency preparedness:

  • Portability: Compact and lightweight, making them easy to carry in your emergency kit or backpack.
  • Versatility: Variety of flavors, making them more palatable and enjoyable to drink, encouraging regular fluid intake.
  • Electrolyte replenishment: Helps restore electrolyte balance by supplying essential minerals like sodium, potassium, magnesium, and calcium.
  • No added sugars: Low in sugar, helping to avoid blood sugar spikes and crashes during stressful situations.
  • Purity: Non-GMO, gluten-free, vegan, and contain no artificial preservatives, ensuring you get the best-quality electrolytes.

Knowing When to Use Electrolytes

Here are some indicators that can help you determine when to use electrolytes:

  • Excessive Sweating:  Sweating leads to the loss of both water and electrolytes, and these need to be replenished.|
  • Signs of Dehydration: Dehydration symptoms include dark yellow urine, dry mouth, increased thirst, fatigue, and dizziness. If you notice these signs, it’s essential to rehydrate with electrolyte-containing fluids.
  • Prolonged Physical Activity: Activities such as hiking, biking, or running: using electrolytes can help maintain proper fluid balance and support your performance. Alberta Health has a chart/activity here to give more specific details on how much fluids we require to keep hydrated.
  • Illness or Infections: When you’re sick with conditions like diarrhea, vomiting, or a fever, your body loses fluids and electrolytes more rapidly. Using electrolytes can aid in replenishing what is lost and preventing dehydration.
  • Exposure to Extreme Weather: Whether it’s intense heat or cold, extreme weather conditions can lead to increased perspiration.
  • Emergency Preparedness
Conclusion:

Note that electrolyte needs can vary from person to person depending on factors such as age, sex, weight, and individual health conditions. Therefore, it’s advisable to consult with a healthcare professional or a nutritionist if you have specific concerns about electrolyte intake, especially if you have underlying medical conditions.

In most cases, using electrolytes when you’re engaged in activities that lead to fluid loss or when you experience signs of dehydration is a smart and proactive way to maintain your health and performance. It’s better to prevent imbalances with preventative choices. Happy hydrating!