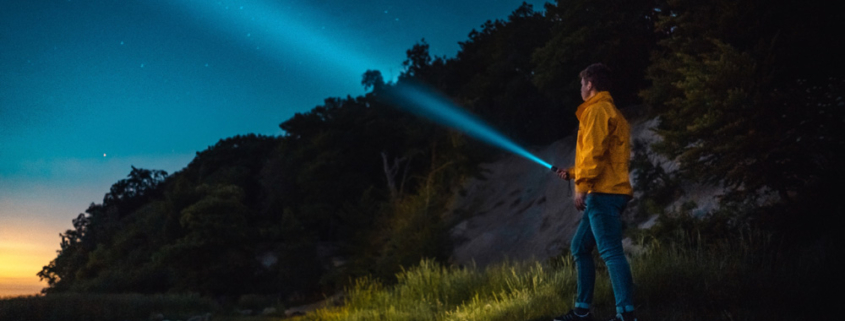
flashlight at night looking at the stars along the river

In the realm of preparedness, having reliable light sources is a cornerstone necessity. Whether facing power outages or summer camping adventures, the right illumination is important for safety, comfort, and functionality. In this guide, we’ll delve into light sources that cater to every season, ensuring you are well-equipped for any situation.

  1. Flashlights:

    Flashlights are versatile, compact, and a must-have for every survival kit. Choose LED models for long-lasting brightness and battery life. In winter, they navigate power outages; in summer, they guide nocturnal adventures.

    Pro-Tip: Have multiple flashlights! Put one in your vehicle, put one in your emergency kit, put one in the garage, put one in your bedroom, and so on. If you have children – store even more! I don’t know about you, but I know that when I need a flashlight, little hands have often ‘borrowed’ it.

  2. Lanterns:

    Lanterns provide ambient light, making them ideal for group settings. Battery-powered or propane lanterns are excellent choices for camping trips or creating a cozy atmosphere during winter storms when electricity falters.Oil lamps combine functionality with a touch of traditional elegance. They offer a steady flame, making them suitable for both indoor and outdoor use, ensuring a timeless glow in any season.

  3. Headlamps:

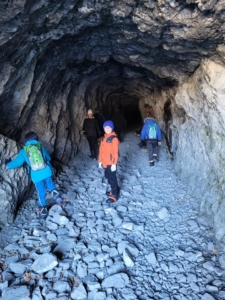
    Headlamps are invaluable for hands-free lighting, perfect for activities like hiking or working in the dark. Their practicality shines in summer camping or winter emergencies when versatility is key.Ex: When we go and visit the Bunker near Canmore, a headlamp helps you enjoy the experience so much more!

  4. Solar-Powered Lights:

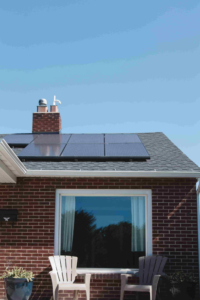
    Solar-powered lights are eco-friendly solutions that come into their own during sun-drenched summers. Use them to charge during the day and provide gentle illumination at night for campsites or emergency situations.

  5. Candles:

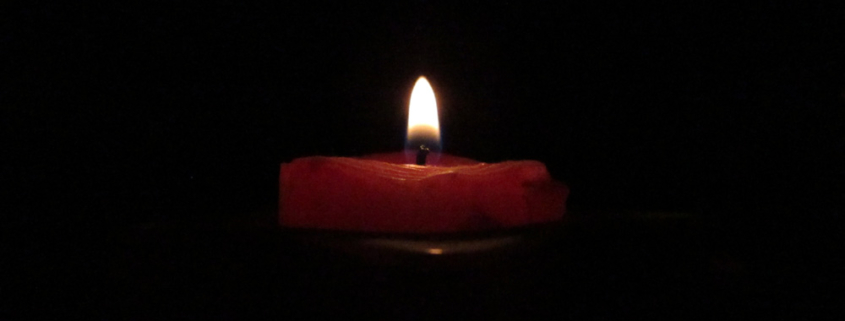
    Candles offer a timeless and reliable light source. During winter power outages, they provide warmth and illumination, while in summer, they enhance the ambiance of outdoor settings

  6. Glow Sticks:

    Glow sticks are compact, portable, and add a touch of color to your survival toolkit. Ideal for signaling, marking trails, or creating a festive atmosphere during summer evenings. Also, kids love them!

Conclusion:

Preparing for year-round survival involves considering the varied lighting needs that each season presents. By diversifying your light sources with flashlights, lanterns, headlamps, solar-powered lights, candles, oil lamps, and glow sticks, you ensure adaptability to any situation. Whether facing winter’s chill or basking in summer’s warmth, a well-equipped lighting arsenal ensures you can navigate the dark with confidence and resilience. Stay prepared, stay illuminated.

flashlight at night looking at the stars along the river

In a world where the unexpected can happen at any time, being prepared is key. Lighting is a fundamental aspect of preparedness, as it ensures you can see, work, and navigate in any situation, especially in our Canadian winter season, when our daylight is shortened. This article delves into lighting hacks, offering creative solutions to illuminate your path to survival.

1. Homemade Oil Lamps

Oil lamps are a reliable and cost-effective lighting solution. You can make your own by using a glass container, such as a mason jar, filling it with vegetable oil, and placing a cotton wick inside. Trim the wick to the desired length, and light it. This DIY oil lamp provides a steady, long-lasting flame that can light up a room.

  • Glass container (e.g., mason jar)
  • Vegetable oil
  • Cotton wick
  • Scissors

2. Solar-Powered Lights

Harness the power of the sun with DIY solar lights. Purchase solar garden lights, and repurpose the solar panels and LEDs. You can create custom solar-powered lighting solutions for emergencies, such as portable lanterns and path lights.

  • Solar garden lights

3. Altoids Tin Candles

Altoids tins can be transformed into compact and efficient candles. Melt wax and pour it into the tin, adding a wick to create a small, portable candle that can burn for hours. These tin candles are easy to store and ideal for lighting small spaces during power outages or on the go.

  • Altoids tin
  • Wax (e.g., old candles or wax melts)
  • Wick
  • Double boiler or microwave-safe container

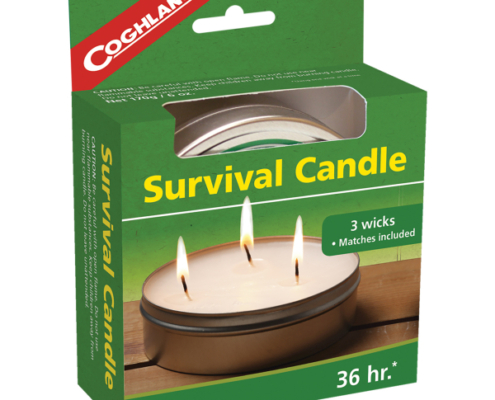
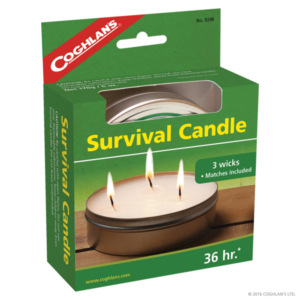
3 wick survival candle

Or consider our 36 hour candle.

4. Battery-Powered LED Hacks

Enhance your battery-powered LED lights with DIY modifications. You can amplify their brightness and distribution by attaching them to reflective surfaces, like aluminum foil or small mirrors. This hack ensures more efficient use of your battery-powered lighting during an emergency.

  • Battery-powered LED lights
  • Aluminum foil or small mirrors
  • Adhesive or tape

5. Glow Stick Cluster Lamps

Glow sticks are a fun and versatile DIY lighting option. Cluster several glow sticks together using tape or string, and hang them from a central point. This creates a unique and effective overhead lighting source. In a pinch, you can attach them to the brim of a hat for hands-free illumination.

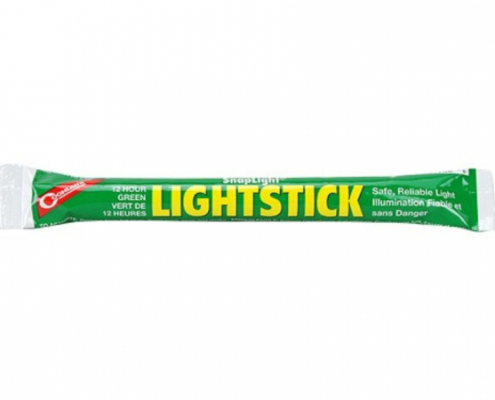
Safe, reliable light illumination lightstick

6. Vegetable Can Lanterns

Repurpose empty vegetable cans into lanterns. Use a hammer and nail to create decorative patterns or designs on the can’s surface. Place a candle or battery-operated LED light inside for a charming and functional lantern that can light your way in the dark.

  • Empty vegetable cans
  • Hammer and nail for decoration
  • Candle or battery-operated LED light

7. Crayon Candles

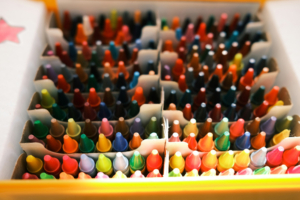
In an emergency, crayons can become makeshift candles. Remove the paper wrapper and light the crayon as you would a candle. One crayon can burn for up to 30 minutes, providing you with essential illumination in a pinch.

  • Crayons (remove paper wrapper)
  • Lighter or matches

crayon box

8. Reflective Tarp Tents

Reflective emergency blankets or tarps can be used to create makeshift tents or shelters. By directing a light source, such as a flashlight or candle, onto the reflective surface, you can amplify and disperse the light throughout your shelter, creating a well-lit environment.

  • Reflective emergency blanket or tarp
  • Light source (flashlight, candle, or lantern)

9. Rechargeable Solar-Powered Mason Jar Lights

Combine the simplicity of mason jars with the convenience of solar-powered lighting. Attach a solar-powered lid to a mason jar and let it charge during the day. At night, you have a portable, eco-friendly, and reusable light source.

  • Mason jar with lid
  • Solar-powered lid
  • Sunlight for charging

10. Classic Campfire

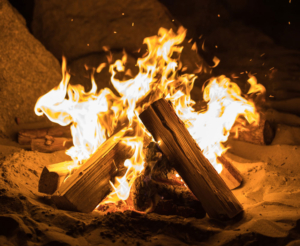
Of course, building a fire offers a natural heat and light source. It has been a reliable source of light for centuries, offering practicality and comfort in various settings.

Conclusion

Lighting hacks fare not only practical but also fun to create. By incorporating these inventive solutions into your emergency preparedness plan, you’ll be better equipped to shine a light on survival during power outages, camping trips, or other unexpected situations. With a little creativity and resourcefulness, you can illuminate your path to safety and self-reliance.


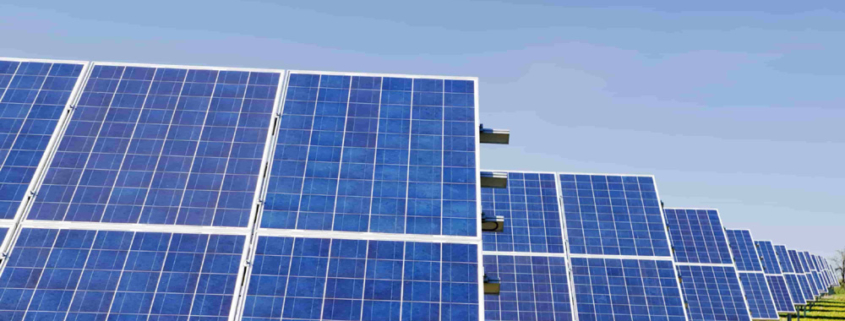
field of solar panels

Solar Potential:

Today we will talk about the basics around solar power in Canada. While solar resources vary across the country, technological advancements have made solar power a viable option for Canadians.

How Solar Power Works:

Solar power is generated using photovoltaic (PV) cells, which convert sunlight into electricity. Here’s a simplified explanation:

  • Photovoltaic Cells: Solar panels consist of photovoltaic cells made of semiconductor materials, usually silicon. When sunlight hits these cells, it excites electrons, generating an electric current.
  • Inverter Conversion: The direct current (DC) electricity produced by the solar panels is converted into alternating current (AC) electricity using an inverter. AC is the type of electricity used in most homes and businesses.
  • Grid Connection or Storage: The electricity can be used on-site or fed into the grid. Some systems include battery storage, allowing homeowners to store excess energy for later use.

man putting solar panels onto the roof of his home

Systems to consider vary in size, such as 5 kW, 10 kW, 12 kW, and so on; this refers to the capacity or size of a solar power system, specifically its maximum power output under ideal conditions. The capacity of a solar power system is typically measured in kilowatts (kW) or megawatts (MW), and it indicates how much electricity the system can generate.

Here’s what each of these capacity specifications means:
  1. 5 kW System:
    • A 5 kW system has a capacity of 5 kilowatts.
    • This means that, under optimal conditions, the system can produce 5 kilowatts of electricity per hour.
    • This system is often sufficient to cover a significant portion of an average household’s electricity needs.
    • It can power essential appliances such as refrigerators, lighting, televisions, computers, and other small electronics.
    • It may not be enough to cover the entire energy consumption of larger homes or homes with high energy demands, especially during peak usage times.
  2. 10 kW System:
    • A 10 kW system has a capacity of 10 kilowatts.
    • It can generate double the amount of electricity compared to a 5 kW system under the same conditions.
    • A 10 kW system has a higher capacity and is more likely to cover the electricity needs of a larger home.
    • It can power all the appliances mentioned for the 5 kW system and potentially support additional appliances, such as a washing machine, dryer, or electric stove.
    • Depending on the location and efficiency of the system, it might even cover the majority of a larger home’s energy needs.
  3. 16 kW System:
    • A 16 kW system has a capacity of 16 kilowatts.
    • It has a higher capacity than the 5 kW and 10 kW systems, indicating a larger and more powerful solar installation.
    • A 16 kW system is a robust installation with the potential to power a significant portion of a larger home’s energy demands.
    • It can power all the appliances mentioned for the 5 kW and 10 kW systems and may have the capacity to support additional high-energy appliances or multiple HVAC units.
    • In some cases, a well-designed and efficient 16 kW system could cover the entire energy consumption of a large home.

Note that the actual energy production of a solar power system can vary based on factors such as sunlight exposure, geographic location, shading, and system efficiency. Conduct a thorough energy audit to determine your specific energy needs.

Consulting with a local solar professional can provide a more tailored assessment based on your individual circumstances.

solar panels

Costs of Solar Power:

  • Installation Costs: The cost of installing solar panels depends on factors such as system size, location, and the complexity of the installation. Prices have decreased over the years due to technological advancements and increased demand.
  • Government Incentives: Various provinces and territories offer incentives, rebates, and tax credits to encourage solar adoption. These can significantly reduce the upfront costs.
  • Operational Costs: Solar systems have low operational costs as they require minimal maintenance. Regular cleaning and occasional checks are typically sufficient.

Return on Investment (ROI):

While the initial investment in solar panels can be significant, homeowners often experience a positive return on investment over time. The ROI can vary based on several factors, including location, system size, local incentives, and energy consumption. Let’s break down the costs and potential savings for a home installation based on a 1500 square foot home:

Installation Costs: Depending on the system, size, and far too many factors, the cost of installation is too difficult for me to predict. My research suggests that before rebates or incentives, solar panels can range anywhere from $10,000 to $40,000. (A proper consultation is the best way to know what your home costs would be)

Annual Savings: The savings from a solar panel system come from the electricity generated and the reduction in your electricity bill. On average, a 5 kW system can generate around 6,000 to 8,000 kWh per year, depending on factors like sunlight exposure and system efficiency.

Annual Savings ≈ Annual Electricity Production (kWh) × Electricity Rate (per kWh)

For example, if your electricity rate is $0.15 per kWh on a 5kW system:
Annual Savings ≈ (6,000 kWh to 8,000 kWh) × $0.15    = $900 to $1200

Payback Period: The payback period, or the time it takes for your solar investment to pay for itself through savings, can be calculated by dividing the installation cost by the annual savings.

Payback Period (years)=Installation Cost / Annual Savings

As a rough estimate, the payback period for a residential solar panel system in Canada is often in the range of 5 to 15 years.

Important Note: These calculations are approximate, and actual costs and savings can vary based on specific circumstances. It’s recommended to consult with local solar providers and take into account any changes in technology, energy rates, and government incentives

Environmental Benefits:

Solar power is a clean and renewable energy source, producing electricity without emitting greenhouse gases. Choosing solar helps reduce dependence on non-renewable resources and contributes to a more sustainable energy future.

Challenges:

Challenges in Canada include variations in sunlight intensity depending on the region, occasional extreme weather conditions, and the upfront costs.

On average, solar panels can last for 25 to 30 years or more. Many manufacturers offer performance warranties that guarantee the panels will still produce a certain percentage of their rated power output after a specified number of years, often 80% or more after 25 years.

Several factors contribute to the longevity of solar panels:

  1. Material Quality: The quality of materials used in the manufacturing of solar panels is a significant factor. High-quality panels made with durable materials tend to have a longer lifespan.
  2. Manufacturing Standards: Panels produced in accordance with industry standards and quality control measures are more likely to withstand environmental stresses and maintain performance over time.
  3. Environmental Conditions: The local climate and environmental conditions can impact the longevity of solar panels. For example, extreme weather events, such as hailstorms or hurricanes, can potentially damage panels. However, most panels are designed to withstand standard weather conditions.
  4. Maintenance: Proper maintenance, such as occasional checks for damage or shading issues, can contribute to the longevity and efficiency of solar panels.

Conclusion:

Solar power in Canada is a promising and increasingly accessible source of clean energy. As technology advances and costs continue to decrease, more homeowners and businesses are adopting solar solutions, contributing to a greener and more sustainable energy landscape.

If you have any comments, please reach out to BridenAcademy@BridenSolutions.ca

flashlight at night looking at the stars along the river

Flashlights: A Fundamental Tool

A reliable flashlight is a cornerstone of any emergency kit. Here’s how to make the most of this light source:

SOS Signal:

The international distress signal, SOS, can be transmitted using a flashlight. Simply shine the light in a pattern of three short flashes, followed by three long flashes, and then three short flashes again. This universally recognized signal indicates that you are in need of assistance.

Remember that the SOS signal (· · · — — — · · ·) is an essential code to know for emergencies.

Color Filters:

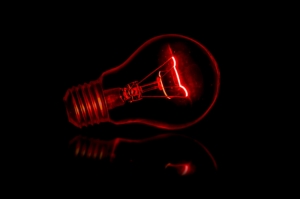
Some flashlights come with color filters. Red light, for example, helps maintain night vision when reading maps or charts, while green light are for signaling without alerting potential threats. Here’s how to use them effectively:

  • Red Filters: Red light is ideal for low-light situations as it preserves your night vision, making it easier to read maps, charts, and documents in the dark. Here’s how you can maximize the utility of red filters:
    • Night Vision: When in a dark environment, especially with a group, the sudden burst of white light from a regular flashlight can temporarily blind everyone, including yourself. A red filter on your flashlight maintains your night vision while still providing adequate illumination.
    • Subtle Signaling: Red light can be used for subtle signaling among a group without alerting potential threats. It’s less likely to be seen from a distance compared to white light, making it a valuable tool for maintaining covert operations during an emergency


  • Green Filters: Green filters are less common but can be handy in certain situations. Here’s how they can be beneficial:
    • Enhanced Visibility: Green light is easy for the human eye to distinguish, and it’s often used in emergency situations to improve visibility. Green filters can increase the range of your signaling or provide a more noticeable light source.
    • Wilderness Signaling: In a wilderness setting, where the surroundings are predominantly green, using a green light can make your signals stand out against the natural backdrop.

When adding color filters to your flashlight,  ensure they are of high quality and specifically designed for your flashlight model. Poorly fitted or low-quality filters reduce the intensity of your light and potentially compromise their effectiveness. Practice using the filters to familiarize yourself with the different lighting conditions and their applications.

Signal Mirrors: Reflecting Hope

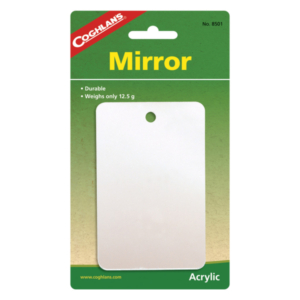
Signal mirrors are designed for long-distance signaling and are particularly effective in sunny conditions. To use a signal mirror:

  • Aim the Mirror: Position the mirror so that it reflects sunlight onto your target. This can be an aircraft, boat, or rescue team.
  • Flash the Target: Tilt the mirror to aim the reflected sunlight at your target. The flashing light will catch their attention.

Glow Sticks: Low-Light Signaling

Glow sticks are a portable, low-light source that can be seen from a distance. To signal for help using a glow stick, activate it and wave it in a conspicuous manner during low-light conditions. It also serves as a low light source if you are stuck in the darkness.

Smartphone Flashlight: Modern Signaling

Most smartphones have built-in flashlights. Use your phone’s flashlight to signal for help by repeatedly turning it on and off in a pattern, such as the SOS signal or other recognizable sequences. Be cautious of your battery levels, unless you have backup power banks. Use your battery life wisely!

Strobe Lights: Attention-Grabbing Flashes

Strobe lights are designed for high-visibility signaling. They emit bright, rapid flashes of light. These are particularly effective for attracting attention in low-visibility situations. You might be thinking, “how and why on earth would I carry a strobe light while out in the great outdoors?” The why is for emergencies, but the how is simpler than you might think! Many flashlights have this feature already included, and as it turns out, it was not created solely to annoy parents! Headlights often have this strobe option as well.

In times of crisis, your ability to signal and communicate with light can make all the difference. Whether stranded in the wilderness or facing an emergency, knowing how to use light as a beacon of hope can connect you with help, your loved ones, or a rescue team. Remember to include a variety of light sources and signaling tools in your emergency kit to be fully prepared for any situation.

campfire at the beach

The Right Wood Matters

The first rule of thumb when it comes to efficient wood burning is knowing your wood. Not all wood is created equal, and choosing the right type makes all the difference.

  • Hardwoods like oak, maple, and hickory burn hotter and longer, making them ideal for those cozy nights by the fireplace or extended cooking sessions.
  • Softwoods like pine, spruce, and fir ignite quickly but do not last as long. They’re perfect for a quick, hot fire to boil water or get warm in a hurry.

Understanding the properties of different woods and having the right type on hand is helpful. I recommend finding an app or a guidebook, and going on a scavenger hunt identifying the various types. Look for color, shape, scent, and texture and see what you can find!

fire wood

Dry as a Bone

Wet wood can be a real buzzkill when it comes to building a fire. Always aim to use dry, seasoned wood. Wood with a moisture content of 20% or less is ideal. If you’re scavenging in the wild (where and when allowed), look for dead standing trees or branches off the ground. Always carry a fire-starter or two in your survival kit – you never know when you’ll need a quick ignition source. If you have wood stocked at home for your wood burning stove or outdoor pit, store it in a dry, sheltered location.

The Right Tools for the Job

Axe or Hatchet: A high-quality axe or hatchet allows you to chop logs into manageable pieces for your fire or shelter. Make sure to keep your cutting tools sharp; dull blades make the job harder and less safe.

Saw: While an axe is excellent for splitting wood, a saw is invaluable for cutting logs into smaller, more manageable lengths.

Knife: Beyond its role in preparing food, a knife can be used for tasks like carving wood, or feathering sticks for kindling. And if you’re like my children, whittling is a great pass time around the fire.

  • A Multi-tool pocket knife also is great to have handy – you never know when you’ll need a set of pliers!

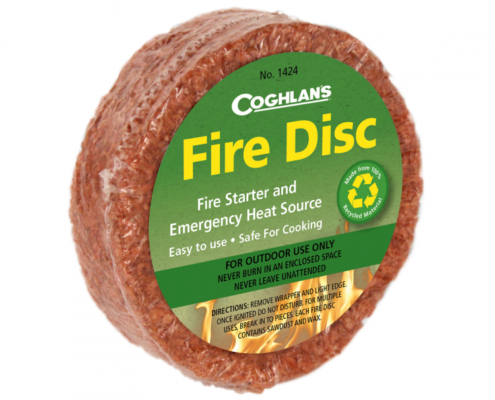
Firestarter: Even with all the tools and knowledge, getting a fire going from scratch can be a challenge, especially in adverse conditions. That’s where fire-starters come in. You can choose from various options like waterproof matches, flint and steel, or fire discs. Keep a few of these in your survival or camp kit.

Backpacking Stove: A lightweight backpacking stove like a JetBoil, Kelly Kettle or a Coghlan’s folding stove can be a game-changer. It’s a highly efficient and controlled way to cook your meals and boil water without the need for a full campfire.

Firewood Carrier: When you’re transporting firewood from your processing area to your campsite, a firewood carrier can save you multiple trips. They come in various styles, including wheelbarrows, canvas or mesh bags and strap systems. Or, if you have children, they can be excellent firewood transporters (no promises you’ll be able to hear the pleasant sounds of nature over them).

Keep It Ventilated

No one likes a smoky fire. A well-ventilated fire is a happy and efficient fire. Proper ventilation not only ensures that your fire burns cleanly but also contributes to its longevity and effectiveness. Here’s how you can achieve excellent ventilation for your outdoor fire:

Build Your Fire Lay:

The arrangement of your firewood has a substantial impact on airflow. When building your fire, consider using one of the following methods:

  • Teepee Method: This classic method involves stacking your kindling and fuel wood in the shape of a teepee. Leave an opening on one side to allow airflow. As the fire burns, it draws in oxygen through the bottom, sustaining combustion.
  • Log Cabin Method: Create a square or rectangular shape with your logs by stacking them perpendicular to each other. Build several layers, and place kindling and tinder inside. The gaps between the logs create ample airflow. This is similar to a pyramid but much more space between logs to allow air flow.
  • Lean-to Method: Lean a larger log against a sturdy support, and stack smaller logs and kindling against it on the windward side. This setup channels air towards the base of the fire, providing a steady supply of oxygen.
  • Pyramid Method: Stack your wood largest on the bottom, getting smaller the taller you get, keeping your wood snug and close together. Your kindling and tinder goes on top, and the fire will slowly burn downwards, allowing you to keep a fire burning through the night if necessary. Remember to have rocks or a fire pit circling your fire for safety.
  • Star Method (Cross-ditch): If you’re starting a fire to one-pot cook over, this method is perfect. You can set up your tripod over the center.

Clear the Area: Ensure the area around your fire pit is clear of leaves, grass, or debris that could hinder proper ventilation. A clean, non-flammable space prevents embers from spreading and encourages efficient airflow.

Position the Windward Side: If possible, align your fire pit or campfire with the prevailing wind. This ensures that oxygen-rich air is continuously funneled into your fire, enhancing its combustion.

Add Air Channels:

In situations where you need to start a fire in less-than-ideal conditions, consider adding air channels to encourage airflow. Place a few sticks or rocks beneath your tinder to create space for air to circulate.

Caution: While proper ventilation is essential for a good fire, be aware of your surroundings. In windy conditions, a fire can quickly get out of control. Always keep an eye on the fire and be prepared to adjust your fire’s size and airflow to maintain safety.

Smoke:

Have you ever built a fire and found it to be really smoky? Here are some tips:

  • Use Dry Wood: Wet or green wood contains a substantial amount of moisture that, when burned, results in excessive smoke.
  • Proper Wood Selection: Choose hardwoods over softwoods. Hardwoods like oak, maple, or hickory tend to produce less smoke compared to softwoods like pine, spruce, or fir.
  • Start with Small Sticks: When initially lighting your fire, begin with small sticks, twigs, or kindling.
  • Well-Designed Fire Lay: As mentioned earlier, the method you use to arrange your firewood can significantly impact smoke production. The teepee, log cabin, and lean-to methods provide ample ventilation, resulting in more complete combustion and less smoke.
  • Avoid Overloading the Fire: Adding too much wood too quickly can overwhelm the fire and cause incomplete combustion, leading to smoke. Gradually add fuel wood as the fire gains strength, ensuring it’s always getting enough air to burn efficiently.
  • Maintain Proper Ventilation: Position your fire pit or campfire where it can draw in oxygen from the windward side. Adjust the size and arrangement of your logs to keep air circulating.
  • Regularly Stoking the Fire: To reduce smoke during the burning process, periodically stoke the fire by adding small logs or adjusting the arrangement of existing logs. This helps maintain a steady and efficient burn.

Step-by-Step Guide: How to Start a Fire
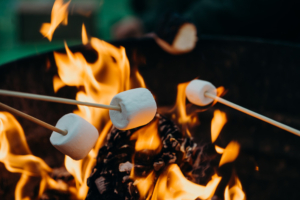
Roasting over the fire

Now, let’s break down the process of starting a fire in the great outdoors. Whether you’re using a fire pit, a wood-burning stove, or building a wilderness fire, these steps will guide you:

Step 1: Gather Your Materials
  • Tinder: Start with easily ignitable materials like dry leaves, pine needles, or small twigs. You can also use commercial fire-starters, cotton balls soaked in petroleum jelly, or dryer lint. This is your very first source of fuel to get the fire ignited
  • Kindling: Gather small branches, twigs, or sticks. These should be about the diameter of a pencil and easily combustible
  • Fuel Wood: These are your larger logs
Step 2: Set Up Your Fire Lay

There are several fire lay methods mentioned above, but for beginners, the teepee method is often the easiest:

  • Place a small pile of tinder in the center of your fire pit.
  • Form a teepee structure around the tinder using your kindling. Leave an opening for airflow.
Step 3: Ignite the Tinder

Use a fire-starter, a lighter, or matches to ignite the tinder in the center of your teepee. As the tinder catches fire, it will ignite the kindling.

Step 4: Feed the Fire

As the kindling ignites and the flames grow, gradually add more kindling and then larger fuel wood. Ensure you maintain proper airflow.

Step 5: Maintain the Fire

Continue to add fuel wood as needed to keep the fire going. Be attentive to its size and intensity, adjusting as necessary.


By choosing the right wood, keeping it dry, using the right tools, maintaining proper ventilation, and prioritizing safety, you’ll be a wood-burning pro in no time. So, let’s keep the fires burning, stay safe while doing so, and enjoy the warmth and comfort of a well-burning fire in any situation. Happy camp-firing, my friends!
lightning flash in the night sky

Living in regions prone to unpredictable weather or unpredictable happenings, we find ourselves on occasion facing the challenges of power outages. Whether it’s a winter blizzard, severe thunderstorm, or wind knocking over a tree onto your local powerline, being prepared for loss of electricity is important. In this article, we’ll explore practical tips on how to prepare for a power outage.

Emergency Kit Essentials:

Have one! Check out this previous post about 72 hour kits for some ideas on what to have in yours. Don’t forget a can opener!

electricity

Backup Power Sources:

  1. Generators:
    • Portable Generators: They are fueled by gasoline, propane, or diesel and should be operated outdoors for safety.
    • Standby Generators: Permanently installed and connected to your home’s electrical system. They automatically turn on when the power goes out and can provide uninterrupted power for your entire home. They run on natural gas or propane and are more expensive than portable generators.
  2. Power Inverters:
    • Power inverters convert DC (direct current) power from a battery into AC (alternating current) power that can be used to run household appliances and electronics. They are an excellent choice for keeping small devices and low-power appliances operational during an outage.
  3. Uninterruptible Power Supplies (UPS):
    • UPS devices are typically used to protect computers and sensitive electronics. They provide a short-term battery backup when the power goes out, allowing you to save your work and shut down your devices properly. They come in various sizes and can provide anywhere from a few minutes to a few hours of backup power.
  4. Solar Power Systems:
    • Solar panels combined with battery storage systems can provide a sustainable source of backup power. During normal conditions, solar panels generate electricity and store excess energy in batteries. During a power outage, this stored energy can be used to power your home.
  5. Power Banks and Portable Chargers:
    • Power banks, also known as portable chargers, are compact devices that store electrical energy. They are primarily used to charge smartphones, tablets, and other small electronic devices.
  6. Candles and Oil Lamps:
    • Ensure you have a supply of candles, matches, and oil or lamp fuel on hand for back up light. Always use them safely and keep an eye on open flames.

When choosing a backup power device, consider your specific needs, the duration of potential outages, and your budget. It’s also important to maintain and test your backup power sources regularly to ensure they are ready when needed. Having a combination of these devices can provide a comprehensive backup power solution for different situations and needs during a power outage.

Winter Power Outage Essentials:

Winters can be harsh here, and during outages, we sometimes rely on wood stoves or propane heaters to stay warm in our homes. Ensure you have a safe, and well stocked heating source and plenty of warm clothing and blankets. Keep doors and windows closed as often as possible to keep heat in.

Stay Connected and Informed:

When the power goes out, staying connected can be a lifeline. Have a communication plan in place with family and friends, know which websites or radio stations to look up or tune in to get up to date information. Or if necessary use your phone to call your local emergency services (eg: police or fire department). Charge your phones and devices when the power is on and consider investing in a backup power source for them.

Protect Your Perishables:

    • This would be a possible 72 Hour Kit or food storage moment.
    • Keep the Fridge and Freezer Closed:  A well-insulated fridge can keep food cold for about 4 hours if unopened, while a full freezer can maintain its temperature for about 48 hours, and a half-full freezer for about 24 hours.
    • Use Ice Packs: Placing ice packs in your refrigerator can help maintain temperatures.
    • Consider Cooler Storage: If you anticipate a prolonged power outage, consider transferring perishable items to a well-insulated cooler with ice packs or ice. This can help extend the freshness of these items until the power is restored.
    • Prioritize Consumption: Use perishable items that are at risk of spoiling first. Plan meals that incorporate these foods early in the power outage to reduce waste. Canned and non-perishable foods can be reserved for later use.
    • Be Cautious with Food: When in doubt, throw it out. If you are unsure about the safety of a particular food item, it’s better to discard it rather than risk food borne illness.
Conclusion

Power outages may be a temporary inconvenience, but with the right preparation and resilience, we can weather any storm that comes our way. Stay prepared, stay safe, and remember that we’re all in this together!

candle burning

Let’s talk about something that doesn’t usually get the spotlight (pun intended) but should be in your emergency preparedness kit: light sources. When things go south, and darkness threatens to engulf your world, light sticks and candles can be your trusty companions.

Why Light Sources Matter

Alright, picture this: you’re in the middle of a thunderstorm, and the power’s out. Your smartphone flashlight is your only source of light, but the battery’s on its last breath. That’s where light sticks and candles come to the rescue. Having a source of light can be a massive driver of emotional well being – you feel safe and secure when you can see your surroundings. We take it for granted in our first world settings, and don’t realize how dark the dark can actually become. Being forced into the dark for an unknown amount of time can be a very scary situation.

Light Sticks: Glow in the Dark

Let’s start with light sticks – those nifty, glow-in-the-dark tubes that brings out our inner child. They’re like magic wands during a blackout. Crack one open, give it a shake, and bam! You’ve got a glow that can last for hours. They’re portable, easy to use, and don’t rely on batteries or electricity. Plus, they’re safe for kids to handle.

Candles: Old-School Charm

Now, candles might seem old-school, but don’t underestimate them. They’ve been lighting up our lives for centuries! Candles are not just a source of light; they bring warmth and comfort too. The soft, flickering glow can ease anxiety during a tense situation. Plus, they’re great for setting a sweet ambience during power-outage dinners, right?

Choosing the Right Ones

When you’re shopping for light sticks, look for ones with a decent glow duration. Check the expiry date too – they do have a shelf life. I can guarantee that your children will thoroughly enjoy receiving them when they’re coming up on their expiry date! As for candles, opt for unscented ones, so you’re not battling overwhelming floral scents while trying to stay calm, unless of course that’s your jam.

PRO TIP – Light sticks are the safe choice for lighting when you think there may be a gas leak nearby. Never light up a candle or flame based light source if you think there is a chance of a gas leak.

Storing and Maintaining

Light sticks are pretty low-maintenance. Just keep them in a cool, dry place, away from direct sunlight. Candles, on the other hand, need a bit more TLC. Store them in airtight containers to prevent moisture from ruining them (a wet wick isn’t going to help you out much). And remember, never leave candles unattended when lit – safety first!

Incorporating Light into Your Plan

When you’re prepping for emergencies, don’t forget to factor in your light sources. Create a plan that includes where you’ll store them and how you’ll access them in the dark. Teach your family or roommates how to use them too – it’s a team effort!

Here is a short list of other light considerations:

1. Battery-Powered Lights:

  • Flashlights
  • Lanterns
  • Headlamps

2. Solar-Powered Lights:

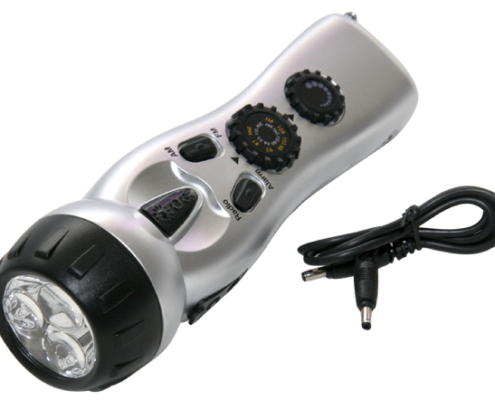
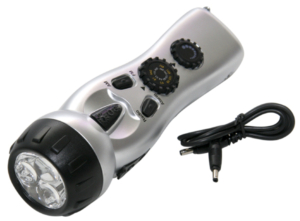
3. Hand-Cranked or Dynamo Lights

4. Fire-Based Lighting:

  • Candles
  • Oil Lamps
  • Camp fire

5. LED Emergency Lighting

6. Emergency Glow-in-the-Dark Products

Having a mix of these light sources in your emergency kit ensures you’re prepared for a wide range of situations. Remember to consider factors like the duration of light needed, portability, reliability, and power source availability when choosing the right light sources for your emergency preparedness plan.

Shine bright and stay safe!

light on the wall

Hey there, folks! When it comes to emergency preparedness, we often talk about stockpiling food, water, and even first aid supplies. But there’s one aspect that’s often overlooked until the lights go out – literally. That’s right, I’m talking about lighting! In this article, I want to shed some light on how to choose the right light sources for your family’s emergency preparedness needs.

The Darkness Dilemma

Picture this: It’s the dead of night, and the power’s out. Your kids are scared (maybe you are too), and you’re trying to figure out how to navigate through the pitch-black house. It’s moments like these that make you realize that maybe you don’t know where the flashlights are, or there isn’t any batteries left to run them. So let’s dive into some preparedness ideas!

little boy who is surprised

Flashlights: Your Trusty Sidekick

Flashlights are like the Swiss Army knives of emergency lighting. I don’t know about you, but in our home we have probably a dozen because they’re like the measuring tape – I can never find one when I need one! I have them strategically placed throughout our home. When choosing one, look for those with a sturdy build and a reliable battery life.

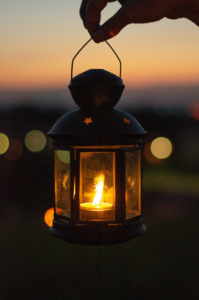
Lanterns: Lighting Up the Nightlantern providing light

Lanterns can light up a room like no other. I’ve got battery-powered lanterns we keep in our camping gear. But hey, maybe solar-powered or propane lanterns are the ones for you.  Solar lanterns are eco-friendly, and propane lanterns can keep going as long as you have fuel. The brighter the better when the lights are out.

Headlamps: Hands-Free Heroes

Headlamps are great for those times when you need both hands free. Whether you’re fixing a leaky pipe in the basement, or reading a book to your kids during a power outage, they’re a game-changer. Look for ones with adjustable brightness settings and comfy straps because comfort leads to less stress which is key in the midst of an emergency.

Batteries and Power Management: The Unsung Heroes

I’ve learned the hard way – batteries are like gold during emergencies. Stock up on various types like AA, AAA, and D. It’s best to check all your devices because the ones you need will murphy’s law be the ones you don’t have! And don’t forget about rechargeable batteries and solar chargers to extend your capabilities. Save power by using LED lights and dimming options, and you’ll make those batteries last longer.

Another nifty option is to have battery phone banks charged and handy for your cell phones, because personally I use my phone flashlight on a regular basis and rely on it often. If we have no power, we have no cell phone charger, and that battery pack will feel like a miracle in those types of moments.

Fire and Flame-Based Lighting: Old School, but Still Cool

There’s something comforting about the soft glow of candles or the flickering flames of a torch. They’re not the brightest, but they sure add ambiance. Just be careful, folks – fire and emergencies can be a risky mix. Always use them with caution and far away from any fuel sources or flammable materials. Alternatively, you may have a fireplace in your home or even outdoors. Depending on the circumstances, it also provides another light source – and heat as an added bonus.

Solar-Powered Lights: A Bright Idea

Solar-powered lights are like a gift from the sun. They charge during the day and shine all night long. Stick some in your garden for perimeter lighting, and you’ll have a well-lit and secure space during emergencies. Just make sure they get enough sunlight during the day and aren’t blocked by other objects around them.

Emergency Lighting Planning: Shine a Light on It

Plan ahead, my friends! Identify key locations for your light sources, like bedrooms, living areas, garages, and even your backyard. Ensure everyone in the family knows where to find the lights when things go dark. Might I suggest keeping light sources near or in your 72 hour kit and with your important documents box (or folder- however you store yours). And if you have little ones, involve them in your emergency lighting drills. It can be a fun and educational experience when done with the right tone.
Safe, reliable light illumination lightstick

Light the Way

So there you have it, folks – a crash course in light source options for your preparedness needs. Having the right lights at the right time can make all the difference during an emergency. So, get your lighting gear together, and shine on through those dark times! Stay safe, stay prepared, and stay bright!