72 hour kit 4 person deluxe

We sell a line of 72 hour kits, catering to fit 2 or 4 people, with the ability to customize to fit 3 or 5 people sized families, etc. When you receive this kit, a good portion of the product will have the Coghlan name on it. Below you will find a short origin story about this company. First, lets just refresh our minds as to the importance of a 72 hour kit.

Pro Tip: My family of 5, which includes a son whom is a celiac, we have adjusted our kit not to include the Datrex bars because he is unable to eat them. Without a way to avoid cross contamination whilst rehydrating the bars, we replaced them with a suitable alternative for our family.

car kit to store in the vehicles in case of an emergency 72 hour

72 Hour Kit

A 72-hour kit, also known as a “grab-and-go-bag” or “emergency kit,” is a collection of essential items and supplies designed to sustain an individual or a family for approximately 72 hours in the aftermath of an emergency or disaster. Here are several reasons why having a 72-hour kit is important:

  • Immediate Response to Emergencies: Having a 72-hour kit ensures that you have the necessary supplies to meet your basic needs until help arrives or normal services are restored.
  • Self-Sufficiency during Evacuation: In situations where evacuation is necessary, having a ready-to-go kit allows you to quickly leave your home with essential items, ensuring you are self-sufficient during the initial phase of evacuation.
  • Unforeseen Circumstances: Emergencies and disasters can strike unexpectedly, leaving individuals and families with little time to gather essentials. Having a pre-made kit minimizes the stress and uncertainty during such situations, providing a sense of security and readiness, and can also alleviate the stress on available resources supporting evacuees.
  • Customized to Specific Needs: Take into account factors such as dietary restrictions, medical conditions, and climate considerations. Ensure that your kit is tailored to the unique requirements of each person or family.
  • Peace of Mind: Knowing that you have a well-prepared emergency kit gives you peace of mind. It reduces anxiety and allows you to focus on immediate priorities during a crisis, knowing that you have the essentials needed for survival readily available.

Coghlan’s Origin Story:

In 1959, Canadian Norm Coghlan was working downtown Winnipeg as a repairman for Coleman camp stoves and lanterns. He saw an opportunity and created the camp stove toaster. He added them as an item in his store, and quickly discovered they were a hot demand product. Toasting toast while camping was a real delight! This became the purpose of the Coghlan company: to figure out how to make camping easier and more enjoyable whilst in the outdoors.

Embarking on outdoor adventures is a pursuit of joy and self-discovery, and having the right gear can make all the difference. Coghlan’s boasts a rich history of providing outdoor enthusiasts with reliable and durable camping gear. With decades of experience, the brand has become synonymous with quality, earning the trust of campers, hikers, and adventurers worldwide.

Preparedness:

Our 72 hour kits carry these Coghlan specific items (depending on whether you order a Basic or Deluxe kit).

Of course, there are plenty of trusted brands out there! For instance we also stock items such as these in our kits:

In times of crisis, every minute counts, and the thoughtful design of our kits align seamlessly with the urgency in emergency situations. Happy prepping!

Trail butter apple slices and flavors

In the world of outdoor adventures and emergency preparedness, having a reliable and nutritious energy source is helpful. Enter Trail Butter, a versatile and power-packed energy food that caters to the needs of outdoor enthusiasts and those preparing for unforeseen emergencies.

Trail Butter: Origin Story

Jeff & Brad Boggess are brothers, and the founders of Trail Butter. Jeff in particular is a bike enthusiast and set out to bike ride his epic 8,900 mile bike tour from Germany to California, by way of Europe, Northern Africa and the United States (with a boat ride across the Atlantic). He found he was trying to fit into his bags large and bulky energy foods (nut butters & trail mix for example) and it was taking up precious space in his already limited cargo room.

At this point it was decided to combine his snacks into one, and Trail (mix) + (nut) Butter = Trail Butter was born! He joined forces with his brother Brad, and we now have the joy of enjoying this tasty all natural energy packed food during our adventures.

That Was Interesting! Tell Me More:

Nutrient-Dense:

Trail Butter is crafted from a blend of high-quality nuts, seeds, and other wholesome ingredients. Packed with essential nutrients, such as protein, healthy fats, and fiber, Trail Butter provides a sustained release of energy, making it an ideal fuel for extended outdoor activities like hiking, biking, and camping.

Convenient and Portable:

One of the key advantages of Trail Butter lies in its convenience and portability. It is packaged in easy-to-carry pouches, which are also conveniently small in size. It is a mess-free and compact energy source that fits seamlessly into backpacks, pockets, or kits. Its user-friendly design ensures quick and hassle-free consumption on the go.

Versatility:

Whether you need a quick energy boost on a challenging trail or a reliable source of sustenance during a crisis, it can be consumed directly, used as an ingredient in a recipe, spread on crackers, or added to other foods. Its adaptability makes it suitable for various situations.

Stable in Different Temperatures:

For outdoor enthusiasts who face diverse weather conditions, Trail Butter is a reliable companion. Resistant to temperature fluctuations, the product remains stable in both hot and cold environments. This quality ensures that you can count on this tasty pouch to deliver energy regardless of the challenges Mother Nature throws your way.

Shelf Life for Emergency Preparedness:

Trail Butter has a typical unopened shelf life of approximately 1 year. Though not as long as some products, but with some monitoring of best before dates, this is a great addition to your on-the-go snacks. This feature ensures that you have a nutritious energy source ready whenever the need arises.

Yummy Flavors: Subject to Change – See Website for up to date flavors! 
  • Maple syrup & sea salt nut butter, and
  • Salted brownie peanut butter nut butter.
  • These come in a convenient 32 gram pouches!

To Conclude:

Trail Butter emerges as a top-tier energy food and proves to be a reliable companion for individuals venturing into the great outdoors or preparing for unexpected situations. Consider adding this to your repertoire, and experience the sustained energy and nutritional benefits it brings to your adventures.

hurricane

Hurricanes are named and identified through an international system coordinated by the World Meteorological Organization (WMO). Information was used from the linked website and also the National Hurricane Center, referenced below.

WMO Headquarters is located in Geneva, Switzerland, headed by the United Nations Secretariat. There is a Board of Directors that meet monthly, to discuss the progress of the organizations objectives and goals. WMO works with 193 states and territories across the world. The Organization plays a leading role in international efforts to monitor and protect from the climate and the environment, in particular to weather, climate and water.

The Different Terminologies

Different terminology is used for this weather phenomenon depending on the location:

  • In the Caribbean Sea, the Gulf of Mexico, the North Atlantic Ocean and the eastern and central North Pacific Ocean, it is called “hurricane
  • In the western North Pacific, it is called “typhoon
  • In the Bay of Bengal and Arabian Sea, it is called “cyclone
  • In western South Pacific and southeast Indian Ocean, it is called “severe tropical cyclone
  • In the southwest Indian Ocean, it is called “tropical cyclone”.

Here’s an overview of how hurricanes are named and identified:

Naming Hurricanes:

What’s in a Name?
    • Historically, storms were named, but usually after the fact, and based on a person or object or location.
        • For example, an Atlantic storm that ripped the mast off a boat named Antje would become known as Antje’s hurricane.
    • Using female names for storms started in the middle of the 20th century. Then, in the pursuit of a more organized system, meteorologists in the North Atlantic decided to identify storms using names from an alphabetical list.
    • As of 1953, the National Hurricane Center provided the name lists for Atlantic tropical storms.
    • In 1979, male names were introduced, alternating with the female names.

Names are retired if a hurricane is particularly deadly or costly.

    • WMO has now developed strict procedures to determine a list of tropical cyclone names. There are different rules for naming cyclones in different parts of the world.
        • In some places like the Atlantic and Southern Hemisphere, cyclones are named alphabetically, alternating men’s and women’s names.
        • In other regions, names follow the alphabetical order of the countries.

Naming tropical cyclones has proven to be the fastest way to communicate warnings and raise public awareness and preparedness. Assigning names to tropical cyclones makes tracking and discussing specific storms more straightforward, especially when multiple storms are active simultaneously. Additionally, naming tropical cyclones can aid historical record-keeping and research on storm behavior and impacts.

The Process of Naming Tropical Cyclones

The WMO has a running list of 6 years worth of names, which cycle through every 6 years. Ex: The first Hurricane of 2024 in the Atlantic region will be named Alberto, and then again in 2030 the first Hurricane of 2030 will be named Alberto (of course so long as Alberto doesn’t pose a dangerous threat his first time, eliminating him from the list).

The National Hurricane Center provides a lengthy list of the the names, in which I will portray with just one sample list:

When selecting a new name should a name have been stricken or removed, the WMO go through a set process, using some the following consideration:

  • Short in character length for ease of use in communication
  • Easy to pronounce
  • Appropriate significance in different languages
  • Uniqueness – same names cannot be used in other regions.

Identifying Hurricanes:

Formation: Step by Step Explanation
  • Hurricanes require warm ocean water as their primary energy source. Sea surface temperatures of at least 26.5 degrees Celsius (80 degrees Fahrenheit) or higher are necessary for the initial development and intensification of a hurricane.
  • The atmosphere above the warm ocean water must be unstable, allowing warm, moist air near the surface to rise rapidly. This process is crucial for the formation of powerful updrafts.
  • The Coriolis effect, caused by the rotation of the Earth, is necessary for the development of the initial spin or rotation of a tropical cyclone.
      • The Coriolis effect is weak near the equator, so hurricanes do not form within about 5 degrees of latitude from it.
  • A pre-existing weather disturbance, such as a cluster of thunderstorms, is needed to initiate the formation of a hurricane.
      • As warm air over the ocean surface rises, it creates an area of low pressure at the surface.
  • When the weather disturbance becomes more organized and the winds around the low-pressure center strengthen, a tropical depression can form (less than 60mph wind speeds).
  • If the tropical depression intensifies, with sustained winds reaching or exceeding 60mph, it is upgraded to a tropical storm.
  • The storm is given a name at this stage, according to the rotating list of names for the specific region, as explained above.
Categorizing Hurricanes:
  • The hurricane is categorized into different levels (Category 1 to Category 5) based on its sustained wind speed, according to the Saffir-Simpson Hurricane Wind Scale.
  • One of the most dangerous aspects of a hurricane making landfall is the storm surge. This is a rapid rise in sea level caused by the hurricane’s winds pushing water toward the shore.
  • Storm surge can result in coastal flooding, inundating low-lying areas and causing significant damage to coastal infrastructure.
  • Hurricanes bring extremely strong winds, and when they make landfall, these winds can cause widespread damage to buildings, trees, power lines, and other structures.
  • Hurricanes are associated with heavy rainfall, which can lead to flash floods, river flooding, land or mud slides.
  • Landfalling hurricanes can spawn tornadoes, adding an additional threat to affected regions.
Eye Formation:
  • Mature hurricanes typically have a well-defined center known as the eye, which is surrounded by a eyewall which is where much there is much heat formed, and this heat is what fuels the storm
  • The eye is often calm, with clear skies.
  • The diameter of the eye can vary widely, from a few kilometers to more than 100 kilometers (60 miles) in large hurricanes. (A hurricane can be as wide overall as big as 200-500kms, even bigger has been known to occur.)
  • Smaller eyes are often associated with more intense hurricanes.
  • In summary, the calmness of the eye is a result of descending air, centrifugal force, low pressure, conservation of angular momentum, and the heat release in the surrounding eyewall. The unique combination of these factors (kind of magically if you ask me) creates a relatively tranquil and clear center within the turbulent environment of a tropical cyclone.
Hurricanes are Sustained by Warm Water:
  • The hurricane’s strength and intensity are sustained by the warm ocean water, as long as the storm remains over these warm waters.

It’s important to note that not all tropical disturbances develop into hurricanes, and the conditions described above are necessary but not always sufficient. The complex interplay of atmospheric and oceanic conditions influences the formation and intensification of hurricanes.

Public Alerts: Stay Informed

  • When a hurricane poses a threat to coastal areas, public alerts and warnings are issued through various channels, including television, radio, and emergency notification systems.
  • Evacuation orders may be issued to ensure the safety of residents in the hurricane’s path.

Hurricane Preparation:

  • Emergency Kit: Prepare an emergency kit – view our article detailing this further.
  • Evacuation Plan: Know your evacuation routes and follow evacuation orders if issued. See our article about how to create your own evacuation plan.
  • Secure Property: Secure windows and doors with storm shutters or plywood. Move outdoor furniture, vehicles, and other items indoors or to a secure location.
  • Protect Important Documents: Safeguard important documents such as identification, insurance policies, and medical records in waterproof containers.
  • Emergency Shelter: If staying at home is not safe, seek shelter in designated evacuation centers.
  • Stay Indoors During the Storm: Once the hurricane arrives, stay indoors and away from windows. Be prepared for power outages, and use flashlights instead of candles.
  • After the Storm: Wait for official clearance before returning home or venturing outdoors. Be cautious of hazards such as flooded areas, downed power lines, and debris.

In Canada we are not as affected by Hurricanes, however they can happen! And, if you are a world-traveler by nature, it is important to know and educate oneself about how and when these storms are common around our glorious coastal world.

family cooking a meal together, learning how to cook

In times of emergencies, such as natural disasters or unforeseen crises, the availability of conventional cooking supplies may be limited. However, with a bit of resourcefulness and creativity, it’s possible to create nourishing meals using minimal ingredients and tools. This article explores various emergency food hacks to help you make the most of what you have during challenging situations.

Maximizing Shelf-Stable Staples:

  • Utilize long-lasting staples such as freeze dried fruits and vegetables, rice, pasta, and dried legumes as the foundation of your meals. Briden Solutions has numerous options – check it out!
  • Create hearty stews or one-pot dishes by combining beans, vegetables, and grains.
  • Try pre-made meals – whether in a pouch (5 year shelf life), or in a can (up to 30 years unopened).

Improvise with Non-Perishables:

  • Get creative with non-perishable items like canned or freeze dried meat, fish, or vegetables. Make a list of recipes or meals that you can make with what is in your non-perishable stock.
  • For example: transform canned tuna or salmon into a makeshift meal with pantry items like pickles, and mayonnaise.
  • One-pan wonders: cook an entire meal, such as chili in a single pan to simplify cleanup on top of it

Make the Most of Condiments:

  • Condiments can add flavor and variety to simple dishes. Keep the basics (ketchup, mustard, mayo for example) in your storage.
  • Combine soy sauce, vinegar, and sugar for a makeshift stir-fry sauce or use ketchup and spices to create a flavorful marinade for proteins.

DIY Baking:

  • No oven? No problem!
      • Use a thick-bottomed pan to simulate baking right on your stovetop. Place a wire rack or trivet inside the pan, and put your baking dish on top. Cover the pan with a lid to trap heat.
  • No rolling pin? No problem!
      • Use a clean, smooth bottle or a tall glass to roll out dough.
  • No baking powder? No problem!
      • Mix 1/4 teaspoon of baking soda with 1/2 teaspoon of cream of tartar as a substitute for baking powder.
  • No eggs? No problem!
      • Applesauce or Mashed Banana: Substitute 1/4 cup of unsweetened applesauce or mashed banana for one egg in recipes.
      • Yogurt or Buttermilk: Use 1/4 cup of yogurt or buttermilk for each egg.
  • No buttermilk? No problem!
      • Add 1 tablespoon of vinegar or lemon juice to a cup of milk as a substitute for buttermilk.
  • No vanilla? No problem!
      • Use maple syrup, almond extract, or even a bit of coffee as a substitute for vanilla extract.

Here’s a few more baking hacks, just for fun!

  • Cold butter? No problem!
      • Grate cold butter using a cheese grater to quickly bring it to room temperature.
  • Brown sugar hard? No problem!
      • Microwave hardened brown sugar with a damp paper towel for a few seconds to soften it.
  • Separate your eggs with ease!
      • Crack eggs into a slotted spoon, allowing the egg whites to separate through the slots while retaining the yolk.

Roasting over the fire

Outdoor Cooking Techniques:

  • Explore outdoor cooking methods, such as grilling or using a portable camping stove, to prepare meals when indoor resources are limited.
  • Many people love BBQ, if this is you, be sure to have spare fuel handy!
  • Campfire cooking options:
      • Cooking with a stick
      • Dutch oven
      • Foil wrapped food
      • Tripod
      • Burying food in the coals
      • Grilling

Foraging for Flavor:

  • If safe and possible, explore foraging for edible wild plants or fruits to supplement your meals.
  • Learn about local edible plants in your area beforehand to ensure safety and avoid toxic plants.
      • Field guides & local experts can help you educate yourself further in safety while foraging.

dandelions

Kitchen Tools:

  • On the go: stock a mess kit to supply all of the items necessary for you to cook comfortably on the go. The running joke in preparedness world is “don’t forget your can opener”!
  • These tools can enhance your ability to prepare a variety of meals with limited resources. Think about what it is you use the most and what you would want and need in an emergency.
      • Chef’s Knife: A high-quality chef’s knife is indispensable for chopping, slicing, and dicing. It’s the workhorse of the kitchen.

What type of kitchen knife should I have?:

I spoke with Cory, from our “Cooking With Cory” videos, and he told me that you do not have to spend a fortune on a knife, as long as its sharp, and fits your hand/grip. He also explained to me that a serrated knife vs a straight edge have different purposes.

For example: I watched him chop onions, and asked him if he cries every time. He explained to me that keeping the onions in the fridge (think the concept of viscosity), and using a sharp, straight edge knife minimizes the release of whatever enzyme is within the onion.

      • Cutting Board: A durable cutting board provides a safe and stable surface for food preparation. Look for one that is easy to clean and won’t damage your knives.
      • Spoon and Spatula Set: Spoons and spatulas for stirring, flipping, and serving.
      • Saucepan(s) with Lid: Essential for boiling, simmering, and preparing sauces. Look for a durable and heat-conductive material.
      • Mixing Bowls: Durable mixing bowls in various sizes are essential for combining and preparing ingredients. Choose bowls made of stainless steel, glass, or durable plastic.
      • Meat Thermometer: Ensure accurate cooking temperatures, especially for meat, with a meat thermometer. It’s crucial for food safety and achieving the desired level of doneness.
      • Oven Mitts: Protect your hands from burns when handling hot pots, pans, and baking sheets.

cutting board with various food items on it ready to cook

Community Cooking:

  • Pool resources and collaborate with neighbors or community members to share ingredients and cooking tools.
      • When I see this type of suggestion, to me this suggests that we need to have positive relationships with our neighbors and community, so that if “push comes to shove”, we can help one another out during a challenging time.
  • Community kitchens can help everyone make the most of the available resources and ensure that everyone is well-fed during challenging times.
Conclusion:

In times of crisis, resourceful cooking becomes a valuable skill. By incorporating these emergency food hacks, you can turn limited ingredients and tools into satisfying meals that provide comfort and nourishment during difficult situations. Stay resilient, stay prepared, and keep your creativity alive in the kitchen even when faced with unexpected challenges.

cutting board with various food items on it ready to cook

Proper food storage is important for maintaining safe food, nutritional value, and freshness. These tips will help you organize and store your food effectively, reducing waste and promoting a healthier lifestyle.

  1. Understand Storage Zones:
    • Different foods require different storage conditions. Divide your kitchen into zones based on temperature and humidity needs. For instance, store fruits and vegetables in the crisper drawer of your refrigerator, while pantry items like grains and canned goods should be kept in a cool, dry place.organizing food in the fridge
  2. Utilize Airtight Containers:
    • Invest in high-quality airtight containers for storing dry goods like rice, pasta, and cereal. These containers prevent exposure to air and moisture, keeping your pantry staples fresh for longer periods and reducing the risk of spoiling or even pests.
  3. Label and Date:
    • Labeling containers with the purchase or expiration date helps you keep track of the freshness of your food. This is particularly important for items in the freezer, as it helps you rotate stock and use older items first.
  4. Practice FIFO (First In, First Out):
    • When restocking your pantry or refrigerator, place newer items behind older ones. This simple practice ensures that you use the older items first, preventing food from expiring or going bad before you get a chance to use it.
  5. Freeze Smartly:
    • Freeze items in portion sizes to make thawing and using them more convenient. Use freezer bags or vacuum-sealed bags to minimize freezer burn, and be sure to remove excess air before sealing. Label frozen items with the date and type for easy identification.
  6. Store Meat Safely:
    • Raw meat and poultry should always be stored on the lowest shelf of the refrigerator to prevent cross-contamination. Keep them in leak-proof containers or on a tray to catch any potential drips.
  7. Monitor Refrigerator Temperature:
    • Keep your refrigerator at or below 40°F (4°C) to slow down the growth of bacteria. Use a refrigerator thermometer to ensure the proper temperature and adjust settings accordingly.
  8. Rotate Your Stock:
    • Regularly assess the contents of your pantry, refrigerator, and freezer. Use items nearing expiration firstkitchen pantry and replace them with fresh purchases. This practice not only reduces food waste but also ensures that you’re consuming the most nutritious products.
  9. Avoid Overpacking:
    • Overpacking your refrigerator can obstruct proper airflow, leading to uneven cooling and potential food spoilage. Allow air to circulate by leaving some space between items, and don’t block vents. Also, as you learn your appliances, you may have experienced your fresh produce freezing at the back of the fridge. Proper placement can save you  food and money.
  10. Educate Yourself on Shelf Lives:
    • Understand the shelf life of various foods to make informed decisions about what to purchase and when to use it. Familiarize yourself with expiration dates, and be aware of signs of spoilage such as off odors, discoloration, or changes in texture.

expirty date example photo

Conclusion:

By following these tips, you can create a well-organized and efficient food storage system in your kitchen. Not only will you reduce food waste, but you’ll also ensure that your meals are made with fresh, safe ingredients. Embracing these practices will not only benefit your wallet but also contribute to a healthier and more sustainable lifestyle. Happy storing!

Our very own Cory demonstrates how to bake the following 3 delicious goodies using your food storage ingredients. The videos were filmed at Christmas time, but these are timeless treats enjoyed year round.

Who is Cory?

Cory is our resident Chef. He has 30+ years experience in the industry. He joined the Briden team 2 years ago and manages our cannery in Cochrane where InCaseOf products come to life. I have had the privilege of enjoying his cooking and you are in for a treat seeing his culinary skills at work! O

(You can check out the YouTube channel for other “Cooking With Cory” videos where he demonstrates how to rehydrate freeze dried foods/meals)

Here are the recipes followed by an instructional video. Happy Baking!

3 Yummy Treat Recipes Using Food Storage:

Raspberry Sandwich Cookies Ingredients

Nutristore Freeze Dried Raspberries

Chocolate Cookies:
2 x Your favourite Chocolate cake mix (We used Betty Crocker Devil’s Food Mix)
4 x Eggs (Whisked)
2/3 Cup Oil
Raspberry Buttercream Filling:
1 Cup Nutristore Freeze Dried Raspberries (Powdered)
1 Cup Butter
4 Cups Powdered Sugar
4 Tbsp Water or Milk (We used Almond Milk)
1/2 Tsp Vanilla extract

Snowball Crinkle Cookies

Nutristore Freeze Dried Strawberries

3/4 Cup Nutristore Freeze Dried Strawberries
3/4 Cup Nutristore Freeze Dried Raspberries
3/4 Cup White Granulated Sugar
1 2/3 Cups All-purpose Flour
1/2 Tsp Baking Powder
1/2 Tsp Baking Soda
1/4 Salt
1/2 Vegetable Oil
2 Large Eggs
1 Tsp Vanilla Extract
1 Cup Powdered Sugar

Berry Christmas Bark Ingredients

Nutristore Freeze Dried Blueberries

3 Cups Chocolate Chips
2 Tbsp Coconut Oil
1 Cup Nutristore Freeze Dried Blueberries
1/2 Cup Almonds
1/4 Cup Pecans
4 Tbsp Coconut Flakes
2 Tbsp Nutristore Freeze Dried Strawberries
2 Tbsp Nutristore Freeze Dried Raspberries

Freeze-dried meals have gained immense popularity in recent years to outdoor enthusiasts, emergency preparedness, and busy individuals looking for quick and easy meal options. As the demand for these freeze-dried products continues to rise, a key decision emerges for consumers: premade meals or individual ingredients?

In this article, we’ll explore the advantages and disadvantages of both options to help you make an informed choice. The inspiration behind this article is our new line of Nutristore meals we carry!

Premade Freeze-Dried Meals

Advantages:
  1. Convenience: Perhaps the most significant advantage of premade freeze-dried meals is the convenience they offer. Designed for quick preparation, these meals require minimal effort and can be ready to eat in a matter of minutes. This makes them ideal for camping trips, backpacking, or any situation where time and resources are limited.
  2. Portion Control: Premade meal pouches are often portioned to meet the dietary needs of an individual or a group. The Nutristore line, you scoop an amount out, whether into a bowl or into a bag in your pack.
  3. Variety: Manufacturers of premade freeze-dried meals strive to offer a diverse range of flavors and cuisines. This variety can be appealing to those who enjoy trying different dishes without the need for extensive meal planning or ingredient sourcing.
Disadvantages:
  1. Limited Customization: One of the main drawbacks of premade freeze-dried meals is the limited ability to customize them according to personal taste preferences or dietary restrictions. If you have specific requirements or allergies, finding a suitable premade option can be challenging.
  2. Cost: While premade meals offer convenience, they can be more expensive than purchasing individual freeze-dried ingredients. I can’t say I have done the math on this to confirm in regard to Nutristore, but cost of all food is definitely high in 2023!

Individual Freeze-Dried Ingredients

Advantages:
  1. Customization: When opting for individual freeze-dried ingredients, you have the freedom to customize your meals to suit your taste and dietary preferences. This is beneficial for those with allergies, sensitivities, or specific dietary requirements.
  2. Cost-Effective: Buying individual freeze-dried ingredients can be more cost-effective than purchasing premade meals. This can be true when buying in bulk, as it allows for better control over portion sizes and reduces packaging costs.
  3. Long-Term Storage: Individual freeze-dried ingredients typically have a longer shelf life than premade meals. This can be advantageous for individuals who want to stock up on staples for emergency preparedness or those who prefer to buy in larger quantities.
Disadvantages:
  1. Time and Effort: The primary drawback of using individual freeze-dried ingredients is the time and effort required for meal preparation. Planning, measuring, and combining ingredients can be time-consuming. Individual ingredients necessitates the need for an array of cooking utensils, pots, or stoves.
Conclusion

Ultimately, this choice depends on your specific needs, preferences, and the context in which you plan to use these products. If the convenience of quick and easy meals is what you value quick, premade meals might be the ideal solution. If you enjoy the freedom to customize your meals, have specific dietary requirements, or are looking for a more cost-effective option, individual freeze-dried ingredients offer a compelling alternative.

For me personally, I am completely intrigued by pre-made meal choices! Takes the stress out. However, I appreciate the need for individual ingredients, especially for some of my picky eaters whom I live with.

Upper Kananaskis Lake

Article 1: Embracing the Heat
The Ultimate Guide to Hot Weather Outdoor Activities

When the sun is blazing and the temperatures are soaring, outdoor enthusiasts need clothing that not only keeps them cool but also ensures safety and comfort during hot weather adventures. Whether you’re hitting the hiking trails or engaging in sports under the scorching sun, your choice of clothing can make all the difference.

Embrace Breathable Fabrics

In the sweltering heat, lightweight and breathable fabrics are your best companions. Opt for moisture-wicking synthetic materials or lightweight merino wool. These materials efficiently pull sweat away from your skin, keeping you cool and preventing discomfort during activities.

On hot days, choosing the right material for your clothing can make a significant difference in your comfort level. The best materials for hot weather are those that are loose fitting, breathable, lightweight, and have moisture-wicking properties. Here are some materials that are particularly well-suited for hot days:

  1. Cotton:
    • Pros: Cotton is a natural and breathable fabric that allows air to circulate, making it suitable for hot weather. It’s comfortable and absorbs moisture, keeping you cool.
    • Cons: While cotton is breathable, it can absorb and retain moisture, potentially leading to a damp feeling. It may not dry as quickly as synthetic fabrics.
  2. Linen:
    • Pros: Linen is a lightweight and breathable fabric that allows heat to escape from the body. It’s known for its natural cooling properties and is comfortable in hot and humid conditions.
    • Cons: Linen wrinkles easily, so it may not maintain a polished appearance throughout the day.
  3. Moisture-Wicking Fabrics (Polyester, Nylon, and Blends):
    • Pros: Fabrics designed to wick away moisture, such as polyester and nylon, are excellent choices for hot weather. These materials pull sweat away from the body, promoting faster evaporation and keeping you dry.
    • Cons: Some people find that pure synthetic fabrics can trap odors more than natural fibers. Look for blends that incorporate antimicrobial properties to address this issue.
  4. Merino Wool:
    • Pros: Merino wool is a natural fiber that is surprisingly effective in hot weather. It has moisture-wicking properties and helps regulate body temperature. Additionally, it has the advantage of being odor-resistant.
    • Cons: Merino wool garments can be more expensive than some synthetic options.
  5. Rayon (Viscose):
    • Pros: Rayon is a semi-synthetic fabric derived from natural sources. It’s lightweight, breathable, and has a silky feel. Rayon clothing is comfortable and suitable for warm weather.
    • Cons: Rayon may not be as durable as some other fabrics and may require special care during washing.
  6. CoolMax:
    • Pros: CoolMax is a specialized synthetic fabric designed for moisture management. It wicks away sweat, allowing for quick evaporation and keeping you cool during physical activities.
    • Cons: While effective, clothing made from CoolMax or similar high-performance fabrics may be more geared towards sports and outdoor activities.

Long Sleeves and UPF Protection

Contrary to popular belief, long sleeves can be a game-changer in hot weather. Choose shirts with built-in UPF (Ultraviolet Protection Factor) to shield your skin from the sun’s harmful rays. This not only prevents sunburn but also reduces the risk of heat-related illnesses.

Stay Cool with Convertible Pants

Invest in convertible pants that can be transformed into shorts when the heat becomes too intense. Look for pants with ventilation features, such as zippered vents, to enhance airflow and regulate your body temperature during outdoor activities.staying in the shade during a heat stretch

Sun Protection Essentials

Shield yourself from the intense sun by wearing a wide-brimmed hat that provides shade. Don’t forget to don UV-blocking sunglasses to protect your eyes from harsh glare and potential UV damage. Of course, sunscreen or sunblock is also great for protecting your skin from the UV rays. As a fair skinned soul, I keep a SPF30 close by during the summer time!

Hydration-Friendly Clothing

Staying hydrated is crucial in hot weather. Choose clothing with pockets to accommodate water bottles or hydration systems. Some outdoor apparel even incorporates moisture-wicking technology to enhance the cooling effect. Keep a travel towel handy in your hiking pack or sports bag. (Hydration with H2O of course is the top way to stay hydrated!)

Beach Time

Of course in the summer heat, playing or sitting by the lake, river, ocean, etc. can be very satisfying! Consider a shade source, like an umbrella if there are no natural ones nearby. Beachwear comes in many different styles and sizes. Rash-guards may not be as visually appealing to some, but serve as an excellent protectant from UV rays.

Conclusion:

Incorporating these hot weather clothing tips into your outdoor wardrobe ensures you can enjoy your adventures without wilting in the heat. Stay cool, stay safe, and embrace the thrill of outdoor activities even in the warmest conditions.


Article 2: Conquering the Chill
Essential Clothing for Cold Weather in the Outdoors

hiking in the winter

When winter’s chill sets in and snow blankets the landscape, outdoor enthusiasts gear up for a different kind of adventure. Whether you’re conquering snowy trails or engaging in cold weather sports, the right clothing is paramount to staying warm, comfortable, and safe in icy conditions.

Before we get into it, here are some materials that are particularly well-suited for cold weather:

  1. Wool:
    • Pros: Wool, especially merino wool, is an excellent insulator that retains warmth even when wet. It wicks moisture away from the body, keeping you dry. Wool also has natural antimicrobial properties, reducing odor.
    • Cons: Some people may find wool to be itchy, but high-quality merino wool is known for its softness.
  2. Down:
    • Pros: Down insulation, typically sourced from ducks or geese, is incredibly effective at trapping heat. Down jackets and vests provide excellent warmth without adding much weight.
    • Cons: Down loses its insulating properties when wet, so it’s essential to pair it with a waterproof or water-resistant outer layer.
  3. Synthetic Insulation (Thinsulate, PrimaLoft):
    • Pros: Synthetic insulation is designed to mimic the warmth-retaining properties of down but maintains insulation even when wet. It’s lightweight and suitable for various cold-weather activities.
    • Cons: While synthetic insulation has come a long way, it may not provide the same level of warmth-to-weight ratio as down.
  4. Fleece:
    • Pros: Fleece is a warm and breathable material that dries quickly. It’s often used as a mid-layer to provide additional insulation under a shell or outer layer.
    • Cons: Fleece alone may not be sufficient in very cold and windy conditions, so layering is often recommended.
  5. Gore-Tex and Other Waterproof/Breathable Fabrics:
    • Pros: For outer layers, waterproof and breathable fabrics like Gore-Tex are crucial. They keep out wind and moisture while allowing perspiration to escape, preventing you from getting wet and chilled.
    • Cons: These fabrics may be less breathable in extremely cold conditions, and they can be more expensive.
  6. Thermal or Moisture-Wicking Base Layers:
    • Pros: Base layers made from thermal or moisture-wicking fabrics (such as polyester or merino wool) are essential for keeping you dry by wicking sweat away from your body. They also provide an extra layer of insulation.
    • Cons: Choosing the right weight for your base layer depends on the severity of the cold weather.
  7. Polyester and Nylon Blends:
    • Pros: These synthetic materials are often blended with other fabrics to create durable, moisture-wicking, and quick-drying clothing. They are commonly used in activewear for cold weather.
    • Cons: While effective, some people may find that these fabrics do not have the same insulating properties as natural fibers.

Start with a Moisture-Wicking Base Layerhiking during the winter

Begin your cold weather ensemble with a moisture-wicking base layer that pulls sweat away from your skin, preventing the chilling effect of dampness. Materials like merino wool or synthetic fibers work well to keep you dry and warm.

Layer Up for Insulation

Add an insulating layer to trap body heat. Fleece or down jackets are excellent choices for cold conditions, providing effective insulation without adding excessive bulk. The key is to create layers that can be adjusted based on the intensity of the cold.

Embrace Waterproof and Windproof Outer Layers

Shield yourself from winter elements with a waterproof and windproof outer layer. Look for jackets and pants made from breathable, waterproof materials like Gore-Tex to keep you dry in rain or snow. This outer layer acts as a barrier against wind chill and moisture.

Protect Extremities with Insulated Accessories

winter time preparation

Don’t forget your extremities. Insulated hats and gloves are crucial to retaining heat and preventing frostbite in cold weather. Look for options with moisture-wicking properties to keep you warm and dry.

  • Consider the Activity: The type of gloves you need depends on the activity. For instance, skiing gloves will differ from those used for hiking or everyday use.
  • Down or Synthetic Insulation: If you’ll be in extremely cold conditions, look for gloves with down or synthetic insulation. Down provides excellent warmth but loses its insulating properties when wet, while synthetic insulation retains warmth even when damp.
  • Waterproof or Water-Resistant: If you anticipate exposure to rain, snow, or wet conditions, opt for waterproof or water-resistant gloves. This is especially important for activities like skiing or snowboarding.
  • Leather: Leather gloves are durable, provide good insulation, and can be water-resistant when treated. They are suitable for various activities, including casual wear and outdoor pursuits.
  • Synthetic Materials: Gloves made from synthetic materials like nylon or polyester are often lightweight, quick-drying, and suitable for activities where dexterity is crucial.
  • Snug but Not Tight: Gloves should fit snugly without being too tight. A snug fit helps retain heat, but overly tight gloves can restrict circulation and reduce warmth.

Invest in Thermal Socks and Insulated Footwearwinter boots

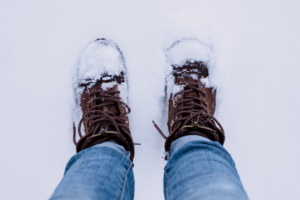
Keep your feet warm and dry by wearing thermal socks and insulated, waterproof footwear. Cold feet can quickly sap your energy, so investing in quality footwear is essential for winter excursions. Footwear comes with ratings for temperatures, and water proof/resistance details. Picking appropriate footwear will make your outdoor journey much more pleasant!

Choosing the right thermal socks is crucial for keeping your feet warm and comfortable in cold weather. Here are some factors to consider when selecting thermal socks:

  • Material:
    • Merino Wool: Known for its natural insulation properties, merino wool is an excellent choice for thermal socks. It regulates temperature, wicks moisture away from the skin, and is odor-resistant.
    • Synthetic Materials (Polyester, Nylon): Some thermal socks blend synthetic materials for added durability, moisture-wicking, and quick-drying properties.
  • Thickness: Thermal socks come in different thickness levels. Consider the severity of the cold weather and the level of insulation you need. Thicker socks provide more warmth but may be less suitable for tight-fitting shoes.
  • Breathability: Look for thermal socks with moisture-wicking properties. This feature helps keep your feet dry by drawing sweat away from the skin, preventing discomfort and potential cold-related issues.
  • Consider the Activity: If you’ll be engaging in high-impact activities, choose thermal socks with adequate cushioning and padding for added comfort and protection.
  • Reduced Friction: Seamless construction minimizes friction and reduces the likelihood of blisters. This is particularly important for extended wear and activities such as hiking or snow sports.
  • Choose the Right Length: Thermal socks come in various lengths, from ankle to knee-high. Consider the type of footwear you’ll be wearing and choose a length that provides adequate coverage and fits comfortably.
  • Snug Fit: Thermal socks should fit snugly without being too tight. A proper fit ensures efficient insulation and prevents discomfort.
Conclusion:

By tailoring your clothing choices to the specific challenges of cold weather, you’ll not only stay warm but also enhance your performance and safety during winter outdoor sports. Embrace the chill, layer up, and conquer the winter wonderland with confidence.

handshake unity

Barter & Trade is the direct exchange of goods and services without using money. In early human societies, people engaged in barter out of necessity, swapping surplus goods with others to meet their diverse needs. This rudimentary form of trade marked the foundation of economic transactions.

Bartering or trading can be a creative and resourceful way for individuals or families to meet their needs without relying solely on traditional currency. Here are some practical real life ideas:

Skill Swapping:Car Maintenance
  • Exchange academic skills. For example, if one tax accountant requires some mechanical work, they could exchange services in place of a currency.
Tutoring Services:
  • Family members with expertise in certain subjects can offer tutoring services in exchange for help with household chores, such as cleaning or organizing.
  • An individual proficient in a subject could offer tutoring in exchange for lawn services or music lessons.
Meal Exchange:jar salad
  • Organize meal exchanges with neighbors or friends. Each unit takes turns preparing a meal for the others, allowing everyone to enjoy diverse home-cooked dishes without the need for monetary transactions.
Clothing Swap:
  • Families or neighborhoods can organize clothing swaps with friends or within their community. This allows for refreshing wardrobes without spending money. It’s an eco-friendly way to reduce waste and promote a sense of community.
Book or Textbook Exchange:
  • People can organize book exchanges to share textbooks or leisure reading materials. This not only helps save money on purchasing new books but also promotes a culture of shared resources.
Rideshare or Carpooling:
  • Those with transportation needs can organize a rideshare or carpooling system. One might also offer rides in exchange for assistance with grocery shopping or other tasks.
Childcare Exchange:cooking a meal together
  • Parents can organize a childcare exchange with other families. Each family takes turns looking after the children, allowing parents to have some free time without the expense of hiring a babysitter.
Home Maintenance Assistance:
  • People with skills in home maintenance, such as plumbing, carpentry, or landscaping, can offer their services to others in exchange for assistance with tasks they may not excel in, like tutoring or meal preparation.
Language Exchange:
  • Students studying different languages can engage in language exchange programs. For instance, a student fluent in Spanish might help another student with their Spanish studies in exchange for assistance with English.
Digital Services:
  • People with digital skills, such as graphic or web design, coding, or content creation, can offer their services in exchange for goods or assistance. For instance, designing a flyer for a neighbor’s event in return for gardening help.

These examples illustrate that bartering or trading doesn’t have to be limited to goods; it can involve skills, services, and time, creating a sense of community and mutual support. Such exchanges can lead to cost savings and stronger social connections.

Other Ways to Barter/Trade:

Freecycle and Buy Nothing Groups:
  • Join local Freecycle or Buy Nothing groups where people offer items they no longer need for free or in exchange for something else. This is an excellent way to declutter your home or acquire items without spending money.
Tool Libraries:
  • Some communities have tool libraries where members can borrow tools they need for home projects instead of purchasing them. Consider contributing to the library by offering your skills or assistance.
    • Ex: Cochrane, AB Public Library has a tool lending library, and also seasonally offer snow shoes, or hiking/camping gear
Fitness Class Swaps:
  • Fitness enthusiasts can arrange class swaps. For instance, someone who teaches yoga might exchange classes with a friend who offers personal training sessions.
Gardening Swaps:garden
  • Gardeners can swap seeds, plants, or even the produce from their gardens. This not only fosters community but also encourages sustainable and local agriculture.
    • Ex: My neighbor has a green house and she grows tomatoes and other more delicate-to-Alberta-weather plants. I grow the hearty root vegetables, and other options, and we exchange at harvest.
Homestay or House Swaps:
  • Families or individuals can arrange homestays or house swaps for vacations. This allows people to explore new places without the cost of accommodation.
Knowledge Bartering:
  • Offer your expertise or knowledge in a particular field in exchange for learning something new. This informal education exchange can happen between individuals with different skills or interests.

These real-life examples illustrate the diverse ways people engage in barter and trade, showcasing the flexibility and adaptability of these systems in various aspects of life. Do a personal inventory and self evaluation: learn your skills and talents, and pursue your interests. Be prepared and willing to barter or trade with those around you! Happy trading!

having a discussion

In a world that often seems unpredictable and chaotic lets remember the motto “Be prepared, not scared”. The key to navigating through life’s uncertainties lies in preparation rather than fear. Adopt a proactive mindset to empower yourself to face challenges head-on.

Embracing a Proactive Mindset

Anticipate Challenges: One of the cornerstones of preparation is anticipating potential challenges. By identifying hurdles in advance, you can develop strategies to overcome them. Look at your professional and personal life for ways that challenges arise.

Set Goals and Objectives: Have clear goals and objectives. Define what success looks like for you and create a roadmap to achieve it. Set realistic and achievable milestones to help you stay focused and motivated.

Continuous Learning: A proactive mindset includes a commitment to continuous learning. Stay informed about changes in your industry, acquire new skills, and broaden your knowledge base. This not only enhances your adaptability but also positions you as a valuable asset in any situation.

Preparedness in Daily Life

Financial Security: Establish an emergency fund, manage your budget, and invest in your future. This financial preparedness provides a safety net during unexpected events.

Health and Well-being: Prioritize your health by adopting a proactive approach. Take preventative measures through regular exercise, a balanced diet, and routine health check-ups to to overall well-being.

Time Management: Organize your daily tasks, prioritize responsibilities, and set realistic deadlines. This not only reduces stress but also ensures that you are well-prepared for upcoming challenges.

Emergency Food Storage: Having 1, 3, 6, 9, or 12 month food & water storage can remove stress from an emergency situation (short or long term). Contact our team at Briden Solutions, or email BridenAcademy@BridenSolutions.ca for more support and help with this category.

Facing the Unknown with Confidence

Crisis Preparedness: Life is unpredictable, and unforeseen crises can occur. Establish a crisis management plan for both personal and professional scenarios. Having a well-thought-out plan allows you to respond calmly and effectively in times of crisis.

Emotional Resilience: Being prepared extends beyond the tangible aspects of life. Cultivate emotional resilience by developing coping mechanisms for stress and adversity. This mental preparedness equips you to face challenges with a clear and focused mind.

Adaptability: While preparation is important, so is adaptability. Be open to change, and be willing to adjust your plans when necessary. A rigid mindset can hinder progress, but a prepared and adaptable approach ensures you are ready for whatever comes your way.

Assessing your own flexibility and rigidity can be a valuable self-reflection exercise. Here are some questions to help you gauge your level of adaptability and openness to change:

  1. How do you react to unexpected changes in your plans or routine?
    • Are you able to adapt quickly, or does it cause significant stress and discomfort?
  2. In what ways have you embraced new ideas or perspectives in the last year?
    • Reflect on instances where you were open to changing your viewpoint or considering alternative opinions.
  3. Are you comfortable with ambiguity and uncertainty, or do you prefer clear-cut plans?
    • Consider your tolerance for situations where outcomes are uncertain.
  4. How often do you seek feedback on your work or behavior?
    • Openness to feedback can be an indicator of a flexible mindset.
  5. Do you find it challenging to let go of control in certain situations?
    • Consider whether you have a tendency to micromanage or if you can delegate effectively.
  6. Are you resistant to change, even if it might lead to improvement?
    • Evaluate your attitude towards change, especially when it comes to making improvements in your personal or professional life.
  7. Think about a recent disagreement. Were you willing to compromise or stuck to your position rigidly?
    • Assess your ability to find common ground and collaborate with others.
  8. How do you respond to constructive criticism?
    • Reflect on whether you are open to feedback or if you become defensive when receiving constructive criticism.
  9. In what areas of your life do you resist trying new things or taking risks?
    • Identify aspects where you might be avoiding stepping out of your comfort zone.

Take questions such as these, and decide what kind of flexibility you hold, and should you find yourself closer to rigidity, embrace who you are! Create ways in your plan to communicate that to others during a crisis. Prepare yourself and learns ways (such as what is listed above) to handle moments that may cause you stress. Knowledge is power.

Self-awareness is the first step toward personal growth and positive change, so use these questions as a starting point for understanding and improving your adaptability.

Conclusion

In the face of uncertainty, being prepared is a powerful tool for navigating life’s journey. The proactive mindset is not about living in constant fear but rather about facing challenges with confidence, armed with the knowledge and resources to overcome them. So, let’s embrace the mantra: “Be prepared, not scared,” and approach life with a sense of readiness and resilience!