Briden Academy

When it comes to camping choosing the right tent is important. With so many options available, how do you choose the right one? In this guide, we’ll walk you through everything you need to know to find the perfect tent for your outdoor adventures.

1. Consider Your Needs:

Before diving into tent features and specifications, take some time to consider yourcamping trip on a beautiful starry night specific camping needs. Are you backpacking or car camping? How many people will be using the tent? What age of people will be using the tent? What weather conditions do you expect to encounter? These factors will help you narrow down your options.

2. Types of Tents:

There are several types of tents to choose from, each designed for different purposes and preferences:

  • Backpacking Tents: Lightweight and compact, ideal for backpackers and solo campers.
  • Family Tents: Spacious and durable, suitable for larger groups or car camping.
  • Three-Season Tents: Versatile tents designed for use in spring, summer, and fall, offering a balance of ventilation and weather protection.
  • Four-Season Tents: Sturdy and insulated tents built to withstand harsh winter conditions, including snow and strong winds.

Here are a few more names/types of tents available:

  • Pop-Up Tents: These tents feature a collapsible frame that “pops up” into shape when unfolded, making them incredibly quick and easy to set up. They’re ideal for casual campers or those who value convenience.
  • Cabin Tents: Cabin tents are spacious and tall, with vertical walls that maximize interior space. They often feature multiple rooms or dividers, making them a popular choice for families or groups who want separate sleeping areas.
  • Ultralight Tents: Designed for minimalist backpackers and thru-hikers, ultralight tents prioritize weight savings without sacrificing durability or weather protection. They’re typically made from lightweight materials and feature streamlined designs to keep pack weight to a minimum.
  • Bivy Tents: Bivy (bivouac) tents are small, lightweight shelters designed for solo backpackers and minimalist adventurers. They provide basic protection from the elements and are often used in conjunction with a sleeping bag and pad for ultralight camping.
  • Teepee Tents: Inspired by traditional Native American teepees, these tents feature a conical shape and a central pole for support. Teepee tents offer spacious interiors and excellent ventilation, making them a comfortable option for camping in warmer weather.
  • Truck Tents: Designed to fit in the bed of a pickup truck, truck tents provide an elevated sleeping platform and protection from the elements. They’re a convenient option for campers who prefer to sleep off the ground or want to maximize available space in their vehicle.

3. Size and Capacity:

Tent size is crucial for comfort and usability. Most tents are labeled with their capacity, but keep in mind that these ratings can vary depending on the manufacturer.

Here are some key factors to consider when evaluating tent capacity:

  • Number of Sleepers: The primary consideration when determining tent capacity is the number of people who will be sleeping in the tent. Tent capacities typically range from one-person tents to large family tents that can accommodate eight people or more.
  • Sleeping Arrangements: Consider how individuals will be arranged inside the tent. Will everyone be sleeping side by side, or will some people prefer to have their own sleeping space? Keep in mind that tent capacities are often based on the assumption of individuals sleeping closely together, so if you prefer more personal space, you may want to choose a tent with a higher capacity.
  • Gear Storage: In addition to sleeping space, consider the amount of gear and personal belongings that need to be stored inside the tent. Larger tents often provide more vestibule or storage space for gear, while smaller tents may require gear to be stored inside with the sleepers.
  • Comfort and Livability: While it’s possible to squeeze more people into a tent than its stated capacity, doing so can compromise comfort and livability. Overcrowding can lead to cramped quarters, limited ventilation, and difficulty moving around inside the tent. It’s generally best to choose a tent with a capacity that comfortably accommodates the number of sleepers and their gear.
  • Group Dynamics: Consider the dynamics of your camping group and how individuals prefer to sleep. Some people may be comfortable sharing close quarters with others, while others may prefer more personal space. Choose a tent capacity that aligns with the preferences and comfort levels of your camping group.

4. Features and Design:

Pay attention to the following features and design aspects when evaluating tents:

  • Setup: Look for tents with straightforward and intuitive setup processes, including for example color-coded poles and easy-to-follow instructions.
    • This is particularly important in temporary tenting. If the tent is to stay assembled for longer terms, a little more complex set up can be acceptable.
  • Ventilation: Proper ventilation is essential for airflow and condensation management. Choose tents with mesh panels, windows, and adjustable vents for improved airflow.
  • Weather Resistance: Opt for tents with durable and waterproof materials, reinforced seams, andcamping and sleeping in the outdoors in warm sleeping bags weatherproof coatings to keep you dry and protected in inclement weather.
    • I personally enjoy a tent that has space around the perimeter on the inside of the tent while my sleeping bag is open.  While I’m sleeping if it’s raining, then my sleeping bag avoids touching the sides, which would cause my sleeping bag to come damp or wet.
  • Durability: Consider the tent’s construction and materials, including the denier (thickness) of the fabric, quality of the poles and stakes, and overall build quality.
  • Weight and Packability: For backpacking and hiking trips, prioritize lightweight and compact tents that won’t weigh you down on the trail. While a family vacation can allow for more bulky tents.

5. Budget Considerations:

Set a budget for your tent purchase and prioritize features based on your camping needs and preferences. While high-end tents may offer advanced features and materials, there are plenty of budget-friendly options available that provide adequate performance for most campers.

6. Test Before You Buy:

Whenever possible, visit a local outdoor retailer to see tents in person and test them out firsthand. Often you will be able to view sample tents in store, crawl inside, and evaluate its size, comfort, and usability. This hands-on approach will help you make an informed decision and ensure you’re satisfied with your purchase.

7. Read Reviews and Compare Options:

Before making a final decision, consider reading online reviews and compare different tent models to gather insights from other campers’ experiences. Pay attention to factors such as durability, weather resistance, ease of setup, and overall value for the price.

8. Emergency Tent:Coghlans tube tent

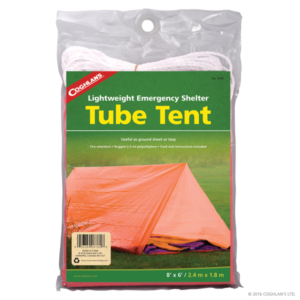
Another considering is in your car kit, or your 72 hour kit, keeping a tent tube in case of emergency. Grabbing the tent from storage in a pinch isn’t always feasible!

Conclusion:

Choosing the right tent is essential for a comfortable and enjoyable camping experience. By considering your needs, evaluating features, and setting a budget, you can find the perfect shelter for your outdoor adventures. With the right tent in tow, you’ll be ready to embark on unforgettable camping trips and create lasting memories in the great outdoors.

field of solar panels

Solar Potential:

Today we will talk about the basics around solar power in Canada. While solar resources vary across the country, technological advancements have made solar power a viable option for Canadians.

How Solar Power Works:

Solar power is generated using photovoltaic (PV) cells, which convert sunlight into electricity. Here’s a simplified explanation:

  • Photovoltaic Cells: Solar panels consist of photovoltaic cells made of semiconductor materials, usually silicon. When sunlight hits these cells, it excites electrons, generating an electric current.
  • Inverter Conversion: The direct current (DC) electricity produced by the solar panels is converted into alternating current (AC) electricity using an inverter. AC is the type of electricity used in most homes and businesses.
  • Grid Connection or Storage: The electricity can be used on-site or fed into the grid. Some systems include battery storage, allowing homeowners to store excess energy for later use.

man putting solar panels onto the roof of his home

Systems to consider vary in size, such as 5 kW, 10 kW, 12 kW, and so on; this refers to the capacity or size of a solar power system, specifically its maximum power output under ideal conditions. The capacity of a solar power system is typically measured in kilowatts (kW) or megawatts (MW), and it indicates how much electricity the system can generate.

Here’s what each of these capacity specifications means:
  1. 5 kW System:
    • A 5 kW system has a capacity of 5 kilowatts.
    • This means that, under optimal conditions, the system can produce 5 kilowatts of electricity per hour.
    • This system is often sufficient to cover a significant portion of an average household’s electricity needs.
    • It can power essential appliances such as refrigerators, lighting, televisions, computers, and other small electronics.
    • It may not be enough to cover the entire energy consumption of larger homes or homes with high energy demands, especially during peak usage times.
  2. 10 kW System:
    • A 10 kW system has a capacity of 10 kilowatts.
    • It can generate double the amount of electricity compared to a 5 kW system under the same conditions.
    • A 10 kW system has a higher capacity and is more likely to cover the electricity needs of a larger home.
    • It can power all the appliances mentioned for the 5 kW system and potentially support additional appliances, such as a washing machine, dryer, or electric stove.
    • Depending on the location and efficiency of the system, it might even cover the majority of a larger home’s energy needs.
  3. 16 kW System:
    • A 16 kW system has a capacity of 16 kilowatts.
    • It has a higher capacity than the 5 kW and 10 kW systems, indicating a larger and more powerful solar installation.
    • A 16 kW system is a robust installation with the potential to power a significant portion of a larger home’s energy demands.
    • It can power all the appliances mentioned for the 5 kW and 10 kW systems and may have the capacity to support additional high-energy appliances or multiple HVAC units.
    • In some cases, a well-designed and efficient 16 kW system could cover the entire energy consumption of a large home.

Note that the actual energy production of a solar power system can vary based on factors such as sunlight exposure, geographic location, shading, and system efficiency. Conduct a thorough energy audit to determine your specific energy needs.

Consulting with a local solar professional can provide a more tailored assessment based on your individual circumstances.

solar panels

Costs of Solar Power:

  • Installation Costs: The cost of installing solar panels depends on factors such as system size, location, and the complexity of the installation. Prices have decreased over the years due to technological advancements and increased demand.
  • Government Incentives: Various provinces and territories offer incentives, rebates, and tax credits to encourage solar adoption. These can significantly reduce the upfront costs.
  • Operational Costs: Solar systems have low operational costs as they require minimal maintenance. Regular cleaning and occasional checks are typically sufficient.

Return on Investment (ROI):

While the initial investment in solar panels can be significant, homeowners often experience a positive return on investment over time. The ROI can vary based on several factors, including location, system size, local incentives, and energy consumption. Let’s break down the costs and potential savings for a home installation based on a 1500 square foot home:

Installation Costs: Depending on the system, size, and far too many factors, the cost of installation is too difficult for me to predict. My research suggests that before rebates or incentives, solar panels can range anywhere from $10,000 to $40,000. (A proper consultation is the best way to know what your home costs would be)

Annual Savings: The savings from a solar panel system come from the electricity generated and the reduction in your electricity bill. On average, a 5 kW system can generate around 6,000 to 8,000 kWh per year, depending on factors like sunlight exposure and system efficiency.

Annual Savings ≈ Annual Electricity Production (kWh) × Electricity Rate (per kWh)

For example, if your electricity rate is $0.15 per kWh on a 5kW system:
Annual Savings ≈ (6,000 kWh to 8,000 kWh) × $0.15    = $900 to $1200

Payback Period: The payback period, or the time it takes for your solar investment to pay for itself through savings, can be calculated by dividing the installation cost by the annual savings.

Payback Period (years)=Installation Cost / Annual Savings

As a rough estimate, the payback period for a residential solar panel system in Canada is often in the range of 5 to 15 years.

Important Note: These calculations are approximate, and actual costs and savings can vary based on specific circumstances. It’s recommended to consult with local solar providers and take into account any changes in technology, energy rates, and government incentives

Environmental Benefits:

Solar power is a clean and renewable energy source, producing electricity without emitting greenhouse gases. Choosing solar helps reduce dependence on non-renewable resources and contributes to a more sustainable energy future.

Challenges:

Challenges in Canada include variations in sunlight intensity depending on the region, occasional extreme weather conditions, and the upfront costs.

On average, solar panels can last for 25 to 30 years or more. Many manufacturers offer performance warranties that guarantee the panels will still produce a certain percentage of their rated power output after a specified number of years, often 80% or more after 25 years.

Several factors contribute to the longevity of solar panels:

  1. Material Quality: The quality of materials used in the manufacturing of solar panels is a significant factor. High-quality panels made with durable materials tend to have a longer lifespan.
  2. Manufacturing Standards: Panels produced in accordance with industry standards and quality control measures are more likely to withstand environmental stresses and maintain performance over time.
  3. Environmental Conditions: The local climate and environmental conditions can impact the longevity of solar panels. For example, extreme weather events, such as hailstorms or hurricanes, can potentially damage panels. However, most panels are designed to withstand standard weather conditions.
  4. Maintenance: Proper maintenance, such as occasional checks for damage or shading issues, can contribute to the longevity and efficiency of solar panels.

Conclusion:

Solar power in Canada is a promising and increasingly accessible source of clean energy. As technology advances and costs continue to decrease, more homeowners and businesses are adopting solar solutions, contributing to a greener and more sustainable energy landscape.

If you have any comments, please reach out to BridenAcademy@BridenSolutions.ca

Briden Academy

In the wild, having the ability to create shelter is a fundamental skill. Whether you’re an avid outdoors enthusiast, a camper, or find yourself unexpectedly stranded, knowing how to construct a suitable shelter is vital.

Shelter Typesshelter

Lean-To Shelter:

  • To build a lean-to shelter:
    • Find a long, sturdy branches, logs or poles and prop against a horizontal support.
    • Secure the ridgepole with cordage, vines, or even shoelaces.
    • Create a roof by using a tarp, leaning smaller branches, or sticks against it. Cover the frame with leaves, grass, or branches for insulation.

Tarp Shelter:

  • If you have a tarp or a waterproof piece of fabric, you can create a tarp shelter. Secure the corners of the tarp to trees or use improvised supports, creating a simple, waterproof roof. From here you can use branches, logs, and natural supplies to create walls or wind breaks.

Tents and Other:

Briden Academy

  • Carrying a portable tent or something as simple as a tube tent (which can be stored in a vehicle, backpack, or 72 hour kit) can provide you an emergency shelter. Another option could be a hammock. Offering some shelter and off-the-ground comfort. The goal is being as much out of the elements as possible to stay safe and warm.

Site Selection

Proximity to Water:

  • When selecting a shelter site, prioritize proximity to water. Access to water is vital for drinking, cooking, and hygiene. However, avoid low-lying areas and flood-prone zones.

Natural Windbreaks:

  • Look for locations with natural windbreaks, such as rocks, cliffs, or dense vegetation. These features can provide additional protection from harsh winds and elements.

Avoid Hazards:

  • Ensure your chosen site is safe. Avoid areas with dead trees or overhanging branches that could fall. Steer clear of areas with wildlife activity like game trails or animal dens.

Staying Warm and Dry

Insulation:

  • If you do not have a ground cover, lay insulating materials, like leaves or grass, between you and the ground to prevent heat loss through conduction.

Keep It Cozy:

  • The smaller and more enclosed your shelter, the easier it is to retain warmth. Use your own body heat to your advantage.

Use a Fire:

  • If resources permit and it’s safe to do so, build a fire near your shelter for warmth and protection. Ideally you will have matches, a flint n steel, or other fire starting tools. More difficult but do-able: using solar reflection from a magnifying glass or your emergency mirror. Or the “bow and spindle” method of rubbing two sticks together.

Signal for Rescue:

  • In a survival situation, creating a signal fire near your shelter can help rescuers locate you. Use damp leaves, green vegetation, or rubber from a bicycle tire to create excess smoke for visibility. Universal sign for help is waving both hands over your head, and of course SOS.


Wilderness shelter-building skills are important for anyone who spends time in the great outdoors. Whether you’re on a camping trip or facing an unexpected survival scenario, knowing how to create shelter can keep you safe, warm, and dry. Practice these techniques and always carry the knowledge of shelter-building as one of your most valuable wilderness survival skills.


rope work out

Are you ready for any emergency or disaster that might come your way? Whether it’s a natural disaster, power outage, or unforeseen crisis, being prepared is helpful. Welcome to “Mastering Preparedness: A 30-Day Home Prepper Bootcamp,” a challenge to transform your home into a fortress of self-sufficiency and resilience.

The path to preparedness might seem daunting, but we’ve designed this bootcamp to be accessible and engaging. Each day’s activity is carefully crafted to ensure you make measurable progress while learning new skills and reinforcing old ones. Whether you’re a seasoned prepper or new to the concept, this bootcamp is your opportunity to fine-tune your preparedness efforts and elevate your level of readiness.

Are you up for the challenge? Let’s begin!

Have a notebook and/or a binder with loose-leaf to make notes and track progress, plus please feel free to peruse the Academy for related articles from day to day!

Week 1: Food and Water

Day 1: Take an inventory of your current food and water supplies. Make a list of what you have and their expiration dates.

Day 2: Research and create a basic emergency food supply plan. Calculate the amount of food your household needs for one week and make a shopping list.

Day 3: Go grocery shopping for your emergency food supply. Focus on non-perishable items like canned goods, freeze dried or dehydrated foods, and grains. We have you covered here!

Day 4: Purchase a water purification system or additional water storage containers. Ensure you have at least 2-4 liters of water per person per day for a week.

Day 5: Create a water purification plan. Learn how to use water purification tablets or filters effectively.

Day 6: Research and prepare a list of recipes that can be made from your emergency food supply. Include cooking instructions.

Day 7: Organize your food and water supplies in a dedicated storage area, keeping the oldest items up front for easy rotation.

Week 2: Shelter and Warmth

Day 8: Assess your home for potential shelter and heating needs during an emergency. Identify weak points and drafty areas.

Day 9: Make a list of necessary shelter and warmth supplies such as blankets, sleeping bags, or a portable heater.

Day 10: Purchase or gather the shelter and warmth supplies you identified, if lacking.

Day 11: Create an emergency heating plan, including safe use of any heating devices.

Day 12: Practice setting up a temporary shelter or insulation in your home, such as a tent or tarp.

Day 13: Learn how to start a fire safely, both indoors (if you have a fireplace) and outdoors.

Day 14: Review your emergency heating and shelter plans with your household members.

Roasting over the fire

Week 3: First Aid and Health

Day 15: Check your first aid kit for expiration dates and restock any missing items.

Day 16: Sign up for a basic first aid and CPR course or review your existing skills.

Day 17: Create a list of essential medications for your family and check their expiration dates.

Day 18: Refill any necessary prescriptions and purchase over-the-counter medications for common ailments.

Day 19: Learn basic home remedies and herbal remedies for common health issues.

Day 20: Organize your medical supplies and first aid kit in a clearly marked and accessible container.

124 piece First Aid Kit

Day 21: Teach your household members basic first aid skills and ensure they know where the first aid supplies are located.

Week 4: Communication and Security

Day 22: Establish a communication plan with family or household members during an emergency. Ensure everyone has a list of emergency contacts, or access to them.

Day 23: Invest in a battery-operated or hand-crank emergency radio for staying informed during power outages.

Day 24: Create a list of important documents and gather them in a waterproof container.

Day 25: Practice safe firearm storage and handling if you have them. Make sure appropriate licenses or permits are in place.

Day 26: Set up a neighborhood watch or community emergency response group. Alternatively, have a conversation with neighbors about an emergency response plan.

Day 27: Develop a security plan for your home and review it with your household members.

Day 28: Revisit your overall preparedness plan and make any necessary adjustments.

Day 29: Conduct a emergency drill to test your preparedness efforts.

Day 30: Reflect on your progress over the past 30 days and create a long-term preparedness plan to continue improving your readiness.

Triathlon finish


CONGRATULATIONS! You did it! Feel free to reach out to BridenAcademy@bridensolutions.ca and tell us all about your experience going through the challenge. We would love to hear how it went!

Senior scrabble tiles

Have you ever thought about how our beloved seniors might need some extra TLC during emergencies? Or maybe you are a senior creating a plan for your own needs. It’s important to prepare and plan ahead to keep you and our loved ones safe and secure.

This article is going to focus on:

  • being prepared to shelter at home,
  • being prepared to evacuate,
  • general guidelines to keep seniors’ homes safe from day-to-day,
  • and 72 hour kits for seniors

Might I also add, if you have any questions, concerns, or thoughts, our team at Briden Solutions would be happy to help you in any way we can.

Ideas to Consider In Your Emergency Plan

  • Medical conditions and medications: Be aware of seniors’ health needs in emergencies. Organize meds and medical documents. It’s not always feasible to store meds in your grab and go kit, however I do recommend keeping and updating a list of current medications. Another tip is to keep medications in a primary location for quick access.
  • Cognitive impairments: Memory loss and other challenges pose some real hurdles during emergencies for seniors. We need to be guiding lights and accommodate quirks during these tough times. Further down the article there is a list of suggestions on how to handle a situation to alleviate the stress for everyone involved.
  • Medical Equipment and Devices: Seniors may use hearing aids, glasses, or other assistive devices that they need to have readily available in an emergency situation. Those with medical conditions may also depend on equipment like oxygen concentrators, CPAP machines, or dialysis equipment, which require a stable power supply.
  • Other: Dietary constraints, temperature sensitivities, and mental health conditions may need to be factored into the plan.

Emergency Plan for Seniors: Sheltering at Home

Assess the risks! Sit down and figure out what could go wrong. Example: what if homecare is unavailable to arrive for 24 hours? A little home safety evaluation goes a long way!

When conducting a safety evaluation for seniors’ homes, it’s important to be on the lookout for potential risks. Here are some common areas to consider within the home:

  • Trip Hazards: Look for loose rugs or carpets, cluttered walkways, electrical cords across walkways, or uneven flooring that may pose a tripping risk.
  • Stair Safety: Check the condition of handrails and ensure they are sturdy and well-maintained. Look for any loose steps, worn-out carpeting, or inadequate lighting on stairs. If a lift is installed, ensure that backup power/batteries are available.
  • Bathroom Safety: Assess grab bars and handrails in the bathroom, ensuring they are properly installed and secure. Look for slip hazards like wet floors, loose bath mats, or inadequate lighting.
  • Kitchen Safety: Identify potential fire hazards such as unattended cooking appliances, overloaded outlets, or flammable materials stored improperly. Check for sharp objects or heavy items that may cause injury if improperly stored.
  • Electricity and Appliances: Ensure that electrical outlets and switches are in good condition and not overloaded. Look for faulty or frayed electrical cords and potential fire hazards near heat sources or appliances.

More Home-Care Tips:

  • Home Security: Evaluate the quality of locks on doors and windows. Install smoke detectors and carbon monoxide detectors in correct locations like bedrooms, kitchens, doorways or hallways.
  • Emergency Preparedness: Verify that there are accessible fire extinguishers, first aid kits, and emergency contact information readily available. Routinely check that seniors are aware of evacuation routes and nearby shelters.
  • Lighting: Assess the adequacy of lighting throughout the home, especially in hallways, stairs, and entranceways. Insufficient lighting can increase the risk of falls or accidents.
  • Outdoor Safety: Evaluate the condition of pathways, handrails, and steps leading to and from the house. Look for potential hazards such as loose pavers or uneven surfaces.

PRO TIPS:

Each home and individual’s needs will vary, so tailor the safety evaluation to address any specific concerns or challenges faced by each individual.

Run some fire drills or practice evacuations to be sure the pathway out is clean and clear, plus they know what to do without being surprised!

preparing vegetables for a healthy meal


Points to consider when helping a senior with memory and cognitive impairments during an emergency:

  • Ensure Safety: Make sure everyone is safe.
  • Call for Help: Dial 911 if needed.
  • Notify Someone: Inform a trusted contact about the situation.
  • Speak Calmly: Use a clear, soothing voice.
  • Reassure: Comfort and reassure the senior.
  • Visual Aids: Use pictures or notes to communicate.
  • Stay Together: Don’t leave them alone.
  • Limit Distractions: Keep the environment calm.
  • Monitor Needs: Ensure they’re hydrated and have appropriate medications at required intervals.
  • Plan to Reunite: Plan to reunite if separated.
  • Be Patient: Show patience, empathy and compassion.

Emergency Kits for Seniors If Evacuating

Here is a suggested checklist of items seniors may need upon evacuation. Is there special equipment normally used? Always personalize the plan based on particular needs.

Essential Documents and Information:
  • Copies of identification (ID, passport, driver’s license)
  • Medical records and insurance information
  • List of allergies and medical conditions
  • Medication list with dosage and instructions
  • Emergency contact list (family, friends, doctors)
Medications and Medical Supplies:
  • A one-week supply of prescription medications (rotate as needed)
  • Over-the-counter medications (pain relievers, antacids, etc.)
  • Medical equipment (hearing aids, glasses, mobility aids)
  • First-aid kit with bandages, antiseptic wipes, and basic medical supplies
Water and Food:
  • At least three days’ supply of bottled water (one gallon per person per day)
  • Non-perishable, easy-to-open food items (canned goods, granola bars, dry fruits)
  • Manual can opener and utensils
Clothing and Bedding:
  • Extra clothing, including warm layers
  • Sturdy, comfortable shoes and socks
  • Blankets or sleeping bags or heat pads/water bottles
Personal Hygiene Items:
  • Toothbrush, toothpaste, and dental floss
  • Soap, shampoo, and a washcloth
  • Sanitary supplies (if applicable)
  • Hand sanitizer and wet wipes
Lighting and Communication:
  • Flashlight with extra batteries
  • Battery-powered or hand-crank emergency radio
  • Whistle or signaling device
Personal Comfort and Entertainment:
  • Comfort items (favorite books, puzzles, or games)
  • Eyeglasses, hearing aids, and spare batteries
  • Notepad and pen
Cash and Important Keys:money, cash, coins
  • Small denominations of cash (ATMs may not work during emergencies)
  • Spare keys for home and vehicle

EXTRAS to Consider:

  • Maps of the local area and an evacuation plan – Meeting places and emergency contact information
  • Recent photos of the senior and family members for identification purposes

Pro Tip: Remember to periodically check and refresh the emergency kit to ensure that items are not expired, medications are up-to-date, and documents are current. Store the kit in an easily accessible location, and make sure the senior knows where it is and how to use its contents.

Grandpa & toddlerConclusion:

First and foremost, preparedness is key. Seniors, their families, and caregivers must work together to create emergency plans and assemble well-stocked emergency kits tailored to their unique needs that can provide a sense of security during trying times.

Moreover, communication is vital. Seniors should be informed about potential emergencies in their area and be well-versed in evacuation plans, local resources, and emergency contacts. Caregivers and family members should maintain open channels of communication, ensuring that everyone is on the same page and capable of acting swiftly and decisively when the situation calls for it.

Lastly, it is imperative that we as a society foster a culture of inclusion and support for our elderly population. Together, we can help our seniors weather the storm and emerge stronger on the other side.

Briden Academy

Understanding the Science of Heat Loss

In the battle against cold, knowledge is your best weapon. Understanding the science of heat loss is necessary. The human body loses heat through four primary mechanisms: conduction, convection, radiation, and evaporation.

  • Conduction: This occurs when your body comes into direct contact with cold surfaces or materials. For instance, sitting or lying on cold ground can rapidly siphon heat away from your body. To counteract this, consider insulating yourself from the ground with materials like foam pads or layers of leaves and debris.
  • Convection: Wind and moving air carry heat away from your body more quickly than still air. Wind chill, which combines cold temperatures with wind, can make it feel much colder than it actually is. Windproof outer layers and shelter are your defenses against convective heat loss.
  • Radiation: The human body constantly emits infrared radiation, losing heat to the environment. Radiant barriers, like reflective materials, can help reduce heat loss. Emergency space blankets, which should be included in your survival kit, are designed for this purpose.
      • This is why mothers and grandparents always tell us to wear a hat, to lessen losing heat from our bodies!
  • Evaporation: Even in cold conditions, sweat and moisture from your skin can evaporate, cooling you down. This is why moisture-wicking base layers are essential—they keep sweat away from your skin, preventing unnecessary cooling. Even a headband is a great tool here.

PRO TIP: Understanding these mechanisms empowers you to take proactive measures to combat heat loss. Your primary goal in any outdoor emergency is to preserve your core body temperature. In swimming lessons we are are taught HELP: Heat Escape Lessoning Position – which is rolling up in a ball best you can to reduce heat loss. I would say the same principle applies out of the water!

Layer Up

Layering is the key to staying warm.

  • Start with a moisture-wicking base layer to keep sweat away from your skin.
  • Next, add insulating layers like wool, fleece, or synthetic materials to trap heat.
  • Finally, top it off with waterproof and windproof outer layers to shield against the elements.
  • Hats, gloves, scarves to reduce heat loss from extremities

PRO TIP: Putting on a rain poncho when you’re cold can almost instantly raise your body temperature by a few degrees. They are amazing at taming the elements like wind.

Building a Shelter

Tents: If you have a portable tent with you, it’s your most reliable option. Set it up quickly in a sheltered location, ideally away from wind and on higher ground to avoid potential flooding. A tent provides a barrier against wind, rain, and cold, creating a microclimate that is easier to warm with your body heat.

Tarps and Emergency Shelters: They are lightweight, packable, and versatile. Secure one end to a tree or other anchor point, and then create a sloped roof to shed rain and snow. Close off the sides to further block the wind. Check out the tube tent we sell on our website!

Natural Materials: If you find yourself without any gear, you can utilize natural materials to construct a shelter. Look for natural features like caves, rock formations, or large fallen trees that can provide immediate protection from the elements. In snowy conditions, consider digging a snow cave or trench shelter, as snow acts as a natural insulator.

Insulate Your Shelter

Creating a shelter is only half the battle. To stay warm, you’ll need to insulate it effectively. Insulation traps warm air inside and cold air outside. Here are some insulating techniques:

  • Natural Insulators: If you’re in a forested area, gather leaves, pine needles, or other debris to create a thick layer beneath you inside the shelter. This acts as an insulating barrier between your body and the cold ground. This is “conduction” that we discussed earlier.
  • Reflective Materials: If you have a space blanket or emergency reflective material, use it inside your shelter. Place it on the ground to reflect your body heat back toward you.
  • Sleeping Bag or Blankets: If you have a sleeping bag or extra blankets, use them to line the interior of your shelter. The added insulation will help keep you warm throughout the night.

Harness the Power of Fire

Fire is your ultimate ally in staying warm. It also doubles as a cooking source, and even a way to purify water for hydration.

Fire-making begins with gathering the right materials, even in wet conditions:

  • Tinder: Start with tinder, which ignites easily. Dry leaves, grass, and bark shavings are good natural options. Additionally, carry some reliable man-made tinder in your survival kit, like cotton balls soaked in petroleum jelly or commercially available fire starter tabs.
  • Kindling: Kindling consists of small twigs, sticks, or branches that catch fire quickly and sustain the flame. Look for dry twigs or branches under overhanging tree canopies or in sheltered spots.
  • Fire Starting: Matches, lighters, flint and steel, fire discs
  • Fuel: Fuel wood is the larger wood that will keep your fire burning steadily once it’s established. Collect dry logs and branches of various sizes to ensure a steady heat source.
  • Firewood Prep: If all you have is damp wood, you can still make it burnable. Split logs to expose the dry interior and use a knife or hatchet to shave off wet outer layers.

Fire Safety

While fire is a valuable survival tool, it must be handled with care:

  • Create a fire pit to contain the flames and prevent them from spreading. Clear away flammable materials from the immediate area.
  • When you’re done with the fire, extinguish it completely. Pour water on the embers, stir the ashes, and repeat until everything is cold to the touch.
  • Keep a bucket of water or sand nearby in case of accidental flare-ups.
  • Remember to follow Leave No Trace principles by minimizing your impact on the environment.

Generating Body Heat

  • Keep Moving: Physical activities, even simple ones like jogging in place, can raise your body temperature significantly.
  • Share Body Heat: In a group, huddling together can provide crucial warmth. Body-to-body contact helps conserve heat..
  • Conserve Energy: Avoid overexertion, as sweating can lead to wet clothing, which accelerates heat loss. Prioritize tasks and rest when necessary. Assess the situations for whether movement or conservation of energy is the better choice.

Staying Warm With FoodStinger Organic Energy Chews

High-Energy Foods:

In cold weather, your body burns more calories to maintain its core temperature. Consuming high-energy foods provides the fuel you need to generate heat. Here are some options:

  • Nuts: High in healthy fats and protein, trail butter, nuts like almonds and walnuts are excellent sources of sustained energy.
  • Granola Bars: Portable and packed with carbs, granola bars are a convenient snack to keep your energy up.
  • Energy Gels or Chews: These compact, high-carbohydrate snacks are designed for endurance sports and can be an efficient way to replenish energy.

Warming Foods:

Consuming foods that warm your body from the inside can help you maintain comfort and heat:

  • Hot Soups: Instant soup mixes or dehydrated soups are not only hydrating but also provide warmth and comfort.
  • Hot Beverage: A warm beverage can raise your body temperature and provide psychological comfort.
  • Spicy Foods: Spices like cayenne pepper or chili can increase your metabolic rate and create a warming sensation. Consider trying chicken coconut curry.

Hydration Matters

In cold environments, it’s easy to forget about staying hydrated because you may not feel as thirsty as in hot weather. However, dehydration can exacerbate the cold. Cold air is typically dry, and your body loses moisture through respiration and perspiration.

  • Drink small sips of water at regular intervals. If you don’t have access to a water source, ration your supply, but don’t wait until you’re thirsty to drink.
  • Avoid Alcohol and Caffeine: These beverages can lead to increased fluid loss, so it’s best to avoid them in cold conditions.
  • Melting Snow or Ice: If possible purify it by boiling or using purification tablets. Check out this really amazing Kelly Kettle Ultimate Base Camp Kit.

The Power of Survival Stories

hiking during the winterReading survival stories and learning about the experiences of others can provide valuable insights and mental strategies for staying warm and hopeful during challenging times. Here is one about John utilizing the above steps in his survival.

A few years ago, John embarked on a winter backpacking adventure in the remote mountains. It was meant to be a thrilling solo trip, but things took an unexpected turn when a sudden snowstorm rolled in, shrouding the landscape in an icy, white veil. John found himself disoriented and exposed to freezing temperatures, with daylight quickly fading. Panic started to set in, but he knew that staying warm was paramount to making it through the night.

Seeking Immediate Shelter:

His heart raced as he scanned the surroundings for refuge. Thankfully, he spotted a cluster of pine trees nearby. With his heart pounding, he hurried over and took shelter beneath their thick, snow-laden branches. It was far from cozy, but it shielded him from the worst of the snowfall and biting winds.

Gathering Firewood:

John’s fingers numb from the cold, he began to gather firewood. Beneath the pine trees, he found relatively dry twigs and branches. It was a small victory amidst the chaos.

Fire-Making Skills:

With trembling hands, he pulled out his waterproof matches and a trusty fire starter. The matches ignited on the first try, and the flames danced to life, casting a warm, flickering glow in the snowy darkness. The relief was palpable.

Insulating His Shelter:

As the fire crackled, John remembered the importance of insulating his shelter. Gathering pine needles and leaves, he created a makeshift floor to insulate himself from the cold ground. It was far from luxurious, but it would make a world of difference.

Stay Hydrated and Nourished:

John’s water bottle was his lifeline. He took small, deliberate sips, knowing he had to make it last. In his backpack, he found a granola bar and a thermos of hot tea. The warmth of the tea was a soothing balm, and the granola bar provided much-needed sustenance.

Keep Moving:

To stave off the bone-chilling cold, he began doing light exercises within his shelter. He stretched, jumped around, and jogged in place, all while keeping a watchful eye on the dwindling fire.

Signal for Help:

As the night wore on, the storm began to relent. John grabbed a whistle from his backpack and blew it periodically, hoping against hope that someone, somewhere, would hear his distress signal. The hours felt like an eternity, but John’s determination to stay warm and alive pushed him onward. By the time dawn broke, the snowstorm had passed, revealing the pristine beauty of the mountains. As he gazed at the tranquil landscape, he knew he had faced a true test of survival.

John’s ability to stay warm, focused, and prepared in the face of an unexpected outdoor emergency was a testament to the resilience of the human spirit. It was a reminder that, even in the most challenging of situations, the will to survive can be an unwavering source of strength.

In Conclusion:

Staying warm in outdoor emergencies is a skill every outdoorsy person should master. With the right knowledge, clothing, gear, and survival mindset, you can face the harshest conditions with confidence. Always be prepared, stay informed, and remember that in the wild, knowledge and preparation are your greatest assets. Stay warm, stay safe, and embrace the thrill of the great outdoors.

Briden Academy

You never know when Mother Nature might decide to throw a curveball your way, or when circumstances might take a wild turn. That’s why having an emergency shelter is important—you might not need it every day, but when you do, it can save the day!

Why Bother with an Emergency Shelter Kit?

Okay, let’s be real for a second. When I first started thinking about preparing for emergencies, I was more interested in weekend hikes than doomsday scenarios. But then, during one of those adventures, I got caught in a sudden downpour with nothing but a soggy pack and a leaky poncho. It made me realize that life can throw surprises at you when you least expect it. And that’s why having a well-thought-out emergency shelter kit is a game-changer.

So, what exactly is an emergency shelter kit? It’s a collection of essential items that can keep you safe and comfortable when things go south. Whether you’re stranded in the wilderness, dealing with a power outage, or facing a natural disaster, your shelter kit has you covered – literally! *Modify to fit your needs: a wilderness kit will differ from a grab and go kit and a shelf-in-place kit.

The Must-Have Gear

Coghlans tube tent

Here’s what your emergency shelter kit could include:

1. Shelter Options: You’ll want something to protect you from the elements. Toss in a hammock, umbrella, a tent, a tarp, extra ponchos or even some emergency blankets. In addition, have a plan of locations to take shelter at.

  • For example if you’re not stranded in the woods your plan may include extended family or a neighbors home, a favorite campsite, the family cabin, or a neighborhood church building. The more details you have with your emergency kit the better. If you are in the woods, be able to “set up camp” in a pinch.
  • Check out this other blog of ours here about wilderness shelters & survival.

2. Sleeping Gear: Ever tried sleeping on a cold, hard surface? It’s no fun. Sleeping bags/blankets, sleeping pads or a cot and a pillow can make all the difference. Your local camping store is a great resource for this.

3. Clothing: A full outfit, extra layers, rain gear, and sturdy footwear. Depending on the size of your kit, you may want multiple types of footwear (like rubber boots or sandals).

4. Tools and Equipment: A trusty multi-tool, some rope and duct tape can save you in a pinch.

emergency mirror to call for help

5. Lighting and Communication: Flashlights with extra batteries are a lifesaver. Don’t forget a whistle and a signal mirror—they’re tiny but mighty when you need help.

6. First Aid and Hygiene: Accidents happen. A first aid kit comes in handy. Toss in some personal hygiene items and sanitation supplies just in case!

124 piece First Aid Kit

Customize and Maintain Your Kit

Now, here’s the thing—your shelter kit should fit your needs. Consider your family size, where you live, and what kind of emergencies are more likely in your area. And for the love of all things preparedness, check your kit regularly. Replace expired items, clothes too small, and make sure it’s easy to grab in a hurry.

PRO TIP: Consider having a packing list of those items that you use regularly that you need to grab that cannot be kept in your kit full time.

Being prepared can make all the difference when things get tough. So, take action now, create your emergency shelter kit, and rest easy knowing that you’ve got your superhero cape ready to go when you need it most.

Stay safe out there friends and if you have questions, don’t hesitate to reach out to our team via the contact information below!