.In this article we are going to discuss the ins and outs of a fire extinguisher, how to use one and when to use one. We need to know the types of extinguishers, the types of fires, and the phases that fires go through.

Anatomy of the Fire Extinguisher

  • Trigger – releases the solvent
  • Safety pin – prevents accidental extinguishing
  • Handle
  • Pressure Gauge – green equals fully charged, red means not
  • Hose/Nozzle – directs the stream (use a sweeping motion)

PRO-TIP:

Regularly inspect your extinguisher(s)!

Check for clean, readable labels and instructions, no rust & full pressure on  the gauge. Log your inspections!

Fire Extinguishing Safety Rules

But First!

  • If you are at work, pull the fire alarm and notify the fire department (or assign someone to this task).
  • If you are at home, notify the fire department.
  • Assist anyone  in danger, or cannot evacuate on their own. Remember not to put yourself at risk.

IF IT’S SAFE:

  • Notify someone that you are about to attempt extinguishing.
  • Identify your evacuation path
    • Never allow the flame to come between you and your way out!
  • Here’s the Acronym of most importance: PASS
    • Pull (the pin)
    • Aim (the nozzle)
    • Squeeze (the trigger)
    • Sweep (sweeping motion)

Fight (the fire) or Flee (to safety)?
Questions to Consider Ourselves:

  1. Is the fire small enough for my efforts to even be effective?
  2. Do I remember how to use the extinguisher?
  3. Do I have the appropriate extinguisher available for this type of fire?
  4. Is the air safe to breath?
  5. Do I have an evacuation route in place?

Types of Fire: A, B, C, D, K

Here are 5 types of fire and examples:

Class A: wood, paper, cloth, rubber, & many plastics

Class B: flammable liquids

  • Gas, propane, butane, petroleum greases, tars, oils, oil based paints, solvents, alcohol
  • NOT cooking oil or cooking fats

Type Class C: energized electrical equipment

  • Computers, appliances, motors, transformers
  • ONLY if there’s power to the item. No electrical supply and these items fall under a different category

Class D: combustible metals

  • Magnesium, calcium, sodium, lithium, potassium, phosphorus

Class K: vegetable oils, animal oils, cooking grease and fats

Types of Extinguishers

There are many types of extinguishers on the market. Be sure that whichever one you pick is appropriate for your work or home space. Here are a few that are available. Learn from my mistakes and know that extinguishers are not all “universal”!

  1. Water & Foam: Class A fires only
  2. Carbon Dioxide: Class B&C, ineffective on A
  3. Multi-purpose Dry Chemical: Class A, B, C
  4. Ordinary Dry Chemical: Class B&C
  5. Dry Powder Chemical: Class D only
  6. Clean Agent: Class A, B, C
  7. Wet Chemical: Class K

Most commonly in your home you are likely to have a Multi-purpose or a Clean Agent style extinguisher that covers classes A, B, and C.

If you are a kitchen connoisseur, having a Class K in your kitchen might be a beneficial preparation to have!

Stages of a Fire:

Incipient: Phase 1

  • Flame still in beginning stage
  • Small flame, not wide spread at this time
  • Smoke allows for visibility & almost normal breathing in the space
  • Heat emitted is low

Growth: Phase 2

  • Sufficient oxygen and fuel available
  • Thicker layer of smoke forming
  • No condensation on windows
  • Windows may show brown staining or start to crack

Fully Developed: Phase 3

  • Dark/black smoke
  • Dense/thick smoke
  • Substantial heat
  • Blackened windows
  • Visible exterior flame

Decay: Phase 4

  • Fuel and oxygen is running out 

fire burning

Fire Size: Extinguish or Evacuate?

Evacuate If:

  • Fire is a flammable solvent (such as fuel)
  • 5.6 square meters or larger
  • Partially hidden in a wall or ceiling – size is undetermined
  • Cannot be reached from standing – meaning  above your head or taller than your head
  • Heat is too intense
  • You need to crawl or be on the floor because the heat is too thick

Extinguish If:

  • #1 & most importantly: you feel comfortable trying. The first rule is that if you do not feel safe and secure, evacuate and let the professionals take care of the situation.
  • Limited to the original material that was ignited
    • Ex: A box of Kleenex lit up, and has not spread, then you may attempt extinguishing
  • It is contained
  • Flame is not higher than your head
  • Good visibility
  • Protective gear not required for your safety
  • Room temperature not raised

Prevention

  • Test smoke detectors (monthly or on a calendared schedule)
  • No smoking indoors. Never leave buds on ground outdoors. Always properly dispose of these!
  • Candles – never leave unattended
  • Store flammable products properly
  • Know where all shut offs are, such as gas lines, circuit breakers, appliances and fuses
  • Maintain your electrical cords – check for frayed or damaged cords. Check for power bars and over-burdened electric plug ins
  • Inspect heating sources (furnace filters, hot water heater, regular maintenance)
Conclusion:

And just like that, you are ready to extinguish in the hopefully unlikely event of a mis-placed fire! Congratulations on educating yourself and being one step closer in your preparedness. Locate your extinguisher, follow the maintenance guidelines, and feel ready to embrace whatever life may throw your way. Have a great day!

Roasting over the fire

Living in Canada, where winter temperatures can plummet, it’s essential to be prepared for emergencies, especially power outages that can leave you without electricity and, consequently, heating. In this article, we’ll explore  methods for generating emergency heat.

Wood-Burning Stoves and Fireplaces:

If this is an option for your, wood-burning stoves and fireplaces are traditional sources of heat. Keep a good supply of seasoned firewood in a dry place, and ensure your fireplace or stove is well-maintained. In case of a power outage, these can serve as reliable alternatives for keeping your home warm.

Many new builds, in Alberta specifically, are not built with a wood-burning fire place, but rather gas fireplaces. Often these will also continue to function during an electrical outage. Test yours to know for sure, for this is a possible emergency heat source in your home.


Propane Heaters:

Portable propane heaters are excellent options for emergency heating. They are easy to use, efficient, and suitable for outdoor use. Make sure to store enough propane canisters to last through an emergency situation. You can get garage/workshop friendly heaters, but unless specifically states ideal for indoor use, avoid using propane ran products indoors.

Example: A propane firebowl can serve as an outdoor source, in addition to or in place of an outdoor firepit

Insulation and Thermal Curtains:

Prioritize insulation to retain as much heat as possible. Seal gaps in doors and windows, and use thermal curtains to trap warmth inside. This not only helps maintain a comfortable temperature but also conserves energy. Added bonus: during the summer heat, it serves as a way to keep the heat out as well.

Examples: Install draft stoppers, thermal curtains, weather stripping, close exterior doors when not in use, and/or shrink wrap windows.

Hot Water Bottles and Bed Warmers:

Utilize the comforting warmth of hot water bottles and bed warmers to stay cozy during power outages. Boil water or hot tap water and fill the bottles or warmers for a reliable heat source. Consider in an emergency your hand/feet warmers from your emergency kit.

Heat factory hand warmers

Example: All winter I add a hot water bottle to my bed. They can stay warm for hours! Also, could be used while huddled around in the living room.

Emergency Blankets and Sleeping Bags:

Emergency blankets and sleeping bags are excellent for retaining body heat. Keep a supply of these in your emergency kit to stay warm, especially when sleeping or resting in unheated areas. Also, all of those extra blankets and quilts stored in your hall-closet, these are those moments they become an excellent source of warmth!

Coghlan blanket to keep warm in an emergency

Layered Clothing and Thermal Wear:

Dressing in layers is a simple yet effective way to stay warm. Keep a collection of thermal wear, jackets, and moisture-wicking clothing to regulate body temperature and stay comfortable during power outages. Slippers, robes, fuzzy pajamas. These can become layers and emergency clothing if the need to stay warm arises.

Example: Merino wool base layers provide excellent insulation without bulk and are a great addition to your emergency clothing kit.

Conclusion:

While modern conveniences like central heating systems may fail during power outages, or simply your furnace dies as they are known to malfunction on occasion, adopting old-school methods can be a lifesaver in emergency situations, especially in the Canadian winter. By incorporating these traditional heating solutions into your emergency preparedness plan, you can ensure the warmth and safety of your household even when the power goes out. Stay warm, stay safe!

field of solar panels

Solar Potential:

Today we will talk about the basics around solar power in Canada. While solar resources vary across the country, technological advancements have made solar power a viable option for Canadians.

How Solar Power Works:

Solar power is generated using photovoltaic (PV) cells, which convert sunlight into electricity. Here’s a simplified explanation:

  • Photovoltaic Cells: Solar panels consist of photovoltaic cells made of semiconductor materials, usually silicon. When sunlight hits these cells, it excites electrons, generating an electric current.
  • Inverter Conversion: The direct current (DC) electricity produced by the solar panels is converted into alternating current (AC) electricity using an inverter. AC is the type of electricity used in most homes and businesses.
  • Grid Connection or Storage: The electricity can be used on-site or fed into the grid. Some systems include battery storage, allowing homeowners to store excess energy for later use.

man putting solar panels onto the roof of his home

Systems to consider vary in size, such as 5 kW, 10 kW, 12 kW, and so on; this refers to the capacity or size of a solar power system, specifically its maximum power output under ideal conditions. The capacity of a solar power system is typically measured in kilowatts (kW) or megawatts (MW), and it indicates how much electricity the system can generate.

Here’s what each of these capacity specifications means:
  1. 5 kW System:
    • A 5 kW system has a capacity of 5 kilowatts.
    • This means that, under optimal conditions, the system can produce 5 kilowatts of electricity per hour.
    • This system is often sufficient to cover a significant portion of an average household’s electricity needs.
    • It can power essential appliances such as refrigerators, lighting, televisions, computers, and other small electronics.
    • It may not be enough to cover the entire energy consumption of larger homes or homes with high energy demands, especially during peak usage times.
  2. 10 kW System:
    • A 10 kW system has a capacity of 10 kilowatts.
    • It can generate double the amount of electricity compared to a 5 kW system under the same conditions.
    • A 10 kW system has a higher capacity and is more likely to cover the electricity needs of a larger home.
    • It can power all the appliances mentioned for the 5 kW system and potentially support additional appliances, such as a washing machine, dryer, or electric stove.
    • Depending on the location and efficiency of the system, it might even cover the majority of a larger home’s energy needs.
  3. 16 kW System:
    • A 16 kW system has a capacity of 16 kilowatts.
    • It has a higher capacity than the 5 kW and 10 kW systems, indicating a larger and more powerful solar installation.
    • A 16 kW system is a robust installation with the potential to power a significant portion of a larger home’s energy demands.
    • It can power all the appliances mentioned for the 5 kW and 10 kW systems and may have the capacity to support additional high-energy appliances or multiple HVAC units.
    • In some cases, a well-designed and efficient 16 kW system could cover the entire energy consumption of a large home.

Note that the actual energy production of a solar power system can vary based on factors such as sunlight exposure, geographic location, shading, and system efficiency. Conduct a thorough energy audit to determine your specific energy needs.

Consulting with a local solar professional can provide a more tailored assessment based on your individual circumstances.

solar panels

Costs of Solar Power:

  • Installation Costs: The cost of installing solar panels depends on factors such as system size, location, and the complexity of the installation. Prices have decreased over the years due to technological advancements and increased demand.
  • Government Incentives: Various provinces and territories offer incentives, rebates, and tax credits to encourage solar adoption. These can significantly reduce the upfront costs.
  • Operational Costs: Solar systems have low operational costs as they require minimal maintenance. Regular cleaning and occasional checks are typically sufficient.

Return on Investment (ROI):

While the initial investment in solar panels can be significant, homeowners often experience a positive return on investment over time. The ROI can vary based on several factors, including location, system size, local incentives, and energy consumption. Let’s break down the costs and potential savings for a home installation based on a 1500 square foot home:

Installation Costs: Depending on the system, size, and far too many factors, the cost of installation is too difficult for me to predict. My research suggests that before rebates or incentives, solar panels can range anywhere from $10,000 to $40,000. (A proper consultation is the best way to know what your home costs would be)

Annual Savings: The savings from a solar panel system come from the electricity generated and the reduction in your electricity bill. On average, a 5 kW system can generate around 6,000 to 8,000 kWh per year, depending on factors like sunlight exposure and system efficiency.

Annual Savings ≈ Annual Electricity Production (kWh) × Electricity Rate (per kWh)

For example, if your electricity rate is $0.15 per kWh on a 5kW system:
Annual Savings ≈ (6,000 kWh to 8,000 kWh) × $0.15    = $900 to $1200

Payback Period: The payback period, or the time it takes for your solar investment to pay for itself through savings, can be calculated by dividing the installation cost by the annual savings.

Payback Period (years)=Installation Cost / Annual Savings

As a rough estimate, the payback period for a residential solar panel system in Canada is often in the range of 5 to 15 years.

Important Note: These calculations are approximate, and actual costs and savings can vary based on specific circumstances. It’s recommended to consult with local solar providers and take into account any changes in technology, energy rates, and government incentives

Environmental Benefits:

Solar power is a clean and renewable energy source, producing electricity without emitting greenhouse gases. Choosing solar helps reduce dependence on non-renewable resources and contributes to a more sustainable energy future.

Challenges:

Challenges in Canada include variations in sunlight intensity depending on the region, occasional extreme weather conditions, and the upfront costs.

On average, solar panels can last for 25 to 30 years or more. Many manufacturers offer performance warranties that guarantee the panels will still produce a certain percentage of their rated power output after a specified number of years, often 80% or more after 25 years.

Several factors contribute to the longevity of solar panels:

  1. Material Quality: The quality of materials used in the manufacturing of solar panels is a significant factor. High-quality panels made with durable materials tend to have a longer lifespan.
  2. Manufacturing Standards: Panels produced in accordance with industry standards and quality control measures are more likely to withstand environmental stresses and maintain performance over time.
  3. Environmental Conditions: The local climate and environmental conditions can impact the longevity of solar panels. For example, extreme weather events, such as hailstorms or hurricanes, can potentially damage panels. However, most panels are designed to withstand standard weather conditions.
  4. Maintenance: Proper maintenance, such as occasional checks for damage or shading issues, can contribute to the longevity and efficiency of solar panels.

Conclusion:

Solar power in Canada is a promising and increasingly accessible source of clean energy. As technology advances and costs continue to decrease, more homeowners and businesses are adopting solar solutions, contributing to a greener and more sustainable energy landscape.

If you have any comments, please reach out to BridenAcademy@BridenSolutions.ca

Kelly Kettle Basecamp kit

When it comes to outdoor adventures, having the right equipment can make all the difference. The Kelly Kettle Base Camp, a portable and efficient camping kettle, is one such tool that has won the hearts of outdoor enthusiasts worldwide.

Who Invented the Kelly Kettle Base Camp?

The Kelly Kettle Base Camp is a product of the Kelly family, hailing from Ireland. The ingenious design of this kettle, initially known as the “Volcano Kettle,” was created by Patrick Kelly in the early 1900s. Since then, it has been passed down through generations and remains a beloved item for campers, hikers, and adventurers.

What Is the Kelly Kettle Base Camp?

The Kelly Kettle is a unique, chimney-style camping kettle. It’s designed for quick and efficient boiling of water in the great outdoors, using natural fuels such as sticks, twigs, or dry leaves. Its construction includes a main chamber for holding water and a separate chamber for fuel. The kettle’s conical shape and double-walled design allow for rapid heating, making it an indispensable tool for outdoor cooking, hot beverages, and even emergency water purification.

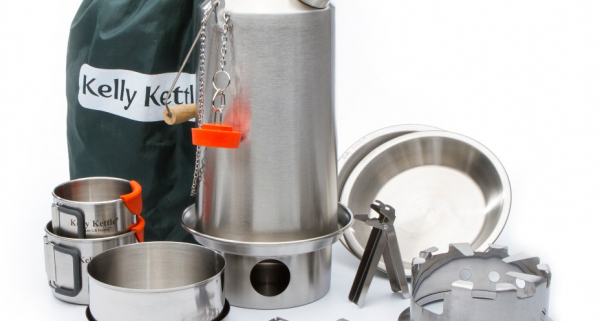
Where Can You Use the Kelly Kettle Base Camp?

The Kelly Kettle Base Camp is a versatile companion for various outdoor settings. Whether you’re camping in the wilderness, hiking in remote areas, or simply having a picnic at your local park, this kettle provides a reliable source of hot water, even in challenging conditions.

When Is the Best Time to Use It?

  • Camping Trips: Whether you’re in a designated campsite with fire rings or out in the backcountry, it ensures you have a source of hot water for cooking, cleaning, and making hot beverages.
  • Hiking and Backpacking: It’s lightweight and compact, making it a valuable addition to your gear. It can also help you save space and weight by eliminating the need to carry extra fuel canisters.
  • Picnics and Day Trips: In a local park, at the beach, or on a scenic hike, having the ability to quickly heat water a hot beverage or instant meals is convenient.
  • Boating and Fishing: If you’re out on the water, it’s particularly useful for anglers who want to enjoy a hot meal while fishing.
  • Emergency Situations: In the event of power outages, natural disasters, or other emergency situations, it provides a reliable means of heating water for drinking, rehydrating food, and staying warm.
  • Outdoor Events and Festivals: An outdoor concert, a sports event, or a festival, the Kelly Kettle can help you save money and avoid long lines at food vendors. Who knows, maybe you will attract some new friends while you’re at it!
  • Winter Activities: Provides you a source of hot water to stay warm, prepare hot cocoa, and rehydrate freeze-dried meals.

Why Choose the Kelly Kettle Base Camp?

  • Efficiency: By using readily available natural fuels like sticks, twigs, or leaves, it eliminates the need for additional equipment or fuel canisters.
  • Speed: Whether you’re in need of a hot beverage in the morning or a hot meal after a long day of hiking, the Kelly Kettle can significantly cut down on cooking time.
  • Reliability: Its simple design means fewer parts to break or malfunction, making it a reliable and trusty companion for your outdoor adventures.
  • Versatility: With the appropriate accessories like the cooking set, you can use it to prepare a wide range of meals, from simple soups and stews to more elaborate campfire recipes.
  • Emergency Preparedness
  • Cost-Effective: Over time, the Kelly Kettle can prove to be a cost-effective choice. Its reliance on natural fuels means you don’t need to continually purchase costly fuel canisters, making it an investment that pays for itself through savings on fuel expenses

How to Use the Kelly Kettle Base Camp

Using the Kelly Kettle Base Camp is straightforward:

  • Fill the main chamber with water.
  • Place natural fuels, such as sticks and leaves, in the fire base.
  • Ignite the fuel, and the chimney effect will draw the heat up, quickly boiling the water in the main chamber.

Check out this video with Billy showing how it works!

Conclusion

The Kelly Kettle Base Camp is a testament to timeless ingenuity and practical design. Its ability to provide hot water and cook meals with minimal environmental impact makes it a must-have for outdoor enthusiasts and those who prioritize preparedness. Whether you’re deep in the wilderness or just enjoying a day in the park, the Kelly Kettle Base Camp is your trusted outdoor companion.

campfire at the beach

The Right Wood Matters

The first rule of thumb when it comes to efficient wood burning is knowing your wood. Not all wood is created equal, and choosing the right type makes all the difference.

  • Hardwoods like oak, maple, and hickory burn hotter and longer, making them ideal for those cozy nights by the fireplace or extended cooking sessions.
  • Softwoods like pine, spruce, and fir ignite quickly but do not last as long. They’re perfect for a quick, hot fire to boil water or get warm in a hurry.

Understanding the properties of different woods and having the right type on hand is helpful. I recommend finding an app or a guidebook, and going on a scavenger hunt identifying the various types. Look for color, shape, scent, and texture and see what you can find!

fire wood

Dry as a Bone

Wet wood can be a real buzzkill when it comes to building a fire. Always aim to use dry, seasoned wood. Wood with a moisture content of 20% or less is ideal. If you’re scavenging in the wild (where and when allowed), look for dead standing trees or branches off the ground. Always carry a fire-starter or two in your survival kit – you never know when you’ll need a quick ignition source. If you have wood stocked at home for your wood burning stove or outdoor pit, store it in a dry, sheltered location.

The Right Tools for the Job

Axe or Hatchet: A high-quality axe or hatchet allows you to chop logs into manageable pieces for your fire or shelter. Make sure to keep your cutting tools sharp; dull blades make the job harder and less safe.

Saw: While an axe is excellent for splitting wood, a saw is invaluable for cutting logs into smaller, more manageable lengths.

Knife: Beyond its role in preparing food, a knife can be used for tasks like carving wood, or feathering sticks for kindling. And if you’re like my children, whittling is a great pass time around the fire.

  • A Multi-tool pocket knife also is great to have handy – you never know when you’ll need a set of pliers!

Firestarter: Even with all the tools and knowledge, getting a fire going from scratch can be a challenge, especially in adverse conditions. That’s where fire-starters come in. You can choose from various options like waterproof matches, flint and steel, or fire discs. Keep a few of these in your survival or camp kit.

Backpacking Stove: A lightweight backpacking stove like a JetBoil, Kelly Kettle or a Coghlan’s folding stove can be a game-changer. It’s a highly efficient and controlled way to cook your meals and boil water without the need for a full campfire.

Firewood Carrier: When you’re transporting firewood from your processing area to your campsite, a firewood carrier can save you multiple trips. They come in various styles, including wheelbarrows, canvas or mesh bags and strap systems. Or, if you have children, they can be excellent firewood transporters (no promises you’ll be able to hear the pleasant sounds of nature over them).

Keep It Ventilated

No one likes a smoky fire. A well-ventilated fire is a happy and efficient fire. Proper ventilation not only ensures that your fire burns cleanly but also contributes to its longevity and effectiveness. Here’s how you can achieve excellent ventilation for your outdoor fire:

Build Your Fire Lay:

The arrangement of your firewood has a substantial impact on airflow. When building your fire, consider using one of the following methods:

  • Teepee Method: This classic method involves stacking your kindling and fuel wood in the shape of a teepee. Leave an opening on one side to allow airflow. As the fire burns, it draws in oxygen through the bottom, sustaining combustion.
  • Log Cabin Method: Create a square or rectangular shape with your logs by stacking them perpendicular to each other. Build several layers, and place kindling and tinder inside. The gaps between the logs create ample airflow. This is similar to a pyramid but much more space between logs to allow air flow.
  • Lean-to Method: Lean a larger log against a sturdy support, and stack smaller logs and kindling against it on the windward side. This setup channels air towards the base of the fire, providing a steady supply of oxygen.
  • Pyramid Method: Stack your wood largest on the bottom, getting smaller the taller you get, keeping your wood snug and close together. Your kindling and tinder goes on top, and the fire will slowly burn downwards, allowing you to keep a fire burning through the night if necessary. Remember to have rocks or a fire pit circling your fire for safety.
  • Star Method (Cross-ditch): If you’re starting a fire to one-pot cook over, this method is perfect. You can set up your tripod over the center.

Clear the Area: Ensure the area around your fire pit is clear of leaves, grass, or debris that could hinder proper ventilation. A clean, non-flammable space prevents embers from spreading and encourages efficient airflow.

Position the Windward Side: If possible, align your fire pit or campfire with the prevailing wind. This ensures that oxygen-rich air is continuously funneled into your fire, enhancing its combustion.

Add Air Channels:

In situations where you need to start a fire in less-than-ideal conditions, consider adding air channels to encourage airflow. Place a few sticks or rocks beneath your tinder to create space for air to circulate.

Caution: While proper ventilation is essential for a good fire, be aware of your surroundings. In windy conditions, a fire can quickly get out of control. Always keep an eye on the fire and be prepared to adjust your fire’s size and airflow to maintain safety.

Smoke:

Have you ever built a fire and found it to be really smoky? Here are some tips:

  • Use Dry Wood: Wet or green wood contains a substantial amount of moisture that, when burned, results in excessive smoke.
  • Proper Wood Selection: Choose hardwoods over softwoods. Hardwoods like oak, maple, or hickory tend to produce less smoke compared to softwoods like pine, spruce, or fir.
  • Start with Small Sticks: When initially lighting your fire, begin with small sticks, twigs, or kindling.
  • Well-Designed Fire Lay: As mentioned earlier, the method you use to arrange your firewood can significantly impact smoke production. The teepee, log cabin, and lean-to methods provide ample ventilation, resulting in more complete combustion and less smoke.
  • Avoid Overloading the Fire: Adding too much wood too quickly can overwhelm the fire and cause incomplete combustion, leading to smoke. Gradually add fuel wood as the fire gains strength, ensuring it’s always getting enough air to burn efficiently.
  • Maintain Proper Ventilation: Position your fire pit or campfire where it can draw in oxygen from the windward side. Adjust the size and arrangement of your logs to keep air circulating.
  • Regularly Stoking the Fire: To reduce smoke during the burning process, periodically stoke the fire by adding small logs or adjusting the arrangement of existing logs. This helps maintain a steady and efficient burn.

Step-by-Step Guide: How to Start a Fire

Roasting over the fire

Now, let’s break down the process of starting a fire in the great outdoors. Whether you’re using a fire pit, a wood-burning stove, or building a wilderness fire, these steps will guide you:

Step 1: Gather Your Materials
  • Tinder: Start with easily ignitable materials like dry leaves, pine needles, or small twigs. You can also use commercial fire-starters, cotton balls soaked in petroleum jelly, or dryer lint. This is your very first source of fuel to get the fire ignited
  • Kindling: Gather small branches, twigs, or sticks. These should be about the diameter of a pencil and easily combustible
  • Fuel Wood: These are your larger logs
Step 2: Set Up Your Fire Lay

There are several fire lay methods mentioned above, but for beginners, the teepee method is often the easiest:

  • Place a small pile of tinder in the center of your fire pit.
  • Form a teepee structure around the tinder using your kindling. Leave an opening for airflow.
Step 3: Ignite the Tinder

Use a fire-starter, a lighter, or matches to ignite the tinder in the center of your teepee. As the tinder catches fire, it will ignite the kindling.

Step 4: Feed the Fire

As the kindling ignites and the flames grow, gradually add more kindling and then larger fuel wood. Ensure you maintain proper airflow.

Step 5: Maintain the Fire

Continue to add fuel wood as needed to keep the fire going. Be attentive to its size and intensity, adjusting as necessary.


By choosing the right wood, keeping it dry, using the right tools, maintaining proper ventilation, and prioritizing safety, you’ll be a wood-burning pro in no time. So, let’s keep the fires burning, stay safe while doing so, and enjoy the warmth and comfort of a well-burning fire in any situation. Happy camp-firing, my friends!

JetBoil 230g fuel cannister for the JetBoil portable outdoor stove

When it comes to outdoor adventures, having a reliable and efficient cooking system can change your adventure from fun to amazing. JetBoil, a popular brand among outdoor enthusiasts, offers a range of innovative products designed to make cooking in the great outdoors a breeze.

JetBoil logo

How JetBoil Works

JetBoil’s core product is a compact and lightweight cooking system that utilizes a unique design to heat water or prepare meals quickly and efficiently. The primary components of a JetBoil system include:

  1. Stove Unit: It’s designed to create a powerful, focused flame that directs heat to the bottom of the pot, minimizing heat loss and improving cooking efficiency.
  2. Cooking Pot: JetBoil pots are specially designed to work with their stoves. They feature a heat exchanger on the bottom, which captures and transfers heat to the contents. The pots come in various sizes to accommodate different cooking needs.
  3. Fuel Canister: Small, lightweight canisters of compressed gas, usually propane or isobutane. These canisters are easy to attach to the stove and provide the fuel needed for cooking.
  4. Ignition System: Most JetBoil systems include a push-button ignition, making it easy to start the stove without the need for matches or lighters.

PRO TIP: The JetBoil cannister of fuel comes in 3 sizes: 100g, 230g, and 450g.

The shipping limitations: only a certain volume of fuel can be safely sent through the mail. 900g per single shipment is the max.


Here is a video link showing how this cool product works!


What JetBoil Can Do

JetBoil’s versatility makes it suitable for many outdoor activities and cooking needs, including:

  1. Boiling Water: JetBoil excels at rapidly boiling water, making it ideal for preparing hot beverages like coffee and tea, rehydrating freeze-dried meals, or cooking pasta and rice.
  2. Cooking Meals: With the right accessories, you can use JetBoil for cooking a wide range of meals, from simple one-pot dishes to more elaborate outdoor gourmet creations.
  3. Simmering: Some JetBoil models allow for precise flame control, enabling you to simmer or slow-cook dishes.

When and Where to Use JetBoil

JetBoil is versatile and  used in various outdoor scenarios, such as:

  1. Camping: Provides quick and efficient cooking solutions for breakfast, lunch, and dinner.
  2. Hiking and Backpacking: An excellent reliable cooking system without adding excess weight to packs.
  3. Climbing and Mountaineering: A favorite among climbers and mountaineers for its efficiency in high-altitude cooking.
  4. Emergency Preparedness: A valuable addition to your emergency preparedness kit, ensuring you have a reliable way to cook during power outages or other emergencies. (Make sure you are cooking outside with fresh air)

Why Use JetBoil

  1. Speed: This system can boil water in a matter of seconds, saving you valuable time and fuel.
  2. Efficiency: Its innovative design maximizes fuel efficiency, reducing the number of canisters you need to carry.
  3. Portability: JetBoil is compact and lightweight, making it easy to transport and ideal for adventures where every ounce matters.
  4. Reliability: Known for their durability and dependability in various weather conditions.
  5. Convenience: With push-button ignition and quick setup, JetBoil simplifies outdoor cooking

hiking

This innovative cooking system has revolutionized outdoor cooking. JetBoil  ensures you can enjoy hot meals and beverages wherever your outdoor pursuits take you. Elevate your outdoor (or emergency) culinary experience to new heights! Happy cooking!

Briden Academy

Understanding the Science of Heat Loss

In the battle against cold, knowledge is your best weapon. Understanding the science of heat loss is necessary. The human body loses heat through four primary mechanisms: conduction, convection, radiation, and evaporation.

  • Conduction: This occurs when your body comes into direct contact with cold surfaces or materials. For instance, sitting or lying on cold ground can rapidly siphon heat away from your body. To counteract this, consider insulating yourself from the ground with materials like foam pads or layers of leaves and debris.
  • Convection: Wind and moving air carry heat away from your body more quickly than still air. Wind chill, which combines cold temperatures with wind, can make it feel much colder than it actually is. Windproof outer layers and shelter are your defenses against convective heat loss.
  • Radiation: The human body constantly emits infrared radiation, losing heat to the environment. Radiant barriers, like reflective materials, can help reduce heat loss. Emergency space blankets, which should be included in your survival kit, are designed for this purpose.
      • This is why mothers and grandparents always tell us to wear a hat, to lessen losing heat from our bodies!
  • Evaporation: Even in cold conditions, sweat and moisture from your skin can evaporate, cooling you down. This is why moisture-wicking base layers are essential—they keep sweat away from your skin, preventing unnecessary cooling. Even a headband is a great tool here.

PRO TIP: Understanding these mechanisms empowers you to take proactive measures to combat heat loss. Your primary goal in any outdoor emergency is to preserve your core body temperature. In swimming lessons we are are taught HELP: Heat Escape Lessoning Position – which is rolling up in a ball best you can to reduce heat loss. I would say the same principle applies out of the water!

Layer Up

Layering is the key to staying warm.

  • Start with a moisture-wicking base layer to keep sweat away from your skin.
  • Next, add insulating layers like wool, fleece, or synthetic materials to trap heat.
  • Finally, top it off with waterproof and windproof outer layers to shield against the elements.
  • Hats, gloves, scarves to reduce heat loss from extremities

PRO TIP: Putting on a rain poncho when you’re cold can almost instantly raise your body temperature by a few degrees. They are amazing at taming the elements like wind.

Building a Shelter

Tents: If you have a portable tent with you, it’s your most reliable option. Set it up quickly in a sheltered location, ideally away from wind and on higher ground to avoid potential flooding. A tent provides a barrier against wind, rain, and cold, creating a microclimate that is easier to warm with your body heat.

Tarps and Emergency Shelters: They are lightweight, packable, and versatile. Secure one end to a tree or other anchor point, and then create a sloped roof to shed rain and snow. Close off the sides to further block the wind. Check out the tube tent we sell on our website!

Natural Materials: If you find yourself without any gear, you can utilize natural materials to construct a shelter. Look for natural features like caves, rock formations, or large fallen trees that can provide immediate protection from the elements. In snowy conditions, consider digging a snow cave or trench shelter, as snow acts as a natural insulator.

Insulate Your Shelter

Creating a shelter is only half the battle. To stay warm, you’ll need to insulate it effectively. Insulation traps warm air inside and cold air outside. Here are some insulating techniques:

  • Natural Insulators: If you’re in a forested area, gather leaves, pine needles, or other debris to create a thick layer beneath you inside the shelter. This acts as an insulating barrier between your body and the cold ground. This is “conduction” that we discussed earlier.
  • Reflective Materials: If you have a space blanket or emergency reflective material, use it inside your shelter. Place it on the ground to reflect your body heat back toward you.
  • Sleeping Bag or Blankets: If you have a sleeping bag or extra blankets, use them to line the interior of your shelter. The added insulation will help keep you warm throughout the night.

Harness the Power of Fire

Fire is your ultimate ally in staying warm. It also doubles as a cooking source, and even a way to purify water for hydration.

Fire-making begins with gathering the right materials, even in wet conditions:

  • Tinder: Start with tinder, which ignites easily. Dry leaves, grass, and bark shavings are good natural options. Additionally, carry some reliable man-made tinder in your survival kit, like cotton balls soaked in petroleum jelly or commercially available fire starter tabs.
  • Kindling: Kindling consists of small twigs, sticks, or branches that catch fire quickly and sustain the flame. Look for dry twigs or branches under overhanging tree canopies or in sheltered spots.
  • Fire Starting: Matches, lighters, flint and steel, fire discs
  • Fuel: Fuel wood is the larger wood that will keep your fire burning steadily once it’s established. Collect dry logs and branches of various sizes to ensure a steady heat source.
  • Firewood Prep: If all you have is damp wood, you can still make it burnable. Split logs to expose the dry interior and use a knife or hatchet to shave off wet outer layers.

Fire Safety

While fire is a valuable survival tool, it must be handled with care:

  • Create a fire pit to contain the flames and prevent them from spreading. Clear away flammable materials from the immediate area.
  • When you’re done with the fire, extinguish it completely. Pour water on the embers, stir the ashes, and repeat until everything is cold to the touch.
  • Keep a bucket of water or sand nearby in case of accidental flare-ups.
  • Remember to follow Leave No Trace principles by minimizing your impact on the environment.

Generating Body Heat

  • Keep Moving: Physical activities, even simple ones like jogging in place, can raise your body temperature significantly.
  • Share Body Heat: In a group, huddling together can provide crucial warmth. Body-to-body contact helps conserve heat..
  • Conserve Energy: Avoid overexertion, as sweating can lead to wet clothing, which accelerates heat loss. Prioritize tasks and rest when necessary. Assess the situations for whether movement or conservation of energy is the better choice.

Staying Warm With FoodStinger Organic Energy Chews

High-Energy Foods:

In cold weather, your body burns more calories to maintain its core temperature. Consuming high-energy foods provides the fuel you need to generate heat. Here are some options:

  • Nuts: High in healthy fats and protein, trail butter, nuts like almonds and walnuts are excellent sources of sustained energy.
  • Granola Bars: Portable and packed with carbs, granola bars are a convenient snack to keep your energy up.
  • Energy Gels or Chews: These compact, high-carbohydrate snacks are designed for endurance sports and can be an efficient way to replenish energy.

Warming Foods:

Consuming foods that warm your body from the inside can help you maintain comfort and heat:

  • Hot Soups: Instant soup mixes or dehydrated soups are not only hydrating but also provide warmth and comfort.
  • Hot Beverage: A warm beverage can raise your body temperature and provide psychological comfort.
  • Spicy Foods: Spices like cayenne pepper or chili can increase your metabolic rate and create a warming sensation. Consider trying chicken coconut curry.

Hydration Matters

In cold environments, it’s easy to forget about staying hydrated because you may not feel as thirsty as in hot weather. However, dehydration can exacerbate the cold. Cold air is typically dry, and your body loses moisture through respiration and perspiration.

  • Drink small sips of water at regular intervals. If you don’t have access to a water source, ration your supply, but don’t wait until you’re thirsty to drink.
  • Avoid Alcohol and Caffeine: These beverages can lead to increased fluid loss, so it’s best to avoid them in cold conditions.
  • Melting Snow or Ice: If possible purify it by boiling or using purification tablets. Check out this really amazing Kelly Kettle Ultimate Base Camp Kit.

The Power of Survival Stories

hiking during the winterReading survival stories and learning about the experiences of others can provide valuable insights and mental strategies for staying warm and hopeful during challenging times. Here is one about John utilizing the above steps in his survival.

A few years ago, John embarked on a winter backpacking adventure in the remote mountains. It was meant to be a thrilling solo trip, but things took an unexpected turn when a sudden snowstorm rolled in, shrouding the landscape in an icy, white veil. John found himself disoriented and exposed to freezing temperatures, with daylight quickly fading. Panic started to set in, but he knew that staying warm was paramount to making it through the night.

Seeking Immediate Shelter:

His heart raced as he scanned the surroundings for refuge. Thankfully, he spotted a cluster of pine trees nearby. With his heart pounding, he hurried over and took shelter beneath their thick, snow-laden branches. It was far from cozy, but it shielded him from the worst of the snowfall and biting winds.

Gathering Firewood:

John’s fingers numb from the cold, he began to gather firewood. Beneath the pine trees, he found relatively dry twigs and branches. It was a small victory amidst the chaos.

Fire-Making Skills:

With trembling hands, he pulled out his waterproof matches and a trusty fire starter. The matches ignited on the first try, and the flames danced to life, casting a warm, flickering glow in the snowy darkness. The relief was palpable.

Insulating His Shelter:

As the fire crackled, John remembered the importance of insulating his shelter. Gathering pine needles and leaves, he created a makeshift floor to insulate himself from the cold ground. It was far from luxurious, but it would make a world of difference.

Stay Hydrated and Nourished:

John’s water bottle was his lifeline. He took small, deliberate sips, knowing he had to make it last. In his backpack, he found a granola bar and a thermos of hot tea. The warmth of the tea was a soothing balm, and the granola bar provided much-needed sustenance.

Keep Moving:

To stave off the bone-chilling cold, he began doing light exercises within his shelter. He stretched, jumped around, and jogged in place, all while keeping a watchful eye on the dwindling fire.

Signal for Help:

As the night wore on, the storm began to relent. John grabbed a whistle from his backpack and blew it periodically, hoping against hope that someone, somewhere, would hear his distress signal. The hours felt like an eternity, but John’s determination to stay warm and alive pushed him onward. By the time dawn broke, the snowstorm had passed, revealing the pristine beauty of the mountains. As he gazed at the tranquil landscape, he knew he had faced a true test of survival.

John’s ability to stay warm, focused, and prepared in the face of an unexpected outdoor emergency was a testament to the resilience of the human spirit. It was a reminder that, even in the most challenging of situations, the will to survive can be an unwavering source of strength.

In Conclusion:

Staying warm in outdoor emergencies is a skill every outdoorsy person should master. With the right knowledge, clothing, gear, and survival mindset, you can face the harshest conditions with confidence. Always be prepared, stay informed, and remember that in the wild, knowledge and preparation are your greatest assets. Stay warm, stay safe, and embrace the thrill of the great outdoors.

Briden Academy

If you’re anything like me, you know that being prepared for any situation is important. One aspect of preparedness that often gets overlooked is portable cooking. Whether you’re an avid camper, a disaster-prep pro, or just looking for ways to cook on the go, this article is here to help.

Briden Academy

Understanding the Need for Portable Cooking

Picture this: You’re out in the wilderness on a camping trip, and it starts pouring rain, soaking all of your wood. Or maybe you’re stuck in a power outage during a winter storm, and your oven is just a fancy metal box. This is where portable cooking becomes your stomach’s best friend.

In my early days of camping I learned the hard way that a box of granola bars can only take you so far. Having a portable cooking solution not only means you can enjoy a hot meal even in adverse conditions, but it’s also a morale booster. There’s something incredibly comforting about a warm meal when everything else seems uncertain.

Types of Portable Heating Solutions

Now, let’s dive in: What are the options for portable heating solutions, you ask?

Camp Stoves and Burners: These are the go-to for many campers. They come in all shapes and sizes, and the fuel options are varied. I remember one particularly camping trip when my trusty propane stove saved the day (due to a fire ban in this case). A cup of hot cocoa never tasted so good!

Solar Ovens and Cookers: These are perfect for the eco-conscious and those seeking a longer-term solution. You might think that solar cooking is too sci-fi, but it’s surprisingly efficient. I can’t say I’ve tried this way yet but I read that someone baked a batch of cookies using nothing but sunshine. It must have felt like a little taste of the future.

Portable Electric Cookers: For those who want the convenience of electric cooking, there are battery-powered or plug-in options. During a power outage or no-power locations, electric can be a little tricky – unless of course you have a generator or battery operated options.

Selecting the Right Portable Cooking Solution

  • Choosing the right heating solution is a bit like picking the perfect outfit for the day. It should fit your needs, style, and budget. Are you a weekend warrior or a hardcore prepper? Consider your situation and what works best for you.
  • I started with a simple camp stove and worked my way up as I gained more experience and needed a bit more firepower (pun intended). Remember, your cooking solution is an investment in your comfort and well-being during emergencies and adventures alike.

Let me tell you about a few of the products that Briden Solutions can offer you in regard to Camp Stoves & Burners. If you click the below links, you can read a great description of each, and how they work:

  1. Basic: Metal Folding Stove
  2. Camp Heat for folding stove
  3. Kelly Kettle Hobo Stove 
  4. Kelly Kettle Base Camp
  5. Jetboil Minimo Stove 
  6. Jetboil – fuel – varying sizes
  7. www.bridensolutions.ca/tools-and-gear/heat-and-fire Also feel free to click on this link in order to see our entire collection of heating products.

Essential Cooking Accessories

Cooking on the go isn’t just about the stove itself; it’s also about having the right tools for the job. It’s the little things that count:

Take some time to decide what you require at your side when it comes to your cooking plan. I have fond memories of my mom’s multiple bins of kitchen gear, organized just so for our family camping trips. She wanted to have everything to make her family cooking efficient and easy for her!

Cooking Tip: Planning is your best friend here. Prepping meals in advance and storing them in vacuum-sealed bags or check out these pre-made meals: Peak, Mountain House, Nutristore or  Backpackers Pantry  It not only saves time but also precious fuel or energy.

Briden Academy

Maintenance and Care of Portable Cooking Equipment

Let us discuss looking after your gear. By following these instructions, you can ensure that your equipment remains in excellent condition, ready to serve you when you need it most.

1. Inspection and Cleaning:
  • Make it a habit to inspect your cooking equipment before and after each use.
  • After each use, clean your cooking gear meticulously. Use warm, soapy water and a non-abrasive sponge or cloth to remove all traces of food, grease, and residue.
  • Allow your gear to air dry completely before storing it. This helps prevent the growth of mold and mildew.
  • For metal equipment, apply a thin coat of food-grade oil to prevent rust formation. Ensure it’s completely dry before storing.
2. Proper Storage:
  • Always store your gear when it’s clean and dry. Moisture can lead to rust and corrosion, which can compromise the equipment’s functionality.
  • Store each piece of your cooking equipment separately, or use dividers to prevent them from scratching or damaging each other.
  • Avoid storing your gear in extreme temperatures, whether it’s excessively hot or freezing cold. Temperature fluctuations can affect some materials.
3. Equipment-Specific Tips:
  • For camping stoves, clean the burner and fuel lines as instructed in manual to ensure efficient and safe operation. Check for clogs, tight connections, and leaks.
  • Non-stick cookware requires special attention. Avoid using metal utensils that can scratch the coating, and always follow the manufacturer’s recommendations for cleaning and maintenance.
  • Keep your utensils and cutlery in good condition by washing them promptly after use and avoiding exposure to moisture.
4. Periodic Maintenance:
  • Over time, parts of your cooking equipment may wear out or become damaged. Keep an eye on items like gaskets, seals, and O-rings, and replace them as needed to maintain safety and functionality.
  • Some equipment, like camping stoves with moving parts, may benefit from occasional lubrication. Consult the user manual for guidance.

By following these detailed instructions you can extend its lifespan and ensure that it remains dependable during your camping trips or in emergency situations. Remember that proper maintenance not only preserves your gear but also contributes to your overall safety and enjoyment in the great outdoors.

So, there you have it—your crash course in portable cooking solutions. Whether you’re a camping enthusiast, a prepper, or just someone who likes to be prepared for whatever life throws your way, having the right heating gear can be a game-changer. Remember, it’s not just about surviving; it’s about thriving, one hot meal at a time. Stay safe, stay prepared, and stay well-fed on your adventures and in emergencies. Happy cooking!