hiking

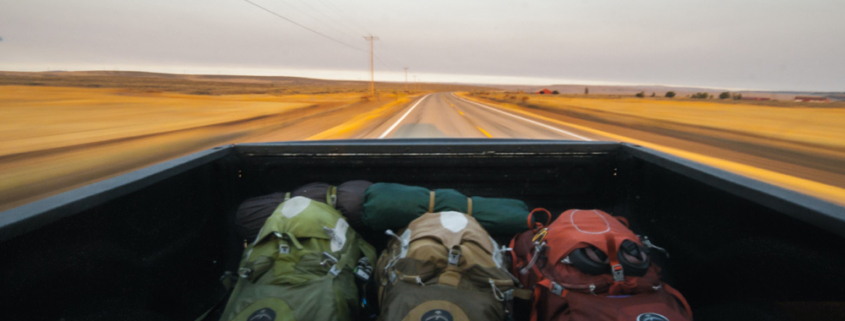
When it comes to embarking on a backpacking adventure it takes careful consideration of the food you want to pack. The right choices can make the difference between an energized, enjoyable journey and one filled with fatigue and hunger pangs. To ensure a successful backpacking trip, select foods that are lightweight, compact, non-perishable, and packed with the nutrients your body needs for sustained physical activity, plus choose items that taste good to you! Today we’ll explore the top recommended foods for your next outdoor excursion.

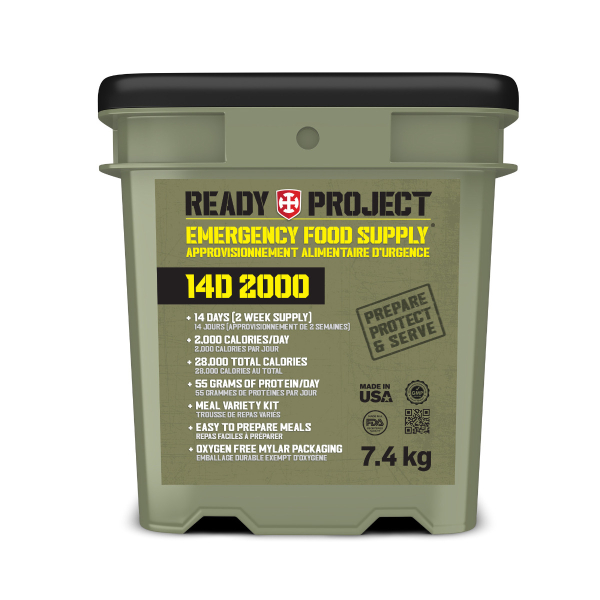
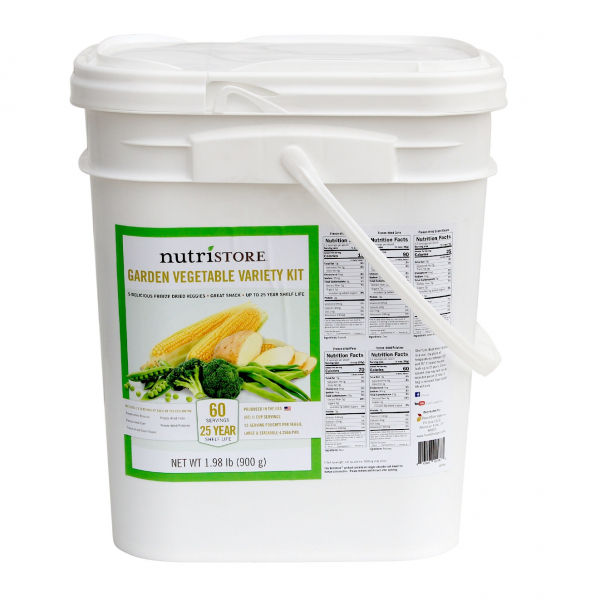
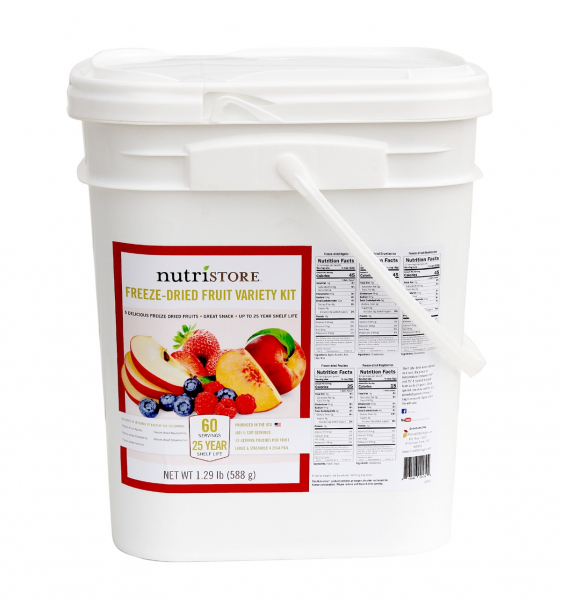
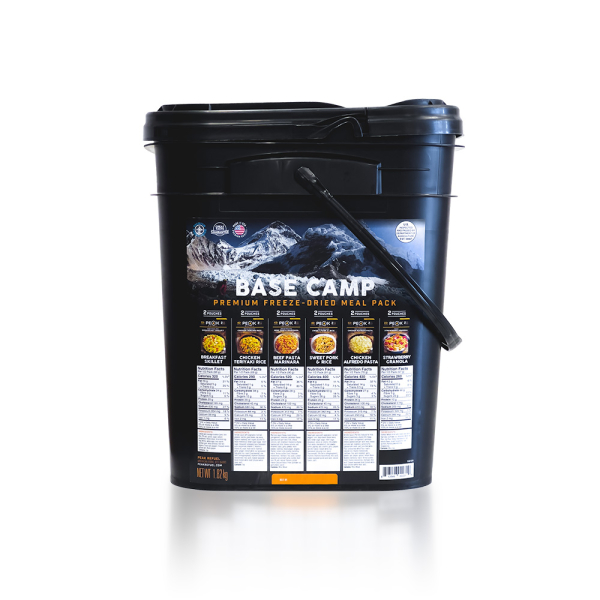
1. Dehydrated or Freeze-Dried Meals

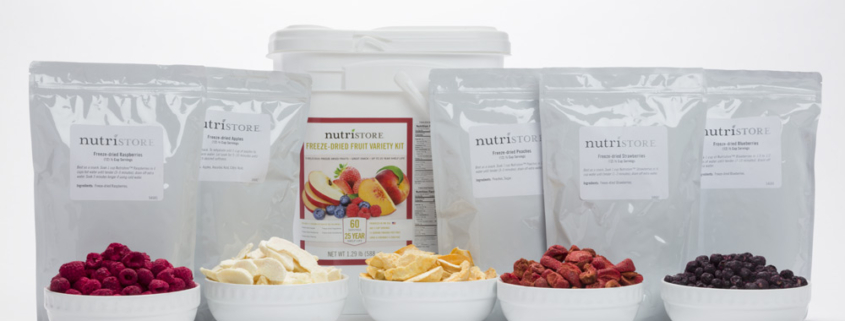
Dehydrated or freeze-dried meals are a backpacker’s best friend. They are lightweight, have a long shelf life, and come in a variety of flavors. The beauty of these meals is that all you need is boiling water to rehydrate them, making them a quick and convenient option for breakfast, lunch, and dinner on the trail. The following are some great brands to consider:

Mountain House

Alpine Aire

Backpackers Pantry

Peak Refuel

Alpen Fuel

2. Trail Mix

Trail mix is a classic choice for snacking on the go. This blend of nuts, seeds, dried fruits, and sometimes a touch of chocolate provides a quick energy boost. It’s a high source of healthy fats, protein, and carbohydrates, making it ideal for refueling during your hike. You can hit up your local Bulk Barn or grocery store create your own, or try some pre-made blends!

Here is a super simple list of ingredients to mix and voila, trailmix!

  • 1 cup of unsalted (or salted if you prefer) nuts (e.g., almonds, cashews, or peanuts)
  • 1 cup of dried fruits (e.g., raisins, cranberries, or apricots)
  • 1 cup of whole-grain cereal (e.g., Cheerios, pretzels or Shreddies)
  • 1/2 cup of chocolate chips, M&M’s or treat of preference (optional for a touch of sweetness)
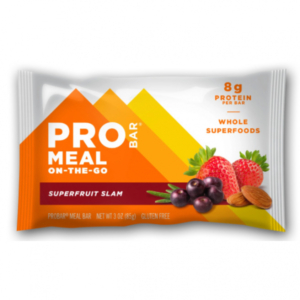
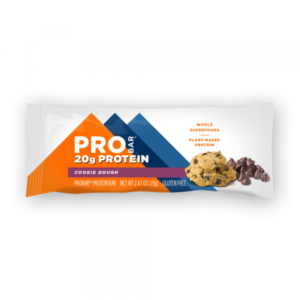
3. Energy Bars

Energy bars come in a compact form and are densely packed with nutrients. Look for options that offer a balanced mix of carbohydrates, protein, and fats to keep your energy levels steady throughout the day. Pro Bars & Thrive are some great brands! Or Clif Bars, granola bars, Good to Go bars – there are many many choices!

4. Instant Oatmeal

For a warm and filling breakfast option, pack individual packets of instant oatmeal. Just add hot water, and you have a nutritious and easy-to-prepare meal to kickstart your day. Oatmeal is also a compact and light item for your pack.

5. Nut Butter

Single-serve packets of peanut butter or almond butter are a calorie-dense and protein-rich snack. They provide a quick energy boost and are a satisfying addition to crackers or tortillas. Check out these delicious Trail Butter options!

6. Jerky

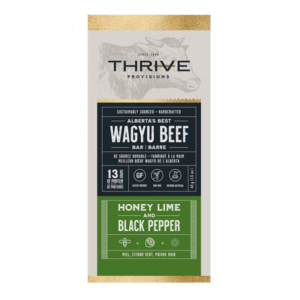
Beef, turkey, or other types of jerky are lightweight and require no refrigeration. Jerky is a concentrated source of protein, which is essential for muscle repair and sustained energy during physical activities like hiking. Protein helps keep you feeling full. Plus, it offers many flavors, and it is easy to share! Also check out these cool beef protein bars by Thrive for another tasty option.

7. Cheeses

Note from my home: My husband said I must add cheese to the list. He was introduced to Enercheez this year, and he absolutely loves it! Definitely a very tasty, light, nutritious option to add to your pack.

8. Instant Soup or Broth

In cold weather or when you crave a comforting meal, consider packing instant soup or broth packets. These provide warmth and hydration, making them an excellent choice for chilly evenings in the wilderness.

Conclusion:

The BIG question is now, why are these top food choices?? Simply put, they are:

  • Nutrient/Calorie dense
  • Lightweight and portable
  • Easy and convenient (requires minimal preparation)
  • Offers alot of variety
  • TASTES excellent

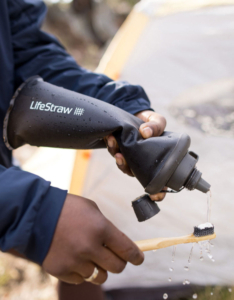
In addition to these food choices, don’t forget to pack essential cooking equipment, such as a compact stove, cookware, utensils, and water purification methods to ensure you can prepare your meals and stay hydrated while backpacking. Always be mindful of any dietary restrictions or food allergies, and select foods that align with your nutritional needs and personal preferences. With a well-thought-out food plan, you’ll be well-prepared for a successful and enjoyable backpacking adventure. Happy hiking!

hiking

road falling apart after a natural disaster

After a disaster strikes, the aftermath can be a time of chaos and confusion. To help you navigate the challenges that follow, here are seven questions to consider.

  1. Are You and Your Loved Ones Safe?

    The first and most critical concern is the safety of yourself and your family. Ensure that everyone is safe and accounted for. This may involve communication via phone or internet, designated meeting points, or emergency shelter check ins.

  2. Have You Checked Your Supplies?

    Assess your supplies. This includes food, water, and necessary medical items. Natural disasters can disrupt supply chains, making it important to have enough provisions to sustain your household for at least 72 hours. Though the initial emergency may be over, you may need to stay home for an extra day or two per the authorities suggestion.

  3. Is Your Home Safe to Reenter?

    Before returning to your home or building, conduct a thorough inspection to assess its safety. Depending on the natural disaster, look for visible structural damage, cracks, or any signs of instability. If there are concerns, do not enter, and instead, contact professionals for a comprehensive assessment. Safety is super important, and so is the legal protocol.

  4. Are Important Documents Secure?

    Confirm the condition and accessibility of your documents. These may include identification, insurance policies, medical records, and financial information. Store digital copies in a secure, cloud-based location and protect physical copies in waterproof containers or at a secondary safe location to prevent loss or damage.

  5. Have You Sought Assistance?

    If you require assistance, do not hesitate to seek help from local authorities, relief organizations, or neighbors. After a disaster, communities often come together to support one another. Assistance may include food, water, shelter, or medical aid, and it’s essential to reach out when needed.

  6. How Are You Coping Emotionally?

    Acknowledge that the aftermath of a disaster can be emotionally challenging. Witnessing destruction, experiencing loss, or displacement can be traumatic. Pay attention to your mental and emotional well-being and seek support from mental health professionals, support groups, or friends and family when necessary. Mental health is a vital aspect of recovery.

  7. What Are Your Next Steps?

    Consider both short-term and long-term plans. In the short term, if applicable, contact your insurance provider to start the claims process and document damage for reference. Engage in immediate recovery efforts, such as cleaning up debris and securing your property. For the long term, plan for rebuilding, strengthening your property against future disasters, and preparing for potential emergencies.

Conclusion

In the aftermath of a disaster, these seven essential questions can provide you guidance as you work towards a safe and secure recovery. Remember that while the challenges may be great, careful planning and seeking support can help you rebuild and move forward with resilience.


Briden Solutions has got your back! Do not hesitate to call our team if you have questions – 1-888-817-5550

Briden Solutions - Canada's Emergency and Outdoor Food Headquarters

flashlight at night looking at the stars along the river

Flashlights: A Fundamental Tool

A reliable flashlight is a cornerstone of any emergency kit. Here’s how to make the most of this light source:

SOS Signal:

The international distress signal, SOS, can be transmitted using a flashlight. Simply shine the light in a pattern of three short flashes, followed by three long flashes, and then three short flashes again. This universally recognized signal indicates that you are in need of assistance.

Remember that the SOS signal (· · · — — — · · ·) is an essential code to know for emergencies.

Color Filters:

Some flashlights come with color filters. Red light, for example, helps maintain night vision when reading maps or charts, while green light are for signaling without alerting potential threats. Here’s how to use them effectively:

  • Red Filters: Red light is ideal for low-light situations as it preserves your night vision, making it easier to read maps, charts, and documents in the dark. Here’s how you can maximize the utility of red filters:
    • Night Vision: When in a dark environment, especially with a group, the sudden burst of white light from a regular flashlight can temporarily blind everyone, including yourself. A red filter on your flashlight maintains your night vision while still providing adequate illumination.
    • Subtle Signaling: Red light can be used for subtle signaling among a group without alerting potential threats. It’s less likely to be seen from a distance compared to white light, making it a valuable tool for maintaining covert operations during an emergency


  • Green Filters: Green filters are less common but can be handy in certain situations. Here’s how they can be beneficial:
    • Enhanced Visibility: Green light is easy for the human eye to distinguish, and it’s often used in emergency situations to improve visibility. Green filters can increase the range of your signaling or provide a more noticeable light source.
    • Wilderness Signaling: In a wilderness setting, where the surroundings are predominantly green, using a green light can make your signals stand out against the natural backdrop.

When adding color filters to your flashlight,  ensure they are of high quality and specifically designed for your flashlight model. Poorly fitted or low-quality filters reduce the intensity of your light and potentially compromise their effectiveness. Practice using the filters to familiarize yourself with the different lighting conditions and their applications.

Signal Mirrors: Reflecting Hope

Signal mirrors are designed for long-distance signaling and are particularly effective in sunny conditions. To use a signal mirror:

  • Aim the Mirror: Position the mirror so that it reflects sunlight onto your target. This can be an aircraft, boat, or rescue team.
  • Flash the Target: Tilt the mirror to aim the reflected sunlight at your target. The flashing light will catch their attention.

Glow Sticks: Low-Light Signaling

Glow sticks are a portable, low-light source that can be seen from a distance. To signal for help using a glow stick, activate it and wave it in a conspicuous manner during low-light conditions. It also serves as a low light source if you are stuck in the darkness.

Smartphone Flashlight: Modern Signaling

Most smartphones have built-in flashlights. Use your phone’s flashlight to signal for help by repeatedly turning it on and off in a pattern, such as the SOS signal or other recognizable sequences. Be cautious of your battery levels, unless you have backup power banks. Use your battery life wisely!

Strobe Lights: Attention-Grabbing Flashes

Strobe lights are designed for high-visibility signaling. They emit bright, rapid flashes of light. These are particularly effective for attracting attention in low-visibility situations. You might be thinking, “how and why on earth would I carry a strobe light while out in the great outdoors?” The why is for emergencies, but the how is simpler than you might think! Many flashlights have this feature already included, and as it turns out, it was not created solely to annoy parents! Headlights often have this strobe option as well.

In times of crisis, your ability to signal and communicate with light can make all the difference. Whether stranded in the wilderness or facing an emergency, knowing how to use light as a beacon of hope can connect you with help, your loved ones, or a rescue team. Remember to include a variety of light sources and signaling tools in your emergency kit to be fully prepared for any situation.

Delicious freeze dried fruits

Food Buckets

Food buckets refer to pre-packaged emergency food supplies that come in a bucket or container. These buckets contain a variety of non-perishable food items designed to provide sustenance during emergencies, natural disasters, or other situations where access to fresh food may be limited.

Here are some key points about food buckets:

  1. Long Shelf Life: The contents of food buckets are selected for their long shelf life. They include freeze-dried foods, which can last for years if stored properly.
  2. Variety of Contents: Food buckets contain a variety of items such as pre-made meals, fruits and vegetables sometimes even desserts or snacks. They are designed to provide a balanced diet or healthy food, though the specific contents can vary depending on the manufacturer and the intended use.
  3. Convenience: Food buckets are convenient because they come in a compact and portable container, such as a plastic bucket with a handle. This makes them easy to store and transport.
  4. Emergency Preparedness: Many people purchase food buckets as part of their emergency preparedness plans. They are useful in situations where access to fresh food is disrupted, such as during natural disasters, power outages, or other emergencies.
  5. Usage: Food buckets are not only for emergencies. Some people also use them for camping, hiking, or other outdoor activities.
  6. Considerations: When purchasing food buckets, it’s important to consider dietary restrictions, preferences, and any special needs of the individuals who may be consuming the food. Regularly check and rotate the contents to ensure that the food remains fresh and safe to eat.

We will explore four food buckets that we offer:

  • the Ready Project 14-Day Bucket,
  • the Nutristore Vegetable Bucket,
  • the Nutristore Fruit Bucket,
  • and the Peak Basecamp Bucket.

Ready Project 14-Day Bucket


  • Brown Sugar Oatmeal
  • Multigrain Cereal
  • Spanish Rice
  • Cheddar Cheese Grits with Green Chilies
  • Savory Beans & Rice
  • Buttery Herb Pasta
  • Creamy Rice Pudding
  • Hobo Stew
  • Cheddar & Broccoli Rice
  • Hearty Potato Stew
  • Breakfast Drink Mix
  • Meal Extender Long Grain Rice
  • Meal Extender Beans


The Ready Project 14-Day Bucket is an all-in-one solution designed to provide 1 person 2000 calories daily for two weeks. This food bucket contains a variety of dehydrated meals and snacks, carefully selected to ensure nutritional balance.


Nutristore Freeze-Dried Garden Vegetable Bucket


60 1/2 cup servings of the following freeze-dried vegetables. That’s 12 servings of each:

Broccoli

Corn

Peas

Green Beans

Potatoes

For those who prioritize their daily dose of vegetables even during an emergency, the Nutristore Vegetable Bucket is an excellent choice.

Pro-tip: My children love to eat these vegetables straight out of the package! In fact, my toddlers thought these were “chips” for the first few years of their lives.

  • Long-term storage: Up to 25 years
  • Short-term storage: Each individual veggie comes packaged in re-sealable mylar pouches inside the bucket. Once opened, the pouches have a shelf life (if stored properly) up to 18 months.


Nutristore Freeze-Dried Fruit Bucket


Fruits are an important source of vitamins and natural sugars that boost your energy levels and mood during an emergency. In this bucket there is 60 1/2 cup servings of:

Apples

Raspberries

Blueberries

Strawberries

Peaches


  • Nutrient-rich options: These fruits offer a wide range of essential vitamins, fiber, and antioxidants, promoting overall health.
  • Snack-ready: The freeze-dried fruits are perfect for snacking, baking, or adding to your cereal, providing a sweet and nutritious treat.
  • Long-lasting freshness: Just like the vegetable bucket, the Nutristore Fruit Bucket can maintain its quality for up to 25 years when stored properly.
  • Short-term: Inside the bucket, the fruits each come in a resealable mylar pouch. Once opened they have a (properly stored) shelf life up to 18 months


Peak Refuel Freeze Dried Basecamp Bucket

The Peak Basecamp Bucket is designed with adventurers and outdoor enthusiasts in mind, making it an excellent choice for both emergency preparedness and camping trips. This food bucket offers a variety of meals that are lightweight and easy to prepare, making it ideal for those on the move. Key highlights include:

  • Lightweight and portable: The meals come in lightweight, compact packaging.
  • Quick preparation: With simple rehydration instructions, you can have a hot meal in minutes.
  • Extended shelf life: The meals in the Peak Basecamp Bucket have a sealed shelf life of up to 5 years.

2 Of The Following In the Bucket:

Beef Pasta Marinara

Chicken Alfredo Pasta

Chicken Teriyaki Rice

Sweet Pork & Rice

Breakfast Skillet

Strawberry Granola


Conclusion:

Food buckets are a smart choice for anyone looking to be prepared for emergencies, ensuring that you have a reliable source of sustenance when traditional food sources are scarce whether due to an emergency, or by choice (like cabin life). Have a great day!

Canadian Celiac Association GF

Emergencies can happen at any time, and being prepared is essential for everyone. However, individuals with specific dietary restrictions face unique challenges when it comes to emergency preparedness. In this article, we will explore what celiac disease is and provide valuable insights on how to be prepared for emergencies when you require gluten-free food.

Understanding Celiac Disease

Celiac disease is an autoimmune disorder that affects the small intestine. When individuals with celiac disease consume gluten (a protein found in wheat, barley, and rye) their immune system responds by damaging the lining of the small intestine. This causes the body to stop being able to absorb the essential nutrients our bodies require. This also leads to a range of digestive and systemic symptoms, including diarrhea, abdominal pain, fatigue, and skin rashes. The only effective treatment for celiac disease is a strict gluten-free diet. Even a tiny amount of gluten can trigger a reaction, making dietary vigilance necessary.

Gluten-free also refers to a dietary choice in which individuals voluntarily avoid foods containing gluten, often to address sensitivities, lifestyle preferences, or diets. Celiac disease necessitates a strict, lifelong gluten-free diet, while voluntarily gluten-free eating is typically made by those without a medical condition. Note: there is also a wheat allergy, which also differs from celiac & gluten-free preference.

  • For the sake of the article, I am writing it from the perspective of a celiac. As a mother of a child with celiac disease, I can attest to the severity of cross contamination and safety of ingredients, and have a soft spot in my heart for anyone living with this difficult disease. This article can be adjusted to fit the needs of someone choosing a gluten-free lifestyle as well!

Emergency Preparedness for a Celiac

Always Have an Emergency Supply

For individuals with celiac disease, maintaining a gluten-free diet is non-negotiable. That’s why it’s vital to have an emergency supply of gluten-free food and necessary supplies. This includes non-perishable gluten-free items such as canned fruits and vegetables, gluten-free crackers, pasta & sauce, rice, beans, or gluten-free granola bars. This link takes you to our site and you can see all of the gluten free food items we carry!

superfruit slam pro bar meal on the go


Pro-Tip: My son has taken premade meals as backup food for youth camps or even going to grandma and grandpa’s house. It provides him a food option, and it’s a safe food alternative for day-to-day use where there might not otherwise be. He has not yet travelled away on a plane, but these pre-made meals would be excellent choices to pack on vacation.

Customize Your Emergency Kit

When assembling an emergency kit, it’s important to customize to your specific needs. In addition to the standard emergency items like water, flashlight, first-aid supplies, and important documents, consider adding gluten-free items. If you rely on gluten-free snacks or meal replacements, make sure to include those in your kit. Remember to replace and update your kit regularly to ensure food safety.

Communication is Key

Inform your close friends, family, and neighbors about your dietary restrictions, so they can assist or provide support if needed. Share your medical condition and emergency plan with trusted individuals who can help advocate for your dietary needs during evacuation or sheltering.

Plan for Safe Food Storage

In the event of an emergency, you may find yourself without electricity or refrigeration. Plan for food storage accordingly. Gluten-free goodies, nut butters, and freeze-dried fruits are good options that do not require refrigeration.

Learn to Read Labels

Familiarize yourself with reading food labels to identify gluten-containing ingredients. In a crisis, you may have limited options and need to quickly assess what is safe to eat. Knowledge of label-reading is a necessary skill for anyone with celiac disease.

3 steps to reading a label

PDF: Learn-to-Read-a-Label-for-Gluten-in-3-Easy-Steps

Safe Cookware

Celiac’s must have cookware and dishes available that are not cross-contaminated and allows for safe consumption of their food. Be sure you add to these things to an emergency kit and plan to have the necessary supplies.

What is Cross-Contamination?

Cross contamination refers to the unintentional transfer of gluten from a gluten-containing food or surface to a gluten-free food. Even tiny amounts of gluten can trigger a reaction and cause harm.

Cross contamination can occur in various ways:
  • Shared Cooking Surfaces: If gluten-free foods are prepared or cooked on surfaces or with utensils that have been in contact with gluten-containing ingredients, there’s a risk of cross contamination.
      • For example, using a toaster that has had regular bread in it for gluten-free bread can lead to cross contamination.
  • Mixing Utensils: If utensils like knives, cutting boards, or stirring spoons are used interchangeably between gluten-containing and gluten-free foods, gluten particles can be transferred.
  • Fryers: Shared fryers in restaurants or at home can be a significant source of cross contamination. If gluten-free items are fried in the same oil as breaded items, the oil becomes contaminated.
  • Bulk Food Bins: Scooping gluten-free grains or flours from bulk bins that have previously held gluten-containing products introduces gluten into the gluten-free food.
  • Condiments and Spreads: Shared condiment jars, butter containers, or peanut butter jars become contaminated if used with regular bread or crackers.
  • Double-Dipping: If someone dips a regular piece of bread into a gluten-free dip, it contaminates the entire container.
To avoid cross contamination and protect those with celiac disease, it’s important to:
  • Use separate cooking utensils, cutting boards, and cookware for gluten-free and gluten-containing items.
  • Clean and sanitize surfaces thoroughly before preparing gluten-free foods.
  • Clearly label gluten-free items and keep them separate in the pantry and refrigerator.
  • Educate family members, friends, and foodservice staff about the importance of preventing cross contamination.
  • Choose certified gluten-free products whenever possible.
  • Be cautious when dining out and communicate your dietary needs to restaurant staff.

Emergencies can be unsettling for anyone, but for individuals with celiac disease, the situation can be even more challenging due to dietary restrictions. However, with careful planning, communication, and resource awareness, you can ensure that you are prepared for any unexpected event. By maintaining an emergency supply of gluten-free food, customizing your kit, and building a support network, you can confidently navigate emergency situations and continue to manage your celiac disease safely. Always remember that knowledge is your best asset when it comes to emergency preparedness, and being informed can make a world of difference when you have specific dietary needs like those associated with celiac disease.

cleaning supplies

When disaster strikes, maintaining proper hygiene is important for your health and well-being. Ensuring proper hygiene is directly linked to the health and safety of individuals and communities. Neglecting sanitation can lead to the spread of diseases and infections, which can be particularly dangerous during already challenging times. In this article, we’ll explore comprehensive sanitation tips and tricks that can help you, your family, and your community stay clean and healthy during times of crisis.

Hand Hygiene and Sanitization

  • Hand Sanitizers: Stock up on alcohol-based hand sanitizers and portable handwashing stations. Encourage regular handwashing, especially before meals and after using the restroom.
  • Wet Wipes: Wet wipes are versatile and can be used for hand and face cleaning when water is scarce.
  • Soap and Water: If water is available, regular handwashing with soap is still the most effective way to prevent the spread of illnesses. Teach your family the importance of thorough handwashing.

DID YOU KNOW? When it comes to handwashing and general hygiene, the temperature of the water you use is less important than the duration and thoroughness of the washing. Both warm and cold water can effectively remove dirt, bacteria, and viruses from your hands, as long as you follow the proper handwashing technique.

The key factors to consider are:

  1. using soap to wash your hands for sanitationDuration: The recommended handwashing duration is at least 20 seconds. This is crucial for ensuring that you thoroughly clean all parts of your hands. Remember: tops and bottoms and in between!
  2. Soap: Soap is essential for breaking down and removing germs and contaminants from your hands. Ensure you use soap and lather well during handwashing.
  3. Friction: Rubbing your hands together vigorously and ensuring you cover all areas, including the backs of your hands, between your fingers, and under your nails, is essential.
  4. Rinse: Rinse your hands thoroughly to remove soap and contaminants.
  5. Drying: Dry your hands with a clean towel or air dryer to prevent the spread of germs.

In many cases, warm water may be more comfortable for handwashing, especially during cold weather, but it’s not necessary for effective hand hygiene.

Water Purification and Safe Storage

  • Water Filters: Invest in water purification filters or purifying tablets. These tools can help ensure your water supply remains safe to drink and wash with.
  • Water Storage: Store an ample supply of water in food-grade containers to ensure you have clean water available.

Toilet Alternatives

  • Portable Toilets: Portable camping toilets can be incredibly convenient when regular plumbing is unavailable. Make sure to stock up on sanitation supplies for these toilets. Consider the Luggable Loo!
  • Biodegradable Toilet Paper: Ensure you have a supply of biodegradable toilet paper in your emergency kit. Lets save the environment wherever we can!
  • Plastic Bags: Use plastic bags for waste disposal in portable toilets, and securely tie them for disposal.

Most importantly – Wash Your Hands after!

Personal Hygiene Essentials

  • Wet Wipes: Wet wipes are not only useful for hand and face cleaning but can also be used for general body cleaning when water is scarce.
  • Dry Shampoo: Dry shampoo can help maintain hair hygiene when traditional washing isn’t possible.
  • Washcloths: Warm water and a washcloth may just feel like heaven if showering isn’t an optionpreparing vegetables for a healthy meal

Special Considerations for Vulnerable Populations

  • Elderly Family Members
  • Young Children
  • Pregnant Women
  • Mental Health Need

All of these groups of people have various needs, be mindful of those needs, and use your best hygiene practices!

Hygiene Education

Learn about the importance of proper hygiene and sanitation practices. Create an emergency plan that includes sanitation guidelines, and make sure everyone is familiar with it. Here are some reasons WHY it’s important to be sanitary and hygienic:

    • Disease Prevention: Good hygiene practices, such as handwashing and cleanliness, are the first line of defense against infectious diseases. Regular handwashing can prevent the spread of illnesses like colds, flu, and foodborne diseases.
    • Reduced Health Risks: Practicing good hygiene reduces the risk of infections and illnesses. It can also minimize the severity of an illness if it does occur, leading to quicker recovery.
    • Personal Well-Being: Good hygiene contributes to an individual’s overall physical and mental well-being. Feeling clean and fresh can boost self-esteem and mental health.
    • Public Health: By practicing good hygiene, your family not only protects themselves but also the community. During public health crises, like pandemics, your family’s hygiene practices can help prevent the spread of diseases to vulnerable populations.
    • Life Skills: Teaching hygiene is about imparting life skills. These skills are not only essential during a crisis but in everyday life. Proper hygiene habits are valuable and applicable in any situation.
    •  Practicing good hygiene shows respect for others. It demonstrates that your family cares about the health and well-being of those around them.

Periodic Maintenance

  • Regular Inventory Check: Periodically check and update your emergency sanitation supplies. Ensure that items like hand sanitizers and wet wipes haven’t expired or are dried out and that your water purification tools are in good working condition.

Proper sanitation during a crisis is not just about cleanliness; it’s about safeguarding your health and the health of your loved ones. By being well-prepared and knowledgeable about sanitation practices, you can minimize health risks and maintain a sense of normalcy during challenging times.

cooking a meal together

Family Food Prep: Let’s Get Ready Together!

Hey there, awesome kids! Today, we’re going to chat about something pretty cool – family food preparedness. It’s all about making sure we have plenty of delicious food and snacks ready, just in case something unexpected happens, like a big storm, a flood or a power outage.

Why We Involve Kids: They Can Learn and Help

So, why should you, as a kid, be part of this? Well, it’s because we can learn lots of exciting stuff together, and we can help our family be safe and prepared. When we work as a team, we can handle anything that comes our way. And guess what? It can be tons of fun! Sometimes adults can get pretty stressed out if things are going sideways, so as kids you can help by knowing what to do too.

Family Adventure Time: Discover the Importance

Think of our food preparedness as a big family adventure. We can sit down and talk about why it’s important to be ready for surprises. I’ll even share some stories from when I was your age and how my family handled unexpected situations. For example, I remember when I was a kid, we had a big storm and the power went out, so we played games (like hide and go seek with flashlights) and shared snacks from our emergency stash. It made the scary storm not so scary after all!

Educational Shopping: Choose the Right Foods for Your Kit

Have you ever been grocery shopping with your family? When we buy food for our emergency stash, we look for foods that can stay good for a long time, like dried fruits or Clif Bars. You can even help choose the stuff you like, as long as it follows our emergency rules. Did I just say rules? I promise they’re not so bad, check them out:

  • Most important – make sure you like them!
  • Make sure they can last in your emergency stash without going bad for a long time (this is called “shelf life”)
  • Try to pick some healthy choices, but some treats are okay too
  • Pick things that don’t need to be cooked or baked – just in case you don’t have a stove
  • Lastly, pick things that can be kept in a special tote bag or bucket, just in case you have to leave your house with it

Cooking Adventures: Become a Mini Chef

Who likes to cook? I do, and I bet you’d love it too! So above I said one of the rules was not to pick foods for your kit that require cooking or baking. However sometimes we are stuck at home (with power) and need to stay at home and not go to the store for a few days.

As a family, learn how to make special meals with your food. Maybe you’ll become a mini chef? A family activity you could do is create a recipe book of emergency recipes so that you have the right ingredients in your pantry to make your favorite meals, even if you can’t leave your house!

Let’s Pretend: Use Your Imagination

How about a little pretend game? Imagine there’s an emergency, and it’s up to us to figure out what to do. It’s like being in an exciting story! You can come up with creative ideas and learn how to solve problems. Let me tell you how to do this:

Roleplay: “The Great Power Outage Adventure”

Once upon an evening, in my cozy home, something extraordinary was about to happen. The sun had set, and it was getting darker by the minute. The lights were out, and I found my family in the middle of a fantastic adventure called “The Great Power Outage Adventure.”

Step 1: The Announcement (let everyone know what’s going on!)

As the sun dipped below the horizon, I gathered my family together and made an exciting announcement. “Guess what, everyone? We’re going on a special adventure tonight. It’s called ‘The Great Power Outage Adventure!’ The power is out , and it’s time for us to put our emergency skills to the test.” (We turned off all the lights because remember, we are just pretending)

My kids’ eyes sparkled with curiosity as I explained that this adventure was all about being ready for surprises and having fun along the way.

Step 2: Emergency Meeting (have a plan!)

Now, it was time for the first important lesson. “In real emergencies,” I said, “we always need a safe place to meet up. So, we’re going to have a special family meeting spot. Our indoors meeting spot is the living room, and our outdoor meeting place is by the shed. Let’s remember that in case of any emergency.” So my family all made our way to the living room.

Step 3: Flashlight Scavenger Hunt (have enough for everyone!)

With a flashlight or battery-operated lantern in hand, kept in a place everyone knows, we set off on an exciting flashlight scavenger hunt. The mission was to find items we’d need during a power outage. They brought me a first-aid kit, snacks, and warm blankets. (What else do you think you’d need to find? Make a list!)

Step 4: Storytime (this helps us stay calm!)

After the hunt, we all gathered in the living room, flashlights shining, and blankets cozily wrapped around us. It was time for stories. Everyone took turns sharing our favorite tales. Some stories were about brave explorers, and others were filled with magical creatures. All the stories seemed to have a common theme – being prepared for adventures and surprises.

Step 5: Mock Snack Time

As the pretend evening went on, it was snack time. My kids eagerly reached for snacks from the emergency food stash. We discussed the importance of having easy-to-prepare and non-perishable snacks during power outages or emergencies. My favorite snack was a fruit snack, and my son’s was the granola bars.

Step 6: Emergency Plan Quiz

Time for a quiz! My kids tested their knowledge with fun questions. “What should you do if you’re in the dark and need to find a flashlight?” and “Where is our family meeting spot?” They answered with enthusiasm, feeling confident about their preparedness skills.

Step 9: The Grand Finale

And then, just as the adventure had started, I announced, “The power’s back on!” Everyone cheered, and the lights came back to life. It was time to celebrate. We put on some music, and had a celebratory dance party. The adventure had come to a happy and successful end.

Check and Update: Keep Your Supplies Fresh

Every now and then, check up on your emergency food. Sometimes food expires – which means we shouldn’t eat it. Ask your family where the date is on the packaging. You can help us make sure everything is fresh and up-to-date. It’s like taking care of your toys and making sure they’re in good shape.

When you’re part of your family’s food preparedness team, it’s not just about getting ready for surprises; it’s also about being a strong, smart, and super responsible helper in your family. So, let’s get ready together, have fun, and make some awesome memories!


Today my friends is my birthday! Here in Canada Thanksgiving is a floating date, but the year I was born, I was born on Thanksgiving Monday. By default October has become my most favorite month, wrapped up with Halloween!

As a lover of all things birthday, I thought I would share a few ways that emergency preparedness can be a part of your own big day.

Emergency Preparedness as a Gift:

You can use a birthday as an opportunity to give the gift of preparedness. Consider gifting emergency supplies or survival gear to a friend or family member. It’s a unique and thoughtful way to show you care about their safety and well-being, or to get them that one thing they may never buy for themselves.

My own wish-list consists of the following items:

Emergency Preparedness-Themed Party:

If you’re passionate about preparedness or survival, you might choose to incorporate this theme into your birthday party. You can have activities centered around emergency preparedness, sharing valuable information and skills with your guests while having fun doing it!

Here are some suggestions for activities:

    • Emergency Kit Building Contest: Divide your guests into teams and challenge them to assemble emergency kits with provided supplies. You can set criteria and time limits, and the team with the best kit, judged based on completeness and creativity, wins a prize. Then consider donating these kits to a local shelter.
    • Emergency Skills: Fire starting, knot-tying, or creating a charades style game.
    • Disaster Simulation Game: Set up a disaster simulation game, such as a mock evacuation or a scavenger hunt for emergency supplies. Create scenarios that encourage participants to think on their feet and make quick decisions.
    • Communication Exercise: Show your guests how to use two-way radios or other communication devices commonly used in emergencies. Have a friendly competition or game involving communication tasks – hide and seek 2.0?
    • Fire Extinguisher Training: If you have access to a fire extinguisher, provide a brief training session on how to use it safely and effectively. This knowledge can be invaluable in emergencies. There’s nothing more exciting at a party then making a really big mess. I suggest doing this outdoors!
    • Outdoor Survival Challenges: If your party takes place outdoors, organize survival challenges like building shelters, purifying water, or identifying edible plants.
    • Mock First Aid Scenario: Create a scenario where someone “injured” or “sick” needs first aid. Have guests take turns applying basic first aid techniques (bandages and tourniquets – toilet paper works too)
    • Lastly, I highly recommend sitting around a campfire (maybe after seeing who has the best fire-starting skills?) Campfires in my opinion make everything so much better. Special bonus if you have smores.

Birthday during an Emergency: On a more somber note, if someone’s birthday happens to fall during an emergency or natural disaster, it can serve as a stark reminder of the importance of preparedness. It may prompt individuals to reflect on their readiness for such situations. Remember, regardless when and how your birthday falls, you have a community who has your back!

So my birthday wish is that we all will smile a little more, be a little kinder, and be a little more prepared – whatever that means for you. Have a wonderful day!


campfire at the beach

The Right Wood Matters

The first rule of thumb when it comes to efficient wood burning is knowing your wood. Not all wood is created equal, and choosing the right type makes all the difference.

  • Hardwoods like oak, maple, and hickory burn hotter and longer, making them ideal for those cozy nights by the fireplace or extended cooking sessions.
  • Softwoods like pine, spruce, and fir ignite quickly but do not last as long. They’re perfect for a quick, hot fire to boil water or get warm in a hurry.

Understanding the properties of different woods and having the right type on hand is helpful. I recommend finding an app or a guidebook, and going on a scavenger hunt identifying the various types. Look for color, shape, scent, and texture and see what you can find!

fire wood

Dry as a Bone

Wet wood can be a real buzzkill when it comes to building a fire. Always aim to use dry, seasoned wood. Wood with a moisture content of 20% or less is ideal. If you’re scavenging in the wild (where and when allowed), look for dead standing trees or branches off the ground. Always carry a fire-starter or two in your survival kit – you never know when you’ll need a quick ignition source. If you have wood stocked at home for your wood burning stove or outdoor pit, store it in a dry, sheltered location.

The Right Tools for the Job

Axe or Hatchet: A high-quality axe or hatchet allows you to chop logs into manageable pieces for your fire or shelter. Make sure to keep your cutting tools sharp; dull blades make the job harder and less safe.

Saw: While an axe is excellent for splitting wood, a saw is invaluable for cutting logs into smaller, more manageable lengths.

Knife: Beyond its role in preparing food, a knife can be used for tasks like carving wood, or feathering sticks for kindling. And if you’re like my children, whittling is a great pass time around the fire.

  • A Multi-tool pocket knife also is great to have handy – you never know when you’ll need a set of pliers!

Firestarter: Even with all the tools and knowledge, getting a fire going from scratch can be a challenge, especially in adverse conditions. That’s where fire-starters come in. You can choose from various options like waterproof matches, flint and steel, or fire discs. Keep a few of these in your survival or camp kit.

Backpacking Stove: A lightweight backpacking stove like a JetBoil, Kelly Kettle or a Coghlan’s folding stove can be a game-changer. It’s a highly efficient and controlled way to cook your meals and boil water without the need for a full campfire.

Firewood Carrier: When you’re transporting firewood from your processing area to your campsite, a firewood carrier can save you multiple trips. They come in various styles, including wheelbarrows, canvas or mesh bags and strap systems. Or, if you have children, they can be excellent firewood transporters (no promises you’ll be able to hear the pleasant sounds of nature over them).

Keep It Ventilated

No one likes a smoky fire. A well-ventilated fire is a happy and efficient fire. Proper ventilation not only ensures that your fire burns cleanly but also contributes to its longevity and effectiveness. Here’s how you can achieve excellent ventilation for your outdoor fire:

Build Your Fire Lay:

The arrangement of your firewood has a substantial impact on airflow. When building your fire, consider using one of the following methods:

  • Teepee Method: This classic method involves stacking your kindling and fuel wood in the shape of a teepee. Leave an opening on one side to allow airflow. As the fire burns, it draws in oxygen through the bottom, sustaining combustion.
  • Log Cabin Method: Create a square or rectangular shape with your logs by stacking them perpendicular to each other. Build several layers, and place kindling and tinder inside. The gaps between the logs create ample airflow. This is similar to a pyramid but much more space between logs to allow air flow.
  • Lean-to Method: Lean a larger log against a sturdy support, and stack smaller logs and kindling against it on the windward side. This setup channels air towards the base of the fire, providing a steady supply of oxygen.
  • Pyramid Method: Stack your wood largest on the bottom, getting smaller the taller you get, keeping your wood snug and close together. Your kindling and tinder goes on top, and the fire will slowly burn downwards, allowing you to keep a fire burning through the night if necessary. Remember to have rocks or a fire pit circling your fire for safety.
  • Star Method (Cross-ditch): If you’re starting a fire to one-pot cook over, this method is perfect. You can set up your tripod over the center.

Clear the Area: Ensure the area around your fire pit is clear of leaves, grass, or debris that could hinder proper ventilation. A clean, non-flammable space prevents embers from spreading and encourages efficient airflow.

Position the Windward Side: If possible, align your fire pit or campfire with the prevailing wind. This ensures that oxygen-rich air is continuously funneled into your fire, enhancing its combustion.

Add Air Channels:

In situations where you need to start a fire in less-than-ideal conditions, consider adding air channels to encourage airflow. Place a few sticks or rocks beneath your tinder to create space for air to circulate.

Caution: While proper ventilation is essential for a good fire, be aware of your surroundings. In windy conditions, a fire can quickly get out of control. Always keep an eye on the fire and be prepared to adjust your fire’s size and airflow to maintain safety.

Smoke:

Have you ever built a fire and found it to be really smoky? Here are some tips:

  • Use Dry Wood: Wet or green wood contains a substantial amount of moisture that, when burned, results in excessive smoke.
  • Proper Wood Selection: Choose hardwoods over softwoods. Hardwoods like oak, maple, or hickory tend to produce less smoke compared to softwoods like pine, spruce, or fir.
  • Start with Small Sticks: When initially lighting your fire, begin with small sticks, twigs, or kindling.
  • Well-Designed Fire Lay: As mentioned earlier, the method you use to arrange your firewood can significantly impact smoke production. The teepee, log cabin, and lean-to methods provide ample ventilation, resulting in more complete combustion and less smoke.
  • Avoid Overloading the Fire: Adding too much wood too quickly can overwhelm the fire and cause incomplete combustion, leading to smoke. Gradually add fuel wood as the fire gains strength, ensuring it’s always getting enough air to burn efficiently.
  • Maintain Proper Ventilation: Position your fire pit or campfire where it can draw in oxygen from the windward side. Adjust the size and arrangement of your logs to keep air circulating.
  • Regularly Stoking the Fire: To reduce smoke during the burning process, periodically stoke the fire by adding small logs or adjusting the arrangement of existing logs. This helps maintain a steady and efficient burn.

Step-by-Step Guide: How to Start a Fire

Roasting over the fire

Now, let’s break down the process of starting a fire in the great outdoors. Whether you’re using a fire pit, a wood-burning stove, or building a wilderness fire, these steps will guide you:

Step 1: Gather Your Materials
  • Tinder: Start with easily ignitable materials like dry leaves, pine needles, or small twigs. You can also use commercial fire-starters, cotton balls soaked in petroleum jelly, or dryer lint. This is your very first source of fuel to get the fire ignited
  • Kindling: Gather small branches, twigs, or sticks. These should be about the diameter of a pencil and easily combustible
  • Fuel Wood: These are your larger logs
Step 2: Set Up Your Fire Lay

There are several fire lay methods mentioned above, but for beginners, the teepee method is often the easiest:

  • Place a small pile of tinder in the center of your fire pit.
  • Form a teepee structure around the tinder using your kindling. Leave an opening for airflow.
Step 3: Ignite the Tinder

Use a fire-starter, a lighter, or matches to ignite the tinder in the center of your teepee. As the tinder catches fire, it will ignite the kindling.

Step 4: Feed the Fire

As the kindling ignites and the flames grow, gradually add more kindling and then larger fuel wood. Ensure you maintain proper airflow.

Step 5: Maintain the Fire

Continue to add fuel wood as needed to keep the fire going. Be attentive to its size and intensity, adjusting as necessary.


By choosing the right wood, keeping it dry, using the right tools, maintaining proper ventilation, and prioritizing safety, you’ll be a wood-burning pro in no time. So, let’s keep the fires burning, stay safe while doing so, and enjoy the warmth and comfort of a well-burning fire in any situation. Happy camp-firing, my friends!

nuun hydration electrolyte tablets

Understanding Electrolytes – The Science Behind Them

Electrolytes are minerals that serve as electrically charged ions in the human body. These ions play a role in various bodily functions. During emergency situations their importance becomes particularly evident. The primary electrolytes include sodium, potassium, calcium, magnesium, chloride, and bicarbonate. Each of these minerals contributes to specific processes vital for our well-being:

  • Sodium is for maintaining fluid balance in and around our cells. It helps control blood pressure and aids in nerve transmission.
  • Potassium is for regulating heart rhythm, muscle contractions, and nerve signals. It helps counterbalance the effects of sodium.
  • Calcium supports bones and teeth but also muscle function, blood clotting, and nerve transmission.
  • Magnesium participates in over 300 biochemical reactions in the body, including muscle and nerve function, blood glucose control, and bone health.
  • Chloride is an important component of stomach acid and aiding in digestion. It also plays a role in maintaining proper pH levels in the body.
  • Bicarbonate functions as a buffer to maintain the body’s pH level, helping to prevent excessive acidity or alkalinity.

In normal circumstances, the body maintains a balance of these electrolytes, aiding optimal health and well-being. During emergencies, this balance can be disrupted due to various factors such as increased physical activity, exposure to extreme weather conditions, limited access to clean water, and restricted access to nutritious food. This disruption can lead to dehydration and electrolyte imbalances.

Given the role that electrolytes play in the body’s normal functioning (especially in times of stress and hardship) it becomes important to replenish and maintain these minerals balance. This is where products like Nuun electrolyte tablets can be invaluable, as they provide a practical and portable means of addressing these needs.

Dehydration and Electrolyte Imbalance in Emergencies

The factors contributing to dehydration or electrolyte imbalance can include:

  • Limited access to clean water
  • Physical exertion and stress
  • Unpredictable weather conditions
  • Limited access to fresh food.
  • Limited medical resources

Nuun Electrolyte Tablets: A Solution for Emergency Preparedness

Nuun, a popular brand known for its electrolyte tablets, offers a convenient and effective solution for maintaining hydration and electrolyte balance in emergencies. These tablets are designed to dissolve quickly in water, providing a portable and easily storable source of electrolytes. Here’s why Nuun electrolyte tablets are a valuable asset in emergency preparedness:

  • Portability: Compact and lightweight, making them easy to carry in your emergency kit or backpack.
  • Versatility: Variety of flavors, making them more palatable and enjoyable to drink, encouraging regular fluid intake.
  • Electrolyte replenishment: Helps restore electrolyte balance by supplying essential minerals like sodium, potassium, magnesium, and calcium.
  • No added sugars: Low in sugar, helping to avoid blood sugar spikes and crashes during stressful situations.
  • Purity: Non-GMO, gluten-free, vegan, and contain no artificial preservatives, ensuring you get the best-quality electrolytes.

Knowing When to Use Electrolytes

Here are some indicators that can help you determine when to use electrolytes:

  • Excessive Sweating:  Sweating leads to the loss of both water and electrolytes, and these need to be replenished.|
  • Signs of Dehydration: Dehydration symptoms include dark yellow urine, dry mouth, increased thirst, fatigue, and dizziness. If you notice these signs, it’s essential to rehydrate with electrolyte-containing fluids.
  • Prolonged Physical Activity: Activities such as hiking, biking, or running: using electrolytes can help maintain proper fluid balance and support your performance. Alberta Health has a chart/activity here to give more specific details on how much fluids we require to keep hydrated.
  • Illness or Infections: When you’re sick with conditions like diarrhea, vomiting, or a fever, your body loses fluids and electrolytes more rapidly. Using electrolytes can aid in replenishing what is lost and preventing dehydration.
  • Exposure to Extreme Weather: Whether it’s intense heat or cold, extreme weather conditions can lead to increased perspiration.
  • Emergency Preparedness
Conclusion:

Note that electrolyte needs can vary from person to person depending on factors such as age, sex, weight, and individual health conditions. Therefore, it’s advisable to consult with a healthcare professional or a nutritionist if you have specific concerns about electrolyte intake, especially if you have underlying medical conditions.

In most cases, using electrolytes when you’re engaged in activities that lead to fluid loss or when you experience signs of dehydration is a smart and proactive way to maintain your health and performance. It’s better to prevent imbalances with preventative choices. Happy hydrating!