Peak Refuel Pouches

For outdoor enthusiasts, mealtime in the wilderness often means sacrificing flavor and variety for convenience. Since Peak Refuel came on the scene in 2018, you can enjoy gourmet-quality meals that are both delicious and hassle-free. Today we are going to explore how Peak Refuel’s meal pouches combine convenience with incredible taste, elevating your outdoor dining experience to new heights (meaning quick, easy meals that taste restaurant quality).

Convenience Redefined

Lightweight and Compact: Peak Refuel’s meal pouches are the epitome of convenience. They are lightweight and designed to be compact, making them easy to pack, carry, and store in your backpack. Whether you’re on a day hike, an extended backpacking trip, a camping adventure, or even a horseback riding trip, these meal pouches won’t weigh you down.

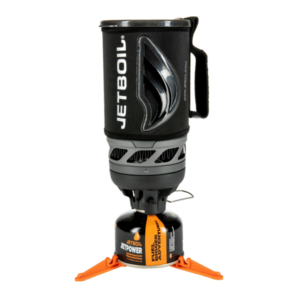
Quick and Easy Preparation: Preparing a delicious meal with Peak Refuel is a breeze. All you need is a portable stove (like the JetBoil or Kelly Kettle) or campfire and hot water. Simply tear open the pouch, add hot water, stir, and wait a few minutes. Voilà! Your gourmet meal is ready to enjoy – even straight from the bag if you want. No need to carry pots, pans and dishes. I do however recommend packing a spoon or fork -wink-

Wide Variety of Flavors: Peak Refuel offers an extensive menu of mouthwatering options to satisfy every palate. From hearty breakfasts like breakfast skillet to savory dinners like beef stroganoff, their menu includes diverse flavors that will keep your taste buds excited throughout your outdoor journey.


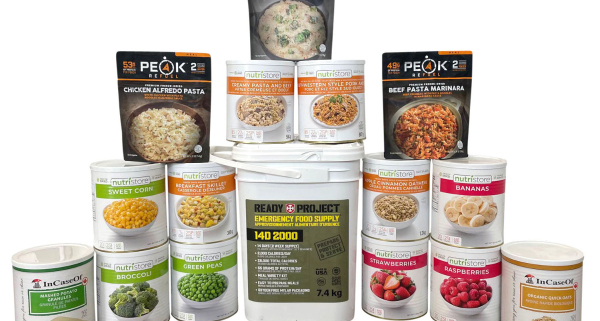
As of this article in Oct 2023 – we have 18 delicious flavors of meal pouches to choose from.

Not all  are depicted here, but you can find them all on our website here!


Incredible Taste, Every Time

Real Ingredients: What sets Peak Refuel apart is their commitment to using high-quality, real freeze-dried ingredients. You won’t find artificial preservatives or yucky soy fillers in these meals. Instead, you’ll enjoy the flavors of pure real meat, vegetables, and spices, just like you would in a home-cooked meal.

Nutrient-Rich: Peak Refuel understands the importance of nutrition in the outdoors. Their meals are carefully crafted to provide the energy and nutrients you need to fuel your adventures. You’ll find a balance of proteins, carbohydrates, and healthy fats in each pouch.

Consistent Quality: Whether you’re indulging in their beef chili or their chicken alfredo, you can count on consistent quality and taste. Peak Refuel takes pride in maintaining the same great taste in every pouch, so you know exactly what to expect with each meal.

Other Fun Facts You’ll Want to Know:

High Protein Content: Peak Refuels fully freeze dried meal pouches are known for their generous protein content. Whether you’re a hiker looking to refuel after a long day on the trail or an athlete seeking post-workout recovery, these meals offer a substantial amount of protein to meet your needs.

Allergen-Friendly Options: Peak Refuel recognizes that dietary restrictions and allergies are common concerns. They offer a variety of gluten-free and dairy-free meal options, making it easier for individuals with specific dietary needs to enjoy their meals.

Allergen Experience: I have a 12 year old son who is a celiac. When he goes away to camp or even for a sleepover, a meal like Sweet Pork & Rice really saves the day as a backup food option for when he cannot find safe food to eat

Long Shelf Life: Peak Refuels meals have a long shelf life, making them an excellent choice for emergency preparedness or as a backup food source during unforeseen situations. They have a sealed shelf life of up to 5 years when stored correctly. (Cool and dry just like other freeze dried foods)

Customer Reviews: Peak Refuel has received thousands of positive reviews from outdoor enthusiasts, backpackers, and campers who appreciate the convenience and exceptional taste of their meals. Reading customer feedback can provide insights into specific meal flavors and quality.

  • Like Joey from BC says: “High protein meals that taste great.”

Customizable Portions: While the entire meal pouch is designed to be a single or double serving, you can easily split the contents into smaller portions if needed, making it versatile for individuals or groups.

Cooking Altitude: These meals are formulated to cook effectively at high altitudes with the lowest amount of fuel and water possible, so whether you’re in the lowlands or the mountains, you can enjoy a satisfying meal without any extra hassle.


But don’t just take my word for it – give them a try! 


Mealtime in the great outdoors no longer has to mean settling for bland or inconvenient options. With Peak Refuel meal pouches, you can elevate your outdoor dining experience to gourmet levels without sacrificing the ease and efficiency you need on your adventures.

These lightweight, delicious meals are a game-changer for outdoor enthusiasts who want to savor incredible flavors in the heart of nature. Say goodbye to bland trail food and hello to Peak Refuel – where convenience meets culinary excellence in the great outdoors. Happy eating!


waterton national park, Alberta Canada,

For day hikers and backpackers alike, ensuring a safe and reliable source of drinking water is very important. This piece of gear offers a simple and effective solution to quench your thirst while minimizing your environmental footprint.

In this article, we’ll explore how the XStream Water Filter Straw works, how to care for it, and when to use it:

How It Works

The XStream Water Filter Straw is a small but powerful water filtration system that makes water purification on the go a breeze. Here’s how it works:

  • Dual Filtration: The XStream Water Filter Straw features a dual filtration system, combining a hollow fiber membrane and a carbon filter. This two-stage filtration process is capable of removing 99.9999% of bacteria, 99.99% of viruses, and 99.9% of protozoan cysts from water sources.
  • Easy Sipping: Using this straw couldn’t be simpler. Just find a fresh water source, whether it’s a stream, river, or lake, and place the straw’s tip into the water. Then, simply sip through the straw, and the advanced filtration system will do the rest. Clean, purified water will flow through the straw and into your mouth, instantly quenching your thirst.
  • The XStream Straw comes with a hand squeeze spray pump to fill water bottles and canisters and share the clean water love.
  • Long Lifespan: The XStream Water Filter Straw is designed for longevity, with a filtration capacity of up to 250 gallons (946 liters). This means you can enjoy many many trips without worrying about filter replacement, making it a cost-effective and environmentally friendly choice.

Caring for Your XStream Water Filter Straw

Proper care and maintenance of your XStream Water Filter Straw ensures it continues to perform at its best. Here are some care tips:

  • Regular Cleaning: After each use, backflush the filter by blowing air into it. Or use the included cleaning syringe to remove any trapped particles and debris.
  • Dry It Out: Allow the filter to air dry thoroughly before storing it long term to prevent mold and mildew growth.
  • Avoid Freezing: Protect your straw from freezing temperatures, as this can damage the filter membrane. Store it in a warm dry place during cold seasons.

When to Use It

Knowing when to use your XStream Water Filter Straw is essential for a successful outdoor adventure:

  • Wilderness Exploration: Hiking in remote forests, trekking through mountainous terrain, and camping by a pristine lake – all of your outdoor adventures!
  • Emergency Situations: It’s not just for planned trips; the XStream Water Filter Straw can be a lifesaver in emergency situations. Keep one in your 72 hour kit or survival kit for the unexpected.
  • International Travel: If you’re an adventurer who loves exploring foreign lands, this is invaluable in regions where tap water quality may be questionable.

Video By Billy

Maybe you wanna see how it actually works? Check out Billy’s quick video giving you a visual run through on how this incredible filter works!


Lessons Learned the Hard Way: Hiking Carthew Alderson Trail

I’d like to share an experience that you are already one step ahead of me by having read this article! A few years ago my father and I went on a hike in Waterton National Park, Alberta, Canada.

He had completed the hike as a young man, and had forgotten how difficult it really was. Combine that with incorrect signage, the hike that should have been 15-17kms ended up actually being closer to 23kms. My father unfortunately was already pushing his limits (at 60+) doing a 15km hike.

  • FYI, I did my civic duty and called Parks Canada to inform them to update their signage

As we continued on: we ran out of food, ran out of water, and my father began moving even slower. I had a LifeStraw in my pack (which is an incredible product too), but my father is a larger man and cannot get down on the ground very well. Plus with his current state of weakening, I was concerned he wouldn’t be able to get back up. We were still in a dead zone without any service to call out for help. We did make it eventually through the experience, with many lessons learned.

When I later discovered the XStream water filter straw, the extended hose would have been incredibly helpful for him, and we could have hydrated him and provided him some safe drinking water as we worked towards completing this unexpected hike. Hydration is extremely important!

Pro tip: Be prepared! Learn from other people’s experiences and stay safe!

Conclusion:

For day hikers and backpackers, the XStream Water Filter Straw by Sagan is a game-changer in the quest for clean and safe drinking water. Grab your backpack, lace up those hiking boots, and embark on your next adventure with confidence, knowing that we have your hydration needs covered. Stay safe, stay hydrated, and keep exploring the world’s most beautiful places!

N95 respiratory mask box

In an unpredictable world where emergencies and crises can strike at any moment, being prepared is becoming more and more important. One essential item that should find its place in your emergency kit is the N95 mask. While these masks gained popularity (or unpopularity depending where you stand on the “masking” debate) their significance extends far beyond that. This article explores when an N95 mask would be most necessary and why it should be a vital component of your emergency preparedness arsenal.

How Does an N95 Mask Work?

  • Mechanical Filtration: N95 masks are made from multiple layers of fine, tightly woven synthetic fibers, typically made of materials like polypropylene. These fibers create a dense network of tiny holes or pores. When air containing particles enters the mask, larger particles (such as dust, bacteria, and viruses) cannot easily pass through the gaps between the fibers. Instead, they collide with the fibers and become trapped.
  • Electrostatic Attraction: N95 masks also incorporate an electrostatic charge into the filter material. This electrostatic charge enhances the mask’s ability to capture smaller particles, including very fine dust, smoke, and even aerosolized pathogens like viruses. The charge attracts particles that may have otherwise passed through the mask due to their small size.

When is an N95 Mask  Necessary?Fort McMurray Wildfire Evacuation

  • Pandemics and Diseases: The most recent scenario is during pandemics and outbreaks of infectious diseases. N95 masks offer a high level of protection against airborne viruses and bacteria, reducing the risk of infection when used correctly.
  • Natural Disasters: In the aftermath of natural disasters such as earthquakes, hurricanes, or wildfires, dust, debris, and smoke can pollute the air. N95 masks filter out harmful particles and provide relief for those affected.
  • Industrial Accidents: Protect against inhaling toxic fumes and hazardous substances in the incident of a chemical spill or gas leak.
  • Wilderness Survival: N95 mask can be invaluable for protecting against wildfire smoke, forest fires, or even unexpected events like dust from a landslide or a volcanic eruption.
  • Home Renovation: During home renovations or when working with materials that generate dust or particles

Why Have an N95 Mask?

  • Filtration: They filter out at least 95% of airborne particles, making them effective in reducing the risk of inhaling harmful substances.
  • Portability: Compact and lightweight
  • Long Shelf Life: Up to 5 years if stored properly
  • Vulnerable Populations: To protect individuals with compromised immune systems or respiratory conditions

Proper fit is important for the effective functioning of N95 masks. These masks are designed to create a seal around the nose and mouth. This ensure that the air being breathed in passes through the filtration material and not around the edges of the mask.

Conclusion:

The N95 mask is not just a pandemic accessory from the past but an important component of your emergency preparedness kit. Its ability to protect against a variety of airborne hazards, coupled with its compact size and versatility, makes it an indispensable tool for your health and your loved ones during crises. Don’t wait for an emergency to strike – ensure you have one available in your emergency kit, ready to provide protection when you need it most.

One month premium pre-built survival food supply

Proper food storage is important for maintaining food safety, freshness, and preventing waste. Whether you’re storing food in your pantry, refrigerator, or freezer, following the right guidelines ensures that your food remains safe. Here are 5 ways to master your kitchen storage!

#1 – First In, First Out (FIFO)

The FIFO principle is a fundamental rule of food storage. It means using older items before newer ones to minimize food waste. To implement this guideline:

  • When stocking your pantry or fridge, place newly purchased items behind existing ones.
  • Label and date homemade or repackaged items.
  • Regularly check and rotate your food supply to ensure older items are used first.

FIFO prevents food from spoiling and becoming forgotten at the back of your storage space.

#2 – Store at the Right Temperature

Temperature control is vital for food safety. Follow these temperature guidelines:

  • Refrigerator: Keep your refrigerator at or below 40°F (4°C) to slow down bacterial growth. Use a thermometer to monitor the temperature.
  • Freezer: Maintain your freezer at 0°F (-18°C) or lower to preserve food quality. Frozen foods can last indefinitely at these temperatures, although quality may diminish over time.
  • Pantry: Store most non-perishable items in a cool, dry place away from direct sunlight. Keep canned goods between 10-21°C for optimal quality.

Always check food labels for specific storage temperature recommendations.

#3 – Proper Packaging

Using the right containers and packaging materials is necessary for preserving food quality and preventing contamination. Follow these packaging guidelines:

  • Airtight Containers: Store grains, cereals, and dried goods in airtight containers to keep out moisture, pests, and air.
  • Reusable Food Storage Bags: Use these eco-friendly bags for snacks, sandwiches, and leftovers instead of disposable plastic bags.
  • Vacuum Sealing: Consider vacuum-sealing foods for longer freezer storage, which prevents freezer burn and extends freshness.

organizing food in the fridge

#4 – Keep Foods Separate

To avoid cross-contamination, store foods separately based on their type and safety guidelines:

  • Raw Meats: Keep raw meats, poultry, and seafood in airtight containers or plastic bags on the lowest shelf in the refrigerator to prevent juices from dripping onto other foods.
  • Ready-to-Eat Foods: Store cooked or ready-to-eat foods above raw items to prevent potential contamination.
  • Fruits and Vegetables: Some fruits release ethylene gas, which can cause nearby vegetables to ripen and spoil faster. Store them separately or use ethylene-absorbing produce storage bags.

#5 – Regularly Check Expiration Dates

Monitoring expiration dates is essential to ensure food safety and quality. Pay attention to the following:

  • “Sell By”/ “Use By” Dates: This indicates when the store should sell the product  by/ the peak quality of the product. You can often use the item safely beyond this date.
  • “Best Before” or “Best By” Date: This suggests when the product is at its best quality but is not an indicator of safety. Use your judgment when consuming items after this date.
  • “Expiration date”. This suggests when a food can spoil, and is recommended you not consume.

More info on this topic in my other article – “Understanding Shelf Life, Best Before, and Expiry Dates in Canada”

expirty date example photo


Let’s walk through a real-time example of how these food storage guidelines can work effectively:

Scenario:

You’ve recently gone grocery shopping and have purchased various items, including fruits, vegetables, herbs, meats, dairy products, and canned goods.

1. First In, First Out (FIFO):
  • As you unpack your groceries, you place the older items at the front of your refrigerator and pantry shelves.
  • You label and date leftover cooked chicken from last night’s dinner and place it in an airtight container in the fridge.
2. Store at the Right Temperature:
  • You check the temperature settings of your refrigerator and ensure it’s at 40°F (4°C) or below.
  • The freezer is set at 0°F (-18°C).
3. Proper Packaging:
  • You transfer your flour and sugar into airtight containers to prevent moisture and pests from getting in.
  • Leftover spaghetti sauce goes into a reusable food storage bag (dated and labelled) before placing it in the freezer to use next week.
  • Fresh herbs are wrapped in damp paper towels and stored in airtight containers in the fridge.
4. Keep Foods Separate:
  • You place raw chicken in a plastic bag before placing it on the lowest shelf of the fridge for tomorrow’s supper.
  • Ready-to-eat salad and fruits are on the upper shelves to avoid cross-contamination.
  • Fruits and vegetables are stored separately in the produce drawer, FIFO style system putting the older stuff at the top
5. Regularly Check Expiration Dates:

jar salad

  • You take a moment to check the dates on dairy products and plan to consume them before they expire.
  • You find a can of soup with a “Best By” date that is still several months away and decide to use it for lunch.


This real-time example demonstrates how you can apply the food storage guidelines in your daily life. By doing so, you ensure that your food remains fresh, safe to eat, organized, and enjoyable while reducing food waste.

And just like that you are a Kitchen Master! You are well on your way to maintaining and mastering your food and food storage. Happy storing. Share with me some of your kitchen wins at BridenAcademy@bridensolutations.ca


little boy who is surprised

Camping Trip: Wasa

Hello folks, I want to share real life experience from a summer camping trip that resulted in my son breaking his elbow. Hindsight is 20-20 they say, and just maybe my mistakes will help someone else! We were camping as a family in July 2019, and as things can go, my middle son fell off the monkey bars at the park and broke his elbow. Thankfully I have been blessed with the ability to stay calm in an emergency and I was able to get through the ordeal fairly well.

Mistake #1

My husband was with my son at the park while I was bringing my other two children in away from the water (safety first). My first mistake was here. I should have swapped roles with my husband as I am the more experienced first-aider and quick thinker, while my husband is much better suited as the “gopher” and runner.

  • In Hindsight: Know your strengths and weaknesses as an individual and as a partnership.
Mistake #2

The next mistake we made was not knowing how cross-provincial health care worked. I had no idea if I could call an ambulance or if I would be charged a large fee being out of province visitors. We opted to transport him ourselves. This was unfortunately an extremely inexperienced and poor choice on my part.

  • In Hindsight: We should have called 9-1-1
ambulanceMistake #3

The next mistake we made was linked to the last mistake. When we got to the hospital I went in to get someone to help us bring a stretcher out to could transport him in to the hospital. The hospital will not do that per their policy. If I wanted him transported inside, I would need to do it myself or call 9-1-1 and then they would send someone to bring him in. At this point we should have done that, but no longer thinking clearly, we carried our 7 year old into the hospital.

  • Hindsight: we should have called 9-1-1

From this point the “system” was able to take over, and my stay calm time was over. I was now able to release some very pent up emotions while they did their x-rays and eventually took him away to surgery.

Mistake #4

My final mistake was that I arrived to the hospital in my beachwear. I luckily had a sweater in our van, but my husband went back to the campground (half an hour away) to get back to our other children (whom were with trusted people). I stayed in the hospital overnight in my bathing suit.

  • Hindsight: When we go to the beach, I now have a bag in our vehicle with us that is sort of like a mini 72-hour kit. It has a change of clothes for me, a few personal hygiene items, a phone charger, a water bottle, and spare cash in it.

Self Evaluation Post Emergency: Questionnaire

Overall, my biggest take away was that my first aid skills were put to the test, and I’d give myself a solid 5 out of 10, with lots of room for improvement. I was able to evaluate the situation after the fact and learn from it. You have to start somewhere right? Experiences are what help us grow and be better prepared for future experiences.

Below is a self-evaluation questionnaire that you can use to assess your emergency situations. This questionnaire can help you reflect on your actions, learn from the experience, and improve your preparedness for future emergencies:

Self-Evaluation Questionnaire for Post-Emergency Situations
  1. Did I remain calm during the emergency and its immediate aftermath?
    • Yes
    • No
    • Somewhat
  2. Was I able to ensure the safety of myself and my loved ones during the emergency?
    • Yes
    • No
    • Partially
  3. Did I effectively communicate with my family or household members during the emergency?
    • Yes
    • No
    • Somewhat
  4. Did I follow my emergency plan and protocols that I had in place before the emergency occurred?
    • Yes
    • No
    • Partially
  5. Was I able to provide basic first aid or medical assistance to those in need during or immediately after the emergency?
    • Yes
    • No
    • Somewhat
  6. Did I have access to essential supplies such as food, water, and medical kits following the emergency?
    • Yes
    • No
    • Partially
  7. How well did I adapt to changing circumstances and make quick decisions during the emergency?
    • Very well
    • Adequately
    • Struggled
  8. Did I maintain clear and effective communication with emergency services, if needed?
    • Yes
    • No
    • Somewhat
  9. Did I document the details of the emergency, including any damages, injuries, or actions taken, for future reference?
    • Yes
    • No
    • Partially
  10. How would I rate my overall preparedness for this emergency on a scale of 1 to 10 (with 10 being extremely well-prepared)?
    • 1
    • 2
    • 3
    • 4
    • 5
    • 6
    • 7
    • 8
    • 9
    • 10

Further Evaluation Questions:

  • What worked well in my response to the emergency, and what areas need improvement?
  • What additional skills, resources, or knowledge do I believe would have been helpful in handling this emergency more effectively?
  • Have I identified any gaps in my emergency preparedness plan or supplies that need to be addressed for future emergencies?
  • What steps will I take to enhance my preparedness and response for future emergency situations?
  • Do I have a plan for debriefing and discussing the emergency response with family or household members to learn from the experience?

Conclusion:

This self-evaluation questionnaire can serve as a valuable tool for individuals to reflect on their actions and preparedness in the aftermath of an emergency. It can help identify areas for improvement and guide future efforts to enhance readiness and resilience in the face of unexpected events.

I wish you all the best as inevitable unexpected situations come to pass, and know that even though I rated myself a 5/10, I am still proud of me and my family for staying calm and collected while handling a crisis moment. We are grateful for the experience to have learned and know what we can and should do if we ever find ourselves in a similar situation again.

lightning flash in the night sky

Living in regions prone to unpredictable weather or unpredictable happenings, we find ourselves on occasion facing the challenges of power outages. Whether it’s a winter blizzard, severe thunderstorm, or wind knocking over a tree onto your local powerline, being prepared for loss of electricity is important. In this article, we’ll explore practical tips on how to prepare for a power outage.

Emergency Kit Essentials:

Have one! Check out this previous post about 72 hour kits for some ideas on what to have in yours. Don’t forget a can opener!

electricity

Backup Power Sources:

  1. Generators:
    • Portable Generators: They are fueled by gasoline, propane, or diesel and should be operated outdoors for safety.
    • Standby Generators: Permanently installed and connected to your home’s electrical system. They automatically turn on when the power goes out and can provide uninterrupted power for your entire home. They run on natural gas or propane and are more expensive than portable generators.
  2. Power Inverters:
    • Power inverters convert DC (direct current) power from a battery into AC (alternating current) power that can be used to run household appliances and electronics. They are an excellent choice for keeping small devices and low-power appliances operational during an outage.
  3. Uninterruptible Power Supplies (UPS):
    • UPS devices are typically used to protect computers and sensitive electronics. They provide a short-term battery backup when the power goes out, allowing you to save your work and shut down your devices properly. They come in various sizes and can provide anywhere from a few minutes to a few hours of backup power.
  4. Solar Power Systems:
    • Solar panels combined with battery storage systems can provide a sustainable source of backup power. During normal conditions, solar panels generate electricity and store excess energy in batteries. During a power outage, this stored energy can be used to power your home.
  5. Power Banks and Portable Chargers:
    • Power banks, also known as portable chargers, are compact devices that store electrical energy. They are primarily used to charge smartphones, tablets, and other small electronic devices.
  6. Candles and Oil Lamps:
    • Ensure you have a supply of candles, matches, and oil or lamp fuel on hand for back up light. Always use them safely and keep an eye on open flames.

When choosing a backup power device, consider your specific needs, the duration of potential outages, and your budget. It’s also important to maintain and test your backup power sources regularly to ensure they are ready when needed. Having a combination of these devices can provide a comprehensive backup power solution for different situations and needs during a power outage.

Winter Power Outage Essentials:

Winters can be harsh here, and during outages, we sometimes rely on wood stoves or propane heaters to stay warm in our homes. Ensure you have a safe, and well stocked heating source and plenty of warm clothing and blankets. Keep doors and windows closed as often as possible to keep heat in.

Stay Connected and Informed:

When the power goes out, staying connected can be a lifeline. Have a communication plan in place with family and friends, know which websites or radio stations to look up or tune in to get up to date information. Or if necessary use your phone to call your local emergency services (eg: police or fire department). Charge your phones and devices when the power is on and consider investing in a backup power source for them.

Protect Your Perishables:

    • This would be a possible 72 Hour Kit or food storage moment.
    • Keep the Fridge and Freezer Closed:  A well-insulated fridge can keep food cold for about 4 hours if unopened, while a full freezer can maintain its temperature for about 48 hours, and a half-full freezer for about 24 hours.
    • Use Ice Packs: Placing ice packs in your refrigerator can help maintain temperatures.
    • Consider Cooler Storage: If you anticipate a prolonged power outage, consider transferring perishable items to a well-insulated cooler with ice packs or ice. This can help extend the freshness of these items until the power is restored.
    • Prioritize Consumption: Use perishable items that are at risk of spoiling first. Plan meals that incorporate these foods early in the power outage to reduce waste. Canned and non-perishable foods can be reserved for later use.
    • Be Cautious with Food: When in doubt, throw it out. If you are unsure about the safety of a particular food item, it’s better to discard it rather than risk food borne illness.
Conclusion

Power outages may be a temporary inconvenience, but with the right preparation and resilience, we can weather any storm that comes our way. Stay prepared, stay safe, and remember that we’re all in this together!

Stacks of #10 sized food cans at the Briden Solutions warehouse in Calgary Alberta Canada.

If you’ve ever shopped for food in bulk, you’ve likely come across the #10 can. These large, cylindrical cans  are used to store a wide variety of products, from fruits and vegetables to soups and sauces. But what exactly is a #10 can, and how can you understand its size and portions? In this article, we’ll explore everything you need to know about #10 cans.

#10 sized cans of freeze dried vegetables

What is a #10 Can?

A #10 can is a standard container used in the food service industry for packaging and storing a variety of food products. It is known for its distinctive size and shape—a cylindrical can that measures approximately 16 cm in diameter and 18 cm in height. The term “#10 can” refers to its volume rather than its physical dimensions. A #10 can hold up to 2.8 liters of food (weight can vary product pending).

History of #10 Cans

The use of standardized cans for food packaging dates back to the early 20th century when the canning industry began to flourish. The #10 can became a standard size due to its convenience and versatility. It is large enough to hold a significant quantity of food, making it suitable for home food storage, commercial kitchens and food service establishments.

Common Uses of #10 Cans

#10 cans are commonly used for bulk storage of various food products. Some of our most common items packed in #10 cans include:

  1. Fruits and Vegetables
  2. Grains – such as pastas, rice, oats, wheat, quinoa, and millet
  3. Baking Ingredients – such as flour and sugar
  4. Meat and Other Proteins – such as beef, chicken, pork, beans, eggs, cheese and powdered skim-milk
  5. Pre-made meals

Understanding Portions

One of the key advantages of using #10 cans in commercial kitchens is portion control. The size of a #10 can allows for easy measurement and distribution of food. Here’s how you can understand portions when using #10 cans in metric units:

  1. Volume: As mentioned earlier, a #10 can can hold up to 2.84 liters of food. This makes it easy to calculate and control portion sizes when preparing dishes. (see example below)
  2. Consistency: Using #10 cans ensures consistency in recipes. You can rely on the standardized size to maintain the quality and taste of their dishes.
  3. Cost-Effective: Buying food in bulk and portioning it out can be cost-effective.

Storing #10 Cans

Proper storage of #10 cans maintains the quality and safety of the food inside. Here are some tips for storing #10 cans:

  • Cool, Dry Place: Store #10 cans in a cool, dry place away from direct sunlight and extreme temperatures (under the stairs for example). On average the ideal recommended temperature can range is between 13 & 21 degrees Celsius.  We are often asked if cans be stored in the garage or outdoors. In Alberta our summers are hot and our winters are cold, so my unheated garage at my home is not a safe storage space.
  • Rotation: Practice a “first in, first out” (FIFO) rotation system to ensure that older cans are used before newer ones. Every can has a date on it, so you can manage your rotation with ease.
  • Labeling: Clearly label the contents and date of each #10 can to make your inventory management and tracking easier. Each can also shows portions per can (based on the calculated Canadian serving size). The label shows how many calories are in a serving size to help determine your own body’s personal serving size needs.
  • Sealing: After opening a #10 can, you can transfer any unused contents to a food-safe container and seal it tightly to prevent spoilage, or seal with a provided lid. Most of our product is freeze dried which is the best way to get the longest shelf life. Our Nutristore freeze dried line of foods are all in the 20 – 30 year range sealed.
      • Freeze dried strawberries for example have a sealed shelf life of 25 years. Once opened, the strawberries have a 6 – 12 month shelf life. So you have a full year to enjoy them. 

In Canada, serving sizes are regulated by Health Canada and the Canadian Food Inspection Agency (CFIA). These agencies provide guidelines to ensure that food products sold in Canada are labeled with accurate and consistent serving sizes.

Canadian serving sizes are typically expressed in metric measurements, such as grams or milliliters, to align with the metric system.

The goal  is to help consumers make informed dietary choices and understand the nutritional content of products in a standardized way.

When using #10 cans or other packaging formats, Canadian food manufacturers adhere to these regulations to ensure that their products meet the nutritional needs and expectations of Canadian consumers. This commitment to clear and standardized serving sizes contributes to a healthier and more transparent food industry in Canada.

Take this #10 can of Nutristore Blueberries for example:


In the bottom corner of this photo, you will find it says this can contains 24 servings, and has a sealed 25 year shelf life.

Each single ingredient product (like Blueberries), have no added preservatives.


On our website there is a tab below to look at “Details,” “More Information,” and “Reviews”.

The More Information tab shows information (see table below) such as shelf life (sealed/opened), serving size, ingredients, allergens

The Details tab shows the Nutritional Facts table and any other pertinent instructions for the product

The Reviews tab shows other wonderful customers whom have tried these amazing products! We sure do love your feedback


Free Shipping Yes – When order subtotal is $199 or more
Shelf Life Sealed Up to 25 years
Shelf Life Opened Up to 3 – 6 months
Servings Per Container 44
Serving Size 1/4 cup (6 g)
Net Weight 9.3 oz (264 g)
Ingredients Blueberries
Allergens Please note: Processed in a plant that handles milk, wheat, soy, egg, peanut, and tree nut products
Ships Canada Wide Yes
Weight notice Our food items are filled by weight and not by volume. Some settling may occur during shipping and this is normal. We do our best to fill packages full, please understand that we have standard pack sizes, and a wide variety of items to fit.

Nutristore Freeze Dried Blueberries Nutritional label

“Blueberries are rich in potassium, fiber, folate, vitamin C, vitamin B6 and phytonutrients. This makes them a great addition to your food storage. Toss them in a salad, muffins, smoothie or just eat them right out of the can for a crunchy sweet treat that’s good for you.

Rehydration Instructions:
Soak 1 cup of Nutristore™ Blueberries in 1/3 to 1/2 cups of water until tender (7-10 minutes). Drain off extra water.”


Super Important Note: In the above example, we used Blueberries that were packaged in the USA. Per Canadian standards, we have updated the product information for this product to metric from the US imperial system, and adjusted the amounts to adhere to Canadian food regulations. The photo above shows 24 servings based on what the US serving size states on the US product. In Canada, government food standards suggest this amount of Blueberries in this can is equivalent to 44 servings. The example above is a teaching example.

Prioritize, procure supplies, prepare, practice, preserving peace of mind

In a world filled with uncertainty, being prepared is not just a motto; it’s a way of life. Emergencies, natural disasters, and unexpected challenges can strike at any time. To ensure your safety and the safety of your loved ones, it’s essential to follow the five fundamental principles of preparedness known as the “5 P’s of Preparedness.” These principles serve as a roadmap for being ready for whatever life throws your way.

  1. Prioritize Planning

The first P in the 5 P’s of Preparedness is “Planning.” Without a well-thought-out plan, you may find yourself overwhelmed and unprepared during an emergency. Start by identifying potential situations and risks and assessing your personal vulnerabilities. Consider factors like your location, climate, and the needs of your household. Develop a comprehensive emergency plan that covers various scenarios, including natural disasters, power outages, and personal emergencies.

Key aspects of your emergency plan should include:

  • Evacuation routes and meeting points
  • Contact information for emergency services and loved ones
  • A communication plan
  • A list of essential supplies and resources
  1. Procure Supplies

The second P is “Procure.” Once you have a solid plan in place, it’s time to gather the necessary supplies. Your emergency supply kit should include enough provisions to sustain you and your family for at least 72 hours. Common items to include in your emergency kit are:emergency kit to store in the vehicles

  • Non-perishable food items
  • Water
  • First aid supplies
  • Flashlights and batteries
  • A multi-tool or Swiss Army knife
  • Warm clothing and blankets
  • Personal hygiene items
  • Important documents (ID, insurance, medical records)
  1. Prepare Your Environment

The third P stands for “Prepare.” This involves making your living environment as disaster-resistant as possible. Consider the following steps:

  • Secure heavy furniture and appliances if you live in an earthquake zone or tornado zone.
  • Install smoke detectors and carbon monoxide alarms.
  • Maintain fire extinguishers and learn how to use them.
  • Keep your home well-insulated and sealed against drafts.
  • Practice fire safety and establish escape routes.
  1. Practice and Training

The fourth P is “Practice.” Having a plan and supplies is not enough; you need to practice and train regularly. Conduct fire drills, practice evacuation procedures, and ensure that every member of your household knows what to do in an emergency. Regular training can make the difference between chaos and calm during a crisis.

  1. Preserving Peace of Mind

The fifth P emphasizes “Preserving peace of mind.” Mental resilience is literally just as crucial as physical preparedness. During times of crisis, stress and anxiety can be overwhelming and debilitating. Have you or someone you know “frozen” in a super stressful situation? We’ve all seen it or felt it and its super scary. To maintain your mental and emotional well-being:

  • Stay informed but limit exposure to distressing news. (aka, don’t look at your cell phone every 30 seconds)
  • Practice relaxation techniques and mindfulness.
  • Maintain a support network of friends and family.
  • Consider seeking professional help if needed.

In an unpredictable world, the 5 P’s of Preparedness provide a comprehensive framework for being ready for any emergency or disaster. Prioritizing planning, procuring supplies, preparing your environment, practicing and training, and preserving peace of mind are all essential aspects of being prepared. By following these principles, you can increase your resilience and ensure the safety and well-being of yourself and your loved ones when the unexpected occurs. Preparedness is not a one-time event but an ongoing commitment to safeguarding your families future.

car kit to store in the vehicles in case of an emergency 72 hour

One month premium pre-built survival food supply

JetBoil 230g fuel cannister for the JetBoil portable outdoor stove

When it comes to outdoor adventures, having a reliable and efficient cooking system can change your adventure from fun to amazing. JetBoil, a popular brand among outdoor enthusiasts, offers a range of innovative products designed to make cooking in the great outdoors a breeze.

JetBoil logo

How JetBoil Works

JetBoil’s core product is a compact and lightweight cooking system that utilizes a unique design to heat water or prepare meals quickly and efficiently. The primary components of a JetBoil system include:

  1. Stove Unit: It’s designed to create a powerful, focused flame that directs heat to the bottom of the pot, minimizing heat loss and improving cooking efficiency.
  2. Cooking Pot: JetBoil pots are specially designed to work with their stoves. They feature a heat exchanger on the bottom, which captures and transfers heat to the contents. The pots come in various sizes to accommodate different cooking needs.
  3. Fuel Canister: Small, lightweight canisters of compressed gas, usually propane or isobutane. These canisters are easy to attach to the stove and provide the fuel needed for cooking.
  4. Ignition System: Most JetBoil systems include a push-button ignition, making it easy to start the stove without the need for matches or lighters.

PRO TIP: The JetBoil cannister of fuel comes in 3 sizes: 100g, 230g, and 450g.

The shipping limitations: only a certain volume of fuel can be safely sent through the mail. 900g per single shipment is the max.


Here is a video link showing how this cool product works!


What JetBoil Can Do

JetBoil’s versatility makes it suitable for many outdoor activities and cooking needs, including:

  1. Boiling Water: JetBoil excels at rapidly boiling water, making it ideal for preparing hot beverages like coffee and tea, rehydrating freeze-dried meals, or cooking pasta and rice.
  2. Cooking Meals: With the right accessories, you can use JetBoil for cooking a wide range of meals, from simple one-pot dishes to more elaborate outdoor gourmet creations.
  3. Simmering: Some JetBoil models allow for precise flame control, enabling you to simmer or slow-cook dishes.

When and Where to Use JetBoil

JetBoil is versatile and  used in various outdoor scenarios, such as:

  1. Camping: Provides quick and efficient cooking solutions for breakfast, lunch, and dinner.
  2. Hiking and Backpacking: An excellent reliable cooking system without adding excess weight to packs.
  3. Climbing and Mountaineering: A favorite among climbers and mountaineers for its efficiency in high-altitude cooking.
  4. Emergency Preparedness: A valuable addition to your emergency preparedness kit, ensuring you have a reliable way to cook during power outages or other emergencies. (Make sure you are cooking outside with fresh air)

Why Use JetBoil

  1. Speed: This system can boil water in a matter of seconds, saving you valuable time and fuel.
  2. Efficiency: Its innovative design maximizes fuel efficiency, reducing the number of canisters you need to carry.
  3. Portability: JetBoil is compact and lightweight, making it easy to transport and ideal for adventures where every ounce matters.
  4. Reliability: Known for their durability and dependability in various weather conditions.
  5. Convenience: With push-button ignition and quick setup, JetBoil simplifies outdoor cooking

hiking

This innovative cooking system has revolutionized outdoor cooking. JetBoil  ensures you can enjoy hot meals and beverages wherever your outdoor pursuits take you. Elevate your outdoor (or emergency) culinary experience to new heights! Happy cooking!

6 pack vegetable food pack freeze dried

As Canadian citizens, we encounter food products on a daily basis, each stamped with different dates: shelf life, best before, and expiry dates. These dates play a role in ensuring food safety and quality. Lets discuss what they mean, and their importance:

oh canada

#1 – Shelf Life

Shelf life refers to the period that a product remains safe to consume and maintains its intended quality when stored under proper conditions. It’s important to note that shelf life is an estimate and can vary depending on storage temperature, humidity, and packaging. In Canada, manufacturers determine shelf life through rigorous testing to ensure their products are safe and meet quality standards.

Example: Canned goods such as our pasta line, or rice, sealed they have a shelf life of 20-30 years. If stored correctly in a cool, dry place, they remain safe to eat for an extended period. Opened/unsealed they have a shortened shelf life of anywhere from 6-18months.

#2 – Best Before Date

The best before date is a label indicating the date until which a product will maintain its optimal quality, taste, and texture, as determined by the manufacturer. After this date, the product may still be safe to eat, but its quality might deteriorate. In Canada, the “best before” date is a legal requirement for most packaged foods.

Example: A box of cereal might have a “best before” date of September 30, 2023. While likely fine to eat after this date, the manufacturer cannot guarantee it will taste as fresh or crunchy as intended.

#3 – Expiry Date

An expiry date is the date by which a product must be consumed for safety reasons. After this date, the product is no longer be safe to eat, regardless of its appearance, taste, or smell. Expiry dates are typically found on perishable items like dairy products and certain medications, where the risk of spoilage is significant.

Example: A carton of milk will usually have an expiry date, and it’s important to discard it after this date has passed, as consuming expired dairy products can lead to health risks.


Here is a 16 minute podcast about food labels created by the CFIA (Canadian Food Inspection Agency) for added information.

Other Key Words & Phrases

In understanding shelf life, best before dates, and expiry dates in Canada, it is helpful to be aware of additional phrases and words that provide valuable information about the product’s quality and safety. Here are some key terms and phrases to look for:

  • Packaging Date or Manufacture Date: This date indicates when the product was packaged or manufactured. It can determine a product’s freshness, especially when it does not have a best before date listed.
  • Lot Number or Batch Code: Lot numbers or batch codes are unique identifiers used by manufacturers to track products. They are used for tracing and identifying specific products in case of recalls or quality issues.
  • Frozen By Date: For frozen foods, this date indicates when the product was frozen. It can help you gauge how long the item has been in storage.
  • Refrigerate After Opening or Keep Refrigerated
  • Open and Close Arrows: These arrows or symbols on packaging indicate how to properly open and reseal a product to maintain its freshness.
  • Allergen Declarations: Look for statements indicating the presence of common allergens such as peanuts, tree nuts, dairy, soy, wheat, and shellfish.
  • No Preservatives Added: This may affect the product’s longevity.
  • Organic: This may influence its shelf life.
Conclusion:

Understanding the differences between shelf life, best before, and expiry dates is important for maintaining food safety and quality in your homes. We should check these labels when shopping for groceries and be mindful of them when storing and consuming food products. By doing so, we can ensure that the food we eat is both enjoyable and safe. Happy eating!