Understanding the Science of Heat Loss
In the battle against cold, knowledge is your best weapon. Understanding the science of heat loss is necessary. The human body loses heat through four primary mechanisms: conduction, convection, radiation, and evaporation.
- Conduction: This occurs when your body comes into direct contact with cold surfaces or materials. For instance, sitting or lying on cold ground can rapidly siphon heat away from your body. To counteract this, consider insulating yourself from the ground with materials like foam pads or layers of leaves and debris.
- Convection: Wind and moving air carry heat away from your body more quickly than still air. Wind chill, which combines cold temperatures with wind, can make it feel much colder than it actually is. Windproof outer layers and shelter are your defenses against convective heat loss.
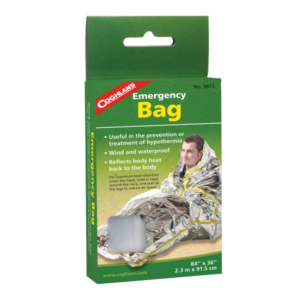
- Radiation: The human body constantly emits infrared radiation, losing heat to the environment. Radiant barriers, like reflective materials, can help reduce heat loss. Emergency space blankets, which should be included in your survival kit, are designed for this purpose.
-
- This is why mothers and grandparents always tell us to wear a hat, to lessen losing heat from our bodies!
- Evaporation: Even in cold conditions, sweat and moisture from your skin can evaporate, cooling you down. This is why moisture-wicking base layers are essential—they keep sweat away from your skin, preventing unnecessary cooling. Even a headband is a great tool here.
PRO TIP: Understanding these mechanisms empowers you to take proactive measures to combat heat loss. Your primary goal in any outdoor emergency is to preserve your core body temperature. In swimming lessons we are are taught HELP: Heat Escape Lessoning Position – which is rolling up in a ball best you can to reduce heat loss. I would say the same principle applies out of the water!
Layer Up
Layering is the key to staying warm.
- Start with a moisture-wicking base layer to keep sweat away from your skin.
- Next, add insulating layers like wool, fleece, or synthetic materials to trap heat.
- Finally, top it off with waterproof and windproof outer layers to shield against the elements.
- Hats, gloves, scarves to reduce heat loss from extremities
PRO TIP: Putting on a rain poncho when you’re cold can almost instantly raise your body temperature by a few degrees. They are amazing at taming the elements like wind.
Building a Shelter
Harness the Power of Fire
Fire is your ultimate ally in staying warm. It also doubles as a cooking source, and even a way to purify water for hydration.
Fire-making begins with gathering the right materials, even in wet conditions: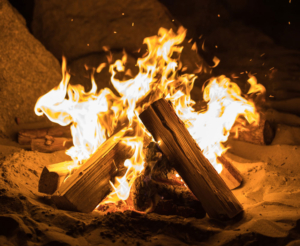
- Tinder: Start with tinder, which ignites easily. Dry leaves, grass, and bark shavings are good natural options. Additionally, carry some reliable man-made tinder in your survival kit, like cotton balls soaked in petroleum jelly or commercially available fire starter tabs.
- Kindling: Kindling consists of small twigs, sticks, or branches that catch fire quickly and sustain the flame. Look for dry twigs or branches under overhanging tree canopies or in sheltered spots.
- Fire Starting: Matches, lighters, flint and steel, fire discs
- Fuel: Fuel wood is the larger wood that will keep your fire burning steadily once it’s established. Collect dry logs and branches of various sizes to ensure a steady heat source.
- Firewood Prep: If all you have is damp wood, you can still make it burnable. Split logs to expose the dry interior and use a knife or hatchet to shave off wet outer layers.
Fire Safety
While fire is a valuable survival tool, it must be handled with care:
- Create a fire pit to contain the flames and prevent them from spreading. Clear away flammable materials from the immediate area.
- When you’re done with the fire, extinguish it completely. Pour water on the embers, stir the ashes, and repeat until everything is cold to the touch.
- Keep a bucket of water or sand nearby in case of accidental flare-ups.
- Remember to follow Leave No Trace principles by minimizing your impact on the environment.
Generating Body Heat
- Keep Moving: Physical activities, even simple ones like jogging in place, can raise your body temperature significantly.
- Share Body Heat: In a group, huddling together can provide crucial warmth. Body-to-body contact helps conserve heat..
- Conserve Energy: Avoid overexertion, as sweating can lead to wet clothing, which accelerates heat loss. Prioritize tasks and rest when necessary. Assess the situations for whether movement or conservation of energy is the better choice.
Staying Warm With Food
High-Energy Foods:
In cold weather, your body burns more calories to maintain its core temperature. Consuming high-energy foods provides the fuel you need to generate heat. Here are some options:
- Nuts: High in healthy fats and protein, trail butter, nuts like almonds and walnuts are excellent sources of sustained energy.
- Granola Bars: Portable and packed with carbs, granola bars are a convenient snack to keep your energy up.
- Energy Gels or Chews: These compact, high-carbohydrate snacks are designed for endurance sports and can be an efficient way to replenish energy.
Warming Foods:
Consuming foods that warm your body from the inside can help you maintain comfort and heat: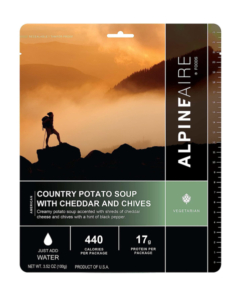
- Hot Soups: Instant soup mixes or dehydrated soups are not only hydrating but also provide warmth and comfort.
- Hot Beverage: A warm beverage can raise your body temperature and provide psychological comfort.
- Spicy Foods: Spices like cayenne pepper or chili can increase your metabolic rate and create a warming sensation. Consider trying chicken coconut curry.
Hydration Matters
In cold environments, it’s easy to forget about staying hydrated because you may not feel as thirsty as in hot weather. However, dehydration can exacerbate the cold. Cold air is typically dry, and your body loses moisture through respiration and perspiration.
- Drink small sips of water at regular intervals. If you don’t have access to a water source, ration your supply, but don’t wait until you’re thirsty to drink.
- Avoid Alcohol and Caffeine: These beverages can lead to increased fluid loss, so it’s best to avoid them in cold conditions.
- Melting Snow or Ice: If possible purify it by boiling or using purification tablets. Check out this really amazing Kelly Kettle Ultimate Base Camp Kit.
The Power of Survival Stories
 Reading survival stories and learning about the experiences of others can provide valuable insights and mental strategies for staying warm and hopeful during challenging times. Here is one about John utilizing the above steps in his survival.
A few years ago, John embarked on a winter backpacking adventure in the remote mountains. It was meant to be a thrilling solo trip, but things took an unexpected turn when a sudden snowstorm rolled in, shrouding the landscape in an icy, white veil. John found himself disoriented and exposed to freezing temperatures, with daylight quickly fading. Panic started to set in, but he knew that staying warm was paramount to making it through the night.
Seeking Immediate Shelter:
His heart raced as he scanned the surroundings for refuge. Thankfully, he spotted a cluster of pine trees nearby. With his heart pounding, he hurried over and took shelter beneath their thick, snow-laden branches. It was far from cozy, but it shielded him from the worst of the snowfall and biting winds.
Gathering Firewood:
John’s fingers numb from the cold, he began to gather firewood. Beneath the pine trees, he found relatively dry twigs and branches. It was a small victory amidst the chaos.
Fire-Making Skills:
With trembling hands, he pulled out his waterproof matches and a trusty fire starter. The matches ignited on the first try, and the flames danced to life, casting a warm, flickering glow in the snowy darkness. The relief was palpable.
Insulating His Shelter:
As the fire crackled, John remembered the importance of insulating his shelter. Gathering pine needles and leaves, he created a makeshift floor to insulate himself from the cold ground. It was far from luxurious, but it would make a world of difference.
Stay Hydrated and Nourished:
John’s water bottle was his lifeline. He took small, deliberate sips, knowing he had to make it last. In his backpack, he found a granola bar and a thermos of hot tea. The warmth of the tea was a soothing balm, and the granola bar provided much-needed sustenance.
Keep Moving:
To stave off the bone-chilling cold, he began doing light exercises within his shelter. He stretched, jumped around, and jogged in place, all while keeping a watchful eye on the dwindling fire.
Signal for Help:
As the night wore on, the storm began to relent. John grabbed a whistle from his backpack and blew it periodically, hoping against hope that someone, somewhere, would hear his distress signal. The hours felt like an eternity, but John’s determination to stay warm and alive pushed him onward. By the time dawn broke, the snowstorm had passed, revealing the pristine beauty of the mountains. As he gazed at the tranquil landscape, he knew he had faced a true test of survival.
John’s ability to stay warm, focused, and prepared in the face of an unexpected outdoor emergency was a testament to the resilience of the human spirit. It was a reminder that, even in the most challenging of situations, the will to survive can be an unwavering source of strength.
In Conclusion:
Staying warm in outdoor emergencies is a skill every outdoorsy person should master. With the right knowledge, clothing, gear, and survival mindset, you can face the harshest conditions with confidence. Always be prepared, stay informed, and remember that in the wild, knowledge and preparation are your greatest assets. Stay warm, stay safe, and embrace the thrill of the great outdoors.

 counterparts.


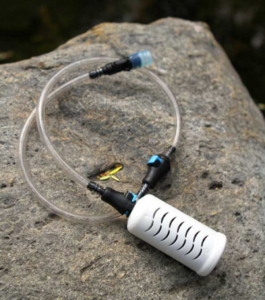 all the tiny particles that do not belong. The mesh lets the clean water through but traps the rest. This method works because those little troublemakers we mentioned earlier are usually larger than the holes in the filter.
 So, the next time you enjoy a glass of clean, safe water, you can appreciate the science behind it. Lets make sure you stay healthy and hydrated, even in emergency situations.

 When conducting a safety evaluation for seniors’ homes, it’s important to be on the lookout for potential risks. Here are some common areas to consider within the home:


 Conclusion:


 Squeezing excess wash water out of clothes is an important step in the laundry process, especially if you’re handwashing. Here are some tips to help you do it effectively:
 ideally away from wind and on higher ground to avoid potential flooding. A tent provides a barrier against wind, rain, and cold, creating a microclimate that is easier to warm with your body heat.
 Creating a shelter is only half the battle. To stay warm, you’ll need to insulate it effectively. Insulation traps warm air inside and cold air outside. Here are some insulating techniques: