124 piece First Aid Kit

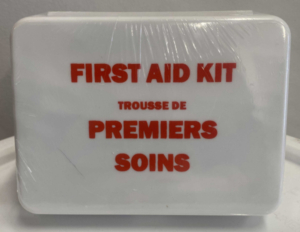
In our busy lives ensuring the safety and well-being of our loved ones is important. One way to do that is by having a well-stocked home first aid kit ready to tackle life’s little emergencies. Whether it’s a scraped knee, a minor burn, or even something more serious, a properly prepared first aid kit can be a lifesaver and keep you out of that emergency room. In this article, we’ll walk you through the essentials of creating a home first aid kit, so you can have peace of mind knowing you’re prepared for the unexpected. Remember: mini kits can be created to have in various locations, like the car, or in your child’s backpacks.

Basic Supplies

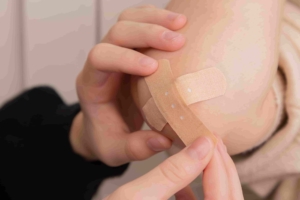
  1. Adhesive Bandages: Various shapes and sizes, making them versatile for covering cuts, scrapes, and minor wounds.
  2. Sterile Gauze Pads and Adhesive Tape: Throw some first aid tape over it to secure it in place!
  3. Antiseptic Wipes or Solution: Clean it thoroughly to prevent infection.
  4. Tweezers and Scissors: Come in handy for removing splinters, thorns, or foreign objects embedded in the skin. Scissors with blunt tips are useful for cutting tape, gauze, or clothing away from wounds without risking further injury.
  5. Disposable Gloves: Protect both the person administering aid and the person receiving it from potential contamination. They are crucial in situations involving bodily fluids or open wounds.
  6. Cotton Balls and Swabs: For applying antiseptic solutions, cleaning wounds, or applying ointments. Cotton swabs are particularly helpful for precise cleaning in small or sensitive areas.
  7. Adhesive Cloth Tape: This type of tape is durable and adheres well to skin. It’s useful for securing bandages and gauze in place.
  8. Pain Relievers: Include over-the-counter pain relievers like acetaminophen and ibuprofen.
  9. Antihistamines: Allergic reactions can happen unexpectedly, so it’s wise to have antihistamines on hand.
  10. Topical Antibiotic Ointment: Applying antibiotic ointment to minor wounds helps prevent infection and promotes faster healing.
  11. Hand Sanitizer: In situations where soap and water aren’t readily available, hand sanitizer maintains proper hand hygiene when providing first aid. Choose a sanitizer with at least 60% alcohol content for effective disinfection.
  12. CPR Face Shield or Barrier Device: A CPR face shield or barrier device is important if you feel confident in performing CPR to someone
  13. Elastic Bandage: Elastic bandages, also known as compression bandages, or tensor bandages to assist with a sprain
  14. Instant Cold Packs: Single-use cold packs can quickly reduce pain and swelling associated with injuries like sprains, strains, or bruises. They activate when you squeeze or shake them, providing instant relief.
  15. Emergency Blanket: Also known as space blankets or Mylar blankets, these compact, reflective blankets are crucial for keeping someone warm in emergency situations. They are especially useful in cases of shock or exposure to extreme cold.

Additional Basic Supplies

  1. Burn Dressings or Burn Gel: Burn dressings or burn gel (like aloe vera) provide relief and protection for minor burns, helping to cool the skin and alleviate pain.
  2. Eye Wash Solution: Eye injuries can occur from foreign particles, chemicals, or other accidents. Eye wash solution and eye cups are crucial for flushing out foreign substances and soothing irritated eyes.
  3. Triangle Bandage: A  tool that can be used as a sling for arm injuries, a head covering, or as a makeshift bandage if needed. It’s an adaptable addition to your first aid kit.
  4. Emergency Whistle: Can help attract attention and signal for help. It’s a compact tool that can be attached to the outside of your first aid kit.
  5. Safety Pins: Can be used to secure bandages, clothing, or improvised slings.
  6. Thermometer: To check for fever and to monitor a fever
  7. Emergency Contact List: Include a list of important emergency contacts, including family members, neighbors, and local medical facilities.
  8. Personal Medications: Include a list of them for each household member, and a location as to where to find them, including your family doctors contact information.
  9. Tourniquet: While not commonly needed, a tourniquet can be essential for controlling severe bleeding from a limb in extreme situations. Ensure you understand how to use it correctly, as improper use can lead to complications.
  10. Tongue Depressors: Tongue depressors can serve various purposes, including applying ointments, spreading adhesive, or as makeshift finger splints.

Organization and Storage

Choosing a suitable container for your kit is essential. You want something that’s durable, easy to carry, and keeps your supplies organized, clean and dry. Place the kit in a location that’s easily accessible to all family members but out of reach to young children. In an emergency, you don’t want to be searching for it. Keep the kit in a cool, dry place away from direct sunlight and extreme temperatures, as heat and humidity can degrade some items. Make sure all items are securely sealed and organized within the kit to maintain their sterility and readiness.

First Aid Kit Maintenance

Many of the items in your first aid kit, such as medications, ointments, and Band-aids, have expiration dates. It’s important to inspect these dates regularly and replace any expired items promptly. Expired products may lose their effectiveness or even become harmful. Make it a routine to go through your kit taking note of any items that need replenishing or replacing.

Whenever you use an item from your first aid kit, put a note in your shopping list to restock it. This ensures that your kit is always fully equipped and ready for emergencies. For instance, if you use adhesive bandages or an antiseptic wipe, replace them as soon as possible.

Remember that needs can change, so update your kit accordingly to meet your family’s evolving requirements. Younger years require more Band-aids, sporty teenage years more cold packs…

Personalizing Your First Aid Kit

Tailor your first aid kit to your family’s unique activities and needs. If you are into sports or outdoor adventures, consider adding extra items like instant cold packs or ankle braces. Include prescription medications and medical devices for anyone in your household who requires them, and don’t forget to include emergency contact information and medical history.

Handling Common Household Injuries

Lastly, familiarize yourself with how to handle common household injuries. Learn how to provide first aid for cuts, burns, bruises, sprains, strains, and fractures. Find a local training center and become a certified first-aider. Recognize the signs of allergic reactions and know when to use an EpiPen if necessary.

In conclusion, creating a home first aid kit is a practical and caring step toward ensuring your family’s safety. By assessing your needs, stocking essential supplies, staying organized, and educating yourself, you’ll be well-prepared to handle life’s unexpected moments.

CPR First aid class

candle burning

Let’s talk about something that doesn’t usually get the spotlight (pun intended) but should be in your emergency preparedness kit: light sources. When things go south, and darkness threatens to engulf your world, light sticks and candles can be your trusty companions.

Why Light Sources Matter

Alright, picture this: you’re in the middle of a thunderstorm, and the power’s out. Your smartphone flashlight is your only source of light, but the battery’s on its last breath. That’s where light sticks and candles come to the rescue. Having a source of light can be a massive driver of emotional well being – you feel safe and secure when you can see your surroundings. We take it for granted in our first world settings, and don’t realize how dark the dark can actually become. Being forced into the dark for an unknown amount of time can be a very scary situation.

Light Sticks: Glow in the Dark

Let’s start with light sticks – those nifty, glow-in-the-dark tubes that brings out our inner child. They’re like magic wands during a blackout. Crack one open, give it a shake, and bam! You’ve got a glow that can last for hours. They’re portable, easy to use, and don’t rely on batteries or electricity. Plus, they’re safe for kids to handle.

Candles: Old-School Charm

Now, candles might seem old-school, but don’t underestimate them. They’ve been lighting up our lives for centuries! Candles are not just a source of light; they bring warmth and comfort too. The soft, flickering glow can ease anxiety during a tense situation. Plus, they’re great for setting a sweet ambience during power-outage dinners, right?

Choosing the Right Ones

When you’re shopping for light sticks, look for ones with a decent glow duration. Check the expiry date too – they do have a shelf life. I can guarantee that your children will thoroughly enjoy receiving them when they’re coming up on their expiry date! As for candles, opt for unscented ones, so you’re not battling overwhelming floral scents while trying to stay calm, unless of course that’s your jam.

PRO TIP – Light sticks are the safe choice for lighting when you think there may be a gas leak nearby. Never light up a candle or flame based light source if you think there is a chance of a gas leak.

Storing and Maintaining

Light sticks are pretty low-maintenance. Just keep them in a cool, dry place, away from direct sunlight. Candles, on the other hand, need a bit more TLC. Store them in airtight containers to prevent moisture from ruining them (a wet wick isn’t going to help you out much). And remember, never leave candles unattended when lit – safety first!

Incorporating Light into Your Plan

When you’re prepping for emergencies, don’t forget to factor in your light sources. Create a plan that includes where you’ll store them and how you’ll access them in the dark. Teach your family or roommates how to use them too – it’s a team effort!

Here is a short list of other light considerations:

1. Battery-Powered Lights:

  • Flashlights
  • Lanterns
  • Headlamps

2. Solar-Powered Lights:

3. Hand-Cranked or Dynamo Lights

4. Fire-Based Lighting:

  • Candles
  • Oil Lamps
  • Camp fire

5. LED Emergency Lighting

6. Emergency Glow-in-the-Dark Products

Having a mix of these light sources in your emergency kit ensures you’re prepared for a wide range of situations. Remember to consider factors like the duration of light needed, portability, reliability, and power source availability when choosing the right light sources for your emergency preparedness plan.

Shine bright and stay safe!

One month premium pre-built survival food supply

Here are 10 suggestions on choosing the right foods for your emergency food storage:

1. Non-Perishable is the Name of the Game:

When we talk about non-perishable foods, we mean items that won’t spoil or go bad easily. During an emergency, you may not have the luxury of refrigeration, so you need foods that can sit on your pantry shelf or in your emergency kit for an extended period without deteriorating.

For example, each of these food items come in #10 cans for long term storage, and there is a wide variety of items across all of the food groups. Vacuum-sealed packages and other canned goods are also excellent choices. These can last for years (check best before/expiry dates), ensuring your family has sustenance when you need it most.

Freeze dried vs dehydrated – see this article to learn more about the difference and pro’s and con’s.

2. Nutrition Matters:

Emergency situations can be physically demanding and stressful. That’s whycolorful delicious salad 
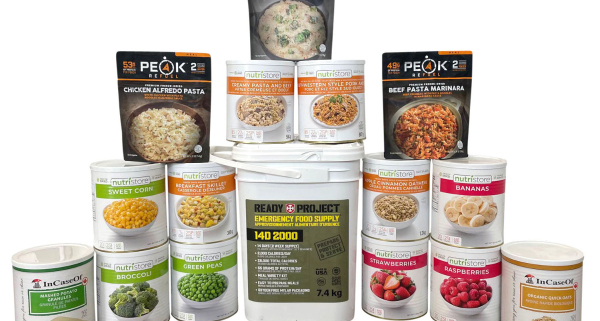
it’s important to stock foods that provide essential nutrients to keep your energy levels up and maintain overall health.

Take a look at Canada’s Food Guide for specific recommendations. Just remember in your planning that living off protein bars alone may not have a wide enough variety of nutrients to be physically healthy.

Nutrition by definition is a fundamental aspect of human physiology and plays a critical role in maintaining and optimizing health throughout life . What does that mean? We need balanced nutrition to grow, to feel and be healthy, and to prevent (for some people) being “hangry”.

PRO TIP: Consider including vitamin and mineral supplements to ensure you’re meeting your nutritional needs, especially if the emergency situation lasts an extended period.

3. Balanced Diet, Even in a Crisis:

Balance may vary depending on individual dietary needs, age, activity level, and health goals. Consider these elements in your individual planning:

    • Fruits and Vegetables
    • Protein Source
    • Grains
    • Dairy or Dairy Alternatives
    • Healthy Fats
    • Moderate Sugars and Sweets
    • Portion Control
    • Hydration
    • Limit Processed Foods (a couple boxes of crackers is great, just not too many)
    • Moderation and Variety

You might be tempted to focus on stocking up on one type of food to simplify your emergency food storage, but that’s not ideal. Just as in everyday life, you need a balanced diet in emergencies too. Aim for variety in your emergency food stash.

Fruits, vegetables, and meats can contribute to a balanced diet. Grains like rice, pasta, and oats provide carbohydrates for energy. Breaking this down, consider your normal meal plan / eating style and store what you eat now,  just in a format that has a longer shelf life.

4. Consider Dietary Needs:

It’s essential to take into account the dietary needs of everyone in your household.

    • Vegetarians/vegans: make sure to stock up on plant-based proteins like canned beans and nuts.
    • Gluten-free: as a mother of a celiac, I factor in the cookware, the food, the cross contamination possibilities, etc.
    • Infants: need to have an adequate supply of formula and baby food.
    • Pets: they also have dietary needs. Store their food and water, as well as any necessary medications or supplies (like kitty litter or baggies).
    • Peanut allergy: on top of storing peanut free foods, consider having an epi-pen available.
    • Canada recognizes these allergens: eggs, milk, mustard, peanuts, fish, sesame seeds, soy, tree nuts, wheat. Check labels of food in your storage should any apply to your household.

5. Variety is the Spice of (Emergency) Life:

Eating the same thing every day, even in an emergency, can become monotonous and affect morale. To keep spirits high, aim to diversify your food choices. Have different types of fruits, vegetables, and meats in your inventory. Rotate through various grains. This variety can make mealtime feel less like a chore and more like a comforting ritual.

Of course literally having spices to spice it up helps, or consider pre-made meals (like these Backpackers Pantry meals), or freezer meals (assuming this particular emergency leaves you with power).

food storage items sealed in the pantry

6. Don’t Forget the Basics:

While we often focus on the “exciting” goods, don’t neglect the basics. Salt, sugar, and cooking oil are essential for seasoning, flavor, and cooking your emergency meals. They’re often overlooked but can make a significant difference in the taste and quality of your emergency dishes.

I recommend having an extra on top of the one you currently use. Personally, in our home we go through 1 box of baking soda a year, so I am not going to store 6 of them, however I do keep 2 in my home at all times. No one likes to be baking and run out of an ingredient right? Basics by definition also have the amazing ability of you being able to create super basic easy and quick foods from just a few ingredients – think bannock or crackers with honey on top. Super easy, super yummy.

8. Comfort Foods:

In times of crisis, a familiar taste from a favorite snack or treat can provide a much-needed emotional boost. Including a few comfort foods, like a bar of chocolate, a pack of cookies, or some chips, can make a world of difference when spirits are low. It’s not just about sustenance; it’s about maintaining a sense of normalcy and comfort.

What this means is that your “secret stash” also doubles as an emergency food storage! Gummy type items often have the longest shelf life in this category. Chocolate bar – maybe 18 months and the chocolate starts to turn. Chips – 6 to 8 months max before they are stale.

9. Long Shelf Life:

The goal in building an emergency food supply is to have it last for an extended period. Check the expiration dates on food items and opt for those with the longest shelf life. Properly stored, many canned and dried goods can remain safe and nutritious for several years, at Briden Solutions some of our products have a 30 years + (sealed) shelf life! Keep an eye on your inventory and rotate items to ensure nothing goes to waste.

10. Consider Individual and Family Needs:

Your emergency food storage should cater to the specific needs of your household. Take into account dietary restrictions, allergies, and preferences. If someone in your family has dietary restrictions or allergies, you need to be extra cautious and read labels carefully. Ensure you have alternatives that cater to their needs.

In summary, choosing the right foods for your emergency food storage isn’t just about filling your shelves; it’s about thoughtful planning to ensure your family’s well-being during challenging times. By selecting non-perishable, nutritionally balanced, and varied foods that meet the dietary needs of your household, you’re taking a proactive step in being prepared for whatever emergencies life may bring your way.

If you have questions about how to create a food storage plan or how much your family needs, give us a call or email BridenAcademy@bridensolutions.ca we are happy to help!