fence with canada maple leaf painted on it

Demystifying Laws and Bylaws in Canada: Understanding the Legal Framework

In Canada, laws and bylaws serve as components of the legal framework at different levels of government. Both laws and bylaws aim to maintain order and ensure compliance with rules. They differ in scope, jurisdiction, and enforcement. First let me simply outline the 3 main tiers of government:

  1. Federal Government:
    • The federal government, based in Ottawa, is responsible for matters that affect the entire country.
    • It oversees areas such as national defense, foreign affairs, immigration, criminal law, currency and banking, and international trade.
    • The federal government is headed by a Prime Minister and Parliament, consisting of the House of Commons and the Senate.
  2. Provincial and Territorial Governments:
    • There are 10 provinces and 3 territories in Canada, each with its own government.
    • Provincial and territorial governments have authority over areas such as education, healthcare, transportation, natural resources, and civil law.
    • They are responsible for administering and delivering services to residents within their respective jurisdictions.
    • Each province and territory has its own Premier and Legislative Assembly or Legislative Council.
  3. Municipal Governments:
    • Municipalities are local governments responsible for specific geographic areas, such as cities, towns, villages, and rural municipalities.
    • Municipal governments have jurisdiction over local matters, including land use planning, zoning, waste management, local roads and infrastructure, and recreation.
    • They are governed by municipal councils or boards  and headed by mayors who are elected by residents of the municipality.

These three levels of government operate independently of each other but do collaborate on issues of mutual interest. The division of powers between these governments is outlined in the Constitution Act, 1867 (formerly known as the British North America Act), which establishes the framework for Canada’s federal system of government.

Laws:

Laws (statutes or legislation) are formal rules established by governments that apply uniformly across the entire jurisdiction. They are enacted through legislative processes, such as parliamentary or provincial assembly debates and voting.

Examples of Federal laws in Canada include:

  • Criminal Code of Canada: Covers a wide range of offenses including assault, theft, fraud, and homicide. It establishes the framework for investigating and prosecuting crimes.
  • Canada Health Act: Sets out the principles and criteria for publicly funded health care in Canada. It ensures that Canadians have access to essential health services without financial barriers and establishes standards for provincial health insurance plans.
  • Canadian Charter of Rights and Freedoms: Part of the Constitution of Canada: the Charter guarantees fundamental rights and freedoms to all Canadians. This includes freedom of expression, equality rights, and the right to a fair trial. It serves as a cornerstone of Canada’s legal system, protecting individuals from government infringement on their rights.
    • Note: “Rights” and “opinions” are not the same thing

Bylaws:

Bylaws are local regulations of municipal governments to govern within their jurisdiction. This includes property use, public safety, and community standards. They derive authority from provincial legislation and apply within the boundaries of the municipality that enacted them.

Examples of bylaws in Canada include:

  • Zoning Bylaws: Municipalities use zoning bylaws to regulate land use and development within their boundaries. These bylaws designate different zones for residential, commercial, industrial, and recreational purposes. They specify permitted land uses, building heights, setbacks, and other zoning regulations.
  • Noise Bylaws: Many municipalities have noise bylaws in place to regulate noise levels and hours of operation for various activities, including construction, commercial operations, and outdoor events. These bylaws aim to minimize noise disturbances and maintain quality of life for residents.
  • Animal Control Bylaws: There are bylaws governing the keeping, licensing, and control of domestic animals within their jurisdiction. These bylaws may include regulations on pet licensing, leash requirements, pet waste disposal, and prohibitions on dangerous or exotic pets.

Key Differences:

  • Jurisdiction: Laws are enacted by federal or provincial governments and apply uniformly across the entire jurisdiction (area), while bylaws are enacted by municipal governments and apply exclusively within their boundaries.
  • Scope: Laws address broad legal principles and issues of national or provincial significance, such as criminal law, health care, and human rights, whereas bylaws focus on specific local matters, such as land use, noise control, and animal regulation.
  • Enforcement: Laws are enforced by federal or provincial law enforcement agencies, such as the Royal Canadian Mounted Police (RCMP) or provincial police forces, whereas bylaws are enforced by municipal bylaw enforcement officers or local police within the municipality’s jurisdiction.

In summary, while laws establish overarching legal principles and standards at the federal and provincial levels, bylaws provide regulations tailored to address local needs and circumstances within municipalities. Understanding the distinctions between laws and bylaws is essential for navigating Canada’s legal landscape and ensuring compliance with applicable rules and regulations at all levels of government.

hiking

Stay Safe in the Wilderness:

Before we get into some written tips, I wanted to share something I discovered in preparation for this blog post. The SAR Alberta (Search and Rescue Alberta) website introduced me to a new app they have called “Adventure Smart”. Below is a short youtube video explaining what it is, but this amazing app is a way to create and plan your wilderness hikes and adventures with added safety. You add an emergency contact, your location, your start and end time, etc, so in case you do not return when you’re supposed to, SAR has some details to begin their search with to find you.

Venturing into the wilderness offers numerous opportunities for adventure and exploration, but it also comes with risks. In remote and rugged environments, access to medical help may be limited, making it important to be prepared to handle medical emergencies effectively. Let’s explore essential wilderness first aid tips to help you stay safe and respond confidently to emergencies in the great outdoors.

1. Prioritize Safety:

Before heading into any outdoor adventure, prioritize safety by familiarizing yourself with the area, assessing potential hazards, and planning accordingly. Share your itinerary with someone reliable, carry essential safety gear, and know how to use it effectively (this is where this new Adventure Smart app comes in perfectly handy).

Real-life Example: During a hiking trip in a remote mountain range, a group of friends encountered unexpected severe weather conditions. They had previously shared their itinerary with family members and were equipped with emergency shelters and extra layers of clothing. By prioritizing safety and following their preparedness plan, they were able to take shelter until the storm passed, avoiding exposure-related injuries.

Kananaskis lakes map

2. Be Prepared:

Pack a well-stocked wilderness first aid kit containing essential supplies such as bandages, gauze, adhesive tape, antiseptic wipes, tweezers, scissors, pain relievers, and any necessary personal medications. Additionally, consider including items specific to your planned activities, such as blister treatment, splints, and/or tourniquets.

Real-life Example: During a backpacking trip, a hiker sustained a minor laceration while navigating a rocky trail. His companions quickly accessed the first aid kit, cleaned the wound, and applied a sterile dressing to prevent infection. The hiker was able to continue the journey with minimal disruption, thanks to the well-prepared first aid kit.

gauze on a scrape

3. Assess the Situation:

In the event of an injury or medical emergency, take a moment to assess the situation calmly and methodically. The acronym STOP: Stop, Think, Observe, Plan…then Act guides you through safe survival.

Determine the severity of the injury, assess the victim’s condition, and prioritize treatment based on the circumstances of your surroundings and position.

Real-life Example: While camping in a remote wilderness area, a camper experienced symptoms of heat exhaustion, including dizziness and nausea. His companions recognized the signs of heat-related illness and immediately moved him to a shaded area, provided water and electrolytes, and cooled him down with wet towels. Their prompt assessment and intervention prevented the situation from escalating into a more serious medical emergency.

Lemon nuun electrolyte tablets showing

4. Treat Injuries Appropriately:

Administer basic first aid to stabilize the victim and prevent further injury.

This may include:

  • cleaning and dressing wounds
  • immobilizing fractures or sprains
  • controlling bleeding
  • providing pain relief

Remember to consider environmental factors such as temperature, weather conditions, and terrain when treating injuries.

Real-life Example: During a backcountry skiing expedition, a skier fell and sustained a suspected ankle fracture. His companions quickly improvised a splint using ski poles and extra clothing to immobilize the injured limb before carefully assisting him back to camp. Their swift and appropriate first aid measures helped minimize discomfort and further injury during the evacuation process.

skiing on the trails

Skiis

5. Know How to Signal for Help:

If medical assistance is needed, know how to signal for help effectively. If you have no phone service, or communication device to contact help, use visual signals such as waving brightly colored clothing or using a signaling mirror to attract attention. Additionally, use auditory signals such as blowing a whistle in a series of three blasts to signal distress.

Real-life Example: While on a backpacking trip in a remote forest, a hiker became disoriented and lost his way on the trail. Unable to find his bearings, he used a whistle to signal for help, producing three loud blasts at regular intervals. His signal was eventually heard by nearby hikers who were able to assist him in finding his way back to the trailhead.

6. Stay Calm and Reassure the Victim:

Maintain a calm and reassuring demeanor when providing first aid to the victim. Your confidence and reassurance can help keep the victim calm and cooperative, which is essential for effective treatment and recovery.

Real-life Example: While camping in a wilderness area, a camper experienced an allergic reaction to a bee sting, causing difficulty breathing and panic. His companions remained calm, reassured him, and administered his prescribed medication while waiting for emergency responders to arrive. Their calm and composed response helped alleviate the victim’s anxiety and ensured prompt medical attention.

lily from the garden

7. Be Prepared to Evacuate:

In some situations, evacuating the victim may be necessary to provide advanced medical care, or to relocate to a safer location. Be prepared to initiate an evacuation plan if the victim’s condition worsens or if you are unable to effectively manage the situation with the resources available. This is a contradiction to “stay in place”, and only applicable if you confidently know your location to continue moving.

Real-life Example: During a mountaineering expedition, a climber suffered a severe altitude sickness at high altitude, experiencing symptoms of confusion and disorientation. His climbing partners recognized the seriousness of the situation and initiated a rapid descent to lower elevation, where they could access medical assistance. Their quick thinking and decisive action saved the climber’s life and prevented further complications.

8. Seek Additional Training:

Consider obtaining formal training in wilderness first aid from reputable organizations. These courses provide valuable hands-on training in wilderness-specific first aid techniques and scenarios, empowering you to respond effectively to emergencies in remote settings.

Real-life Example: A group of outdoor enthusiasts enrolled in a wilderness first aid course to expand their knowledge and skills in managing medical emergencies in remote environments. During a subsequent backpacking trip, they encountered a fellow hiker with a dislocated shoulder and were able to confidently assess the injury and perform a successful relocation procedure, thanks to their training.

CPR First aid class

Conclusion:

By following these wilderness first aid tips and being prepared for emergencies, you can enjoy outdoor adventures with greater confidence and safety. Remember that prevention is the best medicine, so take steps to minimize risks and be proactive in addressing potential hazards. With proper preparation and knowledge, you can navigate the wilderness with peace of mind, knowing that you are equipped to handle whatever challenges may arise.


Briden Academy

When it comes to camping choosing the right tent is important. With so many options available, how do you choose the right one? In this guide, we’ll walk you through everything you need to know to find the perfect tent for your outdoor adventures.

1. Consider Your Needs:

Before diving into tent features and specifications, take some time to consider yourcamping trip on a beautiful starry night specific camping needs. Are you backpacking or car camping? How many people will be using the tent? What age of people will be using the tent? What weather conditions do you expect to encounter? These factors will help you narrow down your options.

2. Types of Tents:

There are several types of tents to choose from, each designed for different purposes and preferences:

  • Backpacking Tents: Lightweight and compact, ideal for backpackers and solo campers.
  • Family Tents: Spacious and durable, suitable for larger groups or car camping.
  • Three-Season Tents: Versatile tents designed for use in spring, summer, and fall, offering a balance of ventilation and weather protection.
  • Four-Season Tents: Sturdy and insulated tents built to withstand harsh winter conditions, including snow and strong winds.

Here are a few more names/types of tents available:

  • Pop-Up Tents: These tents feature a collapsible frame that “pops up” into shape when unfolded, making them incredibly quick and easy to set up. They’re ideal for casual campers or those who value convenience.
  • Cabin Tents: Cabin tents are spacious and tall, with vertical walls that maximize interior space. They often feature multiple rooms or dividers, making them a popular choice for families or groups who want separate sleeping areas.
  • Ultralight Tents: Designed for minimalist backpackers and thru-hikers, ultralight tents prioritize weight savings without sacrificing durability or weather protection. They’re typically made from lightweight materials and feature streamlined designs to keep pack weight to a minimum.
  • Bivy Tents: Bivy (bivouac) tents are small, lightweight shelters designed for solo backpackers and minimalist adventurers. They provide basic protection from the elements and are often used in conjunction with a sleeping bag and pad for ultralight camping.
  • Teepee Tents: Inspired by traditional Native American teepees, these tents feature a conical shape and a central pole for support. Teepee tents offer spacious interiors and excellent ventilation, making them a comfortable option for camping in warmer weather.
  • Truck Tents: Designed to fit in the bed of a pickup truck, truck tents provide an elevated sleeping platform and protection from the elements. They’re a convenient option for campers who prefer to sleep off the ground or want to maximize available space in their vehicle.

3. Size and Capacity:

Tent size is crucial for comfort and usability. Most tents are labeled with their capacity, but keep in mind that these ratings can vary depending on the manufacturer.

Here are some key factors to consider when evaluating tent capacity:

  • Number of Sleepers: The primary consideration when determining tent capacity is the number of people who will be sleeping in the tent. Tent capacities typically range from one-person tents to large family tents that can accommodate eight people or more.
  • Sleeping Arrangements: Consider how individuals will be arranged inside the tent. Will everyone be sleeping side by side, or will some people prefer to have their own sleeping space? Keep in mind that tent capacities are often based on the assumption of individuals sleeping closely together, so if you prefer more personal space, you may want to choose a tent with a higher capacity.
  • Gear Storage: In addition to sleeping space, consider the amount of gear and personal belongings that need to be stored inside the tent. Larger tents often provide more vestibule or storage space for gear, while smaller tents may require gear to be stored inside with the sleepers.
  • Comfort and Livability: While it’s possible to squeeze more people into a tent than its stated capacity, doing so can compromise comfort and livability. Overcrowding can lead to cramped quarters, limited ventilation, and difficulty moving around inside the tent. It’s generally best to choose a tent with a capacity that comfortably accommodates the number of sleepers and their gear.
  • Group Dynamics: Consider the dynamics of your camping group and how individuals prefer to sleep. Some people may be comfortable sharing close quarters with others, while others may prefer more personal space. Choose a tent capacity that aligns with the preferences and comfort levels of your camping group.

4. Features and Design:

Pay attention to the following features and design aspects when evaluating tents:

  • Setup: Look for tents with straightforward and intuitive setup processes, including for example color-coded poles and easy-to-follow instructions.
    • This is particularly important in temporary tenting. If the tent is to stay assembled for longer terms, a little more complex set up can be acceptable.
  • Ventilation: Proper ventilation is essential for airflow and condensation management. Choose tents with mesh panels, windows, and adjustable vents for improved airflow.
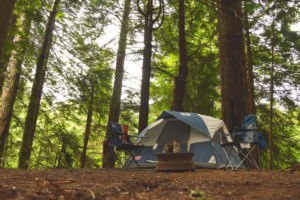
  • Weather Resistance: Opt for tents with durable and waterproof materials, reinforced seams, andcamping and sleeping in the outdoors in warm sleeping bags weatherproof coatings to keep you dry and protected in inclement weather.
    • I personally enjoy a tent that has space around the perimeter on the inside of the tent while my sleeping bag is open.  While I’m sleeping if it’s raining, then my sleeping bag avoids touching the sides, which would cause my sleeping bag to come damp or wet.
  • Durability: Consider the tent’s construction and materials, including the denier (thickness) of the fabric, quality of the poles and stakes, and overall build quality.
  • Weight and Packability: For backpacking and hiking trips, prioritize lightweight and compact tents that won’t weigh you down on the trail. While a family vacation can allow for more bulky tents.

5. Budget Considerations:

Set a budget for your tent purchase and prioritize features based on your camping needs and preferences. While high-end tents may offer advanced features and materials, there are plenty of budget-friendly options available that provide adequate performance for most campers.

6. Test Before You Buy:

Whenever possible, visit a local outdoor retailer to see tents in person and test them out firsthand. Often you will be able to view sample tents in store, crawl inside, and evaluate its size, comfort, and usability. This hands-on approach will help you make an informed decision and ensure you’re satisfied with your purchase.

7. Read Reviews and Compare Options:

Before making a final decision, consider reading online reviews and compare different tent models to gather insights from other campers’ experiences. Pay attention to factors such as durability, weather resistance, ease of setup, and overall value for the price.

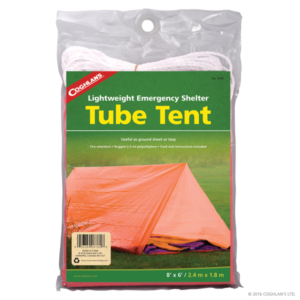
8. Emergency Tent:Coghlans tube tent

Another considering is in your car kit, or your 72 hour kit, keeping a tent tube in case of emergency. Grabbing the tent from storage in a pinch isn’t always feasible!

Conclusion:

Choosing the right tent is essential for a comfortable and enjoyable camping experience. By considering your needs, evaluating features, and setting a budget, you can find the perfect shelter for your outdoor adventures. With the right tent in tow, you’ll be ready to embark on unforgettable camping trips and create lasting memories in the great outdoors.

Balancing Human Needs and Ocean Conservation

The ocean and ocean conservation plays a vital role in sustaining life on Earth, providing essential resources and regulating the planet’s climate. However, human activities have put increasing pressure on marine ecosystems, threatening their health and resilience. In this article, we’ll explore the importance of the ocean to our livelihoods and discuss practical steps we can take to protect and conserve these invaluable resources.

Importance of the Ocean:

Save the Whales! Save the Dolphins! Save the Turtles!

We’ve all heard this before – but why? It’s all about balance

Diverse Ecosystems:

The ocean is home to a vast array of ecosystems, including coral reefs, kelp forests, mangroves, and open ocean habitats. Each of these ecosystems supports a unique mix of marine species, from microscopic plankton to large predators like sharks and whales. (see Nutrient Cycling below for deeper explanation)

Crucial Services:
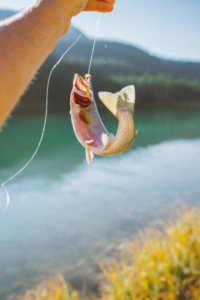
  • Food Production: The ocean is a vital source of food for millions of people around the world. It supportsfishing and catching a fish fisheries and aquaculture operations that provide protein-rich seafood for human consumption.
  • Climate Regulation: The ocean plays a critical role in regulating Earth’s climate by absorbing and storing large amounts of carbon dioxide (CO2) and heat from the atmosphere. This helps to mitigate the impacts of climate change by reducing greenhouse gas concentrations in the atmosphere.
  • Nutrient Cycling: Marine ecosystems play a key role in nutrient cycling, recycling essential nutrients like nitrogen and phosphorus through processes such as photosynthesis, decomposition, and nutrient uptake by marine organisms. This helps to sustain ocean productivity and support marine food webs.
  • Marine Industries: Fishing, tourism, and shipping, contribute significantly to global economies, providing livelihoods for millions of people worldwide.
Interconnectedness:

The health of ocean ecosystems is closely interconnected with terrestrial and atmospheric processes. For example, changes in ocean temperature and chemistry can impact weather patterns, ocean currents, and global climate systems. The ocean supports a diverse array of ecosystems that provide crucial services such as food production, climate regulation, and nutrient cycling.

Threats to Ocean Health:garbage washed up on shore

  • Overfishing: Unsustainable fishing practices, including overfishing and bycatch, deplete fish stocks and disrupt marine food webs.
  • Pollution: Plastic pollution, oil spills, chemical runoff, and marine debris pose significant threats to marine life and ecosystems.
  • Climate Change: Rising sea temperatures, ocean acidification, and sea-level rise driven by climate change endanger marine habitats and species.

Conservation Solutions:

  • Implementing where necessary fishing practices, such as catch limits, gear restrictions, and marine protected areas, to rebuild fish stocks and ensure long-term sustainability
  • Adopting measures to reduce plastic wastefish in aquarium
  • Improve waste management infrastructure
  • Promote recycling and reuse initiatives to prevent pollution from entering the ocean
  • Support beach cleanups, river cleanups, and coastal cleanup events to remove plastic debris and prevent it from entering the marine environment.
  • Promote ocean literacy and environmental education to raise awareness about the importance of ocean conservation and inspire action among individuals, communities, and future generations.
  • Support initiatives that integrate marine science, conservation, and stewardship into school curricula, community programs, and public outreach activities.
  • Choose sourced seafood products certified by reputable organizations
  • Climate Action: Reducing greenhouse gas emissions, transition to renewable energy sources, and support initiatives to protect coastal habitats
Conclusion:

The ocean is a precious resource that sustains life on Earth and supports countless human activities. By recognizing the importance of the ocean we can ensure a healthy and thriving ocean for future generations to enjoy. Let’s work together to safeguard our seas for the benefit of all.

This may be an sensitive topic & post for some*

Importance of a Car Escape Tool:

  1. Emergency Situations: In the event of an accident or vehicle submersion in water, a car escape tool provides a  means of breaking windows or cutting through seat belts to facilitate escape.
  2. Time-Sensitive Scenarios: During emergencies, every second counts. A car escape tool allows for swift action, reducing the time needed to exit a vehicle and increasing the likelihood of survival.
  3. Peace of Mind: Have a car escape tool readily accessible in your vehicle so you can drive with confidence knowing that you’re prepared for unforeseen emergencies.

How to Use a Car Escape Tool:

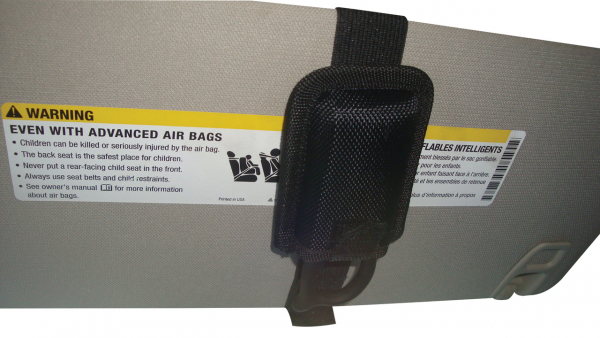
We offer this SuperVizor XT Car Escape Tool – visor mountable – found here!

  1. Window Breaking:
    • Hold the car escape tool firmly in your hand, ensuring a secure grip.
    • Locate the corner of the window farthest away from you or the center of the window for optimal results.
    • Using swift and forceful motion, strike the window with the pointed end of the tool.
    • Repeat the action if necessary until the window shatters completely, allowing for safe exit from the vehicle.
  2. Seat Belt Cutting:
    • In the event of a seat belt entrapment, retrieve the car escape tool from its holder or storage location (glove box or middle console – the backseat or trunk is not accessible).
    • Position the blade of the tool against the seat belt strap, ensuring that it’s aligned with the cutting edge.
    • Apply pressure and saw back and forth in a swift motion until the seat belt is severed, allowing for easy escape from the vehicle.
  3. Emergency Assistance:
    • Once you’ve safely exited the vehicle, use any built-in features of the car escape tool, such as a flashlight or whistle, to attract attention and signal for help.
    • Contact emergency services and provide details of your location and situation to expedite rescue efforts.

Considerations for Car Escape Tools:

  • Accessibility: Keep your car escape tool within reach of the driver’s seat, ideally mounted or stored in a designated location such as the center console, glove compartment, or door pocket. Ensure that all passengers are aware of the tool’s location in case it’s needed in an emergency.
  • Quality and Reliability: Invest in a high-quality car escape tool from a reputable manufacturer. Look for features such as durable construction, sharp cutting blades, and reliable window-breaking mechanisms to ensure effectiveness during emergencies.
  • Training and Familiarization: Familiarize yourself and your passengers with the operation of the car escape tool. Consider practicing using the tool in a controlled environment to build confidence and ensure readiness in real-life emergency situations.
  • Maintenance: Regularly inspect your car escape tool to ensure that it remains in good working condition. Check for any signs of damage, corrosion, or wear and tear, and replace the tool if necessary to maintain its effectiveness.
  • Additional Safety Measures: While a car escape tool is an essential safety device, it’s also important to practice safe driving habits and vehicle maintenance to reduce the risk of accidents and emergencies on the road. Regularly check your vehicle’s brakes, tires, lights, and other essential components to ensure optimal performance. Be aware of driving conditions before you go.

Conclusion:

Having a car escape tool in your vehicle is essential for preparing for emergencies on the road. You can enhance your safety and readiness in unforeseen situations. Be sure to keep your car escape tool easily accessible within your vehicle and familiarize yourself with its operation. Ensure your quick and efficient response during emergencies!

Exploring Nutritional Benefits and Culinary Uses of Lentils, Refried Beans, and Black Beans

Lentils, refried beans, and black beans are not only versatile and delicious but also packed with essential nutrients that contribute to a balanced diet. In this article, we’ll delve into their nutritional value and provide creative ways to incorporate them into your meals.

Nutritional Value:

1. Lentils:

  • Rich in protein, fiber, folate, iron, and manganese.
  • Low in fat and calories.
  • High in antioxidants, including polyphenols and flavonoids.
  • Promote heart health, aid digestion, and regulate blood sugar levels.

2. Refried Beans:

  • Excellent source of plant-based protein and fiber.
  • Packed with nutrients like iron, magnesium, potassium, and zinc.
  • Low in fat and cholesterol.
  • Support muscle growth, aid weight management, and improve digestive health.

3. Black Beans:

  • High in protein and fiber, promoting satiety and aiding weight loss.
  • Rich in antioxidants, vitamins (such as folate and vitamin K), and minerals (including iron, magnesium, and phosphorus).
  • Support cardiovascular health, regulate blood sugar levels, and boost immune function.

We carry these 3 types of Instant Beans, they can be found as a pack here or you can purchase them individually!

Culinary Uses and Recipes:

*Recipes are meal ideas so you can look up your own preferred taste for ingredients.

1. Lentils:
  • Lentil Soup: Simmer lentils with vegetables, herbs, and spices for a hearty and nutritious soup.
  • Lentil Salad: Toss cooked lentils with fresh vegetables, herbs, and vinaigrette for a refreshing salad.
  • Lentil Curry: Cook lentils in a flavorful curry sauce with coconut milk, tomatoes, and spices for a satisfying Indian-inspired dish.
2. Refried Beans:
  • Bean Burritos: Spread refried beans onto tortillas and top with cheese, salsa, lettuce, and avocado for a quick and easy meal.
  • Bean Dip: Blend refried beans with spices of choice, cheese, and salsa for a delicious dip served cold or warm with chips or vegetables.
  • Enchiladas: Fill corn tortillas with refried beans, cheese, and sauce, then bake until bubbly for a comforting Mexican-inspired dish.
3. Black Beans:
  • Black Bean Tacos: Fill taco shells with black beans, lettuce, tomatoes, onions, and cilantro for a flavorful and nutritious meal.
  • Black Bean Salad: Combine black beans with corn, bell peppers, avocado, and lime dressing for a colorful and refreshing salad.
  • Black Bean Soup: Simmer black beans with broth, vegetables, and spices for a comforting and filling soup topped with sour cream and cilantro.

More Ideas To Consider:

  • Bean and Vegetable Stir-Fry
  • Three-Bean Chili
  • Bean and Rice Casserole
  • Black Bean and Corn Quesadillas
  • Lentil Shepherd’s Pie
  • Refried Bean Dip with Tortilla Chips
  • Bean and Avocado Wrap
  • Tuscan White Bean Soup
  • Black Bean and Sweet Potato Enchiladas
  • Lentil Salad with Roasted Vegetables
  • Cuban Black Bean Soup
  • Spicy Chickpea Curry
  • Mexican Bean Salad with Cilantro-Lime Dressing
  • Lentil and Spinach Stuffed Bell Peppers
  • Refried Bean Breakfast Burritos
  • Bean and Mushroom Tacos
  • Black Bean and Quinoa Burgers
  • Lentil and Kale Soup
  • Bean and Cheese Stuffed Bell Peppers
  • Refried Bean and Veggie Quesadillas

Conclusion:

Lentils, refried beans, and black beans are nutritional powerhouses that offer a wide range of health benefits. By incorporating these legumes into your meals, you can enjoy delicious and satisfying dishes while promoting overall health and well-being. Whether you prefer soups, salads, tacos, or dips, there are countless ways to enjoy the versatility and nutritional value of lentils, refried beans, and black beans in your culinary repertoire.

sprouts grown at home

How to Sprout at Home: A Beginner’s Guide

Sprouting at home is an easy, affordable, and nutritious way to add fresh greens to your diet year-round. Whether you’re a seasoned gardener or a beginner with no green thumb, sprouting requires minimal space, time, and effort. Not only are sprouts packed with vitamins, minerals, and enzymes, but they also add a delightful crunch and flavor to salads, sandwiches, stir-fries, and more. In this guide, we’ll walk you through the simple steps to sprout at home successfully.

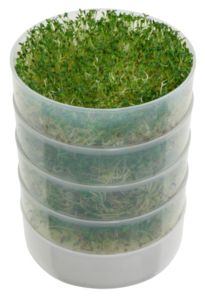
4 tray kitchen sprouter

Check Out our Kitchen Crop Sprouter here!

Getting Started

Choose Your Seeds

Selecting high-quality seeds is important for successful sprouting. You can use a variety of seeds, grains, nuts, and legumes for sprouting. Popular choices include alfalfa, broccoli, mung beans, lentils, radish, and fenugreek. Make sure your seeds are labeled for sprouting or are untreated to ensure they haven’t been chemically treated.

We offer quality Canadian made Mumm’s Sprouting Seeds, which can be found here!

Gather Equipment

You don’t need fancy equipment to sprout at home. Here’s what you’ll need:

  • Above mentioned ready to use Kitchen Crop Sprouter, or
  • Wide-mouthed glass jars or sprouting trays
  • Cheesecloth, mesh lids, or breathable fabric
  • Water
  • Seeds for sprouting

Preparing Your Sprouting Container

If you’re using glass jars, place about one to two tablespoons of seeds in the jar and cover them with water. Secure a piece of cheesecloth or mesh over the mouth of the jar with a rubber band or the jar lid’s ring. If you’re using sprouting trays, follow the manufacturer’s instructions for layering seeds evenly.

The Sprouting Process (may vary dependent on style of sprouter)

1. Soaking

  • After placing the seeds in your container, fill it with water and allow them to soak overnight or for the time recommended on the seed packaging.
  • Soaking softens the seeds’ outer shells and kickstarts the germination process.

2. Rinsing and Draining

  • After soaking, drain the water from the seeds by pouring it out through the cheesecloth or mesh.
  • Rinse the seeds thoroughly with fresh water.
  • For optimal results, rinse and drain your seeds two to three times a day to prevent mold or bacterial growth and to keep them moist.

3. Germination

  • Continue rinsing and draining your seeds regularly until you start to see tiny sprouts emerging.
  • This typically takes anywhere from two to seven days, depending on the type of seed and environmental conditions like temperature and humidity.

4. Greening (Optional)

  • Once your sprouts have germinated, you can expose them to indirect sunlight for a few hours each day to encourage greening.
  • This step is optional but can enhance the flavor and nutritional value of your sprouts.

Harvesting and Storage

  • When your sprouts have reached the desired length—usually about one to three inches—rinse them one final time and drain them thoroughly.
  • Store your sprouts in a clean container in the refrigerator, where they’ll stay fresh for up to a week.
  • Remember to rinse them every few days to maintain freshness.

Safety Precautions

  • Always use clean equipment and wash your hands thoroughly before handling sprouting seeds.
  • Keep sprouting containers away from direct sunlight and in a well-ventilated area to prevent mold growth.
  • If you notice any foul odors, sliminess, or mold on your sprouts, discard them immediately.

Enjoying Your Sprouts

  • Salad Boosters – Sprouts make an excellent addition to any salad, providing a crunchy texture and a burst of freshness. Mix them into leafy greens, cucumber slices, cherry tomatoes, and your favorite salad dressing for a nutritious and flavorful meal.
  • Sandwich Fillings – Upgrade your sandwiches and wraps with a handful of sprouts. Layer them onto your favorite bread or wrap along with sliced avocado, hummus, roasted vegetables, and protein of your choice for a satisfying and nutrient-packed meal. .
  • Stir-fries and Stir-fry Bowls – Add them towards the end of cooking to retain their crispiness and freshness. Combine sprouts with colorful vegetables, tofu, chicken, or shrimp, and your favorite stir-fry sauce for a quick and healthy meal that’s bursting with flavor.
  • Smoothie Boost – Add a handful of sprouts to your morning smoothie for an extra dose of vitamins, minerals, and fiber. While it might sound unconventional, sprouts blend well with fruits like bananas, berries, and mangoes, as well as leafy greens and almond milk.

More Ideas!

  • Garnish for Soups and Curries – Sprinkle sprouts on top of your favorite soups, stews, and curries just before serving to add a pop of freshness and texture. They not only enhance the visual appeal of your dish but also provide a delightful contrast to the warm and comforting flavors.
  • Sushi Rolls – Include sprouts in homemade sushi rolls to add a crunchy element and a nutritional boost. Serve with soy sauce, wasabi, and pickled ginger for a complete sushi experience at home.
  • Sprout Wraps – Fill your wraps with sprouts, grilled vegetables, quinoa, beans, and a drizzle of tahini or avocado dressing for a light and refreshing meal that’s perfect for lunch or dinner.
  • Topping for Pizza or Flatbreads – Sprinkle sprouts on top of homemade pizzas or flatbreads for a nutritious and colorful topping. After baking your pizza or flatbread, scatter a handful of sprouts over the hot surface and let them wilt slightly. Their fresh and crunchy texture adds an unexpected twist to traditional pizza flavors and makes for a vibrant and satisfying meal.
  • Try combining different types of sprouts, such as alfalfa, radish, and broccoli, for added variety and color.

Sprouting at home is not only a fun and rewarding hobby but also a sustainable way to incorporate nutrient-rich greens into your daily diet. With just a little bit of time and effort, you can enjoy fresh, crunchy sprouts year-round, right from the comfort of your own kitchen. Happy sprouting!

If you would like to learn the WHYs of sprouting, as in the “Why Should I?” part of it, keep reading:

1. Nutrient-Rich:

Sprouts are packed with essential vitamins, minerals, and antioxidants, making them a nutritional powerhouse. During the sprouting process, the nutrient content of seeds increases significantly. Sprouts are particularly rich in vitamin C, vitamin K, folate, potassium, iron, and fiber, among other nutrients.

2. Enhanced Digestibility:

Sprouting breaks down complex carbohydrates and proteins into simpler forms, making them easier to digest and absorb. This process also reduces the presence of antinutrients, such as phytic acid and enzyme inhibitors, which can interfere with nutrient absorption in the body. As a result, sprouts are gentler on the digestive system and may improve overall nutrient uptake.

3. Increased Enzyme Activity:

Sprouts are abundant in enzymes that aid in digestion and metabolic processes within the body. Enzymes play a crucial role in breaking down food and facilitating nutrient absorption. Consuming sprouts may help support digestive health and improve the body’s ability to extract and utilize nutrients from food.

4. Low in Calories:

Despite their nutritional density, sprouts are relatively low in calories, making them an excellent option for those looking to manage their weight or reduce calorie intake. Incorporating sprouts into meals adds bulk and texture without significantly increasing calorie consumption, allowing you to feel satisfied while maintaining a balanced diet.

5. Versatility:

Sprouts are incredibly versatile and can be incorporated into a wide range of dishes, including salads, sandwiches, stir-fries, soups, wraps, smoothies, and more. Their mild flavor and crunchy texture complement both sweet and savory flavors, making them a versatile ingredient in various cuisines and culinary styles.

6. Sustainable and Cost-Effective:

Growing sprouts at home is a sustainable and cost-effective way to access fresh greens year-round. Sprouting requires minimal resources, such as water and space, and can be done using simple equipment found in most kitchens. By sprouting your own seeds, you reduce food waste, save money on grocery expenses, and enjoy the satisfaction of growing your own nutritious food.

7. Freshness and Flavor:

Sprouts add a burst of freshness and flavor to dishes, enhancing their taste and appeal. Whether used as a garnish, topping, or main ingredient, sprouts contribute a delightful crunch and subtle nuttiness to meals. Incorporating sprouts into your culinary repertoire can elevate the overall taste and sensory experience of your favorite dishes.

friends

Let’s delve deeper into camping with pets across different styles of camping: backpacking, tent camping, and trailer camping.


Backpacking with Pets: Tips for Adventure on the Trail

Backpacking with pets can be an exhilarating experience, allowing you and your furry friend to explore remote wilderness areas together. Here are some tips for backpacking with pets:

  1. Gear Considerations:
    • Opt for lightweight and compact gear suitable for backpacking. Look for collapsible bowls, lightweight leashes, and compact sleeping pads or blankets for your pet.
    • Consider investing in a dog backpack or saddlebags to allow your pet to carry their own food and gear, but ensure the weight is appropriate for their size and fitness level.
  2. Fitness Preparation:
    • Gradually increase your pet’s fitness level through regular walks and hikes leading up to your backpacking trip. Practice carrying a pack if your pet will be carrying their own gear.
    • Be mindful of your pet’s limitations and adjust your itinerary to accommodate their stamina and endurance levels.
  3. Safety Measures:
    • Keep your pet on a leash at all times, especially in areas with potential hazards such as steep terrain or wildlife encounters.
    • Pack a pet first aid kit with essentials such as bandages, antiseptic wipes, and tweezers for removing ticks or splinters. Be prepared to handle common pet ailments and injuries on the trail.
  4. Trail Etiquette:
    • Respect trail regulations and restrictions regarding pets, including leash requirements and camping regulations.
    • Be considerate of other hikers and wildlife. Keep your pet under control and minimize their impact on the environment by packing out waste and avoiding disturbances to wildlife. I cannot stress enough the importance of educating yourself on wildlife safety while traveling with a pet!

            5. Rest and Hydration:

    • Provide frequent breaks for rest and hydration, especially during hot weather or strenuous sections of the trail.
    • Bring plenty of water for both you and your pet, as water sources may be limited or contaminated along the trail.

Tent Camping with Pets: Creating a Cozy Campsite

Tent camping with pets offers the comforts of home while immersing you and your furry companion in nature. Here are some tips for tent camping with pets:

  1. Comfortable Accommodations:
    • Set up a cozy sleeping area for your pet inside the tent, using a portable pet bed, blanket, or sleeping pad. Familiar scents and familiar bedding can help your pet feel more at ease in the tent.
    • Consider bringing a lightweight, collapsible tent or shelter specifically for your pet if they prefer their own space.
  2. Campsite Safety:
    • Choose a campsite with level ground and sufficient space for your tent and pet’s belongings.
    • Check for any potential hazards such as sharp objects, toxic plants, or areas with heavy foot traffic.
    • Use a sturdy stake or tie-out to secure your pet near your campsite, ensuring they have enough room to move around without wandering off.
  3. Weather Considerations:
    • Be prepared for changing weather conditions by bringing appropriate gear for your pet, such as a lightweight rain jacket or insulating coat for colder nights.
    • Provide shade and ventilation inside the tent to keep your pet comfortable during hot weather, and use blankets or sleeping pads for insulation during colder nights.
  4. Entertainment and Enrichment:
    • Bring along toys, chews, and other enrichment activities to keep your pet entertained during downtime at the campsite. Interactive toys or puzzle feeders can help stimulate your pet’s mind and prevent boredom.
  5. Nighttime Routine:
    • Establish a nighttime routine for your pet to help them feel secure and settled in the tent. Provide reassurance and comfort as needed, and consider bringing familiar items from home such as a favorite blanket or toy.
bunny rabbits eating clover

Bunnies


Trailer Camping with Pets: On-the-Road Adventures

Trailer camping with pets offers the convenience of home on wheels, allowing you to explore new destinations with your furry friend in tow. Here are some tips for your glamping experience with your pets:

  1. Pet-Friendly Amenities:
    • Choose a pet-friendly trailer or RV equipped with features such as a designated pet area, secure tie-out points, and easy-to-clean flooring.
    • Consider installing pet gates or barriers to restrict your pet’s access to certain areas of the trailer, such as the driver’s seat or kitchen area.
  2. Comfortable Traveling:
    • Ensure your pet has a comfortable and secure travel setup inside the trailer, such as a cozy crate or harness restraint system.
    • Allow your pet to become familiar with the trailer environment before embarking on long journeys.
  3. Outdoor Enclosures:
    • Set up a secure outdoor enclosure or playpen at your campsite to provide your pet with a safe area to roam and explore outdoors.
    • Use portable fencing or stakes to create a designated play area away from potential hazards.
  4. Pet-Friendly Destinations:
    • Research pet-friendly campgrounds and destinations along your travel route, and be mindful of any restrictions or regulations regarding pets. Look for campgrounds with amenities such as pet exercise areas or walking trails.
    • Be mindful of other campers, proper etiquette is necessary from all camping in the campground. Respect is important for an enjoyable experience for everyone.
  5. Routine and Structure:
    • Maintain a consistent routine for your pet while traveling, including regular mealtimes, potty breaks, and exercise sessions. Stick to familiar feeding and exercise schedules to help your pet feel more at ease in the trailer.

By following these tips and tailoring your camping experience to suit your pet’s needs, you can create enjoyable and memorable outdoor adventures together. Whether backpacking, tent camping, or trailer camping, camping with pets can strengthen the bond between you and your furry companion while fostering a deeper connection with nature.

camping trip

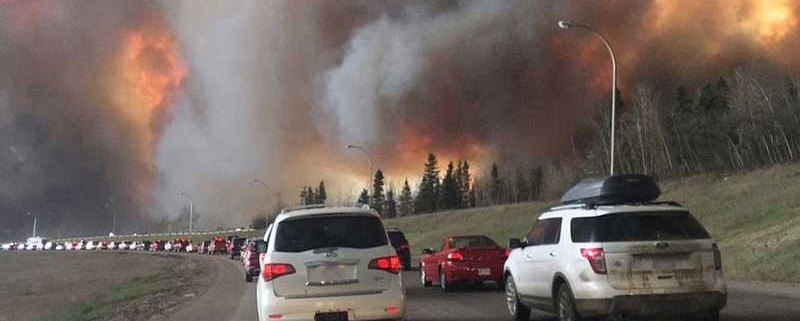
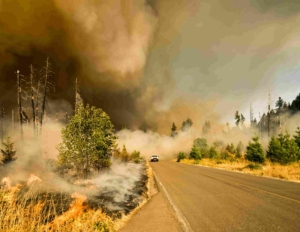
Fort McMurray Wildfire Evacuation

Wildfires pose a significant threat to communities and ecosystems across Canada, with devastating consequences for lives, property, and the environment. Understanding the causes of wildfires, and implementing prevention measures,  are essential for mitigating their impact. In this article, we’ll explore the frequency and origins of wildfires in Canada, as well as strategies for prevention.

Frequency of Wildfires in Canada:

Canada is no stranger to wildfires, with thousands occurring each year, particularly in forested regions. According to statistics from Natural Resources Canada, an average of over 8,000 wildfires burn across the country annually, consuming approximately 2.5 million hectares of land (approx half the size of Nova Scotia). The frequency and severity of wildfires vary from year to year, influenced by factors such as weather conditions, vegetation density, and human activity.

Some helpful websites to track current wildfires, and to further educate yourself:

Canadian National Fire Database

Canadian Red Cross

Fire Smoke Canada

FireSmart Canada

Causes of Wildfires:

Wildfires in Canada can be sparked by various sources, both natural and human-induced. Some common causes include:

  • Climate Conditions: Much of Canada is currently experiencing drought and dry seasons.
  • Campfires: Improperly extinguished or unattended campfires can easily ignite surrounding vegetation, especially during dry conditions.
  • Cigarettes: Discarded cigarette butts that are still lit or not fully extinguished can ignite dry grass, leaves, or other flammable materials.
  • Equipment Use: Sparks or hot exhaust from equipment such as chainsaws, lawn mowers, or off-road vehicles can ignite dry vegetation.
  • Arson: Deliberately set fires by individuals intending to cause damage or harm.
  • Powerlines: Malfunctioning electrical equipment or downed powerlines can generate sparks that ignite nearby vegetation.
  • Railways: Sparks from passing trains or malfunctioning equipment along railway tracks can ignite adjacent vegetation.
  • Lightning: Natural lightning strikes during thunderstorms can ignite wildfires, particularly in forested areas with dry vegetation.
  • Outdoor Burning: Burning yard waste, agricultural debris, or other materials outdoors without proper permits or precautions can lead to wildfires.
  • Fireworks: Improper use of fireworks, particularly in areas with dry vegetation, can spark wildfires.
  • Vehicle Accidents: Collisions or accidents involving vehicles can produce sparks or ignition sources that ignite nearby vegetation, especially if vehicles come into contact with flammable materials.
  • Hazardous Activities: Activities such as welding, grinding, or cutting metal in areas with dry vegetation can generate sparks that ignite wildfires if proper precautions are not taken.

Things to Know Before A Wildfire:

An Evacuation Order means you are at risk and should evacuate the area immediately. Follow the routes specified by officials and move away from the fire as directed.

An Evacuation Alert means that you should be ready to leave on short notice, but do not yet evacuate

Learn fire safety techniques and teach them to members of your family. Discuss concepts such as:

      • Stay Calm
      • Assess Your Surroundings
      • Seek Shelter
      • Stay Low: If trapped outside, stay as low to the ground as possible to avoid smoke inhalation and heat exposure. Cover your mouth and nose with a cloth or mask to protect yourself from smoke and ash.
      • Call for Help: If you have access to a phone, call emergency services (such as 911) and provide your location and situation.
      • Signal for Help: If you are unable to call for help, use signaling devices such as whistles, flashlights, or brightly colored clothing to attract the attention of rescuers or nearby individuals.
      • Stay Informed: Listen for updates and instructions from emergency responders or authorities via radio, television, or other communication channels.
      • Stay Put (unless directed): In most cases, it is safer to stay put and wait for help to arrive rather than attempting to outrun the fire. Moving through a wildfire can be extremely dangerous and increase the risk of injury or death.
      • Stay Hydrated: Drink water regularly to stay hydrated, especially if you are exposed to heat and smoke for an extended period.

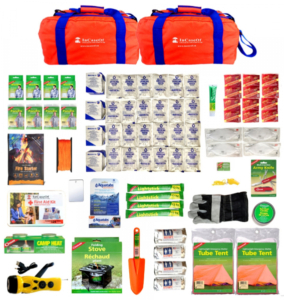
Keep your vehicle fueled and determine two routes out of your neighborhood.72 hour kit 4 person deluxe

Practice your evacuation plan regularly.

If you are on a farm or ranch, leaving livestock unsheltered is preferable, or if time and personal safety permits, evacuation them from the danger zone should be considered.​

Make a personalized 72 hour emergency kit.

During a Wildfire:

If you find yourself in a situation similar of needing to evacuate: grab your emergency kit(s), and follow the instructions of your local officials. Some other tips for your safety to consider:

  • Be prepared to evacuate at any time. If told to evacuate, do so. If told to shelter at home, do so.
  • Monitor local radio stations for up-to-date information on the fire and possible road closures.
  • Park your car, positioned forward out of the driveway. Keep car windows closed and have your valuables ready to be packed in your car should you need to evacuate.
  • If you do not evacuate, close all windows and doors in the house to reduce smoke and debris entering your home. Follow instructions on how to minimize fire damage.
  • Move all combustibles away from the house, including firewood and lawn furniture. Move any propane barbeques into the open, away from structures.

After a Wildfire:

Conduct post-fire assessments to determine the extend of the damage. Take photos and document everything for insurance purposes. Do you not enter or return to your home if there are any visible dangers to your well being.

Utilize if needed support services and resources within your community, including assistance with rebuilding homes, restoring utilities, and addressing emotional and mental health needs in the aftermath of a wildfire.

Conclusion:

To conclude, I’d like to remind everyone once more how to actively do our part in preventing a forest fire from occurring.

  1. Follow Fire Restrictions: Pay attention to fire restrictions and bans issued by local authorities, especially during periods of high fire danger. Avoid outdoor activities that could potentially ignite wildfires, such as campfires, fireworks, and outdoor burning, when restrictions are in place.
  2. Properly Dispose of Cigarettes: Never discard cigarettes, matches, or smoking materials in forested areas or dry vegetation. Always extinguish smoking materials completely in designated receptacles or containers.
  3. Campfire Safety: If allowed, build campfires in designated fire rings or pits away from overhanging branches, dry grass, or other flammable materials. Keep campfires small, never leave them unattended, and fully extinguish them with water before leaving.
    Pro Tip: Have a bucket of water near your fire for quick extinguishing of your campfire
  4. Equipment Safety: Use equipment such as chainsaws, lawnmowers, and off-road vehicles with caution in forested areas. Avoid operating equipment on dry or windy days, and ensure equipment is properly maintained to prevent sparks or hot exhaust from igniting wildfires.
  5. Report Suspicious Activity: Report any suspicious or illegal activity, such as unauthorized burning or arson, to local authorities immediately. Early detection and intervention can help prevent wildfires from spreading and causing extensive damage.
  6. Practice Safe Outdoor Burning: If permitted, follow guidelines for outdoor burning and obtain necessary permits from local authorities. Monitor weather conditions and avoid burning on windy days or during periods of high fire danger.
  7. Educate and Raise Awareness: Raise awareness about wildfire prevention and safety within your community through educational programs, workshops, and outreach efforts. Encourage neighbors and community members to take proactive measures to prevent wildfires and promote a culture of fire safety.
  8. Be Prepared: Be prepared to respond quickly and effectively in the event of a wildfire. Maintain an emergency evacuation plan, assemble an emergency kit with essential supplies, and stay informed about wildfire risks and updates from local authorities.
Briden Academy

Preparing for a camping trip involves more than just grabbing a tent and sleeping bag. To ensure a comfortable and enjoyable outdoor experience, it’s essential to pack the right gear. Whether you’re a seasoned camper or new to the great outdoors, this comprehensive checklist will help you gather all the essential equipment for your next adventure.

1. Shelter and Sleeping Gear:

  • Tent: Choose a tent suitable for your group size and camping conditions.
  • Ground tarp or footprint: Protect your tent floor from abrasion and moisture.
  • Sleeping bag: Select a bag appropriate for the expected temperature range.
  • Sleeping pad or air mattress: Provide insulation and cushioning for a comfortable night’s sleep.
  • Pillow or stuff sack filled with clothes: Add extra comfort to your sleeping setup.

2. Cooking and Food Preparation:

*This obviously varies whether you are backpacking versus site camping

  • Camp stove or portable grill: Choose a stove that suits your cooking needs and fuel preferences.
  • Fuel: Pack enough fuel for the duration of your trip.
  • Cookware: Include pots, pans, utensils, and a cutting board for meal preparation.
  • Cooler: Keep perishable food and beverages cold with a reliable cooler.
    • If backpacking, freeze dried meals like these are an excellent light weight option

1 month peak refuel pouches kit

  • Food: Plan and pack meals and snacks suitable for your camping itinerary.
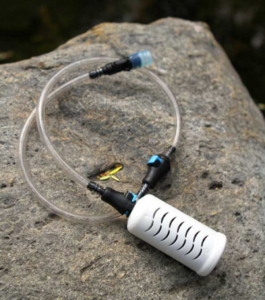
  • Water containers: Carry an ample supply of water for drinking, cooking, and cleaning.

XStream water filter straw for the outdoors

3. Clothing and Footwear:

  • Moisture-wicking clothing: Pack layers suitable for the expected weather conditions.
  • Insulating layers: Include fleece jackets, down vests, or wool sweaters for chilly evenings.
  • Rain gear: Stay dry with a waterproof jacket, pants, and footwear.
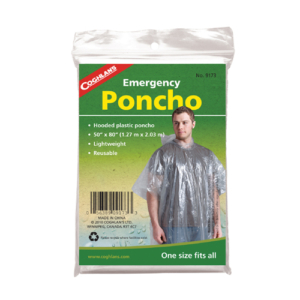
    • If backpacking, garbage bags double as rain gear, or these small light weight rain ponchos are great to throw in your pack.

emergency poncho pocket size

  • Sturdy hiking boots or shoes: Provide support and traction for outdoor exploration.
  • Extra socks and underwear: Keep your feet and body dry and comfortable.

4. Navigation and Safety:

  • Map and compass or GPS device: Navigate your way through the wilderness with confidence.
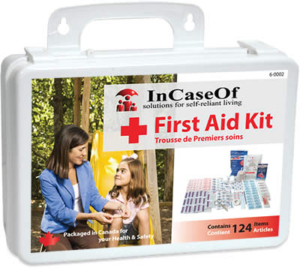
  • First aid kit: Treat minor injuries and ailments with essential medical supplies.

124 piece First Aid Kit

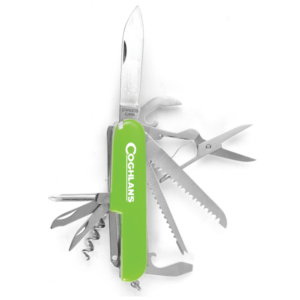
  • Multi-tool or knife: Perform a variety of tasks, from food prep to gear repair.

green pocket knife

  • Headlamp or flashlight: Illuminate your campsite and navigate in low-light conditions.
  • Whistle: Signal for help in case of emergency.
  • Fire-starting supplies: Bring matches, lighters, and fire starters to build and maintain campfires safely.

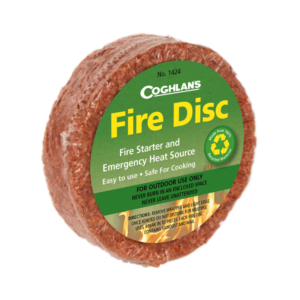
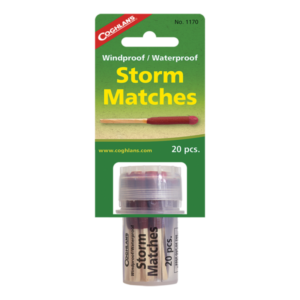
fire starter and emergency heat sourceWindproof, waterproof matches 20 pcs

5. Personal Items:

  • Sun protection: Pack sunscreen, sunglasses, and a wide-brimmed hat to shield yourself from UV rays.
  • Insect repellent: Ward off mosquitoes, ticks, and other pesky bugs.
  • Toiletries: Include essentials such as toothbrush, toothpaste, soap, and hand sanitizer.
  • Personal medications: Ensure you have an ample supply of any prescription medications you may need.
  • Camping chair or portable seating: Relax and enjoy the outdoors in comfort.

camping trip

6. Miscellaneous Items:

  • Backpack or daypack: Carry essentials for day hikes or excursions away from camp.
  • Campsite entertainment: Bring books, games, or musical instruments for leisure time around the campfire.
  • Trash bags: Leave no trace by packing out all trash and waste.
  • Camera or smartphone: Capture memories of your outdoor adventures with photos and videos.

Hammocks in the campsite, family camping

Pro Tip: I have a spreadsheet that I print off prior to every camping trip, broken into categories, to ensure when we as a family go camping we have everything we need!

Conclusion: By following your own personal gear checklist, you’ll be well-equipped for your next camping trip. Remember to tailor your packing list based on the specific destination, activities, and duration of your adventure. With the right gear in tow, you can relax and enjoy all that nature has to offer on your outdoor getaway.