N95 respiratory mask box

In an unpredictable world where emergencies and crises can strike at any moment, being prepared is becoming more and more important. One essential item that should find its place in your emergency kit is the N95 mask. While these masks gained popularity (or unpopularity depending where you stand on the “masking” debate) their significance extends far beyond that. This article explores when an N95 mask would be most necessary and why it should be a vital component of your emergency preparedness arsenal.

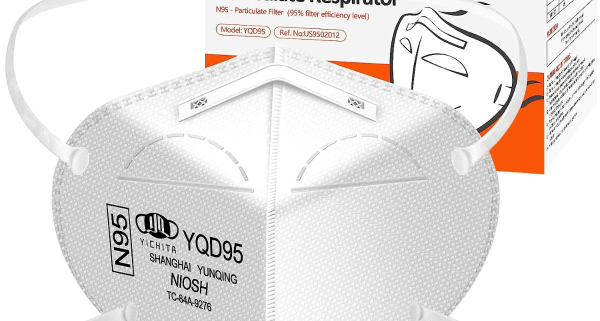
How Does an N95 Mask Work?

  • Mechanical Filtration: N95 masks are made from multiple layers of fine, tightly woven synthetic fibers, typically made of materials like polypropylene. These fibers create a dense network of tiny holes or pores. When air containing particles enters the mask, larger particles (such as dust, bacteria, and viruses) cannot easily pass through the gaps between the fibers. Instead, they collide with the fibers and become trapped.
  • Electrostatic Attraction: N95 masks also incorporate an electrostatic charge into the filter material. This electrostatic charge enhances the mask’s ability to capture smaller particles, including very fine dust, smoke, and even aerosolized pathogens like viruses. The charge attracts particles that may have otherwise passed through the mask due to their small size.

When is an N95 Mask  Necessary?Fort McMurray Wildfire Evacuation

  • Pandemics and Diseases: The most recent scenario is during pandemics and outbreaks of infectious diseases. N95 masks offer a high level of protection against airborne viruses and bacteria, reducing the risk of infection when used correctly.
  • Natural Disasters: In the aftermath of natural disasters such as earthquakes, hurricanes, or wildfires, dust, debris, and smoke can pollute the air. N95 masks filter out harmful particles and provide relief for those affected.
  • Industrial Accidents: Protect against inhaling toxic fumes and hazardous substances in the incident of a chemical spill or gas leak.
  • Wilderness Survival: N95 mask can be invaluable for protecting against wildfire smoke, forest fires, or even unexpected events like dust from a landslide or a volcanic eruption.
  • Home Renovation: During home renovations or when working with materials that generate dust or particles

Why Have an N95 Mask?

  • Filtration: They filter out at least 95% of airborne particles, making them effective in reducing the risk of inhaling harmful substances.
  • Portability: Compact and lightweight
  • Long Shelf Life: Up to 5 years if stored properly
  • Vulnerable Populations: To protect individuals with compromised immune systems or respiratory conditions

Proper fit is important for the effective functioning of N95 masks. These masks are designed to create a seal around the nose and mouth. This ensure that the air being breathed in passes through the filtration material and not around the edges of the mask.

Conclusion:

The N95 mask is not just a pandemic accessory from the past but an important component of your emergency preparedness kit. Its ability to protect against a variety of airborne hazards, coupled with its compact size and versatility, makes it an indispensable tool for your health and your loved ones during crises. Don’t wait for an emergency to strike – ensure you have one available in your emergency kit, ready to provide protection when you need it most.

little boy who is surprised

Camping Trip: Wasa

Hello folks, I want to share real life experience from a summer camping trip that resulted in my son breaking his elbow. Hindsight is 20-20 they say, and just maybe my mistakes will help someone else! We were camping as a family in July 2019, and as things can go, my middle son fell off the monkey bars at the park and broke his elbow. Thankfully I have been blessed with the ability to stay calm in an emergency and I was able to get through the ordeal fairly well.

Mistake #1

My husband was with my son at the park while I was bringing my other two children in away from the water (safety first). My first mistake was here. I should have swapped roles with my husband as I am the more experienced first-aider and quick thinker, while my husband is much better suited as the “gopher” and runner.

  • In Hindsight: Know your strengths and weaknesses as an individual and as a partnership.
Mistake #2

The next mistake we made was not knowing how cross-provincial health care worked. I had no idea if I could call an ambulance or if I would be charged a large fee being out of province visitors. We opted to transport him ourselves. This was unfortunately an extremely inexperienced and poor choice on my part.

  • In Hindsight: We should have called 9-1-1
ambulanceMistake #3

The next mistake we made was linked to the last mistake. When we got to the hospital I went in to get someone to help us bring a stretcher out to could transport him in to the hospital. The hospital will not do that per their policy. If I wanted him transported inside, I would need to do it myself or call 9-1-1 and then they would send someone to bring him in. At this point we should have done that, but no longer thinking clearly, we carried our 7 year old into the hospital.

  • Hindsight: we should have called 9-1-1

From this point the “system” was able to take over, and my stay calm time was over. I was now able to release some very pent up emotions while they did their x-rays and eventually took him away to surgery.

Mistake #4

My final mistake was that I arrived to the hospital in my beachwear. I luckily had a sweater in our van, but my husband went back to the campground (half an hour away) to get back to our other children (whom were with trusted people). I stayed in the hospital overnight in my bathing suit.

  • Hindsight: When we go to the beach, I now have a bag in our vehicle with us that is sort of like a mini 72-hour kit. It has a change of clothes for me, a few personal hygiene items, a phone charger, a water bottle, and spare cash in it.

Self Evaluation Post Emergency: Questionnaire

Overall, my biggest take away was that my first aid skills were put to the test, and I’d give myself a solid 5 out of 10, with lots of room for improvement. I was able to evaluate the situation after the fact and learn from it. You have to start somewhere right? Experiences are what help us grow and be better prepared for future experiences.

Below is a self-evaluation questionnaire that you can use to assess your emergency situations. This questionnaire can help you reflect on your actions, learn from the experience, and improve your preparedness for future emergencies:

Self-Evaluation Questionnaire for Post-Emergency Situations
  1. Did I remain calm during the emergency and its immediate aftermath?
    • Yes
    • No
    • Somewhat
  2. Was I able to ensure the safety of myself and my loved ones during the emergency?
    • Yes
    • No
    • Partially
  3. Did I effectively communicate with my family or household members during the emergency?
    • Yes
    • No
    • Somewhat
  4. Did I follow my emergency plan and protocols that I had in place before the emergency occurred?
    • Yes
    • No
    • Partially
  5. Was I able to provide basic first aid or medical assistance to those in need during or immediately after the emergency?
    • Yes
    • No
    • Somewhat
  6. Did I have access to essential supplies such as food, water, and medical kits following the emergency?
    • Yes
    • No
    • Partially
  7. How well did I adapt to changing circumstances and make quick decisions during the emergency?
    • Very well
    • Adequately
    • Struggled
  8. Did I maintain clear and effective communication with emergency services, if needed?
    • Yes
    • No
    • Somewhat
  9. Did I document the details of the emergency, including any damages, injuries, or actions taken, for future reference?
    • Yes
    • No
    • Partially
  10. How would I rate my overall preparedness for this emergency on a scale of 1 to 10 (with 10 being extremely well-prepared)?
    • 1
    • 2
    • 3
    • 4
    • 5
    • 6
    • 7
    • 8
    • 9
    • 10

Further Evaluation Questions:

  • What worked well in my response to the emergency, and what areas need improvement?
  • What additional skills, resources, or knowledge do I believe would have been helpful in handling this emergency more effectively?
  • Have I identified any gaps in my emergency preparedness plan or supplies that need to be addressed for future emergencies?
  • What steps will I take to enhance my preparedness and response for future emergency situations?
  • Do I have a plan for debriefing and discussing the emergency response with family or household members to learn from the experience?

Conclusion:

This self-evaluation questionnaire can serve as a valuable tool for individuals to reflect on their actions and preparedness in the aftermath of an emergency. It can help identify areas for improvement and guide future efforts to enhance readiness and resilience in the face of unexpected events.

I wish you all the best as inevitable unexpected situations come to pass, and know that even though I rated myself a 5/10, I am still proud of me and my family for staying calm and collected while handling a crisis moment. We are grateful for the experience to have learned and know what we can and should do if we ever find ourselves in a similar situation again.

6 pack vegetable food pack freeze dried

As Canadian citizens, we encounter food products on a daily basis, each stamped with different dates: shelf life, best before, and expiry dates. These dates play a role in ensuring food safety and quality. Lets discuss what they mean, and their importance:

oh canada

#1 – Shelf Life

Shelf life refers to the period that a product remains safe to consume and maintains its intended quality when stored under proper conditions. It’s important to note that shelf life is an estimate and can vary depending on storage temperature, humidity, and packaging. In Canada, manufacturers determine shelf life through rigorous testing to ensure their products are safe and meet quality standards.

Example: Canned goods such as our pasta line, or rice, sealed they have a shelf life of 20-30 years. If stored correctly in a cool, dry place, they remain safe to eat for an extended period. Opened/unsealed they have a shortened shelf life of anywhere from 6-18months.

#2 – Best Before Date

The best before date is a label indicating the date until which a product will maintain its optimal quality, taste, and texture, as determined by the manufacturer. After this date, the product may still be safe to eat, but its quality might deteriorate. In Canada, the “best before” date is a legal requirement for most packaged foods.

Example: A box of cereal might have a “best before” date of September 30, 2023. While likely fine to eat after this date, the manufacturer cannot guarantee it will taste as fresh or crunchy as intended.

#3 – Expiry Date

An expiry date is the date by which a product must be consumed for safety reasons. After this date, the product is no longer be safe to eat, regardless of its appearance, taste, or smell. Expiry dates are typically found on perishable items like dairy products and certain medications, where the risk of spoilage is significant.

Example: A carton of milk will usually have an expiry date, and it’s important to discard it after this date has passed, as consuming expired dairy products can lead to health risks.


Here is a 16 minute podcast about food labels created by the CFIA (Canadian Food Inspection Agency) for added information.

Other Key Words & Phrases

In understanding shelf life, best before dates, and expiry dates in Canada, it is helpful to be aware of additional phrases and words that provide valuable information about the product’s quality and safety. Here are some key terms and phrases to look for:

  • Packaging Date or Manufacture Date: This date indicates when the product was packaged or manufactured. It can determine a product’s freshness, especially when it does not have a best before date listed.
  • Lot Number or Batch Code: Lot numbers or batch codes are unique identifiers used by manufacturers to track products. They are used for tracing and identifying specific products in case of recalls or quality issues.
  • Frozen By Date: For frozen foods, this date indicates when the product was frozen. It can help you gauge how long the item has been in storage.
  • Refrigerate After Opening or Keep Refrigerated
  • Open and Close Arrows: These arrows or symbols on packaging indicate how to properly open and reseal a product to maintain its freshness.
  • Allergen Declarations: Look for statements indicating the presence of common allergens such as peanuts, tree nuts, dairy, soy, wheat, and shellfish.
  • No Preservatives Added: This may affect the product’s longevity.
  • Organic: This may influence its shelf life.
Conclusion:

Understanding the differences between shelf life, best before, and expiry dates is important for maintaining food safety and quality in your homes. We should check these labels when shopping for groceries and be mindful of them when storing and consuming food products. By doing so, we can ensure that the food we eat is both enjoyable and safe. Happy eating!

124 piece First Aid Kit

In our busy lives ensuring the safety and well-being of our loved ones is important. One way to do that is by having a well-stocked home first aid kit ready to tackle life’s little emergencies. Whether it’s a scraped knee, a minor burn, or even something more serious, a properly prepared first aid kit can be a lifesaver and keep you out of that emergency room. In this article, we’ll walk you through the essentials of creating a home first aid kit, so you can have peace of mind knowing you’re prepared for the unexpected. Remember: mini kits can be created to have in various locations, like the car, or in your child’s backpacks.

Basic Supplies

  1. Adhesive Bandages: Various shapes and sizes, making them versatile for covering cuts, 
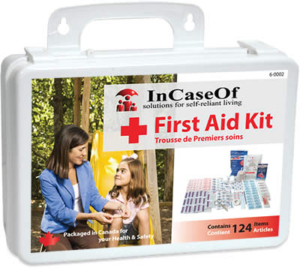
scrapes, and minor wounds.
  2. Sterile Gauze Pads and Adhesive Tape: Throw some first aid tape over it to secure it in place!
  3. Antiseptic Wipes or Solution: Clean it thoroughly to prevent infection.
  4. Tweezers and Scissors: Come in handy for removing splinters, thorns, or foreign objects embedded in the skin. Scissors with blunt tips are useful for cutting tape, gauze, or clothing away from wounds without risking further injury.
  5. Disposable Gloves: Protect both the person administering aid and the person receiving it from potential contamination. They are crucial in situations involving bodily fluids or open wounds.
  6. Cotton Balls and Swabs: For applying antiseptic solutions, cleaning wounds, or applying ointments. Cotton swabs are particularly helpful for precise cleaning in small or sensitive areas.
  7. Adhesive Cloth Tape: This type of tape is durable and adheres well to skin. It’s useful for securing bandages and gauze in place.
  8. Pain Relievers: Include over-the-counter pain relievers like acetaminophen and ibuprofen.
  9. Antihistamines: Allergic reactions can happen unexpectedly, so it’s wise to have antihistamines on hand.
  10. Topical Antibiotic Ointment: Applying antibiotic ointment to minor wounds helps prevent infection and promotes faster healing.
  11. Hand Sanitizer: In situations where soap and water aren’t readily available, hand sanitizer maintains proper hand hygiene when providing first aid. Choose a sanitizer with at least 60% alcohol content for effective disinfection.
  12. CPR Face Shield or Barrier Device: A CPR face shield or barrier device is important if you feel confident in performing CPR to someone
  13. Elastic Bandage: Elastic bandages, also known as compression bandages, or tensor bandages to assist with a sprain
  14. Instant Cold Packs: Single-use cold packs can quickly reduce pain and swelling associated with injuries like sprains, strains, or bruises. They activate when you squeeze or shake them, providing instant relief.
  15. Emergency Blanket: Also known as space blankets or Mylar blankets, these compact, reflective blankets are crucial for keeping someone warm in emergency situations. They are especially useful in cases of shock or exposure to extreme cold.

Additional Basic Supplies

  1. Burn Dressings or Burn Gel: Burn dressings or burn gel (like aloe vera) provide relief and protection for minor burns, helping to cool the skin and alleviate pain.
  2. Eye Wash Solution: Eye injuries can occur from foreign particles, chemicals, or other accidents. Eye wash solution and eye cups are crucial for flushing out foreign substances and soothing irritated eyes.
  3. Triangle Bandage: A  tool that can be used as a sling for arm injuries, a head covering, or as a makeshift bandage if needed. It’s an adaptable addition to your first aid kit.
  4. Emergency Whistle: Can help attract attention and signal for help. It’s a compact tool that can be attached to the outside of your first aid kit.
  5. Safety Pins: Can be used to secure bandages, clothing, or improvised slings.
  6. Thermometer: To check for fever and to monitor a fever
  7. Emergency Contact List: Include a list of important emergency contacts, including family members, neighbors, and local medical facilities.
  8. Personal Medications: Include a list of them for each household member, and a location as to where to find them, including your family doctors contact information.
  9. Tourniquet: While not commonly needed, a tourniquet can be essential for controlling severe bleeding from a limb in extreme situations. Ensure you understand how to use it correctly, as improper use can lead to complications.
  10. Tongue Depressors: Tongue depressors can serve various purposes, including applying ointments, spreading adhesive, or as makeshift finger splints.

Organization and Storage

Choosing a suitable container for your kit is essential. You want something that’s durable, easy to carry, and keeps your supplies organized, clean and dry. Place the kit in a location that’s easily accessible to all family members but out of reach to young children. In an emergency, you don’t want to be searching for it. Keep the kit in a cool, dry place away from direct sunlight and extreme temperatures, as heat and humidity can degrade some items. Make sure all items are securely sealed and organized within the kit to maintain their sterility and readiness.

First Aid Kit Maintenance

Many of the items in your first aid kit, such as medications, ointments, and Band-aids, have expiration dates. It’s important to inspect these dates regularly and replace any expired items promptly. Expired products may lose their effectiveness or even become harmful. Make it a routine to go through your kit taking note of any items that need replenishing or replacing.

Whenever you use an item from your first aid kit, put a note in your shopping list to restock it. This ensures that your kit is always fully equipped and ready for emergencies. For instance, if you use adhesive bandages or an antiseptic wipe, replace them as soon as possible.

Remember that needs can change, so update your kit accordingly to meet your family’s evolving requirements. Younger years require more Band-aids, sporty teenage years more cold packs…

Personalizing Your First Aid Kit

Tailor your first aid kit to your family’s unique activities and needs. If you are into sports or outdoor adventures, consider adding extra items like instant cold packs or ankle braces. Include prescription medications and medical devices for anyone in your household who requires them, and don’t forget to include emergency contact information and medical history.

Handling Common Household Injuries

Lastly, familiarize yourself with how to handle common household injuries. Learn how to provide first aid for cuts, burns, bruises, sprains, strains, and fractures. Find a local training center and become a certified first-aider. Recognize the signs of allergic reactions and know when to use an EpiPen if necessary.

In conclusion, creating a home first aid kit is a practical and caring step toward ensuring your family’s safety. By assessing your needs, stocking essential supplies, staying organized, and educating yourself, you’ll be well-prepared to handle life’s unexpected moments.

CPR First aid class

bandage on a scraped knee

Picture this: You’re on a picturesque hiking trail looking deep into the beauty of a canyon, the sun is shining, the water is the most beautiful blue you’ve ever laid eyes on, and the crisp mountain air fills your lungs. It’s a perfect day for an adventure. But wait, you trip and fall down! That’s where first aid for hikers comes into play. I’m here to share some tips to ensure your outdoor escapades stay fun and safe.Fossil Falls Kananaskis

#1: First Aid Kit – have one with you!

#2: Bear Spray (if applicable in your hiking zone)

#3: Emergency kit – just in case!

#4: Know before you go: read trail reports, check weather reports, carry maps, tell someone where you’re going and when you expect to return, etc.

The Essentials of Hiking First Aid

Let’s start with the basics. When you hit the trail, you’re stepping into an unpredictable environment, even if you’ve been there before.. Weather can change in an instant, and injuries can happen to even the most experienced hikers. Preventing mishaps is important, so always plan ahead.

  • I remember one time when I didn’t check the weather forecast before heading out, and I got caught in a surprise rainstorm. Lesson learned: preparation is key.

Get yourself a reliable hiking first aid kit. Think of it as your trusty sidekick. Customize it to suit your specific needs, but don’t forget essentials like bandages, antiseptic wipes, pain relievers, and blister treatment. (See below for a suggested itemized list)

Common Hiking Injuries and Ailments

Now, let’s talk about the common injuries and ailments you might encounter out there.

  • Cuts, scrapes, and abrasions happen to the best of us. Clean it up, cover it, and prevent infection. A small injury can quickly become a big problem if left untreated.
  • Sprains and strains can cramp your style. Remember the RICE protocol: Rest, Ice, Compression, Elevation. I carry ankle and knee braces, tensors, and even hiking poles to cover my sprain bases.
  • Blisters – oh, the bane of hikers’ existence. Prevention is key here. Properly fitted shoes and moisture-wicking socks can work wonders, plus pre-wrapping or taping areas prone to them. But if you do get a blister, treat it early to avoid misery on the trail. Cover it with a bandage or moleskin. Cut a piece of moleskin into a doughnut shape and place the pad so that it encircles and protects the blister.
  • Heat-related illnesses are no joke. Stay hydrated, wear appropriate hats/clothing, and monitor your time in direct sunlight.  Recognize the signs of heat-related issues: heavy sweating, nausea, headaches, dizziness, clammy skin, and/or irregular pulse.
  • Hypothermia and frostbite are risks in colder climates. Living in Alberta, Canada we do have some experience with winter conditions. Layering is important. Recognizing the symptoms and knowing how to rewarm yourself or a fellow hiker is crucial if you choose to be hiking out in the winter conditions. This is where an All Weather Emergency Heat Retention Bag comes into play. Yes, say that fast 5 times!

First Aid Scenarios:

Let’s dive into some real-world scenarios to see how first aid plays out.

Example 1: Dehydration and Heat Exhaustion

Imagine you’re hiking on a sweltering summer day, and yourLifestraw Water filter drinking straw buddy starts feeling dizzy and weak. It might be dehydration or heat exhaustion.

Action: Give them water, find shade, and cool them down. The key is to act swiftly and avoid the dreaded heatstroke. Continue to communicate, assess your hiking situation and whether you need to seek further assistance. Water sometimes can run low/out and we try to ration it. Consider hiking with a life straw or another form of water filtration system to extend your water abilities in times of need.

Example 2: Ankle Sprain  You’re exploring uneven terrain, and you twist your ankle.

Action: Immobilize it and elevate it if possible. Use your one-time use ice pack, tensor bandage or ankle brace. Take some pain killers if needed. Rest and assess whether your group can help you down or if search and rescue or any other help needs to be contacted.

First Aid/Emergency Kit items for Hiking:

gauze on a scrape

  • Antiseptic wipes
  • Antibacterial ointment
  • Band-aids of varying sizes
  • Gauze pads
  • Medical adhesive tape
  • Mole skin or other blister tape/treatment
  • Pain medication
  • After Bite
  • Allergy medication
  • Tweezers
  • Safety pins
  • Cotton Swab/Q-tip
  • Disposable gloves and/or mask
  • Sanitizer/soap
  • Triangular cravat bandage
  • Rolled gauze
  • Tensor wrap
  • Knee/ankle braces
  • Prescription medications
  • Sunscreen/Bug spray
  • Throat lozenges
  • Electrolytes (specifically for hot days)

Tools and Supplies

Remember, it’s not about expecting the worst but being ready for it. The responsibility of hikers is to respect the wilderness and be prepared for whatever it throws our way.

Stay safe out there, and may your hiking adventures be filled with breathtaking views and memorable moments, rather than unexpected mishaps!