Food Buckets
Food buckets refer to pre-packaged emergency food supplies that come in a bucket or container. These buckets contain a variety of non-perishable food items designed to provide sustenance during emergencies, natural disasters, or other situations where access to fresh food may be limited.
Here are some key points about food buckets:
- Long Shelf Life: The contents of food buckets are selected for their long shelf life. They include freeze-dried foods, which can last for years if stored properly.
- Variety of Contents: Food buckets contain a variety of items such as pre-made meals, fruits and vegetables sometimes even desserts or snacks. They are designed to provide a balanced diet or healthy food, though the specific contents can vary depending on the manufacturer and the intended use.
- Convenience: Food buckets are convenient because they come in a compact and portable container, such as a plastic bucket with a handle. This makes them easy to store and transport.
- Emergency Preparedness: Many people purchase food buckets as part of their emergency preparedness plans. They are useful in situations where access to fresh food is disrupted, such as during natural disasters, power outages, or other emergencies.
- Usage: Food buckets are not only for emergencies. Some people also use them for camping, hiking, or other outdoor activities.
- Considerations: When purchasing food buckets, it’s important to consider dietary restrictions, preferences, and any special needs of the individuals who may be consuming the food. Regularly check and rotate the contents to ensure that the food remains fresh and safe to eat.
We will explore four food buckets that we offer:
- the Ready Project 14-Day Bucket,
- the Nutristore Vegetable Bucket,
- the Nutristore Fruit Bucket,
- and the Peak Basecamp Bucket.
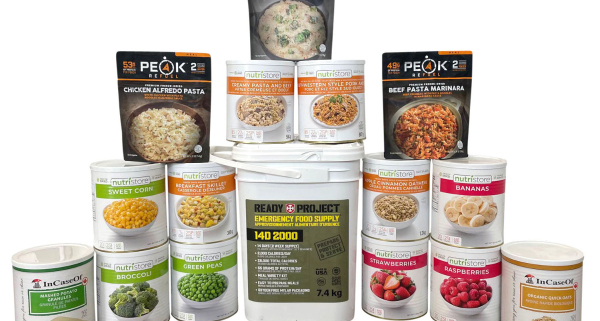
Ready Project 14-Day Bucket
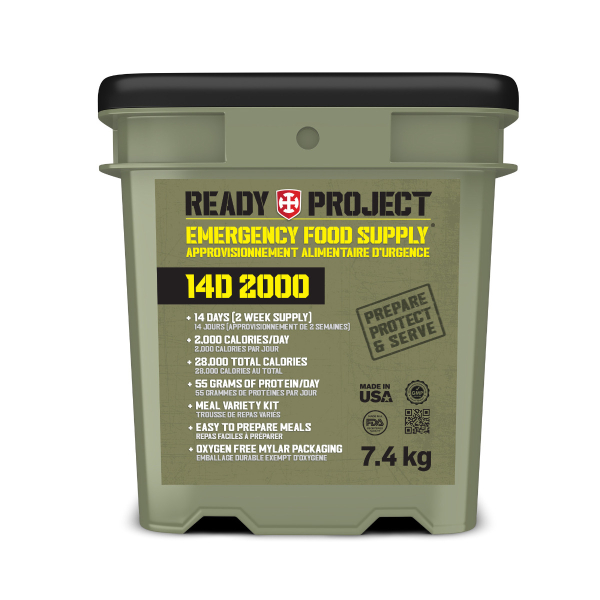
- Brown Sugar Oatmeal
- Multigrain Cereal
- Spanish Rice
- Cheddar Cheese Grits with Green Chilies
- Savory Beans & Rice
- Buttery Herb Pasta
- Creamy Rice Pudding
- Hobo Stew
- Cheddar & Broccoli Rice
- Hearty Potato Stew
- Breakfast Drink Mix
- Meal Extender Long Grain Rice
- Meal Extender Beans
The Ready Project 14-Day Bucket is an all-in-one solution designed to provide 1 person 2000 calories daily for two weeks. This food bucket contains a variety of dehydrated meals and snacks, carefully selected to ensure nutritional balance.
Nutristore Freeze-Dried Garden Vegetable Bucket
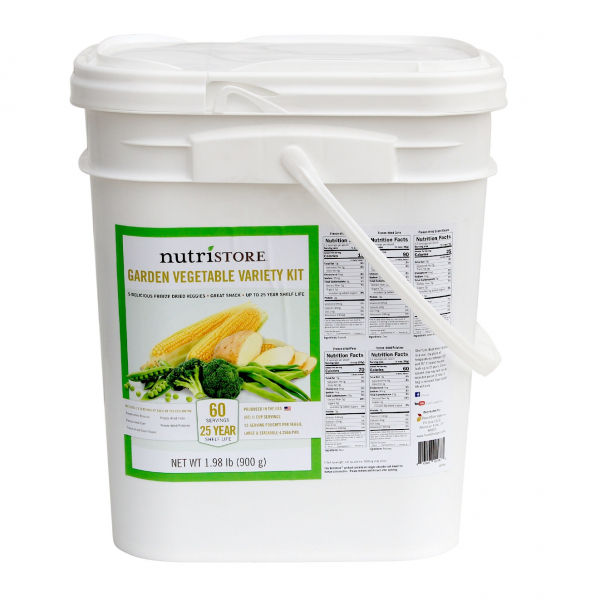
60 1/2 cup servings of the following freeze-dried vegetables. That’s 12 servings of each:
Broccoli
Corn
Peas
Green Beans
Potatoes
For those who prioritize their daily dose of vegetables even during an emergency, the Nutristore Vegetable Bucket is an excellent choice.
Pro-tip: My children love to eat these vegetables straight out of the package! In fact, my toddlers thought these were “chips” for the first few years of their lives.
- Long-term storage: Up to 25 years
- Short-term storage: Each individual veggie comes packaged in re-sealable mylar pouches inside the bucket. Once opened, the pouches have a shelf life (if stored properly) up to 18 months.


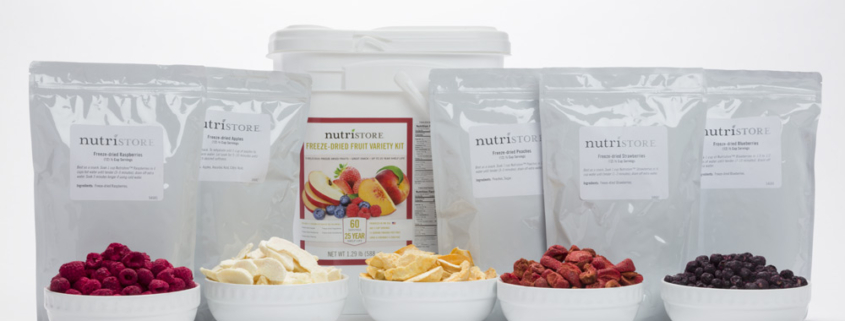
Nutristore Freeze-Dried Fruit Bucket
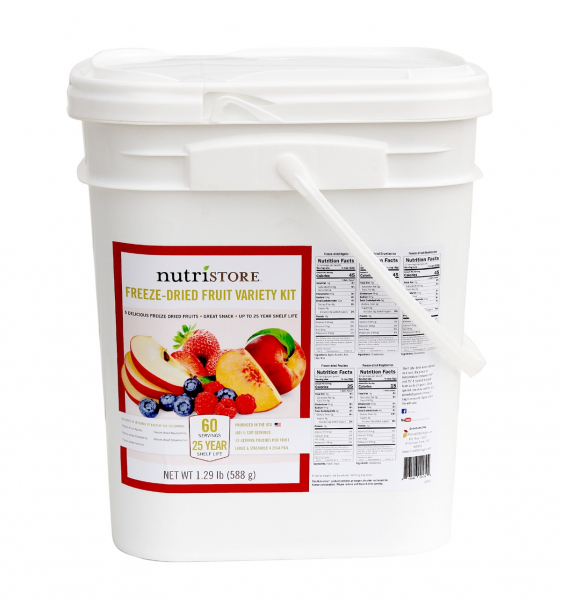
Fruits are an important source of vitamins and natural sugars that boost your energy levels and mood during an emergency. In this bucket there is 60 1/2 cup servings of:
Apples
Raspberries
Blueberries
Strawberries
Peaches
- Nutrient-rich options: These fruits offer a wide range of essential vitamins, fiber, and antioxidants, promoting overall health.
- Snack-ready: The freeze-dried fruits are perfect for snacking, baking, or adding to your cereal, providing a sweet and nutritious treat.
- Long-lasting freshness: Just like the vegetable bucket, the Nutristore Fruit Bucket can maintain its quality for up to 25 years when stored properly.
- Short-term: Inside the bucket, the fruits each come in a resealable mylar pouch. Once opened they have a (properly stored) shelf life up to 18 months


Peak Refuel Freeze Dried Basecamp Bucket
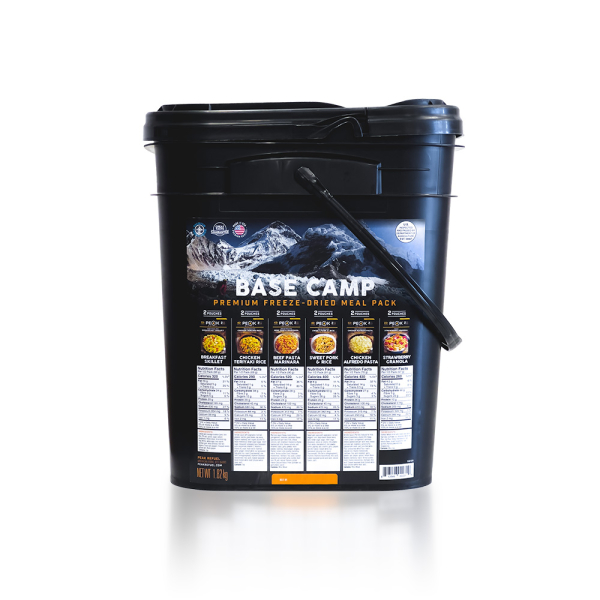
The Peak Basecamp Bucket is designed with adventurers and outdoor enthusiasts in mind, making it an excellent choice for both emergency preparedness and camping trips. This food bucket offers a variety of meals that are lightweight and easy to prepare, making it ideal for those on the move. Key highlights include:
- Lightweight and portable: The meals come in lightweight, compact packaging.
- Quick preparation: With simple rehydration instructions, you can have a hot meal in minutes.
- Extended shelf life: The meals in the Peak Basecamp Bucket have a sealed shelf life of up to 5 years.
2 Of The Following In the Bucket:
Beef Pasta Marinara
Chicken Alfredo Pasta
Chicken Teriyaki Rice
Sweet Pork & Rice
Breakfast Skillet
Strawberry Granola


Conclusion:
Food buckets are a smart choice for anyone looking to be prepared for emergencies, ensuring that you have a reliable source of sustenance when traditional food sources are scarce whether due to an emergency, or by choice (like cabin life). Have a great day!


 Duration: The recommended handwashing duration is at least 20 seconds. This is crucial for ensuring that you thoroughly clean all parts of your hands. Remember: tops and bottoms and in between!


 Once upon an evening, in my cozy home, something extraordinary was about to happen. The sun had set, and it was getting darker by the minute. The lights were out, and I found my family in the middle of a fantastic adventure called “The Great Power Outage Adventure.”