little boy who is surprised

Camping Trip: Wasa

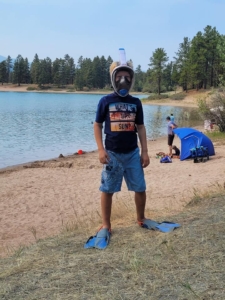
Hello folks, I want to share real life experience from a summer camping trip that resulted in my son breaking his elbow. Hindsight is 20-20 they say, and just maybe my mistakes will help someone else! We were camping as a family in July 2019, and as things can go, my middle son fell off the monkey bars at the park and broke his elbow. Thankfully I have been blessed with the ability to stay calm in an emergency and I was able to get through the ordeal fairly well.

Mistake #1

My husband was with my son at the park while I was bringing my other two children in away from the water (safety first). My first mistake was here. I should have swapped roles with my husband as I am the more experienced first-aider and quick thinker, while my husband is much better suited as the “gopher” and runner.

  • In Hindsight: Know your strengths and weaknesses as an individual and as a partnership.
Mistake #2

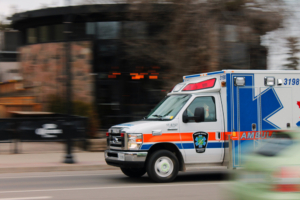
The next mistake we made was not knowing how cross-provincial health care worked. I had no idea if I could call an ambulance or if I would be charged a large fee being out of province visitors. We opted to transport him ourselves. This was unfortunately an extremely inexperienced and poor choice on my part.

  • In Hindsight: We should have called 9-1-1
ambulanceMistake #3

The next mistake we made was linked to the last mistake. When we got to the hospital I went in to get someone to help us bring a stretcher out to could transport him in to the hospital. The hospital will not do that per their policy. If I wanted him transported inside, I would need to do it myself or call 9-1-1 and then they would send someone to bring him in. At this point we should have done that, but no longer thinking clearly, we carried our 7 year old into the hospital.

  • Hindsight: we should have called 9-1-1

From this point the “system” was able to take over, and my stay calm time was over. I was now able to release some very pent up emotions while they did their x-rays and eventually took him away to surgery.
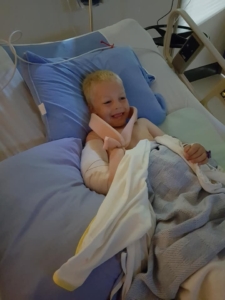
Mistake #4

My final mistake was that I arrived to the hospital in my beachwear. I luckily had a sweater in our van, but my husband went back to the campground (half an hour away) to get back to our other children (whom were with trusted people). I stayed in the hospital overnight in my bathing suit.

  • Hindsight: When we go to the beach, I now have a bag in our vehicle with us that is sort of like a mini 72-hour kit. It has a change of clothes for me, a few personal hygiene items, a phone charger, a water bottle, and spare cash in it.

Self Evaluation Post Emergency: Questionnaire

Overall, my biggest take away was that my first aid skills were put to the test, and I’d give myself a solid 5 out of 10, with lots of room for improvement. I was able to evaluate the situation after the fact and learn from it. You have to start somewhere right? Experiences are what help us grow and be better prepared for future experiences.

Below is a self-evaluation questionnaire that you can use to assess your emergency situations. This questionnaire can help you reflect on your actions, learn from the experience, and improve your preparedness for future emergencies:

Self-Evaluation Questionnaire for Post-Emergency Situations
  1. Did I remain calm during the emergency and its immediate aftermath?
    • Yes
    • No
    • Somewhat
  2. Was I able to ensure the safety of myself and my loved ones during the emergency?
    • Yes
    • No
    • Partially
  3. Did I effectively communicate with my family or household members during the emergency?
    • Yes
    • No
    • Somewhat
  4. Did I follow my emergency plan and protocols that I had in place before the emergency occurred?
    • Yes
    • No
    • Partially
  5. Was I able to provide basic first aid or medical assistance to those in need during or immediately after the emergency?
    • Yes
    • No
    • Somewhat
  6. Did I have access to essential supplies such as food, water, and medical kits following the emergency?
    • Yes
    • No
    • Partially
  7. How well did I adapt to changing circumstances and make quick decisions during the emergency?
    • Very well
    • Adequately
    • Struggled
  8. Did I maintain clear and effective communication with emergency services, if needed?
    • Yes
    • No
    • Somewhat
  9. Did I document the details of the emergency, including any damages, injuries, or actions taken, for future reference?
    • Yes
    • No
    • Partially
  10. How would I rate my overall preparedness for this emergency on a scale of 1 to 10 (with 10 being extremely well-prepared)?
    • 1
    • 2
    • 3
    • 4
    • 5
    • 6
    • 7
    • 8
    • 9
    • 10

Further Evaluation Questions:

  • What worked well in my response to the emergency, and what areas need improvement?
  • What additional skills, resources, or knowledge do I believe would have been helpful in handling this emergency more effectively?
  • Have I identified any gaps in my emergency preparedness plan or supplies that need to be addressed for future emergencies?
  • What steps will I take to enhance my preparedness and response for future emergency situations?
  • Do I have a plan for debriefing and discussing the emergency response with family or household members to learn from the experience?

Conclusion:

This self-evaluation questionnaire can serve as a valuable tool for individuals to reflect on their actions and preparedness in the aftermath of an emergency. It can help identify areas for improvement and guide future efforts to enhance readiness and resilience in the face of unexpected events.

I wish you all the best as inevitable unexpected situations come to pass, and know that even though I rated myself a 5/10, I am still proud of me and my family for staying calm and collected while handling a crisis moment. We are grateful for the experience to have learned and know what we can and should do if we ever find ourselves in a similar situation again.

lightning flash in the night sky

Living in regions prone to unpredictable weather or unpredictable happenings, we find ourselves on occasion facing the challenges of power outages. Whether it’s a winter blizzard, severe thunderstorm, or wind knocking over a tree onto your local powerline, being prepared for loss of electricity is important. In this article, we’ll explore practical tips on how to prepare for a power outage.

Emergency Kit Essentials:

Have one! Check out this previous post about 72 hour kits for some ideas on what to have in yours. Don’t forget a can opener!

electricity

Backup Power Sources:

  1. Generators:
    • Portable Generators: They are fueled by gasoline, propane, or diesel and should be operated outdoors for safety.
    • Standby Generators: Permanently installed and connected to your home’s electrical system. They automatically turn on when the power goes out and can provide uninterrupted power for your entire home. They run on natural gas or propane and are more expensive than portable generators.
  2. Power Inverters:
    • Power inverters convert DC (direct current) power from a battery into AC (alternating current) power that can be used to run household appliances and electronics. They are an excellent choice for keeping small devices and low-power appliances operational during an outage.
  3. Uninterruptible Power Supplies (UPS):
    • UPS devices are typically used to protect computers and sensitive electronics. They provide a short-term battery backup when the power goes out, allowing you to save your work and shut down your devices properly. They come in various sizes and can provide anywhere from a few minutes to a few hours of backup power.
  4. Solar Power Systems:
    • Solar panels combined with battery storage systems can provide a sustainable source of backup power. During normal conditions, solar panels generate electricity and store excess energy in batteries. During a power outage, this stored energy can be used to power your home.
  5. Power Banks and Portable Chargers:
    • Power banks, also known as portable chargers, are compact devices that store electrical energy. They are primarily used to charge smartphones, tablets, and other small electronic devices.
  6. Candles and Oil Lamps:
    • Ensure you have a supply of candles, matches, and oil or lamp fuel on hand for back up light. Always use them safely and keep an eye on open flames.

When choosing a backup power device, consider your specific needs, the duration of potential outages, and your budget. It’s also important to maintain and test your backup power sources regularly to ensure they are ready when needed. Having a combination of these devices can provide a comprehensive backup power solution for different situations and needs during a power outage.

Winter Power Outage Essentials:

Winters can be harsh here, and during outages, we sometimes rely on wood stoves or propane heaters to stay warm in our homes. Ensure you have a safe, and well stocked heating source and plenty of warm clothing and blankets. Keep doors and windows closed as often as possible to keep heat in.

Stay Connected and Informed:

When the power goes out, staying connected can be a lifeline. Have a communication plan in place with family and friends, know which websites or radio stations to look up or tune in to get up to date information. Or if necessary use your phone to call your local emergency services (eg: police or fire department). Charge your phones and devices when the power is on and consider investing in a backup power source for them.

Protect Your Perishables:

    • This would be a possible 72 Hour Kit or food storage moment.
    • Keep the Fridge and Freezer Closed:  A well-insulated fridge can keep food cold for about 4 hours if unopened, while a full freezer can maintain its temperature for about 48 hours, and a half-full freezer for about 24 hours.
    • Use Ice Packs: Placing ice packs in your refrigerator can help maintain temperatures.
    • Consider Cooler Storage: If you anticipate a prolonged power outage, consider transferring perishable items to a well-insulated cooler with ice packs or ice. This can help extend the freshness of these items until the power is restored.
    • Prioritize Consumption: Use perishable items that are at risk of spoiling first. Plan meals that incorporate these foods early in the power outage to reduce waste. Canned and non-perishable foods can be reserved for later use.
    • Be Cautious with Food: When in doubt, throw it out. If you are unsure about the safety of a particular food item, it’s better to discard it rather than risk food borne illness.
Conclusion

Power outages may be a temporary inconvenience, but with the right preparation and resilience, we can weather any storm that comes our way. Stay prepared, stay safe, and remember that we’re all in this together!

Prioritize, procure supplies, prepare, practice, preserving peace of mind

In a world filled with uncertainty, being prepared is not just a motto; it’s a way of life. Emergencies, natural disasters, and unexpected challenges can strike at any time. To ensure your safety and the safety of your loved ones, it’s essential to follow the five fundamental principles of preparedness known as the “5 P’s of Preparedness.” These principles serve as a roadmap for being ready for whatever life throws your way.

  1. Prioritize Planning

The first P in the 5 P’s of Preparedness is “Planning.” Without a well-thought-out plan, you may find yourself overwhelmed and unprepared during an emergency. Start by identifying potential situations and risks and assessing your personal vulnerabilities. Consider factors like your location, climate, and the needs of your household. Develop a comprehensive emergency plan that covers various scenarios, including natural disasters, power outages, and personal emergencies.

Key aspects of your emergency plan should include:

  • Evacuation routes and meeting points
  • Contact information for emergency services and loved ones
  • A communication plan
  • A list of essential supplies and resources
  1. Procure Supplies

The second P is “Procure.” Once you have a solid plan in place, it’s time to gather the necessary supplies. Your emergency supply kit should include enough provisions to sustain you and your family for at least 72 hours. Common items to include in your emergency kit are:emergency kit to store in the vehicles

  • Non-perishable food items
  • Water
  • First aid supplies
  • Flashlights and batteries
  • A multi-tool or Swiss Army knife
  • Warm clothing and blankets
  • Personal hygiene items
  • Important documents (ID, insurance, medical records)
  1. Prepare Your Environment

The third P stands for “Prepare.” This involves making your living environment as disaster-resistant as possible. Consider the following steps:

  • Secure heavy furniture and appliances if you live in an earthquake zone or tornado zone.
  • Install smoke detectors and carbon monoxide alarms.
  • Maintain fire extinguishers and learn how to use them.
  • Keep your home well-insulated and sealed against drafts.
  • Practice fire safety and establish escape routes.
  1. Practice and Training

The fourth P is “Practice.” Having a plan and supplies is not enough; you need to practice and train regularly. Conduct fire drills, practice evacuation procedures, and ensure that every member of your household knows what to do in an emergency. Regular training can make the difference between chaos and calm during a crisis.

  1. Preserving Peace of Mind

The fifth P emphasizes “Preserving peace of mind.” Mental resilience is literally just as crucial as physical preparedness. During times of crisis, stress and anxiety can be overwhelming and debilitating. Have you or someone you know “frozen” in a super stressful situation? We’ve all seen it or felt it and its super scary. To maintain your mental and emotional well-being:

  • Stay informed but limit exposure to distressing news. (aka, don’t look at your cell phone every 30 seconds)
  • Practice relaxation techniques and mindfulness.
  • Maintain a support network of friends and family.
  • Consider seeking professional help if needed.

In an unpredictable world, the 5 P’s of Preparedness provide a comprehensive framework for being ready for any emergency or disaster. Prioritizing planning, procuring supplies, preparing your environment, practicing and training, and preserving peace of mind are all essential aspects of being prepared. By following these principles, you can increase your resilience and ensure the safety and well-being of yourself and your loved ones when the unexpected occurs. Preparedness is not a one-time event but an ongoing commitment to safeguarding your families future.

car kit to store in the vehicles in case of an emergency 72 hour

One month premium pre-built survival food supply

JetBoil 230g fuel cannister for the JetBoil portable outdoor stove

When it comes to outdoor adventures, having a reliable and efficient cooking system can change your adventure from fun to amazing. JetBoil, a popular brand among outdoor enthusiasts, offers a range of innovative products designed to make cooking in the great outdoors a breeze.

JetBoil logo

How JetBoil Works

JetBoil’s core product is a compact and lightweight cooking system that utilizes a unique design to heat water or prepare meals quickly and efficiently. The primary components of a JetBoil system include:

  1. Stove Unit: It’s designed to create a powerful, focused flame that directs heat to the bottom of the pot, minimizing heat loss and improving cooking efficiency.
  2. Cooking Pot: JetBoil pots are specially designed to work with their stoves. They feature a heat exchanger on the bottom, which captures and transfers heat to the contents. The pots come in various sizes to accommodate different cooking needs.
  3. Fuel Canister: Small, lightweight canisters of compressed gas, usually propane or isobutane. These canisters are easy to attach to the stove and provide the fuel needed for cooking.
  4. Ignition System: Most JetBoil systems include a push-button ignition, making it easy to start the stove without the need for matches or lighters.

PRO TIP: The JetBoil cannister of fuel comes in 3 sizes: 100g, 230g, and 450g.

The shipping limitations: only a certain volume of fuel can be safely sent through the mail. 900g per single shipment is the max.


Here is a video link showing how this cool product works!


What JetBoil Can Do

JetBoil’s versatility makes it suitable for many outdoor activities and cooking needs, including:

  1. Boiling Water: JetBoil excels at rapidly boiling water, making it ideal for preparing hot beverages like coffee and tea, rehydrating freeze-dried meals, or cooking pasta and rice.
  2. Cooking Meals: With the right accessories, you can use JetBoil for cooking a wide range of meals, from simple one-pot dishes to more elaborate outdoor gourmet creations.
  3. Simmering: Some JetBoil models allow for precise flame control, enabling you to simmer or slow-cook dishes.

When and Where to Use JetBoil

JetBoil is versatile and  used in various outdoor scenarios, such as:

  1. Camping: Provides quick and efficient cooking solutions for breakfast, lunch, and dinner.
  2. Hiking and Backpacking: An excellent reliable cooking system without adding excess weight to packs.
  3. Climbing and Mountaineering: A favorite among climbers and mountaineers for its efficiency in high-altitude cooking.
  4. Emergency Preparedness: A valuable addition to your emergency preparedness kit, ensuring you have a reliable way to cook during power outages or other emergencies. (Make sure you are cooking outside with fresh air)

Why Use JetBoil

  1. Speed: This system can boil water in a matter of seconds, saving you valuable time and fuel.
  2. Efficiency: Its innovative design maximizes fuel efficiency, reducing the number of canisters you need to carry.
  3. Portability: JetBoil is compact and lightweight, making it easy to transport and ideal for adventures where every ounce matters.
  4. Reliability: Known for their durability and dependability in various weather conditions.
  5. Convenience: With push-button ignition and quick setup, JetBoil simplifies outdoor cooking

hiking

This innovative cooking system has revolutionized outdoor cooking. JetBoil  ensures you can enjoy hot meals and beverages wherever your outdoor pursuits take you. Elevate your outdoor (or emergency) culinary experience to new heights! Happy cooking!

6 pack vegetable food pack freeze dried

As Canadian citizens, we encounter food products on a daily basis, each stamped with different dates: shelf life, best before, and expiry dates. These dates play a role in ensuring food safety and quality. Lets discuss what they mean, and their importance:

oh canada

#1 – Shelf Life

Shelf life refers to the period that a product remains safe to consume and maintains its intended quality when stored under proper conditions. It’s important to note that shelf life is an estimate and can vary depending on storage temperature, humidity, and packaging. In Canada, manufacturers determine shelf life through rigorous testing to ensure their products are safe and meet quality standards.

Example: Canned goods such as our pasta line, or rice, sealed they have a shelf life of 20-30 years. If stored correctly in a cool, dry place, they remain safe to eat for an extended period. Opened/unsealed they have a shortened shelf life of anywhere from 6-18months.

#2 – Best Before Date

The best before date is a label indicating the date until which a product will maintain its optimal quality, taste, and texture, as determined by the manufacturer. After this date, the product may still be safe to eat, but its quality might deteriorate. In Canada, the “best before” date is a legal requirement for most packaged foods.

Example: A box of cereal might have a “best before” date of September 30, 2023. While likely fine to eat after this date, the manufacturer cannot guarantee it will taste as fresh or crunchy as intended.

#3 – Expiry Date

An expiry date is the date by which a product must be consumed for safety reasons. After this date, the product is no longer be safe to eat, regardless of its appearance, taste, or smell. Expiry dates are typically found on perishable items like dairy products and certain medications, where the risk of spoilage is significant.

Example: A carton of milk will usually have an expiry date, and it’s important to discard it after this date has passed, as consuming expired dairy products can lead to health risks.


Here is a 16 minute podcast about food labels created by the CFIA (Canadian Food Inspection Agency) for added information.

Other Key Words & Phrases

In understanding shelf life, best before dates, and expiry dates in Canada, it is helpful to be aware of additional phrases and words that provide valuable information about the product’s quality and safety. Here are some key terms and phrases to look for:

  • Packaging Date or Manufacture Date: This date indicates when the product was packaged or manufactured. It can determine a product’s freshness, especially when it does not have a best before date listed.
  • Lot Number or Batch Code: Lot numbers or batch codes are unique identifiers used by manufacturers to track products. They are used for tracing and identifying specific products in case of recalls or quality issues.
  • Frozen By Date: For frozen foods, this date indicates when the product was frozen. It can help you gauge how long the item has been in storage.
  • Refrigerate After Opening or Keep Refrigerated
  • Open and Close Arrows: These arrows or symbols on packaging indicate how to properly open and reseal a product to maintain its freshness.
  • Allergen Declarations: Look for statements indicating the presence of common allergens such as peanuts, tree nuts, dairy, soy, wheat, and shellfish.
  • No Preservatives Added: This may affect the product’s longevity.
  • Organic: This may influence its shelf life.
Conclusion:

Understanding the differences between shelf life, best before, and expiry dates is important for maintaining food safety and quality in your homes. We should check these labels when shopping for groceries and be mindful of them when storing and consuming food products. By doing so, we can ensure that the food we eat is both enjoyable and safe. Happy eating!

sprouts grown at home

Home sprouting is a simple and rewarding way to add fresh, nutritious greens to your diet. We will explore how a home Sprouter works, why sprouting at home is a healthy choice, and provide ways to help you get started on your home sprouting journey.

6 Easy Steps: How Does a Home Sprouter Work?

A home Sprouter is a device or system designed to facilitate the germination and growth of seeds, grains, legumes, or nuts into edible sprouts. Here’s how it works:

  1. Selection of Seeds: Start by choosing the seeds or legumes you want to sprout. Common choices include alfalfa, broccoli, radish, and lentils.
  2. Soaking: The process begins with soaking the seeds in clean water for a specified period, typically 4-12 hours or overnight. This hydrates the seeds and initiates the germination process. Follow your products instructions of course for this step as they all vary.
  3. Rinsing: After soaking, drain the water and rinse the seeds thoroughly. This helps remove any residue and encourages oxygen supply to the sprouts.
  4. Sprouting: Place the seeds in your sprouting device or in a mason jar with a mesh lid. Over the next few days, continue to rinse and drain the seeds multiple times a day, ensuring they remain moist but not waterlogged. Follow the instructions provided with your Sprouter.
  5. Growth: As you continue to rinse and drain, you’ll notice the seeds sprouting and growing into young plants. The time it takes for sprouting varies depending on the type of seeds, but it typically ranges from 2 to 7 days.
  6. Harvesting: Once the sprouts reach your desired length, usually about 1-3 inches, they are ready to be harvested. Rinse them one final time and enjoy them fresh.

Why Sprout at Home?

Sprouting at home offers numerous benefits:

  1. Nutritional Value: Sprouts are rich in vitamins, minerals, and enzymes, making them a nutrient-dense addition to your diet. They often contain more nutrients than their maturesprouts grown at home counterparts.
  2. Freshness: Homegrown sprouts are incredibly fresh, ensuring peak flavor and nutritional content. You have control over their quality and can harvest them at their prime.
  3. Cost-Effective: Sprouting at home is cost-effective as you can grow a significant amount of sprouts from a small quantity of seeds.
  4. Customization: You can choose from a wide variety of seeds to sprout, allowing you to customize your sprouts to suit your taste preferences and dietary needs.
  5. Sustainability: Growing your own sprouts reduces packaging waste associated with store-bought sprouts and promotes sustainability.

Ways to Use Sprouts


Sprouts are incredibly versatile and can be used in a variety of culinary creations to add a fresh and nutritious twist to your meals. Here are a few ways you can enjoy sprouts:

  1. Salads: Sprouts make a fantastic addition to salads, providing a crunchy texture and a burst of flavor. Whether you’re crafting a classic garden salad or an exotic Thai salad, toss in some sprouts for added freshness and nutrition.
  2. Sandwiches and Wraps: Elevate your sandwiches and wraps by layering them with sprouts. They provide a crisp contrast to the fillings and enhance the overall taste and texture. Whether you’re making a turkey club, veggie wrap, or a hearty panini, sprouts can take your sandwich game to the next level.
  3. Stir-Fries and Asian Dishes: In Asian cuisine, sprouts are commonly used in stir-fries, noodle dishes, and spring rolls. Their crunchiness and mild flavor complement the savory and
  4. aromatic elements of these dishes, adding both texture and nutritional value.
  5. Smoothies: For a nutritious boost, add a handful of sprouts to your morning smoothie. Their mild taste won’t overpower the fruity flavors, and you’ll benefit from the added vitamins, minerals, and enzymes.
  6. Garnish: Sprouts make an excellent garnish for soups, stews, and savory dishes. They add a visually appealing touch while contributing freshness and a hint of nuttiness to the overall taste.
  7. Omelets and Scrambles: Incorporate sprouts into your breakfast routine by folding them into omelets or mixing them into scrambled eggs. They bring a delightful crunch and an extra layer of nutrition to your morning meal.
  8. Sushi Rolls: If you’re a fan of sushi, you’ll appreciate the use of sprouts in rolls like the California roll. Their crispness provides a pleasant contrast to the rice and seafood, creating a well-balanced bite.

PRO TIP: Let me introduce you to our Kitchen Crop Sprouter (Victorio 4-Tray Seed Sprouter) and our great options of sprouts in 2 bag sizes!

Home sprouting is a rewarding and healthy practice that allows you to enjoy fresh, nutrient-rich sprouts right from your kitchen. By understanding how a home Sprouter works and the benefits of sprouting at home, you can embark on a journey to elevate your culinary creations and enhance your overall well-being through nutritious, homegrown sprouts. Happy sprouting!

fresh bread


Wondermill Electric Grain Mill

WonderMill Jr Manual Mill


The WonderMill: A Grain Mill Wonder

The WonderMill is a household name among grain mill enthusiasts, and for good reason. This powerful kitchen appliance allows you to grind your grains at home, which means you get to enjoy unparalleled freshness and nutritional benefits. Let’s take a look at the advantages of owning a WonderMill or a similar home grain mill.

Freshness Beyond Compare

One of the standout features of a home-based grain mill is the unmatched freshness it offers. When you grind your grains at home, you are ensuring that every batch of flour or cereal is as fresh as it gets. The difference in taste and texture is undeniable – your homemade bread, pastries, and cereal will have a depth of flavor that store-bought products simply cannot match.

Nutritional Superiority

Commercially milled flours often undergo processing that strips away essential nutrients. With a home grain mill like the WonderMill, you retain the bran and germ, which are rich in vitamins, minerals, and fiber. This means you can enjoy the full nutritional benefits of whole grains, promoting a healthier lifestyle for you and your family.

Cost-Effective

While the initial investment in a home grain mill may seem significant, it’s a savvy long-term move. By purchasing whole grains in bulk, you’ll save money over time compared to buying pre-packaged flour. Plus, you’ll have the flexibility to experiment with various grains and create custom flour blends to suit your culinary and dietary needs.

Control Over Your Ingredients

Have you ever wondered what goes into commercial flour products? With a home grain mill, you have complete control over the ingredients in your recipes. These additives can include substances such as bleaching agents (like benzoyl peroxide or chlorine dioxide) to whiten the flour, dough conditioners (such as ascorbic acid or enzymes) to improve baking quality, preservatives to extend shelf life, and fortification agents (like iron or folic acid) to enhance nutritional content. The specific additives used may vary depending on the type and brand of flour.

fresh baked bread

Options Galore

A home-based grain mill, like the WonderMill, can be used to grind a variety of grains and other ingredients. Here is a link to the WonderMill website showing what you can (and cannot) grind. In the meantime, a short list of common items that can be ground:

  • Wheat
  • Corn
  • Rice
  • Oats
  • Rye
  • Spices
  • Beans and Legumes.
  • Seeds
  • Quinoa
  • Amaranth
  • Buckwheat
  • Millet

Getting Started

You’re ready to embark on your home grain milling adventure. Here’s how to get started:

  1. Choose Your Grain: Begin by selecting the grains you want to grind.
  2. Set Up Your Mill: Follow the manufacturer’s instructions to set up your grain mill. Most home mills are designed to be user-friendly and quick to set up. Our team is happy to help you find the right person to talk to if we cannot answer your questions!
  3. Start Grinding: Pour your grains into the hopper, adjust the settings to your desired coarseness, and let the mill do its magic.
  4. Experiment: Don’t be afraid to experiment with different grains and flour blends to discover your favourite flavors and textures.

Owning and operating a home-based grain mill opens up a world of culinary possibilities. It’s a delightful journey into the realm of freshness, nutrition, and creativity. Whether you are an experienced baker or just starting, the investment in a grain mill can be a great addition for your kitchen. So, roll up your sleeves, stock up on grains, and get ready to savour the rewards of freshly ground goodness in every bite. Your taste buds will thank you!

Check out Billy demonstrating how to use the WonderMill:


variety of oxygen absorbers

Oxygen absorbers, those little packets found inside sealed packages, play a role in the preservation of a wide range of products. These small sachets contain iron powder and other materials designed to absorb and eliminate oxygen from the surrounding environment within a sealed container. But why are they so important? In this article, we will explore the world of oxygen absorbers in greater detail, offering insights into their functions, benefits, and applications.

The Role of Oxygen in Spoilage

Understanding the role of oxygen in the spoilage of various products helps to understand why we use oxygen absorbers. Oxygen, while essential for human breathing, also is a primary contributor to the degradation and spoilage of many foods. Here’s wh:

1. Oxidation: Oxygen promotes oxidation, a chemical reaction that leads to the breakdown of molecules. In food, this can result in changes in flavor, color, texture, and nutritional content. Think of the browning of sliced apples or the stale taste of exposed bread – both are consequences of oxidation.

2. Microbial Growth: Many spoilage-causing microorganisms, including bacteria, molds, and yeast, require oxygen for growth. Oxygen absorbers work to create an environment with lower oxygen levels, thereby inhibiting or even halting the life of these microorganisms and reducing the risk of spoilage.

3. Rancidity Prevention: Fats and oils are particularly vulnerable to rancidity, a process that generates unpleasant odors and off-flavors. Oxygen absorbers help protect fats and oils from going rancid by reducing the presence of oxygen in the packaging.

How Oxygen Absorbers Work

Oxygen absorbers operate on a simple yet effective principle: they chemically react with and “absorb” the oxygen present in a sealed environment. The key components of an oxygen absorber typically include iron powder, salt, and an absorbent material. The iron powder undergoes a chemical reaction in the presence of oxygen. This reaction not only removes oxygen but also generates heat as a byproduct. (Which by the way, is how hand warmers work.) Oxygen absorber packets are not toxic, unless consumed in massive quantities.

  • A study published in 2015 shows that “The average human weighing 70 kg would have to eat 448 × 100 cc oxygen absorbers before the LD50 (lethal dose) for toxicity is reached.” An oxygen absorber is fully safe to come in contact with foods, even though it should not be consumed because of the choking hazard.

Consider the following scenario: you’re packing a bag of dehydrated fruits for long-term storage. By placing an oxygen absorber inside the bag and sealing it, you create an environment with reduced oxygen levels. As the oxygen absorber reacts with the oxygen present, it converts the iron powder into rust, effectively eliminating the threat of oxidation, microbial growth, and rancidity.

Stacks of #10 sized food cans at the Briden Solutions warehouse in Calgary Alberta Canada.

Do I Keep It In or Throw it Out?

After opening a package containing an oxygen absorber, it’s generally recommended to discard the oxygen absorber rather than keeping it. Oxygen absorbers are typically designed for one-time use and can become saturated after exposure to air, losing their effectiveness at absorbing oxygen. Based on the chemical reaction that oxygen absorbers have once exposed to the air, like a hand warmer, once exposed to the oxygen the chemical reaction does not re-occur.

Applications of Oxygen Absorbers

Oxygen absorbers find a wide range of applications in various industries, each with its unique preservation challenges. Here are some examples:

  • Food Storage: Maintains lengthened shelf life of various foods.
  • Pharmaceutical and Medical Products: Oxygen-sensitive medications, diagnostic test strips, and sensitive medical equipment.
  • Electronics and Metal Products: Can prevent corrosion and oxidation of sensitive components during storage and shipping.
  • Artifacts and Collectibles: For museums and collectors, they protect valuable artifacts and documents from deterioration due to oxygen exposure.
Conclusion:

Oxygen absorbers are silent protectors that help maintain the quality, safety, and shelf life of a diverse range of products. Proper usage, in conjunction with appropriate packaging materials, is key to maximizing the effectiveness of these small but powerful preservation tools.

Keep these in mind in your future endeavors sealing your own food from home!

Upper Kananaskis Lake

We’ve all been there – that moment when nature calls and you’re miles away from the nearest bathroom. Whether you’re out camping in the wilderness, or an emergency situation, the need to relieve yourself will strike at the most inconvenient times. That’s where the trusty Luggable Loo toilet seat comes to the rescue! Today, we’ll look at toileting on the go and how the Luggable Loo can be your portable potty best friend.


Camping Adventures

Picture this: you’re deep in the heart of the great outdoors, surrounded by majestic trees, serene lakes, and a sky full of stars. Camping is all about connecting with nature, but it also means connecting with the call of nature! When you’re camping, you might find yourself miles away from any restroom facilities. That’s where the Luggable Loo steps in.

This ingenious contraption transforms a simple bucket into a portable toilet. Just attach the Luggable Loo toilet seat to a sturdy bucket, line it with a disposable bag like item or some old newspapers, and voilà – you have a clean and convenient camping commode. It’s a game-changer when you’re camping in a remote spot or in a campground with limited restroom facilities, allowing you to keep clean and healthy and enjoy your trip. Plus, if you are camping with someone who is not super keen or comfortable with the little boy or little girls bush across the way, this is an excellent option.

No more wandering into the woods in the middle of the night; your private camping toilet is just a few steps away!

Emergency Situations

Emergencies can strike unexpectedly, and one thing you don’t want to worry about in a crisis is finding a bathroom. Whether it’s a power outage, a natural disaster, or any other unforeseen situation, having a Luggable Loo on hand can provide peace of mind to get you through the situation.

Simply keep the Luggable Loo available as part of your emergency kit.  You can even use a 5 gallon bucket as your emergency kit storage (until you require it for it’s intended purpose of course) as a space saver. It’s compact, lightweight, and easy to store. When the need arises, you have a reliable portable toilet at your disposal. In stressful times, having the comforts of home, even a makeshift toilet, can make a world of difference.

The Luggable Loo: Your Anywhere Anytime Portable Potty

What makes the Luggable Loo so great? The Luggable Loo is a practical and portable toilet solution that turns an ordinary bucket into a functional commode. First, it’s incredibly affordable. Second, it’s user-friendly super simple. Setup takes just a few seconds. The loo toilet seat snaps securely right onto most 5 gallon buckets, providing a comfortable and stable seat. To use, simply line the bucket with a disposable bag or place some newspaper in it to catch waste. Easy pee-sy!

Whether you’re a seasoned camper, an emergency preparedness enthusiast, or just someone who appreciates the convenience of having a portable toilet handy, the Luggable Loo is your ticket to toileting on the go with ease and dignity.

So, the next time nature calls, no matter where you are or what situation you find yourself in, rest assured that the Luggable Loo has got your back. Say goodbye to bathroom worries and hello to portable potty freedom!

And don’t forget to pack some toilet paper!

checklist

Food for Thought: Food Storage Inventory Checklist

We’ve left some space for you to make this your own, and add your personal preferences!

Pantry

Canned Goods:

Soups

Vegetables

Fruits

Beans

Tomatoes

Tuna or canned meats

Dry Goods:

Pasta

Rice

Cereals

Flour

Sugar

Oats

Baking Supplies:

Baking powder

Baking soda

Spices and seasonings

Cooking oils

Vinegar

Snacks:

Chips

Crackers

Nuts

Popcorn

Granola bars

Canned Sauces and Condiments:

Pasta sauces

Salsa

Soy sauce

Ketchup, Mustard, Mayo

Salad Dressings

Hot Sauce

BBQ Sauce

Freezer

Meats and Seafood:

Chicken breasts

Ground beef

Fish fillets

Shrimp or other seafood

Frozen meat alternatives (vegetarian)

Frozen Fruits and Vegetables:

Berries

Peas & Corn

Broccoli florets

Spinach

Frozen Prepared Meals:

Frozen pizza

Frozen dinners

Frozen breakfast items

Bread and Baked Goods:

Bread

Bagels

Muffins

Wraps

Ice Cream and Desserts:

Various ice cream flavors

Frozen desserts or pastries

Fridge

Dairy Products:

Milk

Yogurt

Cheese

Butter

Proteins:

Eggs

Deli meats

Tofu or plant-based protein

Fresh Fruits and Vegetables:

Beverages:

Water

Juices

Soda or other carbonated drinks

Leftovers:

Label with dates for freshness

Soups, stews, or casseroles

Food Storage

Containers and Lids:

Plastic containers

Glass containers

Reusable bags

Aluminum foil

Plastic wrap

Compostable/disposable plates, cups, utensils

Buckets/lids/Mylar pouches

Non-Perishables:

Emergency canned goods

Freeze-dried fruits

Freeze-dried vegetables

Long-lasting grains

Powdered milk & cheeses

Freeze-dried/dehydrated meats

Bottled Water:

Check out this article for more details: Enough water for each member of the family

Spices and Seasonings:

Store spices in airtight containers

Feel free to print this checklist and use it to keep track of your food storage inventory, or to get started making your personalized version. Regularly update it to ensure you have a well-organized and well-stocked pantry, fridge, freezer, and food storage area. Contact us if you have any questions about preparing your own long term food storage.

Briden Solutions - Canada's Emergency and Outdoor Food Headquarters