Life’s full of twists and turns, and it’s always better to be prepared for the unexpected. One essential but often overlooked aspect of readiness is having a solid communication plan in place for when a crisis strikes. Whether it’s a natural disaster, a medical emergency, or just one of those Murphy’s Law days, having a plan can make all the difference in keeping you and your loved ones on the same page.
Understanding Crisis Communication
Think about that time when the power went out, and you didn’t know if it was a local blackout or something more serious. A good communication plan can clear up that confusion. Who or where are you going to get information from? Who do you need to communicate information to? And what is the best way to communicate that information?
Here’s a recent example for you (Sept 2023): Our neighborhood recently was put under a ‘stay indoors’ order due to a criminal at large situation (no harm done – was just precautionary in the end), but because of social media laws and safety reasons, they could not post it online other than on a very small select online platforms. Unless you receive regular notifications from those pages, by the time word spread, the order had been lifted. After the fact, I was shown a local newspaper whom has an App (shout out to Cochrane Now!) that you can specifically select what types of notifications/alerts to receive up to date news. Had I had the app I would have received notification quicker.
Now, I’m sure we’ve all faced some crazy situations in our lives. Remember that time your kid got lost at the amusement park? Or there was a tornado warning, or a flood? Crises come in all shapes and sizes, and it’s important to identify the risks you might face so you can respond appropriately.
Creating a Crisis Communication Team
Let’s talk teamwork. In my family, we’ve all got our roles. I am the organizer, my husband is the runner, and my kids have assignments to deal with pets, grab-and-go bags, etc. Who’s who in your household? Designate your roles and responsibilities in advance.
And don’t forget to pick a spokesperson! It’s much easier to have one person relay information to worried friends or relatives than having everyone calling and texting different information to different people.
If you are single, or live alone, you can still have a team!
Developing Key Messages
Do you remember that time when a little one scraped their knee and wouldn’t stop crying? What did you say to calm them down? Simple, soothing words. The same goes for crisis communication. Craft messages in advance that are simple, easy to understand and address the immediate concerns.
Sample Scenario: Your area is under a severe weather warning, and a hurricane is headed your way…
Key Message 1: Safety First: “Hey, our top priority is your safety. Please stay indoors, away from windows, and in the most secure part of the house. We’ve got plenty of supplies, and we’ll ride this storm out together.”
Key Message 2: Status Update: Keep your radio or communication source on for updates. Remember to charge your phones and stay connected. “As of now, the hurricane is expected to make landfall within the next 12 hours. We’re closely monitoring the situation and will keep you updated.”
Key Message 3: Emergency Contacts: “Here are the emergency contacts we have handy to reach whom we need when we need”:
- Local Emergency Services: [Phone Number]
- Out-of-town Relative: [Relative’s Name and Phone Number]
- Neighbors: [Neighbor’s Names and Contact Info]
- In-Case-of-Emergency (ICE) Contacts in Your Phones: [ICE Contact Names and Numbers]
Key Message 4: Family Reassurance: “Kids, we know this can be scary, but we’re here with you. We’ve prepared for this, and we’re going to stay safe together. We’ve got board games, snacks, and your favorite stories to keep us entertained.”
Key Message 5: Evacuation Plan (if applicable): “In case the situation worsens and we need to evacuate, we have a plan in place. We’ll pack our essentials, secure the house, and head to [Evacuation Location]. If that changes, all of us will know.”
Key Message 6: Post-Storm Check-In: “After the storm passes, we’ll conduct a safety check before anyone ventures outside. Please wait for the all-clear signal before moving around. We’re in this for the long haul, and your safety is our priority.”
These key messages provide crucial information, reassure family members, and ensure everyone is on the same page during a hurricane. Remember to adapt your messages to fit the specific crisis you’re facing, and always keep them clear and concise.
Communication Channels
Nowadays, we’ve got a multitude of ways to stay connected: phones, social media, and good old-fashioned face-to-face communication. Make a list of all the tools you can use and establish an emergency contact list. That way, you won’t be scrambling for numbers when you need them most.
Here’s a list of common communication channels to consider including in your household crisis communication plan:
- Phone Calls: Make sure everyone in your household has a list of important phone numbers.
- Text Messaging (SMS)
- Social Media: Social media platforms like Facebook, Twitter, and Instagram can be used to update friends and family about your status during a crisis. You can also follow local emergency services’ accounts for updates.
- Email
- Two-Way Radios/Walkie-Talkies: In some cases, walkie-talkies can be handy for communicating within your household or with neighbors over short distances.
- Emergency Alert Systems: Sign up for local emergency alert systems and apps. Here in Alberta it is the AEA (Alberta Emergency Alert app).
- Group Messaging Apps: Apps like WhatsApp, or Facebook Messenger
- Landline Phones: If you have a landline phone, it can be more reliable during power outages.
- In-Person Communication: Don’t forget about face-to-face communication. Establish a meeting point within your household where family members can gather to discuss the situation.
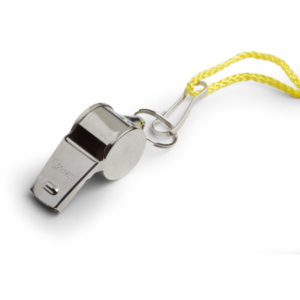
- Emergency Whistle or Signal: In case you need to communicate over short distances without technology, consider having an emergency whistle or signal system.
Building a Crisis Communication Plan
Imagine you’re preparing for a camping trip. You wouldn’t head out without a tent and some snacks, right? Similarly, don’t go into a crisis without a plan. Create a step-by-step guide for different types of crises, and put together a crisis communication kit. Practice makes perfect, so run some drills with your family to make sure everyone knows the plan.
Let’s take a closer look at building a step-by-step crisis communication plan:
- Identify the Crisis Scenarios: Start by identifying the different types of crises your household may face. These can include natural disasters (e.g., hurricanes, earthquakes, floods, wildfires,), medical emergencies, power outages, or personal crises (e.g., a family member goes missing).
- Assess the Risks: Once you’ve identified potential crises, assess the risks associated with each scenario. Consider the severity of the crisis, its likelihood, and the potential impact on your household. Prioritize them based on their potential impact.
- Develop Key Messages: Craft clear, concise, and empathetic key messages for each crisis scenario. These messages should address immediate concerns, provide guidance, and convey empathy and reassurance. For example:
- Safety First: “Our top priority is your safety. Stay indoors and stay safe.”
- Status Update: “We’re monitoring the situation closely and will keep you updated.”
- Emergency Contacts: “Here are the essential contacts you need to have handy.”
- Select Communication Channels: Determine which communication channels (see above) you’ll use for each type of crisis.
- Prepare an Emergency Contact List
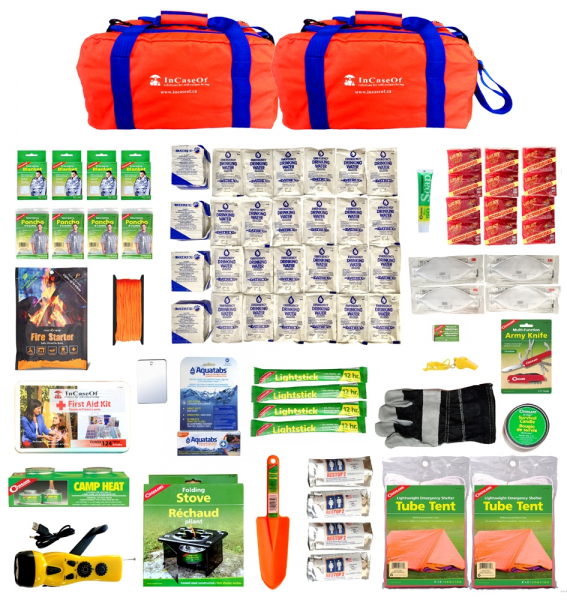
- 72 Hour Kits
- Drills and Practice: Conduct regular drills with your household members to ensure everyone understands their roles and the plan’s procedures.
- Regularly Update the Plan: Keep your crisis communication plan up-to-date. Review it annually or whenever there are changes in your household, such as new family members or updated contact information.
- Emergency Protocols: In addition to communication, establish emergency protocols for other aspects of crisis management, such as evacuation routes, first aid procedures, and accessing emergency supplies.
- Seek Professional Help: If your household includes individuals with specific medical needs or disabilities, ensure your communication plan addresses their unique requirements.
- Post-Crisis Evaluation
Remember that a crisis communication plan should be adaptable to different situations and continually refined based on your experiences and changing circumstances. The goal is to ensure the safety and well-being of your household members while effectively managing communication during challenging times.
Staying Informed
You’ve got your plan in place, but what if things change? Keep an eye on the news and alerts. During the pandemic I was glued to the news reports to know when it was safe to venture out. Staying informed is a key part of crisis communication.
Post-Crisis Evaluation
Once the dust settles, it’s time for some reflection. Did your communication plan work as expected? Identify what went well and what could be improved. Remember, a good plan is a dynamic one, so update it for future readiness.
Having a communication plan can keep heads cool and stress levels under control when chaos strikes. So, take some time to put together your plan, involve your family, and remember that it’s all about keeping everyone safe and sound. You’ve got this!


 all the tiny particles that do not belong. The mesh lets the clean water through but traps the rest. This method works because those little troublemakers we mentioned earlier are usually larger than the holes in the filter.
 So, the next time you enjoy a glass of clean, safe water, you can appreciate the science behind it. Lets make sure you stay healthy and hydrated, even in emergency situations.
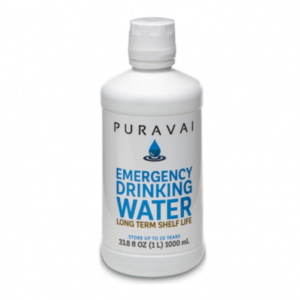

 When conducting a safety evaluation for seniors’ homes, it’s important to be on the lookout for potential risks. Here are some common areas to consider within the home:


 Conclusion:


 Squeezing excess wash water out of clothes is an important step in the laundry process, especially if you’re handwashing. Here are some tips to help you do it effectively:
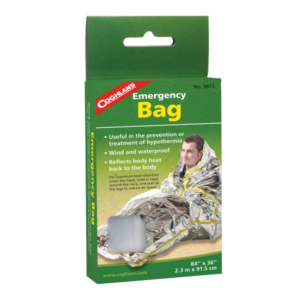
 ideally away from wind and on higher ground to avoid potential flooding. A tent provides a barrier against wind, rain, and cold, creating a microclimate that is easier to warm with your body heat.
 Creating a shelter is only half the battle. To stay warm, you’ll need to insulate it effectively. Insulation traps warm air inside and cold air outside. Here are some insulating techniques:


 Reading survival stories and learning about the experiences of others can provide valuable insights and mental strategies for staying warm and hopeful during challenging times. Here is one about John utilizing the above steps in his survival.
 scrapes, and minor wounds.


 it’s important to stock foods that provide essential nutrients to keep your energy levels up and maintain overall health.


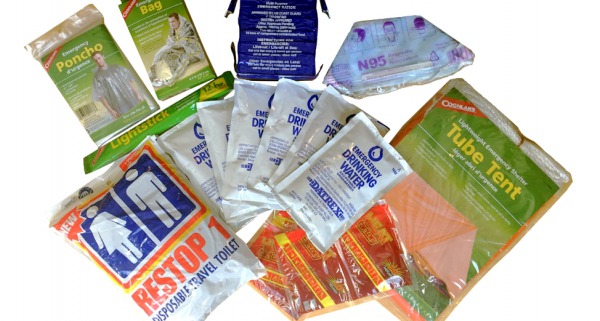
 The Role of 72-Hour Kits
 for non-perishable items like canned goods (don’t forget the can opener!), energy bars, emergency ration bars, or dried fruits. Remember, these should be items you and your family are willing to eat. So test things out before hand. Example: hand a ration bar around the table before supper one night and take everyone’s feedback.