garden seed bank

Oh Canada! Canada’s diverse geography and climate offer a unique challenge for gardeners and horticulturists. The key to successful gardening here lies in understanding Canada’s plant hardiness zones. Today lets explore these zones, what they mean, how they work, and how they can help you make informed decisions for your garden.

What Are Plant Hardiness Zones?

Plant hardiness zones, or growing zones are geographic areas that share similar climate conditions, particularly in terms of minimum temperatures. These zones are determined by the average lowest temperatures during the winter months and help gardeners select plants that can survive and thrive in their specific region.

The Canadian Plant Hardiness Zones

Canada, as one of the largest countries in the world, encompasses a wide range of climates, from the frigid Arctic tundra in the north to temperate coastal areas in the south. Our government has some great information regarding this here. To assist Canadian gardeners, the country is divided into several plant hardiness zones:

Canada’s Plant Hardiness Zones PDF

Here’s a general overview of what you can grow in different plant hardiness zones:

(Arctic) Zone 1:
  • Arctic and subarctic regions with extremely cold winters.
  • Limited plant options; primarily native species adapted to extreme cold.
  • Examples: Arctic poppy, arctic willow.
Zone 2:
  • Cold regions with short growing seasons.
  • Hardy vegetables, fruits, and ornamentals.
  • Examples: Cabbage, carrots, apples beets, chard, raspberries
(Calgary) Zone 3:
  • Cold regions with somewhat longer growing seasons.
  • A wider range of vegetables and fruits.
  • Examples: Broccoli, potatoes, strawberries, green beans, peas
Zone 4:
  • Moderate climates with well-defined seasons.
  • Most common garden crops.
  • Examples: Tomatoes, peppers, apples, peonies, squash
(Southern) Zone 5:
  • Regions with milder winters and a longer growing season.
  • A wide variety of fruits, vegetables, and perennials.
  • Examples: Lettuce, squash, raspberries, roses, most vegetables
(Coast) Zone 6:
  • Areas with mild winters and a longer growing season.
  • Extensive plant choices, including many ornamental plants.
  • Examples: Spinach, corn, azaleas, most fruits and vegetables
(Coast) Zone 7:
  • Mild to warm climates with longer growing seasons.
  • Almost all common garden plants and many subtropicals.
  • Examples: Tomatoes, citrus trees, camellias.
Zone 8:
  • Warm regions with hot summers.
  • A wide range of tropical and subtropical plants.
  • Examples: Peppers, figs, hibiscus.
Zone 9:
  • Warm to hot climates with extended growing seasons.
  • Suitable for many tropical and subtropical crops.
  • Examples: Okra, avocados, plumeria.
(Not in Canada) Zone 10:
  • Tropical climates with high temperatures year-round.
  • Ideal for tropical and exotic plants.
  • Examples: Pineapples, bananas, orchids.

Plant Zones: Select Plants Wisely

When planning your garden choose plants that are recommended for your zone. These plants are more likely to survive and grow successfully.

  • Example #1: In Cochrane I have success with lettuce (multiple varieties), peas, beans, potatoes, etc.
  • Example #2: In Cochrane I do not have success with peppers or other plants that require transplanting from a starter.

Microclimates:

Local factors such as elevation, proximity to bodies of water, and cities create microclimates that differ from the official zone.

  • Example: Within Cochrane, those of us on the top of the hill have a different microclimate than those who live in the valley or close to the river.
  • Example: I have attempted to grow corn on the cob in 3 different parts of my yard, have tried starting them indoors, have purchased pre-started plants from the greenhouse, and I just cannot grow corn! I end up with teeny tiny 2-4 bite cobs, usually 1 cob per plant on average. Just know its okay to have fail. From year to year I have varying crops that excel or flop.

Tips:

  • Local nurseries, gardening clubs, and horticultural experts can provide valuable insights into the best plant choices for your area.
  • Pay attention to weather forecasts and be prepared to protect your plants. A frost or a storm can harm or damage your garden. A few times a year my own garden is covered in bed sheets!

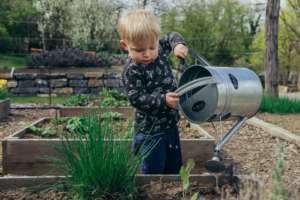
My Garden Experience

Now it’s time (as the kids say) for me to ‘flex’ and talk about about my own little garden. First, our uromastyx Sonny is shown enjoying some home grown dahlias & sunflowers. Our pets consist of a variety of Uromastyx, and bunny rabbits, all of which eat garden vegetables and flowers. I successfully grow to name a few: zucchini, potatoes, strawberries (sometimes), raspberries, pumpkins, and tomatoes. Perennials and Annuals are also a favorite of mine to watch grow. All you need is a garden space in the form of a bed, buckets, or planters plus sunshine, and a watering source. Just remember it takes trial and error!

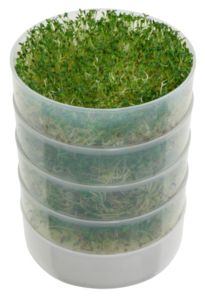
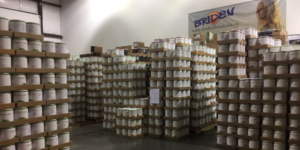
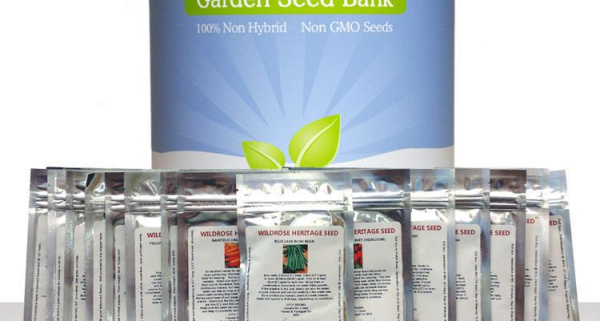
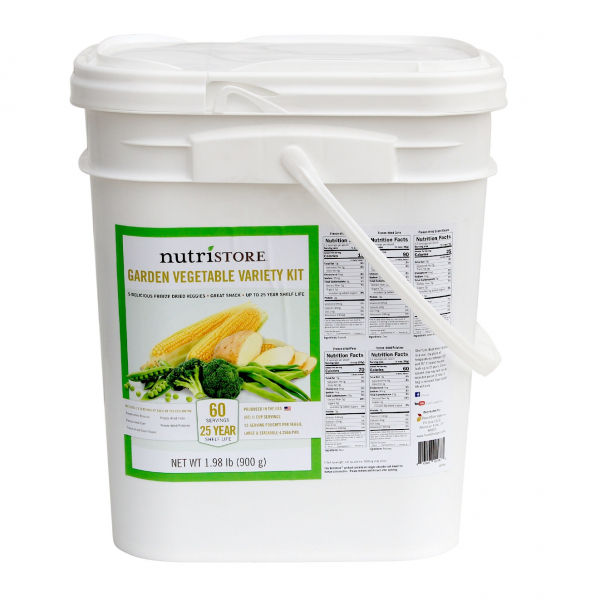
Garden Seed Bank – Let Us Help You Get Started

These seeds are part of our Garden Seed Bank:

Conclusion:

Understanding Canada’s plant hardiness zones is a fundamental beginning point for successful gardening in this incredible country. By selecting seeds and plants that are well-suited to your specific zone, you can create a thriving and vibrant garden, no matter where you are in this vast and beautiful land. Happy gardening!

gardening raised beds
Delicious freeze dried fruits

Food Buckets

Food buckets refer to pre-packaged emergency food supplies that come in a bucket or container. These buckets contain a variety of non-perishable food items designed to provide sustenance during emergencies, natural disasters, or other situations where access to fresh food may be limited.

Here are some key points about food buckets:

  1. Long Shelf Life: The contents of food buckets are selected for their long shelf life. They include freeze-dried foods, which can last for years if stored properly.
  2. Variety of Contents: Food buckets contain a variety of items such as pre-made meals, fruits and vegetables sometimes even desserts or snacks. They are designed to provide a balanced diet or healthy food, though the specific contents can vary depending on the manufacturer and the intended use.
  3. Convenience: Food buckets are convenient because they come in a compact and portable container, such as a plastic bucket with a handle. This makes them easy to store and transport.
  4. Emergency Preparedness: Many people purchase food buckets as part of their emergency preparedness plans. They are useful in situations where access to fresh food is disrupted, such as during natural disasters, power outages, or other emergencies.
  5. Usage: Food buckets are not only for emergencies. Some people also use them for camping, hiking, or other outdoor activities.
  6. Considerations: When purchasing food buckets, it’s important to consider dietary restrictions, preferences, and any special needs of the individuals who may be consuming the food. Regularly check and rotate the contents to ensure that the food remains fresh and safe to eat.

We will explore four food buckets that we offer:

  • the Ready Project 14-Day Bucket,
  • the Nutristore Vegetable Bucket,
  • the Nutristore Fruit Bucket,
  • and the Peak Basecamp Bucket.

Ready Project 14-Day Bucket


  • Brown Sugar Oatmeal
  • Multigrain Cereal
  • Spanish Rice
  • Cheddar Cheese Grits with Green Chilies
  • Savory Beans & Rice
  • Buttery Herb Pasta
  • Creamy Rice Pudding
  • Hobo Stew
  • Cheddar & Broccoli Rice
  • Hearty Potato Stew
  • Breakfast Drink Mix
  • Meal Extender Long Grain Rice
  • Meal Extender Beans


The Ready Project 14-Day Bucket is an all-in-one solution designed to provide 1 person 2000 calories daily for two weeks. This food bucket contains a variety of dehydrated meals and snacks, carefully selected to ensure nutritional balance.


Nutristore Freeze-Dried Garden Vegetable Bucket


60 1/2 cup servings of the following freeze-dried vegetables. That’s 12 servings of each:

Broccoli

Corn

Peas

Green Beans

Potatoes

For those who prioritize their daily dose of vegetables even during an emergency, the Nutristore Vegetable Bucket is an excellent choice.

Pro-tip: My children love to eat these vegetables straight out of the package! In fact, my toddlers thought these were “chips” for the first few years of their lives.

  • Long-term storage: Up to 25 years
  • Short-term storage: Each individual veggie comes packaged in re-sealable mylar pouches inside the bucket. Once opened, the pouches have a shelf life (if stored properly) up to 18 months.


Nutristore Freeze-Dried Fruit Bucket


Fruits are an important source of vitamins and natural sugars that boost your energy levels and mood during an emergency. In this bucket there is 60 1/2 cup servings of:

Apples

Raspberries

Blueberries

Strawberries

Peaches


  • Nutrient-rich options: These fruits offer a wide range of essential vitamins, fiber, and antioxidants, promoting overall health.
  • Snack-ready: The freeze-dried fruits are perfect for snacking, baking, or adding to your cereal, providing a sweet and nutritious treat.
  • Long-lasting freshness: Just like the vegetable bucket, the Nutristore Fruit Bucket can maintain its quality for up to 25 years when stored properly.
  • Short-term: Inside the bucket, the fruits each come in a resealable mylar pouch. Once opened they have a (properly stored) shelf life up to 18 months


Peak Refuel Freeze Dried Basecamp Bucket

The Peak Basecamp Bucket is designed with adventurers and outdoor enthusiasts in mind, making it an excellent choice for both emergency preparedness and camping trips. This food bucket offers a variety of meals that are lightweight and easy to prepare, making it ideal for those on the move. Key highlights include:

  • Lightweight and portable: The meals come in lightweight, compact packaging.
  • Quick preparation: With simple rehydration instructions, you can have a hot meal in minutes.
  • Extended shelf life: The meals in the Peak Basecamp Bucket have a sealed shelf life of up to 5 years.

2 Of The Following In the Bucket:

Beef Pasta Marinara

Chicken Alfredo Pasta

Chicken Teriyaki Rice

Sweet Pork & Rice

Breakfast Skillet

Strawberry Granola


Conclusion:

Food buckets are a smart choice for anyone looking to be prepared for emergencies, ensuring that you have a reliable source of sustenance when traditional food sources are scarce whether due to an emergency, or by choice (like cabin life). Have a great day!

Canadian Celiac Association GF

Emergencies can happen at any time, and being prepared is essential for everyone. However, individuals with specific dietary restrictions face unique challenges when it comes to emergency preparedness. In this article, we will explore what celiac disease is and provide valuable insights on how to be prepared for emergencies when you require gluten-free food.

Understanding Celiac Disease

Celiac disease is an autoimmune disorder that affects the small intestine. When individuals with celiac disease consume gluten (a protein found in wheat, barley, and rye) their immune system responds by damaging the lining of the small intestine. This causes the body to stop being able to absorb the essential nutrients our bodies require. This also leads to a range of digestive and systemic symptoms, including diarrhea, abdominal pain, fatigue, and skin rashes. The only effective treatment for celiac disease is a strict gluten-free diet. Even a tiny amount of gluten can trigger a reaction, making dietary vigilance necessary.

Gluten-free also refers to a dietary choice in which individuals voluntarily avoid foods containing gluten, often to address sensitivities, lifestyle preferences, or diets. Celiac disease necessitates a strict, lifelong gluten-free diet, while voluntarily gluten-free eating is typically made by those without a medical condition. Note: there is also a wheat allergy, which also differs from celiac & gluten-free preference.

  • For the sake of the article, I am writing it from the perspective of a celiac. As a mother of a child with celiac disease, I can attest to the severity of cross contamination and safety of ingredients, and have a soft spot in my heart for anyone living with this difficult disease. This article can be adjusted to fit the needs of someone choosing a gluten-free lifestyle as well!

Emergency Preparedness for a Celiac

Always Have an Emergency Supply

For individuals with celiac disease, maintaining a gluten-free diet is non-negotiable. That’s why it’s vital to have an emergency supply of gluten-free food and necessary supplies. This includes non-perishable gluten-free items such as canned fruits and vegetables, gluten-free crackers, pasta & sauce, rice, beans, or gluten-free granola bars. This link takes you to our site and you can see all of the gluten free food items we carry!

superfruit slam pro bar meal on the go


Pro-Tip: My son has taken premade meals as backup food for youth camps or even going to grandma and grandpa’s house. It provides him a food option, and it’s a safe food alternative for day-to-day use where there might not otherwise be. He has not yet travelled away on a plane, but these pre-made meals would be excellent choices to pack on vacation.

Customize Your Emergency Kit

When assembling an emergency kit, it’s important to customize to your specific needs. In addition to the standard emergency items like water, flashlight, first-aid supplies, and important documents, consider adding gluten-free items. If you rely on gluten-free snacks or meal replacements, make sure to include those in your kit. Remember to replace and update your kit regularly to ensure food safety.

Communication is Key

Inform your close friends, family, and neighbors about your dietary restrictions, so they can assist or provide support if needed. Share your medical condition and emergency plan with trusted individuals who can help advocate for your dietary needs during evacuation or sheltering.

Plan for Safe Food Storage

In the event of an emergency, you may find yourself without electricity or refrigeration. Plan for food storage accordingly. Gluten-free goodies, nut butters, and freeze-dried fruits are good options that do not require refrigeration.

Learn to Read Labels

Familiarize yourself with reading food labels to identify gluten-containing ingredients. In a crisis, you may have limited options and need to quickly assess what is safe to eat. Knowledge of label-reading is a necessary skill for anyone with celiac disease.

3 steps to reading a label

PDF: Learn-to-Read-a-Label-for-Gluten-in-3-Easy-Steps

Safe Cookware

Celiac’s must have cookware and dishes available that are not cross-contaminated and allows for safe consumption of their food. Be sure you add to these things to an emergency kit and plan to have the necessary supplies.

What is Cross-Contamination?

Cross contamination refers to the unintentional transfer of gluten from a gluten-containing food or surface to a gluten-free food. Even tiny amounts of gluten can trigger a reaction and cause harm.

Cross contamination can occur in various ways:
  • Shared Cooking Surfaces: If gluten-free foods are prepared or cooked on surfaces or with utensils that have been in contact with gluten-containing ingredients, there’s a risk of cross contamination.
      • For example, using a toaster that has had regular bread in it for gluten-free bread can lead to cross contamination.
  • Mixing Utensils: If utensils like knives, cutting boards, or stirring spoons are used interchangeably between gluten-containing and gluten-free foods, gluten particles can be transferred.
  • Fryers: Shared fryers in restaurants or at home can be a significant source of cross contamination. If gluten-free items are fried in the same oil as breaded items, the oil becomes contaminated.
  • Bulk Food Bins: Scooping gluten-free grains or flours from bulk bins that have previously held gluten-containing products introduces gluten into the gluten-free food.
  • Condiments and Spreads: Shared condiment jars, butter containers, or peanut butter jars become contaminated if used with regular bread or crackers.
  • Double-Dipping: If someone dips a regular piece of bread into a gluten-free dip, it contaminates the entire container.
To avoid cross contamination and protect those with celiac disease, it’s important to:
  • Use separate cooking utensils, cutting boards, and cookware for gluten-free and gluten-containing items.
  • Clean and sanitize surfaces thoroughly before preparing gluten-free foods.
  • Clearly label gluten-free items and keep them separate in the pantry and refrigerator.
  • Educate family members, friends, and foodservice staff about the importance of preventing cross contamination.
  • Choose certified gluten-free products whenever possible.
  • Be cautious when dining out and communicate your dietary needs to restaurant staff.

Emergencies can be unsettling for anyone, but for individuals with celiac disease, the situation can be even more challenging due to dietary restrictions. However, with careful planning, communication, and resource awareness, you can ensure that you are prepared for any unexpected event. By maintaining an emergency supply of gluten-free food, customizing your kit, and building a support network, you can confidently navigate emergency situations and continue to manage your celiac disease safely. Always remember that knowledge is your best asset when it comes to emergency preparedness, and being informed can make a world of difference when you have specific dietary needs like those associated with celiac disease.

cooking a meal together

Family Food Prep: Let’s Get Ready Together!

Hey there, awesome kids! Today, we’re going to chat about something pretty cool – family food preparedness. It’s all about making sure we have plenty of delicious food and snacks ready, just in case something unexpected happens, like a big storm, a flood or a power outage.

Why We Involve Kids: They Can Learn and Help

So, why should you, as a kid, be part of this? Well, it’s because we can learn lots of exciting stuff together, and we can help our family be safe and prepared. When we work as a team, we can handle anything that comes our way. And guess what? It can be tons of fun! Sometimes adults can get pretty stressed out if things are going sideways, so as kids you can help by knowing what to do too.

Family Adventure Time: Discover the Importance

Think of our food preparedness as a big family adventure. We can sit down and talk about why it’s important to be ready for surprises. I’ll even share some stories from when I was your age and how my family handled unexpected situations. For example, I remember when I was a kid, we had a big storm and the power went out, so we played games (like hide and go seek with flashlights) and shared snacks from our emergency stash. It made the scary storm not so scary after all!

Educational Shopping: Choose the Right Foods for Your Kit

Have you ever been grocery shopping with your family? When we buy food for our emergency stash, we look for foods that can stay good for a long time, like dried fruits or Clif Bars. You can even help choose the stuff you like, as long as it follows our emergency rules. Did I just say rules? I promise they’re not so bad, check them out:

  • Most important – make sure you like them!
  • Make sure they can last in your emergency stash without going bad for a long time (this is called “shelf life”)
  • Try to pick some healthy choices, but some treats are okay too
  • Pick things that don’t need to be cooked or baked – just in case you don’t have a stove
  • Lastly, pick things that can be kept in a special tote bag or bucket, just in case you have to leave your house with it

Cooking Adventures: Become a Mini Chef

Who likes to cook? I do, and I bet you’d love it too! So above I said one of the rules was not to pick foods for your kit that require cooking or baking. However sometimes we are stuck at home (with power) and need to stay at home and not go to the store for a few days.

As a family, learn how to make special meals with your food. Maybe you’ll become a mini chef? A family activity you could do is create a recipe book of emergency recipes so that you have the right ingredients in your pantry to make your favorite meals, even if you can’t leave your house!

Let’s Pretend: Use Your Imagination

How about a little pretend game? Imagine there’s an emergency, and it’s up to us to figure out what to do. It’s like being in an exciting story! You can come up with creative ideas and learn how to solve problems. Let me tell you how to do this:

Roleplay: “The Great Power Outage Adventure”

Once upon an evening, in my cozy home, something extraordinary was about to happen. The sun had set, and it was getting darker by the minute. The lights were out, and I found my family in the middle of a fantastic adventure called “The Great Power Outage Adventure.”

Step 1: The Announcement (let everyone know what’s going on!)

As the sun dipped below the horizon, I gathered my family together and made an exciting announcement. “Guess what, everyone? We’re going on a special adventure tonight. It’s called ‘The Great Power Outage Adventure!’ The power is out , and it’s time for us to put our emergency skills to the test.” (We turned off all the lights because remember, we are just pretending)

My kids’ eyes sparkled with curiosity as I explained that this adventure was all about being ready for surprises and having fun along the way.

Step 2: Emergency Meeting (have a plan!)

Now, it was time for the first important lesson. “In real emergencies,” I said, “we always need a safe place to meet up. So, we’re going to have a special family meeting spot. Our indoors meeting spot is the living room, and our outdoor meeting place is by the shed. Let’s remember that in case of any emergency.” So my family all made our way to the living room.

Step 3: Flashlight Scavenger Hunt (have enough for everyone!)

With a flashlight or battery-operated lantern in hand, kept in a place everyone knows, we set off on an exciting flashlight scavenger hunt. The mission was to find items we’d need during a power outage. They brought me a first-aid kit, snacks, and warm blankets. (What else do you think you’d need to find? Make a list!)

Step 4: Storytime (this helps us stay calm!)

After the hunt, we all gathered in the living room, flashlights shining, and blankets cozily wrapped around us. It was time for stories. Everyone took turns sharing our favorite tales. Some stories were about brave explorers, and others were filled with magical creatures. All the stories seemed to have a common theme – being prepared for adventures and surprises.

Step 5: Mock Snack Time

As the pretend evening went on, it was snack time. My kids eagerly reached for snacks from the emergency food stash. We discussed the importance of having easy-to-prepare and non-perishable snacks during power outages or emergencies. My favorite snack was a fruit snack, and my son’s was the granola bars.

Step 6: Emergency Plan Quiz

Time for a quiz! My kids tested their knowledge with fun questions. “What should you do if you’re in the dark and need to find a flashlight?” and “Where is our family meeting spot?” They answered with enthusiasm, feeling confident about their preparedness skills.

Step 9: The Grand Finale

And then, just as the adventure had started, I announced, “The power’s back on!” Everyone cheered, and the lights came back to life. It was time to celebrate. We put on some music, and had a celebratory dance party. The adventure had come to a happy and successful end.

Check and Update: Keep Your Supplies Fresh

Every now and then, check up on your emergency food. Sometimes food expires – which means we shouldn’t eat it. Ask your family where the date is on the packaging. You can help us make sure everything is fresh and up-to-date. It’s like taking care of your toys and making sure they’re in good shape.

When you’re part of your family’s food preparedness team, it’s not just about getting ready for surprises; it’s also about being a strong, smart, and super responsible helper in your family. So, let’s get ready together, have fun, and make some awesome memories!

One month premium pre-built survival food supply

Proper food storage is important for maintaining food safety, freshness, and preventing waste. Whether you’re storing food in your pantry, refrigerator, or freezer, following the right guidelines ensures that your food remains safe. Here are 5 ways to master your kitchen storage!

#1 – First In, First Out (FIFO)

The FIFO principle is a fundamental rule of food storage. It means using older items before newer ones to minimize food waste. To implement this guideline:

  • When stocking your pantry or fridge, place newly purchased items behind existing ones.
  • Label and date homemade or repackaged items.
  • Regularly check and rotate your food supply to ensure older items are used first.

FIFO prevents food from spoiling and becoming forgotten at the back of your storage space.

#2 – Store at the Right Temperature

Temperature control is vital for food safety. Follow these temperature guidelines:

  • Refrigerator: Keep your refrigerator at or below 40°F (4°C) to slow down bacterial growth. Use a thermometer to monitor the temperature.
  • Freezer: Maintain your freezer at 0°F (-18°C) or lower to preserve food quality. Frozen foods can last indefinitely at these temperatures, although quality may diminish over time.
  • Pantry: Store most non-perishable items in a cool, dry place away from direct sunlight. Keep canned goods between 10-21°C for optimal quality.

Always check food labels for specific storage temperature recommendations.

#3 – Proper Packaging

Using the right containers and packaging materials is necessary for preserving food quality and preventing contamination. Follow these packaging guidelines:

  • Airtight Containers: Store grains, cereals, and dried goods in airtight containers to keep out moisture, pests, and air.
  • Reusable Food Storage Bags: Use these eco-friendly bags for snacks, sandwiches, and leftovers instead of disposable plastic bags.
  • Vacuum Sealing: Consider vacuum-sealing foods for longer freezer storage, which prevents freezer burn and extends freshness.

organizing food in the fridge

#4 – Keep Foods Separate

To avoid cross-contamination, store foods separately based on their type and safety guidelines:

  • Raw Meats: Keep raw meats, poultry, and seafood in airtight containers or plastic bags on the lowest shelf in the refrigerator to prevent juices from dripping onto other foods.
  • Ready-to-Eat Foods: Store cooked or ready-to-eat foods above raw items to prevent potential contamination.
  • Fruits and Vegetables: Some fruits release ethylene gas, which can cause nearby vegetables to ripen and spoil faster. Store them separately or use ethylene-absorbing produce storage bags.

#5 – Regularly Check Expiration Dates

Monitoring expiration dates is essential to ensure food safety and quality. Pay attention to the following:

  • “Sell By”/ “Use By” Dates: This indicates when the store should sell the product  by/ the peak quality of the product. You can often use the item safely beyond this date.
  • “Best Before” or “Best By” Date: This suggests when the product is at its best quality but is not an indicator of safety. Use your judgment when consuming items after this date.
  • “Expiration date”. This suggests when a food can spoil, and is recommended you not consume.

More info on this topic in my other article – “Understanding Shelf Life, Best Before, and Expiry Dates in Canada”

expirty date example photo


Let’s walk through a real-time example of how these food storage guidelines can work effectively:

Scenario:

You’ve recently gone grocery shopping and have purchased various items, including fruits, vegetables, herbs, meats, dairy products, and canned goods.

1. First In, First Out (FIFO):
  • As you unpack your groceries, you place the older items at the front of your refrigerator and pantry shelves.
  • You label and date leftover cooked chicken from last night’s dinner and place it in an airtight container in the fridge.
2. Store at the Right Temperature:
  • You check the temperature settings of your refrigerator and ensure it’s at 40°F (4°C) or below.
  • The freezer is set at 0°F (-18°C).
3. Proper Packaging:
  • You transfer your flour and sugar into airtight containers to prevent moisture and pests from getting in.
  • Leftover spaghetti sauce goes into a reusable food storage bag (dated and labelled) before placing it in the freezer to use next week.
  • Fresh herbs are wrapped in damp paper towels and stored in airtight containers in the fridge.
4. Keep Foods Separate:
  • You place raw chicken in a plastic bag before placing it on the lowest shelf of the fridge for tomorrow’s supper.
  • Ready-to-eat salad and fruits are on the upper shelves to avoid cross-contamination.
  • Fruits and vegetables are stored separately in the produce drawer, FIFO style system putting the older stuff at the top
5. Regularly Check Expiration Dates:

jar salad

  • You take a moment to check the dates on dairy products and plan to consume them before they expire.
  • You find a can of soup with a “Best By” date that is still several months away and decide to use it for lunch.


This real-time example demonstrates how you can apply the food storage guidelines in your daily life. By doing so, you ensure that your food remains fresh, safe to eat, organized, and enjoyable while reducing food waste.

And just like that you are a Kitchen Master! You are well on your way to maintaining and mastering your food and food storage. Happy storing. Share with me some of your kitchen wins at BridenAcademy@bridensolutations.ca


Prioritize, procure supplies, prepare, practice, preserving peace of mind

In a world filled with uncertainty, being prepared is not just a motto; it’s a way of life. Emergencies, natural disasters, and unexpected challenges can strike at any time. To ensure your safety and the safety of your loved ones, it’s essential to follow the five fundamental principles of preparedness known as the “5 P’s of Preparedness.” These principles serve as a roadmap for being ready for whatever life throws your way.

  1. Prioritize Planning

The first P in the 5 P’s of Preparedness is “Planning.” Without a well-thought-out plan, you may find yourself overwhelmed and unprepared during an emergency. Start by identifying potential situations and risks and assessing your personal vulnerabilities. Consider factors like your location, climate, and the needs of your household. Develop a comprehensive emergency plan that covers various scenarios, including natural disasters, power outages, and personal emergencies.

Key aspects of your emergency plan should include:

  • Evacuation routes and meeting points
  • Contact information for emergency services and loved ones
  • A communication plan
  • A list of essential supplies and resources
  1. Procure Supplies

The second P is “Procure.” Once you have a solid plan in place, it’s time to gather the necessary supplies. Your emergency supply kit should include enough provisions to sustain you and your family for at least 72 hours. Common items to include in your emergency kit are:emergency kit to store in the vehicles

  • Non-perishable food items
  • Water
  • First aid supplies
  • Flashlights and batteries
  • A multi-tool or Swiss Army knife
  • Warm clothing and blankets
  • Personal hygiene items
  • Important documents (ID, insurance, medical records)
  1. Prepare Your Environment

The third P stands for “Prepare.” This involves making your living environment as disaster-resistant as possible. Consider the following steps:

  • Secure heavy furniture and appliances if you live in an earthquake zone or tornado zone.
  • Install smoke detectors and carbon monoxide alarms.
  • Maintain fire extinguishers and learn how to use them.
  • Keep your home well-insulated and sealed against drafts.
  • Practice fire safety and establish escape routes.
  1. Practice and Training

The fourth P is “Practice.” Having a plan and supplies is not enough; you need to practice and train regularly. Conduct fire drills, practice evacuation procedures, and ensure that every member of your household knows what to do in an emergency. Regular training can make the difference between chaos and calm during a crisis.

  1. Preserving Peace of Mind

The fifth P emphasizes “Preserving peace of mind.” Mental resilience is literally just as crucial as physical preparedness. During times of crisis, stress and anxiety can be overwhelming and debilitating. Have you or someone you know “frozen” in a super stressful situation? We’ve all seen it or felt it and its super scary. To maintain your mental and emotional well-being:

  • Stay informed but limit exposure to distressing news. (aka, don’t look at your cell phone every 30 seconds)
  • Practice relaxation techniques and mindfulness.
  • Maintain a support network of friends and family.
  • Consider seeking professional help if needed.

In an unpredictable world, the 5 P’s of Preparedness provide a comprehensive framework for being ready for any emergency or disaster. Prioritizing planning, procuring supplies, preparing your environment, practicing and training, and preserving peace of mind are all essential aspects of being prepared. By following these principles, you can increase your resilience and ensure the safety and well-being of yourself and your loved ones when the unexpected occurs. Preparedness is not a one-time event but an ongoing commitment to safeguarding your families future.

car kit to store in the vehicles in case of an emergency 72 hour

One month premium pre-built survival food supply

6 pack vegetable food pack freeze dried

As Canadian citizens, we encounter food products on a daily basis, each stamped with different dates: shelf life, best before, and expiry dates. These dates play a role in ensuring food safety and quality. Lets discuss what they mean, and their importance:

oh canada

#1 – Shelf Life

Shelf life refers to the period that a product remains safe to consume and maintains its intended quality when stored under proper conditions. It’s important to note that shelf life is an estimate and can vary depending on storage temperature, humidity, and packaging. In Canada, manufacturers determine shelf life through rigorous testing to ensure their products are safe and meet quality standards.

Example: Canned goods such as our pasta line, or rice, sealed they have a shelf life of 20-30 years. If stored correctly in a cool, dry place, they remain safe to eat for an extended period. Opened/unsealed they have a shortened shelf life of anywhere from 6-18months.

#2 – Best Before Date

The best before date is a label indicating the date until which a product will maintain its optimal quality, taste, and texture, as determined by the manufacturer. After this date, the product may still be safe to eat, but its quality might deteriorate. In Canada, the “best before” date is a legal requirement for most packaged foods.

Example: A box of cereal might have a “best before” date of September 30, 2023. While likely fine to eat after this date, the manufacturer cannot guarantee it will taste as fresh or crunchy as intended.

#3 – Expiry Date

An expiry date is the date by which a product must be consumed for safety reasons. After this date, the product is no longer be safe to eat, regardless of its appearance, taste, or smell. Expiry dates are typically found on perishable items like dairy products and certain medications, where the risk of spoilage is significant.

Example: A carton of milk will usually have an expiry date, and it’s important to discard it after this date has passed, as consuming expired dairy products can lead to health risks.


Here is a 16 minute podcast about food labels created by the CFIA (Canadian Food Inspection Agency) for added information.

Other Key Words & Phrases

In understanding shelf life, best before dates, and expiry dates in Canada, it is helpful to be aware of additional phrases and words that provide valuable information about the product’s quality and safety. Here are some key terms and phrases to look for:

  • Packaging Date or Manufacture Date: This date indicates when the product was packaged or manufactured. It can determine a product’s freshness, especially when it does not have a best before date listed.
  • Lot Number or Batch Code: Lot numbers or batch codes are unique identifiers used by manufacturers to track products. They are used for tracing and identifying specific products in case of recalls or quality issues.
  • Frozen By Date: For frozen foods, this date indicates when the product was frozen. It can help you gauge how long the item has been in storage.
  • Refrigerate After Opening or Keep Refrigerated
  • Open and Close Arrows: These arrows or symbols on packaging indicate how to properly open and reseal a product to maintain its freshness.
  • Allergen Declarations: Look for statements indicating the presence of common allergens such as peanuts, tree nuts, dairy, soy, wheat, and shellfish.
  • No Preservatives Added: This may affect the product’s longevity.
  • Organic: This may influence its shelf life.
Conclusion:

Understanding the differences between shelf life, best before, and expiry dates is important for maintaining food safety and quality in your homes. We should check these labels when shopping for groceries and be mindful of them when storing and consuming food products. By doing so, we can ensure that the food we eat is both enjoyable and safe. Happy eating!

sprouts grown at home

Home sprouting is a simple and rewarding way to add fresh, nutritious greens to your diet. We will explore how a home Sprouter works, why sprouting at home is a healthy choice, and provide ways to help you get started on your home sprouting journey.

6 Easy Steps: How Does a Home Sprouter Work?

A home Sprouter is a device or system designed to facilitate the germination and growth of seeds, grains, legumes, or nuts into edible sprouts. Here’s how it works:

  1. Selection of Seeds: Start by choosing the seeds or legumes you want to sprout. Common choices include alfalfa, broccoli, radish, and lentils.
  2. Soaking: The process begins with soaking the seeds in clean water for a specified period, typically 4-12 hours or overnight. This hydrates the seeds and initiates the germination process. Follow your products instructions of course for this step as they all vary.
  3. Rinsing: After soaking, drain the water and rinse the seeds thoroughly. This helps remove any residue and encourages oxygen supply to the sprouts.
  4. Sprouting: Place the seeds in your sprouting device or in a mason jar with a mesh lid. Over the next few days, continue to rinse and drain the seeds multiple times a day, ensuring they remain moist but not waterlogged. Follow the instructions provided with your Sprouter.
  5. Growth: As you continue to rinse and drain, you’ll notice the seeds sprouting and growing into young plants. The time it takes for sprouting varies depending on the type of seeds, but it typically ranges from 2 to 7 days.
  6. Harvesting: Once the sprouts reach your desired length, usually about 1-3 inches, they are ready to be harvested. Rinse them one final time and enjoy them fresh.

Why Sprout at Home?

Sprouting at home offers numerous benefits:

  1. Nutritional Value: Sprouts are rich in vitamins, minerals, and enzymes, making them a nutrient-dense addition to your diet. They often contain more nutrients than their maturesprouts grown at home counterparts.
  2. Freshness: Homegrown sprouts are incredibly fresh, ensuring peak flavor and nutritional content. You have control over their quality and can harvest them at their prime.
  3. Cost-Effective: Sprouting at home is cost-effective as you can grow a significant amount of sprouts from a small quantity of seeds.
  4. Customization: You can choose from a wide variety of seeds to sprout, allowing you to customize your sprouts to suit your taste preferences and dietary needs.
  5. Sustainability: Growing your own sprouts reduces packaging waste associated with store-bought sprouts and promotes sustainability.

Ways to Use Sprouts


Sprouts are incredibly versatile and can be used in a variety of culinary creations to add a fresh and nutritious twist to your meals. Here are a few ways you can enjoy sprouts:

  1. Salads: Sprouts make a fantastic addition to salads, providing a crunchy texture and a burst of flavor. Whether you’re crafting a classic garden salad or an exotic Thai salad, toss in some sprouts for added freshness and nutrition.
  2. Sandwiches and Wraps: Elevate your sandwiches and wraps by layering them with sprouts. They provide a crisp contrast to the fillings and enhance the overall taste and texture. Whether you’re making a turkey club, veggie wrap, or a hearty panini, sprouts can take your sandwich game to the next level.
  3. Stir-Fries and Asian Dishes: In Asian cuisine, sprouts are commonly used in stir-fries, noodle dishes, and spring rolls. Their crunchiness and mild flavor complement the savory and
  4. aromatic elements of these dishes, adding both texture and nutritional value.
  5. Smoothies: For a nutritious boost, add a handful of sprouts to your morning smoothie. Their mild taste won’t overpower the fruity flavors, and you’ll benefit from the added vitamins, minerals, and enzymes.
  6. Garnish: Sprouts make an excellent garnish for soups, stews, and savory dishes. They add a visually appealing touch while contributing freshness and a hint of nuttiness to the overall taste.
  7. Omelets and Scrambles: Incorporate sprouts into your breakfast routine by folding them into omelets or mixing them into scrambled eggs. They bring a delightful crunch and an extra layer of nutrition to your morning meal.
  8. Sushi Rolls: If you’re a fan of sushi, you’ll appreciate the use of sprouts in rolls like the California roll. Their crispness provides a pleasant contrast to the rice and seafood, creating a well-balanced bite.

PRO TIP: Let me introduce you to our Kitchen Crop Sprouter (Victorio 4-Tray Seed Sprouter) and our great options of sprouts in 2 bag sizes!

Home sprouting is a rewarding and healthy practice that allows you to enjoy fresh, nutrient-rich sprouts right from your kitchen. By understanding how a home Sprouter works and the benefits of sprouting at home, you can embark on a journey to elevate your culinary creations and enhance your overall well-being through nutritious, homegrown sprouts. Happy sprouting!

fresh bread


Wondermill Electric Grain Mill

WonderMill Jr Manual Mill


The WonderMill: A Grain Mill Wonder

The WonderMill is a household name among grain mill enthusiasts, and for good reason. This powerful kitchen appliance allows you to grind your grains at home, which means you get to enjoy unparalleled freshness and nutritional benefits. Let’s take a look at the advantages of owning a WonderMill or a similar home grain mill.

Freshness Beyond Compare

One of the standout features of a home-based grain mill is the unmatched freshness it offers. When you grind your grains at home, you are ensuring that every batch of flour or cereal is as fresh as it gets. The difference in taste and texture is undeniable – your homemade bread, pastries, and cereal will have a depth of flavor that store-bought products simply cannot match.

Nutritional Superiority

Commercially milled flours often undergo processing that strips away essential nutrients. With a home grain mill like the WonderMill, you retain the bran and germ, which are rich in vitamins, minerals, and fiber. This means you can enjoy the full nutritional benefits of whole grains, promoting a healthier lifestyle for you and your family.

Cost-Effective

While the initial investment in a home grain mill may seem significant, it’s a savvy long-term move. By purchasing whole grains in bulk, you’ll save money over time compared to buying pre-packaged flour. Plus, you’ll have the flexibility to experiment with various grains and create custom flour blends to suit your culinary and dietary needs.

Control Over Your Ingredients

Have you ever wondered what goes into commercial flour products? With a home grain mill, you have complete control over the ingredients in your recipes. These additives can include substances such as bleaching agents (like benzoyl peroxide or chlorine dioxide) to whiten the flour, dough conditioners (such as ascorbic acid or enzymes) to improve baking quality, preservatives to extend shelf life, and fortification agents (like iron or folic acid) to enhance nutritional content. The specific additives used may vary depending on the type and brand of flour.

fresh baked bread

Options Galore

A home-based grain mill, like the WonderMill, can be used to grind a variety of grains and other ingredients. Here is a link to the WonderMill website showing what you can (and cannot) grind. In the meantime, a short list of common items that can be ground:

  • Wheat
  • Corn
  • Rice
  • Oats
  • Rye
  • Spices
  • Beans and Legumes.
  • Seeds
  • Quinoa
  • Amaranth
  • Buckwheat
  • Millet

Getting Started

You’re ready to embark on your home grain milling adventure. Here’s how to get started:

  1. Choose Your Grain: Begin by selecting the grains you want to grind.
  2. Set Up Your Mill: Follow the manufacturer’s instructions to set up your grain mill. Most home mills are designed to be user-friendly and quick to set up. Our team is happy to help you find the right person to talk to if we cannot answer your questions!
  3. Start Grinding: Pour your grains into the hopper, adjust the settings to your desired coarseness, and let the mill do its magic.
  4. Experiment: Don’t be afraid to experiment with different grains and flour blends to discover your favourite flavors and textures.

Owning and operating a home-based grain mill opens up a world of culinary possibilities. It’s a delightful journey into the realm of freshness, nutrition, and creativity. Whether you are an experienced baker or just starting, the investment in a grain mill can be a great addition for your kitchen. So, roll up your sleeves, stock up on grains, and get ready to savour the rewards of freshly ground goodness in every bite. Your taste buds will thank you!

Check out Billy demonstrating how to use the WonderMill:


variety of oxygen absorbers

Oxygen absorbers, those little packets found inside sealed packages, play a role in the preservation of a wide range of products. These small sachets contain iron powder and other materials designed to absorb and eliminate oxygen from the surrounding environment within a sealed container. But why are they so important? In this article, we will explore the world of oxygen absorbers in greater detail, offering insights into their functions, benefits, and applications.

The Role of Oxygen in Spoilage

Understanding the role of oxygen in the spoilage of various products helps to understand why we use oxygen absorbers. Oxygen, while essential for human breathing, also is a primary contributor to the degradation and spoilage of many foods. Here’s wh:

1. Oxidation: Oxygen promotes oxidation, a chemical reaction that leads to the breakdown of molecules. In food, this can result in changes in flavor, color, texture, and nutritional content. Think of the browning of sliced apples or the stale taste of exposed bread – both are consequences of oxidation.

2. Microbial Growth: Many spoilage-causing microorganisms, including bacteria, molds, and yeast, require oxygen for growth. Oxygen absorbers work to create an environment with lower oxygen levels, thereby inhibiting or even halting the life of these microorganisms and reducing the risk of spoilage.

3. Rancidity Prevention: Fats and oils are particularly vulnerable to rancidity, a process that generates unpleasant odors and off-flavors. Oxygen absorbers help protect fats and oils from going rancid by reducing the presence of oxygen in the packaging.

How Oxygen Absorbers Work

Oxygen absorbers operate on a simple yet effective principle: they chemically react with and “absorb” the oxygen present in a sealed environment. The key components of an oxygen absorber typically include iron powder, salt, and an absorbent material. The iron powder undergoes a chemical reaction in the presence of oxygen. This reaction not only removes oxygen but also generates heat as a byproduct. (Which by the way, is how hand warmers work.) Oxygen absorber packets are not toxic, unless consumed in massive quantities.

  • A study published in 2015 shows that “The average human weighing 70 kg would have to eat 448 × 100 cc oxygen absorbers before the LD50 (lethal dose) for toxicity is reached.” An oxygen absorber is fully safe to come in contact with foods, even though it should not be consumed because of the choking hazard.

Consider the following scenario: you’re packing a bag of dehydrated fruits for long-term storage. By placing an oxygen absorber inside the bag and sealing it, you create an environment with reduced oxygen levels. As the oxygen absorber reacts with the oxygen present, it converts the iron powder into rust, effectively eliminating the threat of oxidation, microbial growth, and rancidity.

Stacks of #10 sized food cans at the Briden Solutions warehouse in Calgary Alberta Canada.

Do I Keep It In or Throw it Out?

After opening a package containing an oxygen absorber, it’s generally recommended to discard the oxygen absorber rather than keeping it. Oxygen absorbers are typically designed for one-time use and can become saturated after exposure to air, losing their effectiveness at absorbing oxygen. Based on the chemical reaction that oxygen absorbers have once exposed to the air, like a hand warmer, once exposed to the oxygen the chemical reaction does not re-occur.

Applications of Oxygen Absorbers

Oxygen absorbers find a wide range of applications in various industries, each with its unique preservation challenges. Here are some examples:

  • Food Storage: Maintains lengthened shelf life of various foods.
  • Pharmaceutical and Medical Products: Oxygen-sensitive medications, diagnostic test strips, and sensitive medical equipment.
  • Electronics and Metal Products: Can prevent corrosion and oxidation of sensitive components during storage and shipping.
  • Artifacts and Collectibles: For museums and collectors, they protect valuable artifacts and documents from deterioration due to oxygen exposure.
Conclusion:

Oxygen absorbers are silent protectors that help maintain the quality, safety, and shelf life of a diverse range of products. Proper usage, in conjunction with appropriate packaging materials, is key to maximizing the effectiveness of these small but powerful preservation tools.

Keep these in mind in your future endeavors sealing your own food from home!