eagle flying

Exploring the great outdoors offers an exhilarating opportunity to connect and its magnificent inhabitants up close. However, venturing into the wilderness also means sharing space with wildlife, and understanding how to interact safely and respectfully with these creatures is important. Whether you’re a seasoned adventurer or a novice explorer, here are some tips to ensure harmonious wildlife encounters.

1. Educate Yourself:

baby deer in the grass

Before embarking on any outdoor adventure, take the time to research the local wildlife species you may encounter. Learn about their behaviors, habitats, and any potential risks they pose. Understanding the animals’ natural tendencies will help you anticipate their actions and avoid dangerous situations.

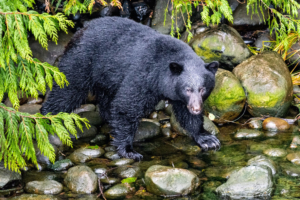
  • For example, if you’re hiking in bear country, familiarize yourself with bear behavior, such as signs of agitation or defensive postures.

Additionally, consider attending guided tours or workshops led by wildlife experts to deepen your knowledge and gain valuable insights into the region’s ecology. These experiences can provide firsthand learning opportunities and equip you with the skills needed to navigate wildlife encounters responsibly. Most National Parks have a variety of free education options available.

2. Keep Your Distance:

moose relaxing in the field

Respect the personal space of wildlife by maintaining a safe distance at all times. Use binoculars or a zoom lens to observe animals from afar, allowing them to go about their daily routines without feeling threatened. Approaching too closely can stress the animals and provoke defensive behaviors. Remember, even seemingly docile creatures like deer or elk can become agitated if they feel cornered or harassed.

It’s crucial to understand the concept of a “safety zone,” which varies depending on the species and the situation.

  • For example, the recommended distance for viewing large predators like wolves or mountain lions is much greater than that for observing birds or smaller mammals. Always err on the side of caution and give wildlife ample space to move freely.

3. Practice Leave No Trace:

squirrel in the woods

Leave No Trace principles advocate for minimal impact outdoor practices to preserve the environment and its inhabitants. Dispose of waste properly, refrain from feeding wildlife, and avoid disturbing their habitats. By minimizing human interference, you help maintain the delicate balance of ecosystems.

Incorporate Leave No Trace principles into your outdoor activities by packing out all trash, including biodegradable items like fruit peels or food scraps. Avoid building campfires in sensitive habitats or using soap in natural water sources to prevent contamination. Respect trail closures or restrictions designed to protect vulnerable wildlife populations or habitats undergoing restoration.

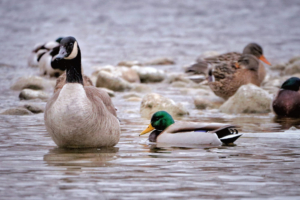
Don’t feed the wildlife! Even the squirrels, chipmunks and ducks!

4. Stay Alert and Vigilant:

Geese and ducks in the water

Be vigilant and attentive to your surroundings while exploring nature. Keep an eye out for signs of wildlife activity, such as tracks, droppings, or rustling in the bushes. Stay alert, especially in areas known to be frequented by large predators, and always be prepared to react calmly and responsibly.

Practice situational awareness by scanning your surroundings regularly and listening for any unusual sounds that may indicate the presence of wildlife nearby. When hiking or camping in bear country, make noise periodically to alert bears of your presence and avoid startling them. Carry bear spray and know how to use it effectively in the event of an encounter.

It is recommended that you do not wear headphones or earbuds while hiking so you are able to hear your surroundings.

5. Respect Wildlife Boundaries:

lynx

Many wildlife species are protected by laws and regulations that prohibit harassment or interference. Respect these boundaries by adhering to designated viewing areas and obeying signage indicating restricted zones. Your actions can have significant consequences for both the animals and their habitats.

Take heed of seasonal closures or restrictions implemented to protect wildlife during critical periods such as nesting, breeding, or hibernation. Avoid venturing off-trail or disturbing sensitive habitats, particularly in areas where endangered or threatened species reside. By respecting wildlife boundaries, you contribute to the preservation of natural ecosystems and ensure the well-being of native wildlife populations.

6. Prepare for Encounters:

black bear

Carry essential safety gear such as bear spray, noise makers, or a whistle when venturing into areas with potential wildlife encounters. Familiarize yourself with proper use techniques and remain calm in the event of an unexpected encounter. Remember, most animals prefer to avoid human interaction and will retreat if given the chance.

In addition to safety equipment, consider bringing along wildlife identification guides or apps to help you recognize local species and understand their behaviors. Practice using your gear before heading into the field to ensure you can deploy it effectively in an emergency situation. Being prepared not only enhances your safety but also instills confidence and peace of mind during outdoor adventures.

7. Travel in Groups:

grizzly bear in the water

When exploring wilderness areas, travel in groups whenever possible. Not only does this enhance safety by providing strength in numbers, but it also reduces the likelihood of surprising wildlife. Make noise periodically to alert animals of your presence, giving them the opportunity to avoid confrontation.

Engage in conversation or clap your hands to create audible signals that announce your presence and deter wildlife from approaching. Avoid hiking alone, especially in remote or unfamiliar areas where assistance may be limited. By traveling in groups, you can share the experience with others while mitigating potential risks associated with solitary excursions.

8. Be Mindful of Breeding Seasons:

Elk in the wild

During breeding seasons, wildlife may exhibit heightened aggression or territorial behavior to protect their young. Research the breeding cycles of local species and exercise extra caution when navigating their habitats during these times. Avoid disturbing nesting sites or dens to minimize stress on vulnerable offspring.

Stay informed about wildlife activity patterns and breeding seasons through local wildlife agencies, park websites, or visitor centers. Plan your outdoor adventures accordingly, avoiding sensitive areas during critical periods of reproduction or rearing. By respecting wildlife’s breeding seasons, you help safeguard their reproductive success and ensure the continuity of future generations.

9. Remain Calm and Respectful:

cougar on rock

In the event of a wildlife encounter, remain calm and composed. Avoid sudden movements or loud noises that may startle the animals. Respect their space and observe from a safe distance, allowing them to move freely without feeling threatened. Remember, you are a guest in their home.

Practice mindfulness and empathy towards wildlife, acknowledging their right to exist undisturbed in their natural habitats. Avoid pursuing animals for the sake of photography or entertainment, prioritizing their well-being over personal interests. By cultivating a respectful attitude towards wildlife, you foster a deeper appreciation for the interconnectedness of all living beings and their environments.

10. Report Concerns or Incidents:

big horn sheep

If you encounter injured, distressed, or aggressive wildlife, report the incident to local authorities or wildlife agencies immediately. Do not attempt to intervene or handle the situation yourself, as this can pose risks to both you and the animals. Your prompt action can help ensure the safety of both wildlife and fellow outdoor enthusiasts.

Provide detailed information about the location, species involved, and any observed behaviors to facilitate an appropriate response from wildlife professionals. Follow any instructions or guidance provided by authorities to ensure the safety of yourself and others in the vicinity. By reporting concerns or incidents promptly, you contribute to the conservation efforts aimed at protecting wildlife and preserving their natural habitats.

In conclusion, enjoying wildlife encounters in nature is a privilege that comes with responsibilities. By staying informed, respecting boundaries, and prioritizing safety, you can foster positive interactions with wildlife while preserving the integrity of their habitats for future generations to enjoy. Let’s cherish and protect the wonders of the natural world, one respectful encounter at a time.

4 people hiking

Leave No Trace: Preserving Nature for Generations to Come

As outdoor enthusiasts, adventurers, and nature lovers, we are blessed  to explore and immerse ourselves in the beauty of the great outdoors. However, with “great power comes great responsibility” (anyone recognize that quote?)—a responsibility to protect and preserve these natural spaces for future generations. This is where the principle of “Leave No Trace” comes into play.

Leave No Trace is not merely a set of rules; it’s a philosophy that guides our actions, encouraging us to minimize our impact on the environment while enjoying the outdoors. Whether you’re embarking on a day hike, camping trip, or a multi-day backpacking adventure, adhering to Leave No Trace is essential for maintaining our natural spaces.

1. Plan Ahead and Prepare

Before setting out on your outdoor excursion, take the time to research and plan your trip thoroughly. Familiarize yourself with the area’s regulations, weather conditions, and terrain. Consider factors such as group size, skill level, and equipment needs to ensure a safe and enjoyable experience. By adequately preparing, you reduce the likelihood of unexpected situations that could lead to environmental damage.

2. Travel and Camp in Established Areas

rainy day hike, getting all wetWhen venturing into the wilderness, stick to established trails and campsites whenever possible. By confining your activities to durable surfaces like trails, rocks, or gravel, you minimize the impact on fragile ecosystems. Avoid trampling vegetation, especially in sensitive areas such as wetlands or alpine zones, where plant life takes years to recover from damage.

  • A friend and I were hiking to Memorial Lakes in Kananaskis and on the way back along the river, we ended up on along the wrong trail (and there are often many mini trails to and from the river from people and animals to access to the water). We needed to be farther north and the GPS said we were essentially running parallel with the main trail, so we opted to “hop” across instead of backtracking half a km. I now have a new appreciation for the forest floor. It was dense, deep, and hard to maneuver. It taught me an important lesson about designated trails and a new grasp on the eco systems in our forests that we likely disrupted that day!

3. Dispose of Waste Properly

One of the fundamental principles of Leave No Trace is to pack out everything you pack in. This includes not only your trash but also food scraps, hygiene products, and even biodegradable items like fruit peels. Carry a sturdy (I prefer sealable as well) trash bag and make sure to properly dispose of waste in designated receptacles or pack it out with you. Human waste should be buried at least 6 to 8 inches deep and at least 200 feet away from water sources.

4. Leave What You Find

  • Ecological Balance: Natural objects, whether they are rocks, plants, or artifacts, play vital roles in maintaining the ecological balance of an area. Disturbing or removing these objects can disrupt ecosystems.
  • Habitat Protection: Many natural objects serve as habitats for various organisms. For example, fallen logs provide shelter for insects, small mammals, and fungi, while rocks and crevices offer nesting sites for birds and reptiles.
  • Cultural Preservation: In addition to natural features, outdoor areas may also contain cultural artifacts and historical sites that hold significance for indigenous communities or have archaeological value.
  • Aesthetic Enjoyment: One of the greatest joys of exploring the outdoors is encountering its natural beauty in its purest form.
  • Scientific Study: Natural objects and features provide valuable opportunities for scientific study and research. They offer insights into geological processes, plant and animal behavior, and environmental changes over time.
  • Ethical Considerations: Ultimately, leaving what we find is a matter of ethical responsibility and respect for the environment. Just as we wouldn’t vandalize a work of art in a museum, we should refrain from altering or removing elements of the natural world.

5. Minimize Campfire Impacts

While campfires can be an enjoyable part of the outdoor experience, they also pose a risk to the environment if not managed properly. When building a fire, use established fire rings or fire pits whenever possible. Keep fires small and only use dead and downed wood for fuel. Make sure to completely extinguish the fire before leaving by dousing it with water and stirring the ashes until cold to the touch.

6. Respect Wildlife

Wild animals are an integral part of the natural world and should be observed from a safe distance. Avoid feeding, approaching, or disturbing wildlife, as this can disrupt their natural behaviors and cause harm to both animals and humans. Keep food and scented items securely stored to prevent attracting wildlife to your campsite. Bear bags for storage, or freeze dried single serving meals to avoid excess scent that may attract wildlife.

Don’t feed us!

7. Be Considerate of Other Visitors

Finally, practice good outdoor etiquette by being considerate of other visitors and minimizing noise pollution.

  • Respect the tranquility of the wilderness by keeping noise to a minimum, especially in areas where others are seeking solitude or quiet enjoyment.
  • When encountering other hikers or trail users, yield the right of way and step aside to let them pass, especially on narrow or steep sections of the trail.
  • When taking breaks or enjoying scenic viewpoints, be mindful of where you place your belongings.
  • If hiking or camping with pets, keep them leashed and under control at all times to prevent them from disturbing wildlife, other visitors, or sensitive ecosystems.
  • Properly dispose of trash, including food wrappers, containers, and hygiene products, by packing them out with you and disposing of them in designated receptacles.
  • Respect the privacy of other visitors by refraining from intruding on their personal space – “read the room”
  • If hiking or camping with a group, be cautious of group mentality and maintain respectful behaviors
  • Share Leave No Trace principles and outdoor etiquette with fellow visitors to promote responsible outdoor recreation and stewardship of natural resources.

In conclusion, Leave No Trace is not just a set of guidelines; it’s a commitment to preserving the natural beauty of our planet for generations to come. By following these principles and encouraging others to do the same, we can ensure that our outdoor adventures leave only footprints and memories, leaving the wilderness pristine and unspoiled for future explorers to enjoy. So, the next time you head out into nature, remember to leave no trace and leave it better than you found it!

.In this article we are going to discuss the ins and outs of a fire extinguisher, how to use one and when to use one. We need to know the types of extinguishers, the types of fires, and the phases that fires go through.

Anatomy of the Fire Extinguisher

  • Trigger – releases the solvent
  • Safety pin – prevents accidental extinguishing
  • Handle
  • Pressure Gauge – green equals fully charged, red means not
  • Hose/Nozzle – directs the stream (use a sweeping motion)

PRO-TIP:

Regularly inspect your extinguisher(s)!

Check for clean, readable labels and instructions, no rust & full pressure on  the gauge. Log your inspections!

Fire Extinguishing Safety Rules

But First!

  • If you are at work, pull the fire alarm and notify the fire department (or assign someone to this task).
  • If you are at home, notify the fire department.
  • Assist anyone  in danger, or cannot evacuate on their own. Remember not to put yourself at risk.

IF IT’S SAFE:

  • Notify someone that you are about to attempt extinguishing.
  • Identify your evacuation path
    • Never allow the flame to come between you and your way out!
  • Here’s the Acronym of most importance: PASS
    • Pull (the pin)
    • Aim (the nozzle)
    • Squeeze (the trigger)
    • Sweep (sweeping motion)

Fight (the fire) or Flee (to safety)?
Questions to Consider Ourselves:

  1. Is the fire small enough for my efforts to even be effective?
  2. Do I remember how to use the extinguisher?
  3. Do I have the appropriate extinguisher available for this type of fire?
  4. Is the air safe to breath?
  5. Do I have an evacuation route in place?

Types of Fire: A, B, C, D, K

Here are 5 types of fire and examples:

Class A: wood, paper, cloth, rubber, & many plastics

Class B: flammable liquids

  • Gas, propane, butane, petroleum greases, tars, oils, oil based paints, solvents, alcohol
  • NOT cooking oil or cooking fats

Type Class C: energized electrical equipment

  • Computers, appliances, motors, transformers
  • ONLY if there’s power to the item. No electrical supply and these items fall under a different category

Class D: combustible metals

  • Magnesium, calcium, sodium, lithium, potassium, phosphorus

Class K: vegetable oils, animal oils, cooking grease and fats

Types of Extinguishers

There are many types of extinguishers on the market. Be sure that whichever one you pick is appropriate for your work or home space. Here are a few that are available. Learn from my mistakes and know that extinguishers are not all “universal”!

  1. Water & Foam: Class A fires only
  2. Carbon Dioxide: Class B&C, ineffective on A
  3. Multi-purpose Dry Chemical: Class A, B, C
  4. Ordinary Dry Chemical: Class B&C
  5. Dry Powder Chemical: Class D only
  6. Clean Agent: Class A, B, C
  7. Wet Chemical: Class K

Most commonly in your home you are likely to have a Multi-purpose or a Clean Agent style extinguisher that covers classes A, B, and C.

If you are a kitchen connoisseur, having a Class K in your kitchen might be a beneficial preparation to have!

Stages of a Fire:

Incipient: Phase 1

  • Flame still in beginning stage
  • Small flame, not wide spread at this time
  • Smoke allows for visibility & almost normal breathing in the space
  • Heat emitted is low

Growth: Phase 2

  • Sufficient oxygen and fuel available
  • Thicker layer of smoke forming
  • No condensation on windows
  • Windows may show brown staining or start to crack

Fully Developed: Phase 3

  • Dark/black smoke
  • Dense/thick smoke
  • Substantial heat
  • Blackened windows
  • Visible exterior flame

Decay: Phase 4

  • Fuel and oxygen is running out 

fire burning

Fire Size: Extinguish or Evacuate?

Evacuate If:

  • Fire is a flammable solvent (such as fuel)
  • 5.6 square meters or larger
  • Partially hidden in a wall or ceiling – size is undetermined
  • Cannot be reached from standing – meaning  above your head or taller than your head
  • Heat is too intense
  • You need to crawl or be on the floor because the heat is too thick

Extinguish If:

  • #1 & most importantly: you feel comfortable trying. The first rule is that if you do not feel safe and secure, evacuate and let the professionals take care of the situation.
  • Limited to the original material that was ignited
    • Ex: A box of Kleenex lit up, and has not spread, then you may attempt extinguishing
  • It is contained
  • Flame is not higher than your head
  • Good visibility
  • Protective gear not required for your safety
  • Room temperature not raised

Prevention

  • Test smoke detectors (monthly or on a calendared schedule)
  • No smoking indoors. Never leave buds on ground outdoors. Always properly dispose of these!
  • Candles – never leave unattended
  • Store flammable products properly
  • Know where all shut offs are, such as gas lines, circuit breakers, appliances and fuses
  • Maintain your electrical cords – check for frayed or damaged cords. Check for power bars and over-burdened electric plug ins
  • Inspect heating sources (furnace filters, hot water heater, regular maintenance)
Conclusion:

And just like that, you are ready to extinguish in the hopefully unlikely event of a mis-placed fire! Congratulations on educating yourself and being one step closer in your preparedness. Locate your extinguisher, follow the maintenance guidelines, and feel ready to embrace whatever life may throw your way. Have a great day!

map of the world

Food is more than sustenance; it’s a culturally woven with traditions, rituals, and communal ties. We have special meals within our unique countries and cultures, and holidays.

Food Across the Globe:

Traditional Staples & Preservation Techniques

Different cultures have distinct staples integral to their culinary identity. In times of emergency, reliance on these staples is important. Preservation methods such as fermentation, pickling, and drying emerge as resilient practices passed down through generations. Here are some examples from around the globe:

  1. Canning:
    • Canned tomatoes from Italy. Italians are known for preserving their tomatoes in cans, which are widely used in cooking, especially for making sauces.
  2. Drying/Dehydrating:Dehydrated food
    • Turkish dried apricots. Turkey is a major producer of dried apricots, and the drying process helps extend their shelf life for export and local consumption.
    • In Morocco, sun-drying is a common method of preserving tomatoes. Tomatoes are sliced and laid out in the sun to remove the moisture, which inhibits the growth of bacteria and molds. Once dried, they can be stored for an extended period and used in various dishes.
    • Indigenous people used to dry meat, also known as pemmican if processed a certain way with fats and berries
  3. Smoking:
    • Scottish smoked salmon. Scotland is renowned for its traditional method of smoking salmon, giving it a distinctive flavor and preserving it for longer storage.
  4. Fermentation:
    • German sauerkraut. Sauerkraut, fermented cabbage, is a popular traditional food in Germany and is often used as a side dish or condiment.
    • Kimchi is a traditional Korean dish made by fermenting vegetables, usually Napa cabbage and Korean radishes, with a variety of seasonings such as chili pepper, garlic, ginger, and fish sauce. The fermentation process not only preserves the vegetables but also imparts a unique and tangy flavor to the dish.
  5. Salting:
    • Spanish salted cod (Bacalao). Salted cod is a traditional ingredient in Spanish cuisine and has been used for centuries as a way to preserve fish.
  6. canning picklesPickling:
    • Japanese pickled ginger (Gari). Gari is often served with sushi and is pickled in a solution of vinegar and sugar to enhance its flavor and shelf life.
    • I pickle cucumbers yearly and process dill pickles via water bathing.
  7. Freezing:
    • Canadian frozen wild blueberries. Canada is a major exporter of frozen blueberries, using freezing as a preservation method to maintain their freshness.
  8. Curing:
    • American bacon. Bacon is cured with a mixture of salt and sugar, and sometimes nitrites, to preserve it and add flavor.
  9. Jelly and Jam Making:
    • British strawberry jam. Jam-making is a common method in the UK, where fruits like strawberries are cooked with sugar and pectin to create jams.
  10. Root Cellaring:
    • Russian potato storage. In Russia, root vegetables like potatoes are often stored in traditional underground cellars to prevent them from freezing during the winter.
  11. Vacuum Packing:
    • Japanese vacuum-packed seaweed. Vacuum packing is commonly used in Japan to preserve seaweed, maintaining its freshness and flavor.
    • How many of you have a food saver of sorts? We definitely vacuum seal various foods for the freezer after we have portioned them down to the right size.
  12. Preservation in Oil:
    • Greek olives in oil. Olives are often preserved in oil in Greece, enhancing their flavor and preventing spoilage.

Worldwide Traditional Food Examples, Starting With Asia:

Chinese Cuisine:
  • Cantonese Cuisine: Known for dim sum, delicate flavors, and seafood dishes.
  • Sichuan Cuisine: Famous for bold and spicy flavors, often using Sichuan peppercorns.
  • Rice and Noodles
  • Soy Sauce, Hoisin Sauce, Oyster Sauce: Common flavor enhancers.
  • Tofu and Bean Sprouts: Used in vegetarian and meat dishes.
Japanese Cuisine:
  • Sushi and Sashimi: Raw fish on vinegared rice and sliced raw fish, respectively.
  • Tempura: Lightly battered and deep-fried seafood and vegetables.
  • Ramen and Udon: Noodle soups with various broths.
Korean Cuisine:
  • Kimchi, a fermented vegetable dish, is a staple, and there are various types of kimchi. Other fermented foods include soybean paste (doenjang) and fermented soybean stew (cheonggukjang).
  • Barbecue (BBQ): Korean barbecue, known as “Gogigui,” is a popular dining style where diners grill their own meat at the table. Samgyeopsal (pork belly), bulgogi (marinated beef), and galbi (marinated short ribs) are common choices for Korean barbecue.
  • Stews and Soups: Korean cuisine features a variety of stews and soups, often spicy and hearty.

Central Asia

Central Asian cuisine is shaped by the nomadic traditions, harsh climates, and diverse landscapes of the region. It encompasses the culinary practices of countries such as Kazakhstan, Kyrgyzstan, Tajikistan, Turkmenistan, and Uzbekistan. Here are a few traditional foods of Central Asian food culture:

  • Grains and Bread: Central Asian cuisine relies on grains such as wheat, barley, and rice. Bread, including flatbreads like naan and tandyr.
  • Meat: Lamb, mutton, and beef are primary meat sources.
  • Plov (Pilaf) is a signature dish. Plov is a culturally beloved dish made with rice, meat (often lamb or beef), carrots, and various spices.
  • Dumplings: Manti (Central Asian Dumplings) is filled with minced meat and onions.

The Middle East:

The Middle East is renowned for its rich and diverse food culture, characterized by a wide array of flavors, ingredients, and cooking techniques. The cuisine of the Middle East reflects its history, geography, and cultural traditions. Here are some key elements and types of food culture in the Middle East:

  • Grains and Breads:
    • Flatbreads: Staple in Middle Eastern cuisine, including pita, lavash, and khubz.
    • Rice: Served as a base for many dishes, like biryanis and pilafs.
  • Proteins:
    • Kebabs: Grilled skewers of marinated meats.
    • Shawarma: Layers of seasoned meat (often lamb or chicken) cooked on a vertical rotisserie and sliced for serving.
  • Spices and Herbs:
    • Sumac: Adds a tangy flavor.
    • Za’atar: A blend of herbs, sesame seeds, and sumac.
    • Cumin, Coriander, and Turmeric: Commonly used in spice blends.
  • Persian Cuisine: Known for its use of saffron, dried fruits, and intricate rice dishes.

Australia

Australia has a diverse culinary landscape that reflects its multicultural society and Indigenous heritage. Here’s a list of some cultural and traditional foods from Australia:

  • Damper: A traditional Australian soda bread, historically made by swagmen and drovers over an open fire. It’s a simple bread made with flour, water, and sometimes milk.
  • Barramundi: A popular Australian fish, often grilled or barbecued. It’s a staple in many coastal regions.
  • Kangaroo: Considered a lean and healthy meat, kangaroo is sometimes used in Australian cuisine. It’s commonly prepared as steaks or sausages.
  • Vegemite: A yeast extract spread, commonly used on toast or crackers. It has a distinctive savory taste and is a popular breakfast item.
  • Witchetty Grubs: Traditionally consumed by Indigenous Australians, these are large, wood-eating moth larvae. They can be eaten raw or lightly cooked.
  • Bush Tomato: A small, round fruit with a strong flavor, often used in Indigenous Australian cuisine. It’s a key ingredient in various dishes.
  • Barramundi Pie: A savory pie filled with barramundi fish and other ingredients, popular in some regions.
  • Macadamia Nuts: Native to Australia, macadamia nuts are used in sweet and savory dishes.
  • Crocodile Meat: Used in dishes like sausages or skewers.

Europe

European traditional foods and food culture are diverse. While it’s challenging to encompass the entirety of European cuisine, here are some iconic dishes that characterize European traditional foods and food culture. You’ll note that North America adopts many of these cuisine’s:

Mediterranean Cuisine:
  • Olives and Olive Oil: Fundamental to Mediterranean dishes.
  • Fresh Vegetables and Herbs: Tomatoes, garlic, basil, and oregano are staples.
  • Seafood: Prominent in coastal regions, with dishes like paella and bouillabaisse.
French Cuisine:
  • Baguette and Croissant: Iconic French breads.
  • Cheese: France is renowned for its diverse cheese varieties.
  • Wine and Champagne: Integral to French dining culture.
Italian Cuisine:
  • Pasta and Pizza: Staple dishes with regional variations.
  • Tomatoes and Olive Oil: Essential ingredients.
  • Gelato and Tiramisu: Classic desserts.
German Cuisine:
  • Sausages (Wurst): Bratwurst, Weisswurst, and more.
  • Pretzels and Sauerkraut: Popular accompaniments.
  • Beer: Germany is known for its beer culture and Oktoberfest.
British Cuisine:
  • Fish and Chips: Fried fish and thick-cut fries.
  • Roast Dinner: Traditionally served on Sundays.
  • Tea and Scones: Afternoon tea is a cultural tradition.
Eastern European Cuisine:
  • Pierogi: Dumplings filled with various ingredients.
  • Borscht: Beet soup, popular in Ukraine and Russia.
  • Cabbage Rolls (Golabki): Stuffed cabbage leaves.
Greek Cuisine:
  • Souvlaki and Gyros: Grilled meat dishes.
  • Feta Cheese and Tzatziki: Common accompaniments.
  • Baklava: Layers of phyllo pastry, nuts, and honey.
Swiss Cuisine:
  • Fondue and Raclette: Melted cheese dishes.
  • Swiss Chocolate: Renowned for its quality.
  • Rösti: Shredded and fried potatoes.
Belgian Cuisine:
  • Belgian Waffles: Light and crispy waffles.
  • Chocolate and Pralines: Belgium is famous for its chocolates.
  • Mussels and Fries: Moules-frites is a popular dish.

Africa

In Africa, the use of root vegetables and grains are prominent. These ingredients, rich in nutritional value, highlight the communal aspects of emergency food sharing and support systems within African culinary traditions.

African food culture is incredibly diverse, reflecting the continent’s vast landscapes, rich history, and the multitude of ethnic groups and communities. Each region and country within Africa has its unique culinary traditions and flavor

Some traditional African foods:

  • Cereals: Grains such as millet, sorghum, and maize are staples in many African diets.
  • Root Vegetables: Cassava, yams, and sweet potatoes are common.
  • Rice and Plantains: Important in West African cuisine.
  • Proteins:
    • Meat: Beef, goat, lamb, and poultry
    • Fish: Coastal regions incorporate fish into their dishes.
    • Insects: In certain regions, insects are consumed for protein content.

North America

North America boasts a diverse and dynamic food culture, shaped by a rich tapestry of indigenous traditions, immigrant influences, and regional variations. Canada, United States & Mexico all have varying cuisine styles, even within each country.

  • Coastal communities versus prairie or inland communities have different cultural cuisine.

Indigenous Food Culture:

  • Seasonal hunting and foraging
  • Bannock
  • Preservation methods of drying and curing meats
  • Using only what you need, deep respect for the land

Some common food trends:

  • Fast Food Culture
  • Barbecue
  • Food Trucks and Street Food – a growing trend

South America

South America is a continent with a rich and diverse food culture, influenced by indigenous traditions, colonial history, and a variety of climates and ecosystems. Here are key elements of South American food culture and cultural food traditions:

Culinary Traditions of the Andean Region:
  • Ceviche: Raw fish or seafood marinated in citrus juices, popular along the Pacific coast.
  • Aji Amarillo: A yellow chili pepper used in many Peruvian dishes.
  • Pachamanca: An Andean cooking technique involving burying food with hot stones.
  • Chicha: A fermented beverage made from maize (purple corn), popular in various Andean cultures.
  • Pisco Sour: A cocktail made with Pisco, a grape brandy.
  • Cuy (Guinea Pig): Considered a delicacy in the Andean region.
  • Chuño: Freeze-dried potatoes used in traditional Andean dishes.

Peru has a special place in my heart as I was able to spend 3 weeks there in April 2023. The modern day need to take photos of our meals and food is surely going to pay off today! While we toured, they constantly wanted to feed us “traditional” food. I will not label what everything is, but there is certainly photos of some of the above and below food items in this next gallery (I added the photos from the Amazon as well as Lima/Cusco).

Amazonian Cuisine:
  • Exotic Fruits: The Amazon rainforest is home to a variety of unique fruits like açaí, camu camu, and cupuaçu.
  • Tucupi: A yellow sauce made from fermented cassava juice, used in Amazonian dishes.
Colombian Cuisine:
  • Arepas: Cornmeal patties often served as a staple side dish.
  • Bandeja Paisa: A hearty dish featuring rice, beans, meat, and plantains.
  • Changua: A traditional breakfast soup with eggs and milk.
Conclusion: A Tapestry of Flavor, History, and Resilience

Each country has its unique dishes and specialties, contributing to the continent’s flavorful and vibrant culinary landscape. Embrace the richness of our cultural heritage!

If you require any assistance in preparing your food storage, please reach out to our team, and we’d be happy to assist you!

A personal hygiene kit is a collection of items assembled to help maintain cleanliness and personal grooming while away from home or in situations where regular facilities are not available. These kits typically contain essential hygiene products and tools necessary for maintaining personal cleanliness and health.

What are 8 types of personal hygiene?
  • Keeping Hands Clean
  • Nail Hygiene
  • Oral Hygiene (dental care)
  • Coughing and Sneezing
  • Body Hygiene
  • Hair and Scalp Hygiene
  • Facial Cleanliness
  • Menstrual Hygiene

Our kits – whether for an emergency, for camping/backpacking, or for travelling should consider the above types of hygiene. They cover all your hygiene needs. Below is a list of items to consider.

Kit Item List:
  1. Hand Hygiene:
    • Hand sanitizer or sanitizing wipes: To clean hands when soap and water are not available.
      • Particular care to wash hands after coughing/sneezing.
      • Cough & sneeze into your elbow
    • Soap: Travel-sized or individually wrapped soap for washing hands.
    • Nail clippers and file: For nail care.using soap to wash your hands for sanitation
  2. Oral Care:
    • Toothbrush and toothpaste: For maintaining oral hygiene.
    • Dental floss or dental picks: To clean between teeth.
    • Travel-sized mouthwash: Optional for additional freshness.
  3. Body Hygiene:
    • Travel-sized shampoo and conditioner: For hair care.
    • Body wash or soap: For overall body cleanliness.
    • Deodorant: To control body odor.
    • Razors and shaving cream: For personal grooming.
    • Tweezers: For removing splinters or unwanted hair.
  4. Hair Care:
    • Comb or brush: For hair grooming.
    • Hair ties or clips: For securing hair.
    • Clippers (if applicable)
  5. Facial Care:
    • Facial tissues or handkerchief: For nose blowing or general use.
    • Moisturizer and sunscreen: Depending on the climate and needs.
    • Face Wash & applicable wash needs (ex: acne and anti-aging products)
  6. Towel and Washcloth:
    • Microfiber towel or compact towel: Lightweight and quick-drying.
    • Washcloth: For face and body cleaning.
  7. First Aid Items (these could be in a separate kit – in your comprehensive first aid kit):
    • Adhesive bandages: For minor cuts or scrapes.
    • Antiseptic wipes: To clean wounds.
    • Pain relievers: Such as acetaminophen or ibuprofen.
    • Any necessary prescription medications: As needed.mask covid
  8. Hygiene Accessories:
    • Disposable gloves: Useful for various hygiene tasks.
    • Face masks: Depending on the situation and health recommendations.
    • Feminine hygiene products: For menstrual care (if applicable).
  9. Compact Container:
    • Ziploc bag or travel pouch: To keep all items organized and easily portable.

Service Opportunity:

Now that we’ve built our own kits, or are preparing to build our own, consider the opportunity to help someone in need! I was going to provide a link to a service opportunity, but I am afraid that over time the link would expire. However, I am confident that a quick google search will bring you to a current opportunity.

For example: The Salvation Army is often looking for hygiene kits for the homeless population, or women’s shelters, or for refugees, etc. You can go directly to their site, or you can go to Just Serve a reputable site and find a local to you service opportunity.

flashlight at night looking at the stars along the river

In the realm of preparedness, having reliable light sources is a cornerstone necessity. Whether facing power outages or summer camping adventures, the right illumination is important for safety, comfort, and functionality. In this guide, we’ll delve into light sources that cater to every season, ensuring you are well-equipped for any situation.

  1. Flashlights:

    Flashlights are versatile, compact, and a must-have for every survival kit. Choose LED models for long-lasting brightness and battery life. In winter, they navigate power outages; in summer, they guide nocturnal adventures.

    Pro-Tip: Have multiple flashlights! Put one in your vehicle, put one in your emergency kit, put one in the garage, put one in your bedroom, and so on. If you have children – store even more! I don’t know about you, but I know that when I need a flashlight, little hands have often ‘borrowed’ it.

  2. Lanterns:

    Lanterns provide ambient light, making them ideal for group settings. Battery-powered or propane lanterns are excellent choices for camping trips or creating a cozy atmosphere during winter storms when electricity falters.Oil lamps combine functionality with a touch of traditional elegance. They offer a steady flame, making them suitable for both indoor and outdoor use, ensuring a timeless glow in any season.

  3. Headlamps:

    Headlamps are invaluable for hands-free lighting, perfect for activities like hiking or working in the dark. Their practicality shines in summer camping or winter emergencies when versatility is key.Ex: When we go and visit the Bunker near Canmore, a headlamp helps you enjoy the experience so much more!

  4. Solar-Powered Lights:

    Solar-powered lights are eco-friendly solutions that come into their own during sun-drenched summers. Use them to charge during the day and provide gentle illumination at night for campsites or emergency situations.

  5. Candles:

    Candles offer a timeless and reliable light source. During winter power outages, they provide warmth and illumination, while in summer, they enhance the ambiance of outdoor settings

  6. Glow Sticks:

    Glow sticks are compact, portable, and add a touch of color to your survival toolkit. Ideal for signaling, marking trails, or creating a festive atmosphere during summer evenings. Also, kids love them!

Conclusion:

Preparing for year-round survival involves considering the varied lighting needs that each season presents. By diversifying your light sources with flashlights, lanterns, headlamps, solar-powered lights, candles, oil lamps, and glow sticks, you ensure adaptability to any situation. Whether facing winter’s chill or basking in summer’s warmth, a well-equipped lighting arsenal ensures you can navigate the dark with confidence and resilience. Stay prepared, stay illuminated.

Roasting over the fire

Living in Canada, where winter temperatures can plummet, it’s essential to be prepared for emergencies, especially power outages that can leave you without electricity and, consequently, heating. In this article, we’ll explore  methods for generating emergency heat.

Wood-Burning Stoves and Fireplaces:

If this is an option for your, wood-burning stoves and fireplaces are traditional sources of heat. Keep a good supply of seasoned firewood in a dry place, and ensure your fireplace or stove is well-maintained. In case of a power outage, these can serve as reliable alternatives for keeping your home warm.

Many new builds, in Alberta specifically, are not built with a wood-burning fire place, but rather gas fireplaces. Often these will also continue to function during an electrical outage. Test yours to know for sure, for this is a possible emergency heat source in your home.


Propane Heaters:

Portable propane heaters are excellent options for emergency heating. They are easy to use, efficient, and suitable for outdoor use. Make sure to store enough propane canisters to last through an emergency situation. You can get garage/workshop friendly heaters, but unless specifically states ideal for indoor use, avoid using propane ran products indoors.

Example: A propane firebowl can serve as an outdoor source, in addition to or in place of an outdoor firepit

Insulation and Thermal Curtains:

Prioritize insulation to retain as much heat as possible. Seal gaps in doors and windows, and use thermal curtains to trap warmth inside. This not only helps maintain a comfortable temperature but also conserves energy. Added bonus: during the summer heat, it serves as a way to keep the heat out as well.

Examples: Install draft stoppers, thermal curtains, weather stripping, close exterior doors when not in use, and/or shrink wrap windows.

Hot Water Bottles and Bed Warmers:

Utilize the comforting warmth of hot water bottles and bed warmers to stay cozy during power outages. Boil water or hot tap water and fill the bottles or warmers for a reliable heat source. Consider in an emergency your hand/feet warmers from your emergency kit.

Heat factory hand warmers

Example: All winter I add a hot water bottle to my bed. They can stay warm for hours! Also, could be used while huddled around in the living room.

Emergency Blankets and Sleeping Bags:

Emergency blankets and sleeping bags are excellent for retaining body heat. Keep a supply of these in your emergency kit to stay warm, especially when sleeping or resting in unheated areas. Also, all of those extra blankets and quilts stored in your hall-closet, these are those moments they become an excellent source of warmth!

Coghlan blanket to keep warm in an emergency

Layered Clothing and Thermal Wear:

Dressing in layers is a simple yet effective way to stay warm. Keep a collection of thermal wear, jackets, and moisture-wicking clothing to regulate body temperature and stay comfortable during power outages. Slippers, robes, fuzzy pajamas. These can become layers and emergency clothing if the need to stay warm arises.

Example: Merino wool base layers provide excellent insulation without bulk and are a great addition to your emergency clothing kit.

Conclusion:

While modern conveniences like central heating systems may fail during power outages, or simply your furnace dies as they are known to malfunction on occasion, adopting old-school methods can be a lifesaver in emergency situations, especially in the Canadian winter. By incorporating these traditional heating solutions into your emergency preparedness plan, you can ensure the warmth and safety of your household even when the power goes out. Stay warm, stay safe!

aloe vera

Alternative medicine and a holistic approach is important to know and understand. If you find yourself lost in the wilderness, or simply want a more natural solution to assist your healing, this article explores the use of herbal remedies to support first aid. I am a believer that both medical and holistic approaches are important in different situations.

Note: We are providing some alternative options to supporting first aid, and to only use such remedies after your own education and research

Harnessing the Power of 4 Herbal Remedies:

Wound Care with Calendula:
  • Benefits: Calendula possesses anti-inflammatory and antimicrobial properties.
  • Application: Create a poultice or infused oil to cleanse and promote healing for minor cuts, scrapes, and burns.
  • Personal experience: 2 of my children were birthed under the care of a midwife (team), and calendula was a staple in the healing kit post birth. Compared to my first born, I noticed a difference in my healing.
Arnica for Bruises and Sprains:
  • Benefits: Arnica is known for its anti-bruising and anti-inflammatory effects.
  • Application: Prepare an arnica salve or compress to alleviate bruising and reduce swelling associated with sprains.
  • In a health food store Arnica also comes in naturopathic dissolving “beads” to melt under the tongue.
Aloe Vera for Burns:
  • Benefits: Aloe Vera offers soothing and cooling properties.
  • Application: Extract the gel from the leaves and apply it to burns for instant relief and accelerated healing.
  • Many people grow Aloe Vera plants at home, and also products can be purchased at the story containing aloe. We keep a bottle of Aloe Vera gel along side our sunscreen in the summer.

Chamomile for Digestive Issues:
  • Benefits: Chamomile has calming and digestive properties.
  • Application: Brew chamomile tea to ease nausea, indigestion, and gastrointestinal discomfort.

First Aid Essentials with Herbal Alternatives:

Herbal Antiseptic Spray:
  • Ingredients: Thyme, lavender, and tea tree essential oils.
  • Application: Mix oils with water in a spray bottle for a natural antiseptic to cleanse wounds.
  • Another option is Silver (in a spray) carried in your first aid kit as a natural antiseptic.
Peppermint Oil for Headaches:
  • Application: Dilute peppermint oil (per essential oil instructions) and apply to temples for headache relief, or inhale for a refreshing pick-me-up.
  • If you are lucky enough to find peppermint in the great outdoors, you may also chew the leaves.

Activated Charcoal Poultice:
  • Benefits: Activated charcoal can absorb toxins and reduce inflammation.
  • Application: Create a poultice to draw out toxins from insect bites, stings, or infected wounds.
      • If you have ever seen those foot absorption pads advertised to detox your body, they are typically made with this same charcoal. Throw a few in your first aid kit in case of bites or stings!
Echinacea Tincture for Immune Support:
  • Benefits: Echinacea is known for its immune-boosting properties.
  • Application: Take echinacea tincture to support the immune system during stressful situations. Can also be found in pill form at the health food store or in some pharmacy’s.

Preparing an Herbal First Aid Kit:

Essential Oils:

There are hundreds of oils, and combinations of oils. Here we will just name a few:

Lavender Oil: Antiseptic, anti-inflammatory, calming.
Uses: Wound care, burns, insect bites, stress relief.

Tea Tree Oil: Antimicrobial, antiseptic, antifungal.
Uses: Disinfecting cuts, treating fungal infections, insect bites.

Peppermint Oil: Analgesic, anti-inflammatory, cooling.
Uses: Headaches, muscle aches, nausea, insect repellent.

Eucalyptus Oil: Decongestant, antiseptic, expectorant.
Uses: Respiratory issues, insect bites, muscle pain.

Chamomile Oil: Anti-inflammatory, calming, analgesic.
Uses: Skin irritation, anxiety, sleep aid.

Frankincense Oil: Anti-inflammatory, antimicrobial, calming.
Uses: Wound healing, inflammation, stress relief.

Lemon Oil: Antiseptic, antibacterial, uplifting.
Uses: Disinfecting, uplifting mood, nausea.

Clove Oil: Analgesic, antimicrobial, anti-inflammatory.
Uses: Toothache, pain relief, insect bites.

Ginger Oil: Analgesic, anti-inflammatory, digestive.
Uses: Nausea, muscle pain, digestive issues.

Tips for Using Essential Oils in First Aid:
  • Dilution: Essential oils are potent, so always dilute them with a carrier oil (like coconut or jojoba oil) before applying to the skin.
  • Patch Test: Perform a patch test before applying essential oils to a larger area to check for any allergic reactions.
  • Inhalation: Inhaling the aroma of essential oils can have therapeutic effects. You can use a diffuser or inhale directly from the bottle.
  • Consultation: If you have specific health concerns or are pregnant, consult with a healthcare professional before using essential oils.
  • Storage: Keep essential oils in dark glass bottles in a cool, dark place to preserve their potency.

Conclusion:

In emergency situations, the integration of herbal remedies into your first aid approach can provide effective and natural solutions. While it’s necessary to seek professional medical assistance when available, having knowledge of herbal alternatives empowers individuals to address immediate health needs with accessible and sustainable resources. By incorporating herbal remedies into your emergency preparedness plan, you can enhance your ability to respond effectively to a range of health issues, fostering a holistic and resilient approach to well-being.

water barrel beside blue flowers

In a world increasingly focused on sustainable practices, the technique of harvesting rainwater has re-emerged as an eco-friendly water solution. This article delves into the art of collecting rainwater, exploring not only the benefits but also the reasons why individuals should embrace this age-old practice to foster sustainability at home.

The Essence of Harvesting Rainwater:

Why Collect Rainwater?

  1. Sustainable Water Source:
    • Rainwater harvesting provides a sustainable and natural water source, reducing your reliance on traditional water supplies and contributing to long-term water conservation efforts.
    • Currently much of Canada is in a drought, and with a 2023-2024 mild/dry winter, my hunch is that we will have a very dry summer which could include water use restrictions.
  2. Cost-Effective Water Supply:
    • Harnessing rainwater is a cost-effective alternative to relying solely on municipal water sources. Once the initial setup is complete, rainwater is essentially free, leading to potential savings on water bills.
  3. Reduction of Runoff and Erosion:
    • Collecting rainwater helps mitigate soil erosion and reduces stormwater runoff. By directing rain into storage systems, you minimize the impact of heavy rainfall on the soil, preventing loss of topsoil and potential flooding.
  4. Landscape Nourishment:
    • Rainwater is naturally soft and devoid of the minerals and chemicals found in treated water supplies. Using collected rainwater for irrigation nourishes plants with a purer water source, promoting healthier growth and minimizing the environmental impact of conventional irrigation practices.

splash of water

How to Collect Rainwater:

  1. Install a Rain Barrel
    • Place rain barrels beneath downspouts to catch and store rainwater. Ensure the barrel has a tight-fitting lid to prevent debris, bugs, and algae from contaminating the water.
  2. Connect to Gutters and Downspouts:
    • Direct water from your roof into the rain barrel by connecting it to gutters and downspouts, ensuring efficient collection during rainfall.
  3. Filter Debris:
    • Use mesh screens or filters at the entry point of gutters to prevent leaves and other debris from entering the rainwater collection system.
  4. Implement Larger Storage Systems:
    • If space permits, for more extensive rainwater harvesting, consider installing larger cisterns or tanks. These systems allow for increased storage capacity and can be integrated into landscaping or hidden underground.

Environmental Impact: Navigating the Path to Sustainability

  1. Environmental Benefits:
    • Rainwater harvesting significantly reduces the demand on local water supplies, especially during dry seasons. This conservation effort helps maintain aquatic ecosystems and preserves water for future generations.
  2. Local Regulations and Incentives:
    • Check local regulations and incentives related to rainwater harvesting. Some areas may offer incentives or rebates for installing rainwater collection systems, while others may have specific guidelines to follow.
  3. Community Awareness:
    • Raise awareness within your community about the benefits of rainwater harvesting. Collaborate with local organizations and authorities to promote sustainable water practices and share knowledge about the positive environmental impact.

watering garden

Why You Should Collect Rainwater:

  1. Self-Sufficiency:
    • Collecting rainwater promotes a sense of self-sufficiency, allowing you to rely less on external water sources and fostering a more resilient living environment.
  2. Environmental Responsibility:
    • Embracing rainwater harvesting reflects a commitment to environmental responsibility. By using a natural resource, you actively participate in reducing the strain on water ecosystems and contribute to a more sustainable future.
  3. Cost Savings:
    • Beyond the initial setup, rainwater is essentially free. Collecting and using rainwater can lead to significant savings on water bills, making it a financially wise and eco-friendly choice.
  4. Landscape Health:
    • Rainwater, free from the chemicals found in treated water, is an excellent source for nourishing your garden and landscape. Plants thrive on the purity of rain, leading to healthier, more vibrant greenery.

Conclusion:

Embracing the art of rainwater harvesting is not only a practical step towards sustainability but a transformative act that connects individuals to the natural rhythm of the environment. By collecting rainwater, we contribute to the preservation of water resources, reduce our ecological footprint, and actively participate in building a more resilient and environmentally conscious community. In the simple act of collecting raindrops, we nurture a sustainable future—one drop at a time.

canning

This article explores the essence of a root cellar or cold room, delving into its purpose, benefits, and the steps to build your own. Discover the timeless wisdom of harnessing nature’s refrigerator to keep your food storage, fruits, vegetables, and harvest bounty fresh throughout the seasons.

What is a Root Cellar?

A root cellar is a traditional storage space designed to provide cool, dark, and humid conditions for storing fruits, vegetables, and other perishables. It serves as a natural refrigeration system, extending the shelf life of produce and allowing individuals to enjoy homegrown or locally sourced foods long after harvest season has ended.

Why You’d Want One:

  1. Preserving Freshness: A root cellar creates an environment that mimics the cool, damp conditions found underground. This helps slow down the natural ripening and decay process.
  2. Energy Efficiency: Unlike modern refrigeration systems, root cellars operate without electricity.
  3. Preservation of Nutritional Value: The cool, dark conditions of a root cellar help preserve the nutritional value of stored fruits and vegetables. Minimal exposure to light and air slows down the degradation of vitamins and nutrients.
  4. Flavor Enhancement: Certain fruits and vegetables develop richer flavors when stored in a root cellar. The slow, natural aging process can enhance the taste and texture of items like apples, potatoes, and carrots.
  5. Versatility in Storage: Root cellars are versatile, accommodating a variety of produce, including root vegetables, apples, onions, and winter squashes. This diversity makes them an excellent solution for storing a wide range of homegrown or locally sourced foods.

How to Build a Root Cellar:

Consult a builder, or professional for specific instructions. Here in this article we will just mention the basics.

  1. Selecting a Location: Choose a site with good drainage, away from trees, and preferably facing north to avoid direct sunlight. The natural insulation provided by the earth ensures a stable temperature.
  2. Creating Ventilation: Install ventilation systems, such as vents or air pipes, to ensure proper air circulation. Adequate ventilation prevents the buildup of ethylene gas produced by stored fruits and vegetables, helping to prevent spoilage. Include measures to control humidity.
  3. Insulating Walls and Ceiling: Insulate the walls and ceiling to regulate temperature and humidity.
  4. Other Tips: 
    • Make sure the cellar is 10 ft deep
    • Must be able to hold a temperature of 0° to 5°C and a humidity level of 85 to 95 percent
        • The cooler temps slow the release of ethylene gas from the root vegetables and stop the growth of microorganisms, which slows down ripening and decomposition.
        • The high humidity prevents loss of moisture through evaporation (no more withering)
    • Communicate with your local authorities to ensure your property is safe to dig (ex: power lines, water table, sewer lines)
    • Here is an interesting article from the Government of Canada giving some specific details

What is a Cold Room?

A cold room, often referred to as a pantry or cool storage room, is a designated space within a home designed to maintain a consistently cool temperature suitable for storing perishable items. Unlike traditional refrigerators, a cold room utilizes the principles of insulation, ventilation, and temperature regulation to create an optimal environment for preserving food.

Why You’d Want One:

  1. Extended Food Storage: A cold room allows for the extended storage of fruits, vegetables, canned goods, and other perishables, providing a solution for those who wish to stock up during harvest seasons or take advantage of bulk purchases.
  2. Energy Efficiency: Cold rooms typically consume less energy than traditional refrigerators, contributing to a more energy-efficient and eco-friendly household. This can lead to reduced electricity costs and a smaller environmental footprint.
  3. Wine Storage: Ideal for wine enthusiasts, a cold room provides a consistent and cool environment necessary for aging and preserving wines. It ensures that your wine collection matures gracefully and maintains its quality.
  4. Seed Storage for Gardeners: Gardeners can use a cold room to store seeds, preserving their viability for future planting seasons. The cool and dark conditions help prevent premature germination and maintain seed quality.
  5. Extended Flower Storage: A cold room is excellent for extending the lifespan of cut flowers. Flowers stored in a cool environment experience slower aging, allowing you to enjoy your floral arrangements for a more extended period.
  6. Cheese Aging: For those who enjoy homemade cheeses, a cold room provides an excellent space for aging and preserving cheese at the right temperature and humidity levels.

How to Create a Cold Room:

  1. Choose the Right Location: Select a location within your home that is easily accessible and can be adequately insulated. Consider spaces such as a basement, root cellar, or an interior room with minimal exposure to external heat sources.
  2. Insulate Walls and Ceiling: Insulate the walls and ceiling using materials like cold room panels, or rigid foam panels.
  3. Install a Ventilation System: Incorporate a ventilation system to ensure proper air circulation. This can include passive vents, fans, or air exchange systems to maintain freshness and prevent stale air or mold. Consider a thermostat to control the temperature within the cold room. Monitor humidity levels.
  4. Shelving and Organization: Install sturdy shelves for efficient organization of items. Consider adjustable shelving to accommodate various storage needs and maximize the use of space.
Conclusion:

Building a root cellar or cold room is a rewarding endeavor that connects us to traditional methods of food preservation while promoting sustainability and self-sufficiency. By embracing the simplicity of a root cellar, individuals can enjoy the flavors of a bountiful harvest year-round and contribute to a more resilient and mindful approach to food storage.