Freeze-dried meat is a type of preserved meat that undergoes a process called freeze-drying, which involves freezing the meat and then removing the water content through sublimation, resulting in a lightweight, shelf-stable product. This preservation method retains the meat’s nutritional integrity, flavor, and texture, making it a convenient and versatile option for long-term storage and emergency preparedness.

Freeze-Dried Meat: Why It’s a Smart Choice for Emergency and Regular Preparedness

In times of crisis or for everyday meal planning, freeze-dried meat emerges as a valuable option. Its long shelf life, nutritional density, and versatility make it an indispensable component of any preparedness strategy. In this post, we will explore the importance of using and storing freeze-dried meat.

Importance of Storing Freeze-Dried Meat:

  1. Extended Shelf Life: Freeze-dried meat can last for decades when stored properly (unopened), making it an ideal choice for long-term emergency preparedness. Its stability ensures you have access to nutritious protein even during prolonged periods of food scarcity.
  2. Nutritional Value: Despite its lightweight and compact form, freeze-dried meat retains its nutritional integrity. It’s rich in protein, essential amino acids, vitamins, and minerals, providing sustenance and energy when needed most. See one of our articles about freeze dried food.
  3. Convenience: Freeze-dried meat requires minimal preparation. Simply rehydrate it with water, and it’s ready to use in various recipes. Its lightweight nature also makes it easy to transport, whether for camping trips, backpacking adventures, or emergencies.

Benefits of Freeze-Dried Meat:

  1. Versatility: Freeze-dried meat can be incorporated into a wide range of dishes, including soups, stews, casseroles, pasta dishes, and stir-fries. Its texture remains intact after rehydration, providing a satisfying and meaty addition to meals.
  2. Space Efficiency: Compared to canned or fresh meat, freeze-dried meat takes up significantly less space. Its compact packaging allows for efficient storage, whether in a pantry, emergency kit, or bug-out bag.
  3. Reduced Waste: With freeze-dried meat, there’s no need to worry about spoilage or expiration dates. You can use only the amount you need and save the rest for later without fear of waste. *Note: There is a “once opened shelf life” time, be aware of that if you open it!
  4. Electricity Outages: Freeze dried products do not spoil in the freezer/fridge after prolonged outages.

Additional Preparedness Tips:6 pack of freeze dried meats

  1. Diversify Your Food Supply: Incorporate a variety of freeze-dried meats, fruits, vegetables, grains, and dairy products into your emergency pantry to ensure a well-rounded and balanced diet. Check out our website, or contact one of our team members to help you create a plan for your storage needs!
  2. Regular Rotation: While freeze-dried meat has a long shelf life, it’s essential to periodically check and rotate your supply to maintain freshness and quality. Use the oldest stock first and replenish as needed.
  3. Meal Planning: Create meal plans that include freeze-dried meat as a staple ingredient. Experiment with different recipes and meal ideas to ensure you’re prepared for any situation.
  4. Emergency Kits: Consider adding freeze-dried meals to your emergency kits, along with other essential supplies such as water, first aid supplies, and communication devices. These kits provide peace of mind and readiness during unexpected emergencies or natural disasters.

Conclusion:

Meat (protein) is a valuable asset for both emergency and regular preparedness. Its long shelf life, nutritional density, versatility, and convenience make it an essential component of any well-prepared pantry or emergency kit. By storing freeze-dried meat and incorporating it into your meal planning, you can ensure readiness, resilience, and peace of mind in any situation.

See also our Freeze-dried Eggs at our website here, or other Freeze-dried complete meals here – all offered through our Nutristore brand line, and others.


Imagine having a kitchen tool that lets you turn grains into flour right in your home. That’s what the Country Living Grain Mill does. It’s a special machine made by a company called Country Living that’s all about helping people live closer to the land and make their own food.

Who is Country Living?

Country Living is a company that believes in quality and living in harmony with nature. They make tools and equipment for people who want to be more self-sufficient, like their Grain Mill.

What Makes the Mill Special?

The Country Living Grain Mill is strong and well-made. It’s built to last for a long time because it’s made from tough materials like aluminum and stainless steel. You can count on it to work well for years to come, possibly generations!

The Quest for Superior Grinding Plates

Fine – Tough – Long Lasting – High-Carbon Steel: Country Living Grinding Plates: Note from the Company

When I started manufacturing the Country Living Grain Mill we used a cast iron plate made from sand castings. They worked, but there was not enough control over every aspect of the grinding plate. So recently we decided to spend thousands of dollars more on an injection die that would allow us to create individual wax patterns for each set of plates. For many centuries artisans of fine (and very expensive) sculptings have used this “Lost Wax” process for reproducing their masterpieces.

This state of the art “investment” casting method is so accurate that it could reproduce even a fingerprint if necessary. So, just like the great sculptors who have captured their timeless and priceless creations in metal over the centuries, each set of Country Living high-carbon steel grinding plates is formed using a refined version of the ancient time-proven lost wax process.

Each plate has its own wax model which is coated with a colloidal silica slurry. Then, it’s put into an autoclave (an oven using both heat and pressure). This, of course, melts the wax (Lost Wax) leaving only the shell. This shell, because of the heat and pressure, turns into an extraordinarily tough monolithic structure.

Finally, 3,000 degree molten high-carbon steel is poured into the shells. Once cooled and hardened, the plates must be machined to assure complete flatness. No other grinding plates in the world go through more exhaustive processes than the plates for your Country Living Mill.

Jack Jenkins
Country Living Productions

Corn & Bean Auger

Corn & Bean Auger:

The corn and bean auger set up requires three keys. The purpose of the keys are to lock the different rotating parts of the grinder to the drive shaft so they all turn as one unit. There’s a key locking the flywheel wheel to the drive shaft on the other side of the mill, another to lock the corn and bean auger to the drive shaft, and on the end of the grinder a third key to lock the rotating burr of the grinder to the drive shaft.

New *2024* Peanut Butter Attachment

With the Peanut Butter+Plus Accessory, you can easily convert your Country Living Grain Mill into a lean, mean nut-butter making machine:  The Peanut Butter+Plus Mill! With it’s patented system, it processes even the largest peanuts that leave other mills clogged and useless.  Country Living has tested this thoroughly!

You can convert your mill back to a grain grinder at any time, by reinstalling the grinding plates (with a Country Living Mill – sold separately).

This attachment is intended for soft oily nuts such as peanuts, cashews, pecans and walnuts.  It is not intended for almonds.


Craftsmanship and Tradition

The Country Living Grain Mill stands as a testament to craftsmanship and tradition. Made in the USA, each mill is meticulously crafted from high-quality materials, ensuring durability and longevity. Its solid cast aircraft aluminum body and stainless steel components guarantee years, even generations, of reliable service.

The Importance of Home Milling

In an era dominated by processed foods, the Country Living Grain Mill champions the return to simplicity and nutrition. Here’s why having one in your home is invaluable:

  1. Nutritional Superiority: Freshly milled flour retains essential nutrients that are often lost in commercially processed varieties. By milling grains at home, individuals can ensure they’re getting the full spectrum of vitamins, minerals, and fiber.
  2. Flavor and Aroma: Nothing compares to the aroma of freshly ground flour. The Country Living Mill allows users to experience the full depth of flavor that comes from milling grains on-demand, enhancing the taste and quality of baked goods and meals.
  3. Self-Sufficiency: In an uncertain world, the mill empowers individuals to produce their own flour, reducing the reliance on outside sources
  4. Versatility: From fine pastry flour to coarse cornmeal, the Country Living Mill offers unparalleled versatility. Its adjustable settings cater to a wide range of grain types and milling preferences, making it suitable for diverse culinary preferences.
  5. Sustainability: By milling grains at home, individuals can minimize their carbon footprint and reduce packaging waste.

Conclusion

The Country Living Grain Mill is more than a kitchen gadget. It’s a way to connect with your food and the land it comes from. Whether an experienced cook or just starting out, this mill allows you the capability to make delicious, healthy food right in your own kitchen. Happy grinding!

Exploring Nutritional Benefits and Culinary Uses of Lentils, Refried Beans, and Black Beans

Lentils, refried beans, and black beans are not only versatile and delicious but also packed with essential nutrients that contribute to a balanced diet. In this article, we’ll delve into their nutritional value and provide creative ways to incorporate them into your meals.

Nutritional Value:

1. Lentils:

  • Rich in protein, fiber, folate, iron, and manganese.
  • Low in fat and calories.
  • High in antioxidants, including polyphenols and flavonoids.
  • Promote heart health, aid digestion, and regulate blood sugar levels.

2. Refried Beans:

  • Excellent source of plant-based protein and fiber.
  • Packed with nutrients like iron, magnesium, potassium, and zinc.
  • Low in fat and cholesterol.
  • Support muscle growth, aid weight management, and improve digestive health.

3. Black Beans:

  • High in protein and fiber, promoting satiety and aiding weight loss.
  • Rich in antioxidants, vitamins (such as folate and vitamin K), and minerals (including iron, magnesium, and phosphorus).
  • Support cardiovascular health, regulate blood sugar levels, and boost immune function.

We carry these 3 types of Instant Beans, they can be found as a pack here or you can purchase them individually!

Culinary Uses and Recipes:

*Recipes are meal ideas so you can look up your own preferred taste for ingredients.

1. Lentils:
  • Lentil Soup: Simmer lentils with vegetables, herbs, and spices for a hearty and nutritious soup.
  • Lentil Salad: Toss cooked lentils with fresh vegetables, herbs, and vinaigrette for a refreshing salad.
  • Lentil Curry: Cook lentils in a flavorful curry sauce with coconut milk, tomatoes, and spices for a satisfying Indian-inspired dish.
2. Refried Beans:
  • Bean Burritos: Spread refried beans onto tortillas and top with cheese, salsa, lettuce, and avocado for a quick and easy meal.
  • Bean Dip: Blend refried beans with spices of choice, cheese, and salsa for a delicious dip served cold or warm with chips or vegetables.
  • Enchiladas: Fill corn tortillas with refried beans, cheese, and sauce, then bake until bubbly for a comforting Mexican-inspired dish.
3. Black Beans:
  • Black Bean Tacos: Fill taco shells with black beans, lettuce, tomatoes, onions, and cilantro for a flavorful and nutritious meal.
  • Black Bean Salad: Combine black beans with corn, bell peppers, avocado, and lime dressing for a colorful and refreshing salad.
  • Black Bean Soup: Simmer black beans with broth, vegetables, and spices for a comforting and filling soup topped with sour cream and cilantro.

More Ideas To Consider:

  • Bean and Vegetable Stir-Fry
  • Three-Bean Chili
  • Bean and Rice Casserole
  • Black Bean and Corn Quesadillas
  • Lentil Shepherd’s Pie
  • Refried Bean Dip with Tortilla Chips
  • Bean and Avocado Wrap
  • Tuscan White Bean Soup
  • Black Bean and Sweet Potato Enchiladas
  • Lentil Salad with Roasted Vegetables
  • Cuban Black Bean Soup
  • Spicy Chickpea Curry
  • Mexican Bean Salad with Cilantro-Lime Dressing
  • Lentil and Spinach Stuffed Bell Peppers
  • Refried Bean Breakfast Burritos
  • Bean and Mushroom Tacos
  • Black Bean and Quinoa Burgers
  • Lentil and Kale Soup
  • Bean and Cheese Stuffed Bell Peppers
  • Refried Bean and Veggie Quesadillas

Conclusion:

Lentils, refried beans, and black beans are nutritional powerhouses that offer a wide range of health benefits. By incorporating these legumes into your meals, you can enjoy delicious and satisfying dishes while promoting overall health and well-being. Whether you prefer soups, salads, tacos, or dips, there are countless ways to enjoy the versatility and nutritional value of lentils, refried beans, and black beans in your culinary repertoire.

sprouts grown at home

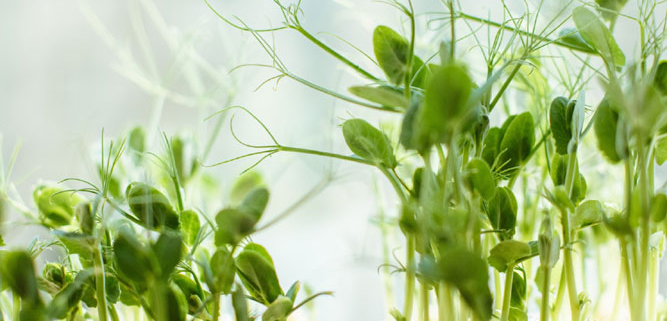
How to Sprout at Home: A Beginner’s Guide

Sprouting at home is an easy, affordable, and nutritious way to add fresh greens to your diet year-round. Whether you’re a seasoned gardener or a beginner with no green thumb, sprouting requires minimal space, time, and effort. Not only are sprouts packed with vitamins, minerals, and enzymes, but they also add a delightful crunch and flavor to salads, sandwiches, stir-fries, and more. In this guide, we’ll walk you through the simple steps to sprout at home successfully.

4 tray kitchen sprouter

Check Out our Kitchen Crop Sprouter here!

Getting Started

Choose Your Seeds

Selecting high-quality seeds is important for successful sprouting. You can use a variety of seeds, grains, nuts, and legumes for sprouting. Popular choices include alfalfa, broccoli, mung beans, lentils, radish, and fenugreek. Make sure your seeds are labeled for sprouting or are untreated to ensure they haven’t been chemically treated.

We offer quality Canadian made Mumm’s Sprouting Seeds, which can be found here!
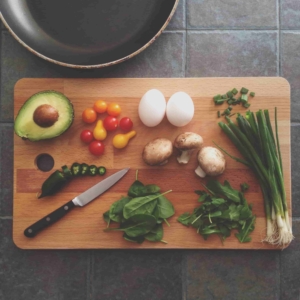
Gather Equipment

You don’t need fancy equipment to sprout at home. Here’s what you’ll need:

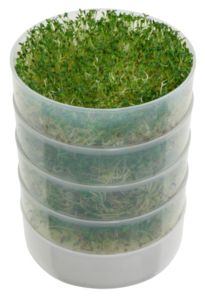
  • Above mentioned ready to use Kitchen Crop Sprouter, or
  • Wide-mouthed glass jars or sprouting trays
  • Cheesecloth, mesh lids, or breathable fabric
  • Water
  • Seeds for sprouting

Preparing Your Sprouting Container

If you’re using glass jars, place about one to two tablespoons of seeds in the jar and cover them with water. Secure a piece of cheesecloth or mesh over the mouth of the jar with a rubber band or the jar lid’s ring. If you’re using sprouting trays, follow the manufacturer’s instructions for layering seeds evenly.

The Sprouting Process (may vary dependent on style of sprouter)

1. Soaking

  • After placing the seeds in your container, fill it with water and allow them to soak overnight or for the time recommended on the seed packaging.
  • Soaking softens the seeds’ outer shells and kickstarts the germination process.

2. Rinsing and Draining

  • After soaking, drain the water from the seeds by pouring it out through the cheesecloth or mesh.
  • Rinse the seeds thoroughly with fresh water.
  • For optimal results, rinse and drain your seeds two to three times a day to prevent mold or bacterial growth and to keep them moist.

3. Germination

  • Continue rinsing and draining your seeds regularly until you start to see tiny sprouts emerging.
  • This typically takes anywhere from two to seven days, depending on the type of seed and environmental conditions like temperature and humidity.

4. Greening (Optional)

  • Once your sprouts have germinated, you can expose them to indirect sunlight for a few hours each day to encourage greening.
  • This step is optional but can enhance the flavor and nutritional value of your sprouts.

Harvesting and Storage

  • When your sprouts have reached the desired length—usually about one to three inches—rinse them one final time and drain them thoroughly.
  • Store your sprouts in a clean container in the refrigerator, where they’ll stay fresh for up to a week.
  • Remember to rinse them every few days to maintain freshness.

Safety Precautions

  • Always use clean equipment and wash your hands thoroughly before handling sprouting seeds.
  • Keep sprouting containers away from direct sunlight and in a well-ventilated area to prevent mold growth.
  • If you notice any foul odors, sliminess, or mold on your sprouts, discard them immediately.

Enjoying Your Sprouts

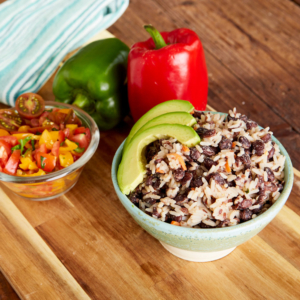
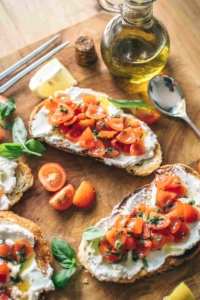
  • Salad Boosters – Sprouts make an excellent addition to any salad, providing a crunchy texture and a burst of freshness. Mix them into leafy greens, cucumber slices, cherry tomatoes, and your favorite salad dressing for a nutritious and flavorful meal.
  • Sandwich Fillings – Upgrade your sandwiches and wraps with a handful of sprouts. Layer them onto your favorite bread or wrap along with sliced avocado, hummus, roasted vegetables, and protein of your choice for a satisfying and nutrient-packed meal. .
  • Stir-fries and Stir-fry Bowls – Add them towards the end of cooking to retain their crispiness and freshness. Combine sprouts with colorful vegetables, tofu, chicken, or shrimp, and your favorite stir-fry sauce for a quick and healthy meal that’s bursting with flavor.
  • Smoothie Boost – Add a handful of sprouts to your morning smoothie for an extra dose of vitamins, minerals, and fiber. While it might sound unconventional, sprouts blend well with fruits like bananas, berries, and mangoes, as well as leafy greens and almond milk.

More Ideas!

  • Garnish for Soups and Curries – Sprinkle sprouts on top of your favorite soups, stews, and curries just before serving to add a pop of freshness and texture. They not only enhance the visual appeal of your dish but also provide a delightful contrast to the warm and comforting flavors.
  • Sushi Rolls – Include sprouts in homemade sushi rolls to add a crunchy element and a nutritional boost. Serve with soy sauce, wasabi, and pickled ginger for a complete sushi experience at home.
  • Sprout Wraps – Fill your wraps with sprouts, grilled vegetables, quinoa, beans, and a drizzle of tahini or avocado dressing for a light and refreshing meal that’s perfect for lunch or dinner.
  • Topping for Pizza or Flatbreads – Sprinkle sprouts on top of homemade pizzas or flatbreads for a nutritious and colorful topping. After baking your pizza or flatbread, scatter a handful of sprouts over the hot surface and let them wilt slightly. Their fresh and crunchy texture adds an unexpected twist to traditional pizza flavors and makes for a vibrant and satisfying meal.
  • Try combining different types of sprouts, such as alfalfa, radish, and broccoli, for added variety and color.

Sprouting at home is not only a fun and rewarding hobby but also a sustainable way to incorporate nutrient-rich greens into your daily diet. With just a little bit of time and effort, you can enjoy fresh, crunchy sprouts year-round, right from the comfort of your own kitchen. Happy sprouting!

If you would like to learn the WHYs of sprouting, as in the “Why Should I?” part of it, keep reading:

1. Nutrient-Rich:

Sprouts are packed with essential vitamins, minerals, and antioxidants, making them a nutritional powerhouse. During the sprouting process, the nutrient content of seeds increases significantly. Sprouts are particularly rich in vitamin C, vitamin K, folate, potassium, iron, and fiber, among other nutrients.

2. Enhanced Digestibility:

Sprouting breaks down complex carbohydrates and proteins into simpler forms, making them easier to digest and absorb. This process also reduces the presence of antinutrients, such as phytic acid and enzyme inhibitors, which can interfere with nutrient absorption in the body. As a result, sprouts are gentler on the digestive system and may improve overall nutrient uptake.

3. Increased Enzyme Activity:

Sprouts are abundant in enzymes that aid in digestion and metabolic processes within the body. Enzymes play a crucial role in breaking down food and facilitating nutrient absorption. Consuming sprouts may help support digestive health and improve the body’s ability to extract and utilize nutrients from food.

4. Low in Calories:

Despite their nutritional density, sprouts are relatively low in calories, making them an excellent option for those looking to manage their weight or reduce calorie intake. Incorporating sprouts into meals adds bulk and texture without significantly increasing calorie consumption, allowing you to feel satisfied while maintaining a balanced diet.

5. Versatility:

Sprouts are incredibly versatile and can be incorporated into a wide range of dishes, including salads, sandwiches, stir-fries, soups, wraps, smoothies, and more. Their mild flavor and crunchy texture complement both sweet and savory flavors, making them a versatile ingredient in various cuisines and culinary styles.

6. Sustainable and Cost-Effective:

Growing sprouts at home is a sustainable and cost-effective way to access fresh greens year-round. Sprouting requires minimal resources, such as water and space, and can be done using simple equipment found in most kitchens. By sprouting your own seeds, you reduce food waste, save money on grocery expenses, and enjoy the satisfaction of growing your own nutritious food.

7. Freshness and Flavor:

Sprouts add a burst of freshness and flavor to dishes, enhancing their taste and appeal. Whether used as a garnish, topping, or main ingredient, sprouts contribute a delightful crunch and subtle nuttiness to meals. Incorporating sprouts into your culinary repertoire can elevate the overall taste and sensory experience of your favorite dishes.
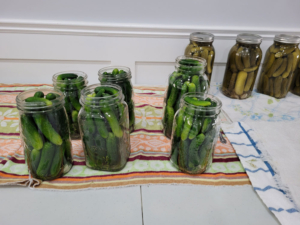
Based out of Colorado since 2001, Honey Stinger is a brand that produces energy snacks. We carry their energy gels, waffles, and chews! They use honey as a natural sweetener and source of energy in their products. This is popular among athletes and outdoor enthusiasts for sustained energy during endurance activities.

They are Gluten Free, Organic, and some are dairy free (check ingredients per item). These are excellent products for hikers, for athletes, or even a quick snack for energy during a long day at the office!

Chews

Honey Stinger Chews: Check out our website for current flavors available.

Honey Stinger Energy Chews provide a quick energy source that your body can easily break down. More than 1,000 pro and college teams plus a generation of endurance athletes prepare, perform and recover with Honey Stinger to help achieve their performance goals and feel better along the way. They are formulated specifically for health-conscious individuals and athletes seeking a great tasting energy snack. These bite-sized chews include 70% RDA of Vitamin C and natural energy from honey.

Stinger Organic Energy Chews

Gels

Honey Stinger Energy Gels provide fuel that’s readily available to maintain energy levels.

Gels may be consumed straight from the packet before or during activity, spread on toast, stirred into a drink, or anyway you would like. All flavors mix well with water to make a natural energy drink.

They are optimized for efficient fueling during athletic efforts. Gels provide instant, honey-powered energy that lasts, which delays muscle fatigue and gives your body the power to achieve your goals.

Waffles

With no artificial sweeteners, colors, or preservatives, Honey Stinger energy waffles sweeten the burn to push through any challenge.

Honey Stinger Waffles are the perfect snack to help you prepare and perform for all activities. The energy in waffles is released immediately and absorbed at a steady rate, which delays muscle fatigue and gives your body the power to achieve your goals.

For years, similar waffles have been sold on street corners throughout Europe and eaten by professional cyclists, so they decided to create our own by sandwiching honey between two thin waffles.

Happy training, or hiking, or whatever reason you enjoy these tasty snacks. Join the Hive!

map of the world

Food is more than sustenance; it’s a culturally woven with traditions, rituals, and communal ties. We have special meals within our unique countries and cultures, and holidays.

Food Across the Globe:

Traditional Staples & Preservation Techniques

Different cultures have distinct staples integral to their culinary identity. In times of emergency, reliance on these staples is important. Preservation methods such as fermentation, pickling, and drying emerge as resilient practices passed down through generations. Here are some examples from around the globe:

  1. Canning:
    • Canned tomatoes from Italy. Italians are known for preserving their tomatoes in cans, which are widely used in cooking, especially for making sauces.
  2. Drying/Dehydrating:Dehydrated food
    • Turkish dried apricots. Turkey is a major producer of dried apricots, and the drying process helps extend their shelf life for export and local consumption.
    • In Morocco, sun-drying is a common method of preserving tomatoes. Tomatoes are sliced and laid out in the sun to remove the moisture, which inhibits the growth of bacteria and molds. Once dried, they can be stored for an extended period and used in various dishes.
    • Indigenous people used to dry meat, also known as pemmican if processed a certain way with fats and berries
  3. Smoking:
    • Scottish smoked salmon. Scotland is renowned for its traditional method of smoking salmon, giving it a distinctive flavor and preserving it for longer storage.
  4. Fermentation:
    • German sauerkraut. Sauerkraut, fermented cabbage, is a popular traditional food in Germany and is often used as a side dish or condiment.
    • Kimchi is a traditional Korean dish made by fermenting vegetables, usually Napa cabbage and Korean radishes, with a variety of seasonings such as chili pepper, garlic, ginger, and fish sauce. The fermentation process not only preserves the vegetables but also imparts a unique and tangy flavor to the dish.
  5. Salting:
    • Spanish salted cod (Bacalao). Salted cod is a traditional ingredient in Spanish cuisine and has been used for centuries as a way to preserve fish.
  6. canning picklesPickling:
    • Japanese pickled ginger (Gari). Gari is often served with sushi and is pickled in a solution of vinegar and sugar to enhance its flavor and shelf life.
    • I pickle cucumbers yearly and process dill pickles via water bathing.
  7. Freezing:
    • Canadian frozen wild blueberries. Canada is a major exporter of frozen blueberries, using freezing as a preservation method to maintain their freshness.
  8. Curing:
    • American bacon. Bacon is cured with a mixture of salt and sugar, and sometimes nitrites, to preserve it and add flavor.
  9. Jelly and Jam Making:
    • British strawberry jam. Jam-making is a common method in the UK, where fruits like strawberries are cooked with sugar and pectin to create jams.
  10. Root Cellaring:
    • Russian potato storage. In Russia, root vegetables like potatoes are often stored in traditional underground cellars to prevent them from freezing during the winter.
  11. Vacuum Packing:
    • Japanese vacuum-packed seaweed. Vacuum packing is commonly used in Japan to preserve seaweed, maintaining its freshness and flavor.
    • How many of you have a food saver of sorts? We definitely vacuum seal various foods for the freezer after we have portioned them down to the right size.
  12. Preservation in Oil:
    • Greek olives in oil. Olives are often preserved in oil in Greece, enhancing their flavor and preventing spoilage.

Worldwide Traditional Food Examples, Starting With Asia:

Chinese Cuisine:
  • Cantonese Cuisine: Known for dim sum, delicate flavors, and seafood dishes.
  • Sichuan Cuisine: Famous for bold and spicy flavors, often using Sichuan peppercorns.
  • Rice and Noodles
  • Soy Sauce, Hoisin Sauce, Oyster Sauce: Common flavor enhancers.
  • Tofu and Bean Sprouts: Used in vegetarian and meat dishes.
Japanese Cuisine:
  • Sushi and Sashimi: Raw fish on vinegared rice and sliced raw fish, respectively.
  • Tempura: Lightly battered and deep-fried seafood and vegetables.
  • Ramen and Udon: Noodle soups with various broths.
Korean Cuisine:
  • Kimchi, a fermented vegetable dish, is a staple, and there are various types of kimchi. Other fermented foods include soybean paste (doenjang) and fermented soybean stew (cheonggukjang).
  • Barbecue (BBQ): Korean barbecue, known as “Gogigui,” is a popular dining style where diners grill their own meat at the table. Samgyeopsal (pork belly), bulgogi (marinated beef), and galbi (marinated short ribs) are common choices for Korean barbecue.
  • Stews and Soups: Korean cuisine features a variety of stews and soups, often spicy and hearty.

Central Asia

Central Asian cuisine is shaped by the nomadic traditions, harsh climates, and diverse landscapes of the region. It encompasses the culinary practices of countries such as Kazakhstan, Kyrgyzstan, Tajikistan, Turkmenistan, and Uzbekistan. Here are a few traditional foods of Central Asian food culture:

  • Grains and Bread: Central Asian cuisine relies on grains such as wheat, barley, and rice. Bread, including flatbreads like naan and tandyr.
  • Meat: Lamb, mutton, and beef are primary meat sources.
  • Plov (Pilaf) is a signature dish. Plov is a culturally beloved dish made with rice, meat (often lamb or beef), carrots, and various spices.
  • Dumplings: Manti (Central Asian Dumplings) is filled with minced meat and onions.

The Middle East:

The Middle East is renowned for its rich and diverse food culture, characterized by a wide array of flavors, ingredients, and cooking techniques. The cuisine of the Middle East reflects its history, geography, and cultural traditions. Here are some key elements and types of food culture in the Middle East:

  • Grains and Breads:
    • Flatbreads: Staple in Middle Eastern cuisine, including pita, lavash, and khubz.
    • Rice: Served as a base for many dishes, like biryanis and pilafs.
  • Proteins:
    • Kebabs: Grilled skewers of marinated meats.
    • Shawarma: Layers of seasoned meat (often lamb or chicken) cooked on a vertical rotisserie and sliced for serving.
  • Spices and Herbs:
    • Sumac: Adds a tangy flavor.
    • Za’atar: A blend of herbs, sesame seeds, and sumac.
    • Cumin, Coriander, and Turmeric: Commonly used in spice blends.
  • Persian Cuisine: Known for its use of saffron, dried fruits, and intricate rice dishes.

Australia

Australia has a diverse culinary landscape that reflects its multicultural society and Indigenous heritage. Here’s a list of some cultural and traditional foods from Australia:

  • Damper: A traditional Australian soda bread, historically made by swagmen and drovers over an open fire. It’s a simple bread made with flour, water, and sometimes milk.
  • Barramundi: A popular Australian fish, often grilled or barbecued. It’s a staple in many coastal regions.
  • Kangaroo: Considered a lean and healthy meat, kangaroo is sometimes used in Australian cuisine. It’s commonly prepared as steaks or sausages.
  • Vegemite: A yeast extract spread, commonly used on toast or crackers. It has a distinctive savory taste and is a popular breakfast item.
  • Witchetty Grubs: Traditionally consumed by Indigenous Australians, these are large, wood-eating moth larvae. They can be eaten raw or lightly cooked.
  • Bush Tomato: A small, round fruit with a strong flavor, often used in Indigenous Australian cuisine. It’s a key ingredient in various dishes.
  • Barramundi Pie: A savory pie filled with barramundi fish and other ingredients, popular in some regions.
  • Macadamia Nuts: Native to Australia, macadamia nuts are used in sweet and savory dishes.
  • Crocodile Meat: Used in dishes like sausages or skewers.

Europe

European traditional foods and food culture are diverse. While it’s challenging to encompass the entirety of European cuisine, here are some iconic dishes that characterize European traditional foods and food culture. You’ll note that North America adopts many of these cuisine’s:

Mediterranean Cuisine:
  • Olives and Olive Oil: Fundamental to Mediterranean dishes.
  • Fresh Vegetables and Herbs: Tomatoes, garlic, basil, and oregano are staples.
  • Seafood: Prominent in coastal regions, with dishes like paella and bouillabaisse.
French Cuisine:
  • Baguette and Croissant: Iconic French breads.
  • Cheese: France is renowned for its diverse cheese varieties.
  • Wine and Champagne: Integral to French dining culture.
Italian Cuisine:
  • Pasta and Pizza: Staple dishes with regional variations.
  • Tomatoes and Olive Oil: Essential ingredients.
  • Gelato and Tiramisu: Classic desserts.
German Cuisine:
  • Sausages (Wurst): Bratwurst, Weisswurst, and more.
  • Pretzels and Sauerkraut: Popular accompaniments.
  • Beer: Germany is known for its beer culture and Oktoberfest.
British Cuisine:
  • Fish and Chips: Fried fish and thick-cut fries.
  • Roast Dinner: Traditionally served on Sundays.
  • Tea and Scones: Afternoon tea is a cultural tradition.
Eastern European Cuisine:
  • Pierogi: Dumplings filled with various ingredients.
  • Borscht: Beet soup, popular in Ukraine and Russia.
  • Cabbage Rolls (Golabki): Stuffed cabbage leaves.
Greek Cuisine:
  • Souvlaki and Gyros: Grilled meat dishes.
  • Feta Cheese and Tzatziki: Common accompaniments.
  • Baklava: Layers of phyllo pastry, nuts, and honey.
Swiss Cuisine:
  • Fondue and Raclette: Melted cheese dishes.
  • Swiss Chocolate: Renowned for its quality.
  • Rösti: Shredded and fried potatoes.
Belgian Cuisine:
  • Belgian Waffles: Light and crispy waffles.
  • Chocolate and Pralines: Belgium is famous for its chocolates.
  • Mussels and Fries: Moules-frites is a popular dish.

Africa

In Africa, the use of root vegetables and grains are prominent. These ingredients, rich in nutritional value, highlight the communal aspects of emergency food sharing and support systems within African culinary traditions.

African food culture is incredibly diverse, reflecting the continent’s vast landscapes, rich history, and the multitude of ethnic groups and communities. Each region and country within Africa has its unique culinary traditions and flavor

Some traditional African foods:

  • Cereals: Grains such as millet, sorghum, and maize are staples in many African diets.
  • Root Vegetables: Cassava, yams, and sweet potatoes are common.
  • Rice and Plantains: Important in West African cuisine.
  • Proteins:
    • Meat: Beef, goat, lamb, and poultry
    • Fish: Coastal regions incorporate fish into their dishes.
    • Insects: In certain regions, insects are consumed for protein content.

North America

North America boasts a diverse and dynamic food culture, shaped by a rich tapestry of indigenous traditions, immigrant influences, and regional variations. Canada, United States & Mexico all have varying cuisine styles, even within each country.

  • Coastal communities versus prairie or inland communities have different cultural cuisine.

Indigenous Food Culture:

  • Seasonal hunting and foraging
  • Bannock
  • Preservation methods of drying and curing meats
  • Using only what you need, deep respect for the land

Some common food trends:

  • Fast Food Culture
  • Barbecue
  • Food Trucks and Street Food – a growing trend

South America

South America is a continent with a rich and diverse food culture, influenced by indigenous traditions, colonial history, and a variety of climates and ecosystems. Here are key elements of South American food culture and cultural food traditions:

Culinary Traditions of the Andean Region:
  • Ceviche: Raw fish or seafood marinated in citrus juices, popular along the Pacific coast.
  • Aji Amarillo: A yellow chili pepper used in many Peruvian dishes.
  • Pachamanca: An Andean cooking technique involving burying food with hot stones.
  • Chicha: A fermented beverage made from maize (purple corn), popular in various Andean cultures.
  • Pisco Sour: A cocktail made with Pisco, a grape brandy.
  • Cuy (Guinea Pig): Considered a delicacy in the Andean region.
  • Chuño: Freeze-dried potatoes used in traditional Andean dishes.

Peru has a special place in my heart as I was able to spend 3 weeks there in April 2023. The modern day need to take photos of our meals and food is surely going to pay off today! While we toured, they constantly wanted to feed us “traditional” food. I will not label what everything is, but there is certainly photos of some of the above and below food items in this next gallery (I added the photos from the Amazon as well as Lima/Cusco).

Amazonian Cuisine:
  • Exotic Fruits: The Amazon rainforest is home to a variety of unique fruits like açaí, camu camu, and cupuaçu.
  • Tucupi: A yellow sauce made from fermented cassava juice, used in Amazonian dishes.
Colombian Cuisine:
  • Arepas: Cornmeal patties often served as a staple side dish.
  • Bandeja Paisa: A hearty dish featuring rice, beans, meat, and plantains.
  • Changua: A traditional breakfast soup with eggs and milk.
Conclusion: A Tapestry of Flavor, History, and Resilience

Each country has its unique dishes and specialties, contributing to the continent’s flavorful and vibrant culinary landscape. Embrace the richness of our cultural heritage!

If you require any assistance in preparing your food storage, please reach out to our team, and we’d be happy to assist you!

canning

This article explores the essence of a root cellar or cold room, delving into its purpose, benefits, and the steps to build your own. Discover the timeless wisdom of harnessing nature’s refrigerator to keep your food storage, fruits, vegetables, and harvest bounty fresh throughout the seasons.

What is a Root Cellar?

A root cellar is a traditional storage space designed to provide cool, dark, and humid conditions for storing fruits, vegetables, and other perishables. It serves as a natural refrigeration system, extending the shelf life of produce and allowing individuals to enjoy homegrown or locally sourced foods long after harvest season has ended.

Why You’d Want One:

  1. Preserving Freshness: A root cellar creates an environment that mimics the cool, damp conditions found underground. This helps slow down the natural ripening and decay process.
  2. Energy Efficiency: Unlike modern refrigeration systems, root cellars operate without electricity.
  3. Preservation of Nutritional Value: The cool, dark conditions of a root cellar help preserve the nutritional value of stored fruits and vegetables. Minimal exposure to light and air slows down the degradation of vitamins and nutrients.
  4. Flavor Enhancement: Certain fruits and vegetables develop richer flavors when stored in a root cellar. The slow, natural aging process can enhance the taste and texture of items like apples, potatoes, and carrots.
  5. Versatility in Storage: Root cellars are versatile, accommodating a variety of produce, including root vegetables, apples, onions, and winter squashes. This diversity makes them an excellent solution for storing a wide range of homegrown or locally sourced foods.

How to Build a Root Cellar:

Consult a builder, or professional for specific instructions. Here in this article we will just mention the basics.

  1. Selecting a Location: Choose a site with good drainage, away from trees, and preferably facing north to avoid direct sunlight. The natural insulation provided by the earth ensures a stable temperature.
  2. Creating Ventilation: Install ventilation systems, such as vents or air pipes, to ensure proper air circulation. Adequate ventilation prevents the buildup of ethylene gas produced by stored fruits and vegetables, helping to prevent spoilage. Include measures to control humidity.
  3. Insulating Walls and Ceiling: Insulate the walls and ceiling to regulate temperature and humidity.
  4. Other Tips: 
    • Make sure the cellar is 10 ft deep
    • Must be able to hold a temperature of 0° to 5°C and a humidity level of 85 to 95 percent
        • The cooler temps slow the release of ethylene gas from the root vegetables and stop the growth of microorganisms, which slows down ripening and decomposition.
        • The high humidity prevents loss of moisture through evaporation (no more withering)
    • Communicate with your local authorities to ensure your property is safe to dig (ex: power lines, water table, sewer lines)
    • Here is an interesting article from the Government of Canada giving some specific details

What is a Cold Room?

A cold room, often referred to as a pantry or cool storage room, is a designated space within a home designed to maintain a consistently cool temperature suitable for storing perishable items. Unlike traditional refrigerators, a cold room utilizes the principles of insulation, ventilation, and temperature regulation to create an optimal environment for preserving food.

Why You’d Want One:

  1. Extended Food Storage: A cold room allows for the extended storage of fruits, vegetables, canned goods, and other perishables, providing a solution for those who wish to stock up during harvest seasons or take advantage of bulk purchases.
  2. Energy Efficiency: Cold rooms typically consume less energy than traditional refrigerators, contributing to a more energy-efficient and eco-friendly household. This can lead to reduced electricity costs and a smaller environmental footprint.
  3. Wine Storage: Ideal for wine enthusiasts, a cold room provides a consistent and cool environment necessary for aging and preserving wines. It ensures that your wine collection matures gracefully and maintains its quality.
  4. Seed Storage for Gardeners: Gardeners can use a cold room to store seeds, preserving their viability for future planting seasons. The cool and dark conditions help prevent premature germination and maintain seed quality.
  5. Extended Flower Storage: A cold room is excellent for extending the lifespan of cut flowers. Flowers stored in a cool environment experience slower aging, allowing you to enjoy your floral arrangements for a more extended period.
  6. Cheese Aging: For those who enjoy homemade cheeses, a cold room provides an excellent space for aging and preserving cheese at the right temperature and humidity levels.

How to Create a Cold Room:

  1. Choose the Right Location: Select a location within your home that is easily accessible and can be adequately insulated. Consider spaces such as a basement, root cellar, or an interior room with minimal exposure to external heat sources.
  2. Insulate Walls and Ceiling: Insulate the walls and ceiling using materials like cold room panels, or rigid foam panels.
  3. Install a Ventilation System: Incorporate a ventilation system to ensure proper air circulation. This can include passive vents, fans, or air exchange systems to maintain freshness and prevent stale air or mold. Consider a thermostat to control the temperature within the cold room. Monitor humidity levels.
  4. Shelving and Organization: Install sturdy shelves for efficient organization of items. Consider adjustable shelving to accommodate various storage needs and maximize the use of space.
Conclusion:

Building a root cellar or cold room is a rewarding endeavor that connects us to traditional methods of food preservation while promoting sustainability and self-sufficiency. By embracing the simplicity of a root cellar, individuals can enjoy the flavors of a bountiful harvest year-round and contribute to a more resilient and mindful approach to food storage.

Trail butter apple slices and flavors

In the world of outdoor adventures and emergency preparedness, having a reliable and nutritious energy source is helpful. Enter Trail Butter, a versatile and power-packed energy food that caters to the needs of outdoor enthusiasts and those preparing for unforeseen emergencies.

Trail Butter: Origin Story

Jeff & Brad Boggess are brothers, and the founders of Trail Butter. Jeff in particular is a bike enthusiast and set out to bike ride his epic 8,900 mile bike tour from Germany to California, by way of Europe, Northern Africa and the United States (with a boat ride across the Atlantic). He found he was trying to fit into his bags large and bulky energy foods (nut butters & trail mix for example) and it was taking up precious space in his already limited cargo room.

At this point it was decided to combine his snacks into one, and Trail (mix) + (nut) Butter = Trail Butter was born! He joined forces with his brother Brad, and we now have the joy of enjoying this tasty all natural energy packed food during our adventures.

That Was Interesting! Tell Me More:

Nutrient-Dense:

Trail Butter is crafted from a blend of high-quality nuts, seeds, and other wholesome ingredients. Packed with essential nutrients, such as protein, healthy fats, and fiber, Trail Butter provides a sustained release of energy, making it an ideal fuel for extended outdoor activities like hiking, biking, and camping.

Convenient and Portable:

One of the key advantages of Trail Butter lies in its convenience and portability. It is packaged in easy-to-carry pouches, which are also conveniently small in size. It is a mess-free and compact energy source that fits seamlessly into backpacks, pockets, or kits. Its user-friendly design ensures quick and hassle-free consumption on the go.

Versatility:

Whether you need a quick energy boost on a challenging trail or a reliable source of sustenance during a crisis, it can be consumed directly, used as an ingredient in a recipe, spread on crackers, or added to other foods. Its adaptability makes it suitable for various situations.

Stable in Different Temperatures:

For outdoor enthusiasts who face diverse weather conditions, Trail Butter is a reliable companion. Resistant to temperature fluctuations, the product remains stable in both hot and cold environments. This quality ensures that you can count on this tasty pouch to deliver energy regardless of the challenges Mother Nature throws your way.

Shelf Life for Emergency Preparedness:

Trail Butter has a typical unopened shelf life of approximately 1 year. Though not as long as some products, but with some monitoring of best before dates, this is a great addition to your on-the-go snacks. This feature ensures that you have a nutritious energy source ready whenever the need arises.

Yummy Flavors: Subject to Change – See Website for up to date flavors! 
  • Maple syrup & sea salt nut butter, and
  • Salted brownie peanut butter nut butter.
  • These come in a convenient 32 gram pouches!

To Conclude:

Trail Butter emerges as a top-tier energy food and proves to be a reliable companion for individuals venturing into the great outdoors or preparing for unexpected situations. Consider adding this to your repertoire, and experience the sustained energy and nutritional benefits it brings to your adventures.

family cooking a meal together, learning how to cook

In times of emergencies, such as natural disasters or unforeseen crises, the availability of conventional cooking supplies may be limited. However, with a bit of resourcefulness and creativity, it’s possible to create nourishing meals using minimal ingredients and tools. This article explores various emergency food hacks to help you make the most of what you have during challenging situations.

Maximizing Shelf-Stable Staples:

  • Utilize long-lasting staples such as freeze dried fruits and vegetables, rice, pasta, and dried legumes as the foundation of your meals. Briden Solutions has numerous options – check it out!
  • Create hearty stews or one-pot dishes by combining beans, vegetables, and grains.
  • Try pre-made meals – whether in a pouch (5 year shelf life), or in a can (up to 30 years unopened).

Improvise with Non-Perishables:

  • Get creative with non-perishable items like canned or freeze dried meat, fish, or vegetables. Make a list of recipes or meals that you can make with what is in your non-perishable stock.
  • For example: transform canned tuna or salmon into a makeshift meal with pantry items like pickles, and mayonnaise.
  • One-pan wonders: cook an entire meal, such as chili in a single pan to simplify cleanup on top of it

Make the Most of Condiments:

  • Condiments can add flavor and variety to simple dishes. Keep the basics (ketchup, mustard, mayo for example) in your storage.
  • Combine soy sauce, vinegar, and sugar for a makeshift stir-fry sauce or use ketchup and spices to create a flavorful marinade for proteins.

DIY Baking:

  • No oven? No problem!
      • Use a thick-bottomed pan to simulate baking right on your stovetop. Place a wire rack or trivet inside the pan, and put your baking dish on top. Cover the pan with a lid to trap heat.
  • No rolling pin? No problem!
      • Use a clean, smooth bottle or a tall glass to roll out dough.
  • No baking powder? No problem!
      • Mix 1/4 teaspoon of baking soda with 1/2 teaspoon of cream of tartar as a substitute for baking powder.
  • No eggs? No problem!
      • Applesauce or Mashed Banana: Substitute 1/4 cup of unsweetened applesauce or mashed banana for one egg in recipes.
      • Yogurt or Buttermilk: Use 1/4 cup of yogurt or buttermilk for each egg.
  • No buttermilk? No problem!
      • Add 1 tablespoon of vinegar or lemon juice to a cup of milk as a substitute for buttermilk.
  • No vanilla? No problem!
      • Use maple syrup, almond extract, or even a bit of coffee as a substitute for vanilla extract.

Here’s a few more baking hacks, just for fun!

  • Cold butter? No problem!
      • Grate cold butter using a cheese grater to quickly bring it to room temperature.
  • Brown sugar hard? No problem!
      • Microwave hardened brown sugar with a damp paper towel for a few seconds to soften it.
  • Separate your eggs with ease!
      • Crack eggs into a slotted spoon, allowing the egg whites to separate through the slots while retaining the yolk.

Roasting over the fire

Outdoor Cooking Techniques:

  • Explore outdoor cooking methods, such as grilling or using a portable camping stove, to prepare meals when indoor resources are limited.
  • Many people love BBQ, if this is you, be sure to have spare fuel handy!
  • Campfire cooking options:
      • Cooking with a stick
      • Dutch oven
      • Foil wrapped food
      • Tripod
      • Burying food in the coals
      • Grilling

Foraging for Flavor:

  • If safe and possible, explore foraging for edible wild plants or fruits to supplement your meals.
  • Learn about local edible plants in your area beforehand to ensure safety and avoid toxic plants.
      • Field guides & local experts can help you educate yourself further in safety while foraging.

dandelions

Kitchen Tools:

  • On the go: stock a mess kit to supply all of the items necessary for you to cook comfortably on the go. The running joke in preparedness world is “don’t forget your can opener”!
  • These tools can enhance your ability to prepare a variety of meals with limited resources. Think about what it is you use the most and what you would want and need in an emergency.
      • Chef’s Knife: A high-quality chef’s knife is indispensable for chopping, slicing, and dicing. It’s the workhorse of the kitchen.

What type of kitchen knife should I have?:

I spoke with Cory, from our “Cooking With Cory” videos, and he told me that you do not have to spend a fortune on a knife, as long as its sharp, and fits your hand/grip. He also explained to me that a serrated knife vs a straight edge have different purposes.

For example: I watched him chop onions, and asked him if he cries every time. He explained to me that keeping the onions in the fridge (think the concept of viscosity), and using a sharp, straight edge knife minimizes the release of whatever enzyme is within the onion.

      • Cutting Board: A durable cutting board provides a safe and stable surface for food preparation. Look for one that is easy to clean and won’t damage your knives.
      • Spoon and Spatula Set: Spoons and spatulas for stirring, flipping, and serving.
      • Saucepan(s) with Lid: Essential for boiling, simmering, and preparing sauces. Look for a durable and heat-conductive material.
      • Mixing Bowls: Durable mixing bowls in various sizes are essential for combining and preparing ingredients. Choose bowls made of stainless steel, glass, or durable plastic.
      • Meat Thermometer: Ensure accurate cooking temperatures, especially for meat, with a meat thermometer. It’s crucial for food safety and achieving the desired level of doneness.
      • Oven Mitts: Protect your hands from burns when handling hot pots, pans, and baking sheets.

cutting board with various food items on it ready to cook

Community Cooking:

  • Pool resources and collaborate with neighbors or community members to share ingredients and cooking tools.
      • When I see this type of suggestion, to me this suggests that we need to have positive relationships with our neighbors and community, so that if “push comes to shove”, we can help one another out during a challenging time.
  • Community kitchens can help everyone make the most of the available resources and ensure that everyone is well-fed during challenging times.
Conclusion:

In times of crisis, resourceful cooking becomes a valuable skill. By incorporating these emergency food hacks, you can turn limited ingredients and tools into satisfying meals that provide comfort and nourishment during difficult situations. Stay resilient, stay prepared, and keep your creativity alive in the kitchen even when faced with unexpected challenges.

cutting board with various food items on it ready to cook

Proper food storage is important for maintaining safe food, nutritional value, and freshness. These tips will help you organize and store your food effectively, reducing waste and promoting a healthier lifestyle.

  1. Understand Storage Zones:
    • Different foods require different storage conditions. Divide your kitchen into zones based on temperature and humidity needs. For instance, store fruits and vegetables in the crisper drawer of your refrigerator, while pantry items like grains and canned goods should be kept in a cool, dry place.organizing food in the fridge
  2. Utilize Airtight Containers:
    • Invest in high-quality airtight containers for storing dry goods like rice, pasta, and cereal. These containers prevent exposure to air and moisture, keeping your pantry staples fresh for longer periods and reducing the risk of spoiling or even pests.
  3. Label and Date:
    • Labeling containers with the purchase or expiration date helps you keep track of the freshness of your food. This is particularly important for items in the freezer, as it helps you rotate stock and use older items first.
  4. Practice FIFO (First In, First Out):
    • When restocking your pantry or refrigerator, place newer items behind older ones. This simple practice ensures that you use the older items first, preventing food from expiring or going bad before you get a chance to use it.
  5. Freeze Smartly:
    • Freeze items in portion sizes to make thawing and using them more convenient. Use freezer bags or vacuum-sealed bags to minimize freezer burn, and be sure to remove excess air before sealing. Label frozen items with the date and type for easy identification.
  6. Store Meat Safely:
    • Raw meat and poultry should always be stored on the lowest shelf of the refrigerator to prevent cross-contamination. Keep them in leak-proof containers or on a tray to catch any potential drips.
  7. Monitor Refrigerator Temperature:
    • Keep your refrigerator at or below 40°F (4°C) to slow down the growth of bacteria. Use a refrigerator thermometer to ensure the proper temperature and adjust settings accordingly.
  8. Rotate Your Stock:
    • Regularly assess the contents of your pantry, refrigerator, and freezer. Use items nearing expiration firstkitchen pantry 
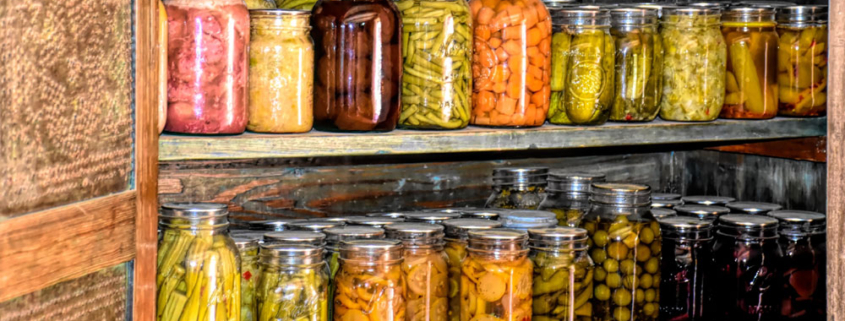
and replace them with fresh purchases. This practice not only reduces food waste but also ensures that you’re consuming the most nutritious products.
  9. Avoid Overpacking:
    • Overpacking your refrigerator can obstruct proper airflow, leading to uneven cooling and potential food spoilage. Allow air to circulate by leaving some space between items, and don’t block vents. Also, as you learn your appliances, you may have experienced your fresh produce freezing at the back of the fridge. Proper placement can save you  food and money.
  10. Educate Yourself on Shelf Lives:
    • Understand the shelf life of various foods to make informed decisions about what to purchase and when to use it. Familiarize yourself with expiration dates, and be aware of signs of spoilage such as off odors, discoloration, or changes in texture.

expirty date example photo

Conclusion:

By following these tips, you can create a well-organized and efficient food storage system in your kitchen. Not only will you reduce food waste, but you’ll also ensure that your meals are made with fresh, safe ingredients. Embracing these practices will not only benefit your wallet but also contribute to a healthier and more sustainable lifestyle. Happy storing!