tomatoes growing inside greenhouse

In this beginner’s guide, lets walk through the basic rules to consider when setting up and operating Greenhouses, along with some key rules and tips to ensure your garden thrives.

Part 1: Setting Up Your Greenhouse

Location, Location, Location:

  • Find a sunny spot: Look for a location with at least 6 hours of direct sunlight a day.
  • Consider wind direction: Protect your greenhouse from strong winds to prevent damage.

Choose Your Greenhouse:

  • Start with a simple, affordable structure like a mini-greenhouse or a polyethylene greenhouse.
  • Assemble with care: Follow the manufacturer’s instructions for set up.
  • Remember that a simple cover over a current bed can be a simple version of a greenhouse! Just modify the tips below to fit.
  • Options are endless depending on your budget and vision – have some fun searching out the types and styles available.

Prepare the Ground:

  • Level the ground: Ensure a stable, level foundation.
  • Lay gravel or a weed barrier: Prevent weed growth underneath.

Ventilation and Shading:

  • Install vents: Proper ventilation is essential to regulate temperature, humidity, and air quality inside the greenhouse. Without good ventilation, the house can become too hot and stuffy, leading to poor plant growth.
    • Roof vents, side vents, louvers (adjustable slats that can open and close
    • Fans may be needed depending on size
  • Shading: Shading is essential to protect plants from excessive sunlight, especially during the hottest parts of the day. Without adequate shading, the greenhouse can become too hot, leading to sunburned plants and stress.
    • Shade cloth, retractable roofs or sides and placement are important to consider

Part 2: Operating Your Greenhouse

Temperature Control:

  • Monitor daily temperatures: Keep an eye on the temperature. Remember that specific plant species may have more precise temperature requirements. Always refer to the care instructions for the plants you are growing, and consider using a thermometer to ensure your greenhouse stays within the appropriate temperature range. Additionally, factors like humidity, light levels, and ventilation play a role in the overall health and growth of your plants, so consider these aspects in conjunction with temperature management.
  • Use heaters or fans

garden

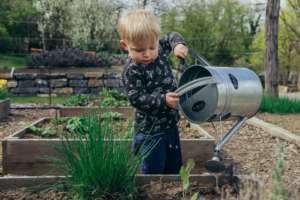
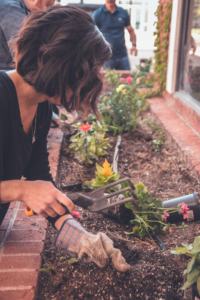
Lesson Learned: The above picture shows some mini greenhouse rows or boxed off plants. The very first time I did something similar in my own garden, I did not realize how they worked, and I completely fried all of my plants underneath the plastic! Learn from my mistakes friends – ventilate and let those babies breath!

Watering and Humidity:

  • Water properly: Use a drip irrigation system or hand-water to keep the soil evenly moist. Read your plant instructions to be sure you provide adequate water supply
  • Maintain humidity: Spraying the floor with water or using a humidifier can help plants thrive.

Part 3: Rules and Tips for Greenhouse Ownership

Local Regulations:

  • Check local zoning laws: Some areas have restrictions on greenhouse size and placement.
  • Permits: Determine if you need any permits before building.

Crop Rotation:

  • Rotate your crops: Avoid planting the same species in the same spot season after season to keep the soil fertile and healthy. Different plants bring different nutrients to your soil! Also, rotating your plants helps with weed and pest control.

Regular Maintenance:

  • Clean and tidy: Other than for safety reasons, we know that cleanliness keeps the germs and pests away.
  • Repair damage: Promptly repair any holes, tears, or damage to the greenhouse covering to help the longevity of your structure.

Greenhouse

Conclusion:

A home-based greenhouse can elevate your gardening game and provide year-round growing opportunities. By carefully setting up, operating, and adhering to the rules, you can become a successful gardener. Whether you’re growing vegetables, fruits, or flowers, your green thumb adventures. Happy gardening!

garden seed bank

Oh Canada! Canada’s diverse geography and climate offer a unique challenge for gardeners and horticulturists. The key to successful gardening here lies in understanding Canada’s plant hardiness zones. Today lets explore these zones, what they mean, how they work, and how they can help you make informed decisions for your garden.

What Are Plant Hardiness Zones?

Plant hardiness zones, or growing zones are geographic areas that share similar climate conditions, particularly in terms of minimum temperatures. These zones are determined by the average lowest temperatures during the winter months and help gardeners select plants that can survive and thrive in their specific region.

The Canadian Plant Hardiness Zones

Canada, as one of the largest countries in the world, encompasses a wide range of climates, from the frigid Arctic tundra in the north to temperate coastal areas in the south. Our government has some great information regarding this here. To assist Canadian gardeners, the country is divided into several plant hardiness zones:

Canada’s Plant Hardiness Zones PDF

Here’s a general overview of what you can grow in different plant hardiness zones:

(Arctic) Zone 1:
  • Arctic and subarctic regions with extremely cold winters.
  • Limited plant options; primarily native species adapted to extreme cold.
  • Examples: Arctic poppy, arctic willow.
Zone 2:
  • Cold regions with short growing seasons.
  • Hardy vegetables, fruits, and ornamentals.
  • Examples: Cabbage, carrots, apples beets, chard, raspberries
(Calgary) Zone 3:
  • Cold regions with somewhat longer growing seasons.
  • A wider range of vegetables and fruits.
  • Examples: Broccoli, potatoes, strawberries, green beans, peas
Zone 4:
  • Moderate climates with well-defined seasons.
  • Most common garden crops.
  • Examples: Tomatoes, peppers, apples, peonies, squash
(Southern) Zone 5:
  • Regions with milder winters and a longer growing season.
  • A wide variety of fruits, vegetables, and perennials.
  • Examples: Lettuce, squash, raspberries, roses, most vegetables
(Coast) Zone 6:
  • Areas with mild winters and a longer growing season.
  • Extensive plant choices, including many ornamental plants.
  • Examples: Spinach, corn, azaleas, most fruits and vegetables
(Coast) Zone 7:
  • Mild to warm climates with longer growing seasons.
  • Almost all common garden plants and many subtropicals.
  • Examples: Tomatoes, citrus trees, camellias.
Zone 8:
  • Warm regions with hot summers.
  • A wide range of tropical and subtropical plants.
  • Examples: Peppers, figs, hibiscus.
Zone 9:
  • Warm to hot climates with extended growing seasons.
  • Suitable for many tropical and subtropical crops.
  • Examples: Okra, avocados, plumeria.
(Not in Canada) Zone 10:
  • Tropical climates with high temperatures year-round.
  • Ideal for tropical and exotic plants.
  • Examples: Pineapples, bananas, orchids.

Plant Zones: Select Plants Wisely

When planning your garden choose plants that are recommended for your zone. These plants are more likely to survive and grow successfully.

  • Example #1: In Cochrane I have success with lettuce (multiple varieties), peas, beans, potatoes, etc.
  • Example #2: In Cochrane I do not have success with peppers or other plants that require transplanting from a starter.

Microclimates:

Local factors such as elevation, proximity to bodies of water, and cities create microclimates that differ from the official zone.

  • Example: Within Cochrane, those of us on the top of the hill have a different microclimate than those who live in the valley or close to the river.
  • Example: I have attempted to grow corn on the cob in 3 different parts of my yard, have tried starting them indoors, have purchased pre-started plants from the greenhouse, and I just cannot grow corn! I end up with teeny tiny 2-4 bite cobs, usually 1 cob per plant on average. Just know its okay to have fail. From year to year I have varying crops that excel or flop.

Tips:

  • Local nurseries, gardening clubs, and horticultural experts can provide valuable insights into the best plant choices for your area.
  • Pay attention to weather forecasts and be prepared to protect your plants. A frost or a storm can harm or damage your garden. A few times a year my own garden is covered in bed sheets!

My Garden Experience

Now it’s time (as the kids say) for me to ‘flex’ and talk about about my own little garden. First, our uromastyx Sonny is shown enjoying some home grown dahlias & sunflowers. Our pets consist of a variety of Uromastyx, and bunny rabbits, all of which eat garden vegetables and flowers. I successfully grow to name a few: zucchini, potatoes, strawberries (sometimes), raspberries, pumpkins, and tomatoes. Perennials and Annuals are also a favorite of mine to watch grow. All you need is a garden space in the form of a bed, buckets, or planters plus sunshine, and a watering source. Just remember it takes trial and error!

Garden Seed Bank – Let Us Help You Get Started

These seeds are part of our Garden Seed Bank:

Conclusion:

Understanding Canada’s plant hardiness zones is a fundamental beginning point for successful gardening in this incredible country. By selecting seeds and plants that are well-suited to your specific zone, you can create a thriving and vibrant garden, no matter where you are in this vast and beautiful land. Happy gardening!

gardening raised beds
colorful delicious salad

Starting a garden for emergency preparedness  as a hobby is a wise and practical step for a reliable source of fresh food. If you are new to gardening, you might be wondering how to start a garden from scratch. Whether a spacious backyard or just a small balcony, today we are going to help you get your garden started.

1. Choose the Right Location

The first step in starting a garden is selecting the right location. Consider these factors:raised beds garden

  • Sunlight: Most plants require at least 6 hours of sunlight each day. Observe sun movement of your garden site for a few days to determine the amount of sun it receives and choose plants that match those conditions.
  • Space: The available space will dictate the size and type of garden you can build. You can garden in the ground, raised beds, containers, or vertical gardens, depending on your space.

2. Prepare the Soil

Fertilizing a garden provides plants with the necessary nutrients for healthy growth and abundant yields. Fertilizing is slightly different from composting, as it involves the addition of specific nutrients, whereas composting is more about improving soil structure and overall fertility. Here’s what you need to know about fertilizing your garden:

When to Fertilize:
  • Before Planting: Prepare the soil by incorporating compost or well-rotted manure a few weeks before planting. This provides a slow-release source of nutrients.
  • At Planting: When transplanting seedlings or setting out new plants, you can add a balanced, granular, or slow-release fertilizer according to the package instructions. This gives your plants an initial nutrient boost.
  • Depending on the type of plants and your garden’s needs, you may need to fertilize during the growing season. Generally, it’s a good idea to fertilize your garden in spring and early summer when plants are actively growing.
  • Some plants, like tomatoes or squash, are heavy feeders and may benefit from additional applications of fertilizer during the growing season.
Signs It’s Time to Fertilize:
  • If you notice that the older leaves of your plants are turning yellow too early, it can be a sign of nutrient deficiency. This is a common indicator that your plants may need additional fertilization.
  • Slow growth and undersized fruits can be signs that your plants are not getting enough nutrients.

3. Plan Your Garden

Now it’s time to decide what you want to grow in your garden. Consider the following:

Plant Selection: Choose plants that are well-suited to your region and garden conditions. It’s a good idea to start with easy-to-grow vegetables and herbs like tomatoes, lettuce, basil, and mint. Make a list of your favorite foods and see what is growable in your area from that list! Check out our other gardening articles, including Canada’s plant growing zones!

Garden Seed Bank – Let Us Help You Get Started

These seeds are part of our Garden Seed Bank:

Beans (25g) – Blue Lake Bush – Approximately 2-4 seed per gram
Pepper (0.5g) – California Wonder Bell – Approximately 165 seeds per gram
Cucumber (1g) – Marketmore 70 – Approximately 40 seeds per gram
Carrots (1g) – Scarlet Nantes – Approximately 650-825 seeds per gram
Lettuce (1g) – Parris Island Romaine – Approximately 1036 seeds per gram
Cabbage (0.5g) – Golden Acre Y.R. – Approximately 315 seeds per gram
Beets (5g) – Detroit Dark Red – Approximately 55 seeds per gram
Peas (25g) – Green Arrow – Approximately 3-4 seeds per gram
Swiss Chard (3g) – Lucullus – Approximately 50-60 seeds per gram
Parsnip (1g) – Harris Model – Approximately 430 seeds per gram
Tomato (0.1g) – Bonny Best – Approximately 405 seeds per gram
Radish (5g) – Cherry Belle – Approximately 75 seeds per gram
Broccoli (1g) – Calabrese Organic – Approximately 315 seeds per gram
Squash (1g) – Australian Butter – Approximately 12-15 seeds per gram
Spinach (5g) – Bloomsdale Dark Green – Approximately 100 seeds per gram
Onion (0.5g) – Yellow Sweet Spanish – Approximately 250-270 seeds per gram
Corn (25g) – Early Golden Bantam Sweet – Approximately 3-4 seeds per gram
Cantaloupe (0.25g) – Hales Best – Approximately 40-45 seeds per gram
Cauliflower (0.1g) – Amazing – Approximately 250-315 seeds per gram
Zucchini (2g) – Black Beauty – Approximately 7-14 seeds per gram

Companion Planting:healthy fruits and vegetables

Companion planting is a gardening practice that involves strategically planting different types of plants together to enhance their growth, protect them from pests, and improve overall garden health. This practice is based on the idea that certain plant combinations can benefit each other through various mechanisms. Here’s more information about the benefits of companion planting:

  • Pest Control: Some plants release chemicals that deter or repel specific pests. For example:
    • Marigolds can help deter nematodes and repel aphids.
    • Nasturtiums can attract aphids away from other plants.
    • Basil can deter flies and mosquitoes.
    • Chives can help repel carrot flies.
  • Attracting Beneficial Insects: Certain plants attract beneficial insects like ladybugs, lacewings, and pollinators, which help control garden pests and improve pollination. For example:
    • Sunflowers attract pollinators like bees.
    • Dill and fennel attract beneficial insects like parasitic wasps that prey on garden pests.
  • Some plants, like legumes (peas, beans, and clover), have the ability to fix atmospheric nitrogen into the soil. This benefits neighboring plants by providing a source of natural fertilizer.
  • Companion planting maximizes space in your garden. Tall plants provide shade to those that prefer cooler conditions. Ground covers can help retain soil moisture.
  • Improved Flavor and Growth: Certain plant combinations improve the flavor or growth of neighboring plants. For example:
    • planting herbs like basil, oregano, or parsley near tomatoes can enhance their flavor.

It’s important to note that while companion planting has many benefits, not all plant combinations work as intended, and some traditional pairings may not be as effective as once believed. The effectiveness of companion planting can also depend on your local climate and soil conditions. Experiment and have some fun with it!

Planting Schedule:
Depending on your climate, plan your planting times. Some plants thrive in cool weather, while others prefer the warmth of summer.

Hardy vegetables and can tolerate cooler temperatures, so they can be planted early, even before the last frost. Others are more sensitive to cold and should be planted after the last frost to avoid damage. Here’s a sample breakdown of both categories, keeping in mind your zone (found here) can affect this list:carrots

Vegetables That Can Be Planted Early (Before the Last Frost):
  • Leafy greens like spinach, lettuce, kale, and arugula can be planted early. They can tolerate light frost and even some snow.
  • Root Vegetables: Carrots, beets, radishes, and parsnips can be sown early in the season. The cold temperatures can enhance the sweetness of some of these roots.
  • Peas
  • Broccoli and Cauliflower
  • Onions and Leeks
Vegetables That Should Be Planted After the Last Frost:
  • Tomatoes
  • Peppers
  • Cucumbers, Squash, and Melons
  • Beans: Both bush and pole varieties, prefer warm soil and should be planted after the last frost.
    • I can attest to this! You would think beans could handle it, but when I plant too early they do not come up.
  • Corn
  • Basil and Other Herbs
  • Warm-Season Greens: Vegetables like okra and sweet potatoes are best planted after the last frost when the soil has warmed.

4. Plant Your Gardengardening raised beds

Pro-tip: Mark your rows or sections. I like to draw the layout and save it into my phone. This has been my most cost effective and simple method

With your garden plan in place, it’s time to get your hands dirty:

  • Spacing: Follow the spacing recommendations on your seed packets or plant labels to give your plants room to grow. If you have a small garden plot, consider square foot block gardening, or vertical gardening.
  • Planting Depth: Different seeds have different planting depths. Be sure to plant them at the right depth, usually indicated on the seed packet.
  • Watering: Water thoroughly after planting, and be consistent with your watering routine. Keep the soil consistently moist but not waterlogged.

5. Maintain Your Garden

Gardening is an ongoing commitment. Regular maintenance is key:

  • Weeding: Keep an eye out for weeds and remove them promptly. Weeds compete with your plants for water and nutrients.
  • Fertilizing: Depending on your soil and the needs of your plants, you may need to fertilize during the growing season.
  • Be vigilant for signs of pests and diseases. Early detection and proper management prevent damage to your garden.

gardening raised beds

Pro Tip: Consider non-creepy crawly “pests” that could get to your garden such as deer or cats – maybe your garden needs a fence around it? I had a late strawberry yield and all of them were nipped right off the vine by a friendly neighborhood Bambi

Harvesting:

When your plants produce fruits or vegetables, harvest them at their peak ripeness. This will ensure the best flavor and quality. Here are some pro tips on harvesting your garden produce:

  • Harvest at the Right Time: Vegetables, fruits, and herbs taste best and have the most nutritional value when picked at the right time. Research the ideal harvest time for each plant in your garden.
  • Use the Right Tools: Proper tools can make the harvesting process more efficient and less damaging to the plants.
  • Gentle Handling
  • Harvest in the Morning: Many vegetables and herbs are best harvested in the morning when they are crisp and full of moisture. As the day progresses, heat and sunlight can cause produce to wilt.
  • Harvest Regularly: Many crops, like zucchini and tomatoes, produce more if you harvest them regularly.
  • Know How to Cut or Snap: For crops like beans, peas, or asparagus, learn the proper way to cut or snap them to ensure the plant continues to produce.
Conclusion:

Starting a garden can be a learning experience, so don’t be discouraged by setbacks or mistakes. Gardening is a journey, and each season provides opportunities to improve and enjoy the fruits of your labor. Happy gardening!


hiking

When it comes to embarking on a backpacking adventure it takes careful consideration of the food you want to pack. The right choices can make the difference between an energized, enjoyable journey and one filled with fatigue and hunger pangs. To ensure a successful backpacking trip, select foods that are lightweight, compact, non-perishable, and packed with the nutrients your body needs for sustained physical activity, plus choose items that taste good to you! Today we’ll explore the top recommended foods for your next outdoor excursion.

1. Dehydrated or Freeze-Dried Meals

Dehydrated or freeze-dried meals are a backpacker’s best friend. They are lightweight, have a long shelf life, and come in a variety of flavors. The beauty of these meals is that all you need is boiling water to rehydrate them, making them a quick and convenient option for breakfast, lunch, and dinner on the trail. The following are some great brands to consider:

Mountain House

Alpine Aire

Backpackers Pantry

Peak Refuel

Alpen Fuel

2. Trail Mix

Trail mix is a classic choice for snacking on the go. This blend of nuts, seeds, dried fruits, and sometimes a touch of chocolate provides a quick energy boost. It’s a high source of healthy fats, protein, and carbohydrates, making it ideal for refueling during your hike. You can hit up your local Bulk Barn or grocery store create your own, or try some pre-made blends!

Here is a super simple list of ingredients to mix and voila, trailmix!

  • 1 cup of unsalted (or salted if you prefer) nuts (e.g., almonds, cashews, or peanuts)
  • 1 cup of dried fruits (e.g., raisins, cranberries, or apricots)
  • 1 cup of whole-grain cereal (e.g., Cheerios, pretzels or Shreddies)
  • 1/2 cup of chocolate chips, M&M’s or treat of preference (optional for a touch of sweetness)
3. Energy Bars

Energy bars come in a compact form and are densely packed with nutrients. Look for options that offer a balanced mix of carbohydrates, protein, and fats to keep your energy levels steady throughout the day. Pro Bars & Thrive are some great brands! Or Clif Bars, granola bars, Good to Go bars – there are many many choices!

4. Instant Oatmeal

For a warm and filling breakfast option, pack individual packets of instant oatmeal. Just add hot water, and you have a nutritious and easy-to-prepare meal to kickstart your day. Oatmeal is also a compact and light item for your pack.

5. Nut Butter

Single-serve packets of peanut butter or almond butter are a calorie-dense and protein-rich snack. They provide a quick energy boost and are a satisfying addition to crackers or tortillas. Check out these delicious Trail Butter options!

6. Jerky

Beef, turkey, or other types of jerky are lightweight and require no refrigeration. Jerky is a concentrated source of protein, which is essential for muscle repair and sustained energy during physical activities like hiking. Protein helps keep you feeling full. Plus, it offers many flavors, and it is easy to share! Also check out these cool beef protein bars by Thrive for another tasty option.

7. Cheeses

Note from my home: My husband said I must add cheese to the list. He was introduced to Enercheez this year, and he absolutely loves it! Definitely a very tasty, light, nutritious option to add to your pack.

8. Instant Soup or Broth

In cold weather or when you crave a comforting meal, consider packing instant soup or broth packets. These provide warmth and hydration, making them an excellent choice for chilly evenings in the wilderness.

Conclusion:

The BIG question is now, why are these top food choices?? Simply put, they are:

  • Nutrient/Calorie dense
  • Lightweight and portable
  • Easy and convenient (requires minimal preparation)
  • Offers alot of variety
  • TASTES excellent

In addition to these food choices, don’t forget to pack essential cooking equipment, such as a compact stove, cookware, utensils, and water purification methods to ensure you can prepare your meals and stay hydrated while backpacking. Always be mindful of any dietary restrictions or food allergies, and select foods that align with your nutritional needs and personal preferences. With a well-thought-out food plan, you’ll be well-prepared for a successful and enjoyable backpacking adventure. Happy hiking!

hiking

Delicious freeze dried fruits

Food Buckets

Food buckets refer to pre-packaged emergency food supplies that come in a bucket or container. These buckets contain a variety of non-perishable food items designed to provide sustenance during emergencies, natural disasters, or other situations where access to fresh food may be limited.

Here are some key points about food buckets:

  1. Long Shelf Life: The contents of food buckets are selected for their long shelf life. They include freeze-dried foods, which can last for years if stored properly.
  2. Variety of Contents: Food buckets contain a variety of items such as pre-made meals, fruits and vegetables sometimes even desserts or snacks. They are designed to provide a balanced diet or healthy food, though the specific contents can vary depending on the manufacturer and the intended use.
  3. Convenience: Food buckets are convenient because they come in a compact and portable container, such as a plastic bucket with a handle. This makes them easy to store and transport.
  4. Emergency Preparedness: Many people purchase food buckets as part of their emergency preparedness plans. They are useful in situations where access to fresh food is disrupted, such as during natural disasters, power outages, or other emergencies.
  5. Usage: Food buckets are not only for emergencies. Some people also use them for camping, hiking, or other outdoor activities.
  6. Considerations: When purchasing food buckets, it’s important to consider dietary restrictions, preferences, and any special needs of the individuals who may be consuming the food. Regularly check and rotate the contents to ensure that the food remains fresh and safe to eat.

We will explore four food buckets that we offer:

  • the Ready Project 14-Day Bucket,
  • the Nutristore Vegetable Bucket,
  • the Nutristore Fruit Bucket,
  • and the Peak Basecamp Bucket.

Ready Project 14-Day Bucket


  • Brown Sugar Oatmeal
  • Multigrain Cereal
  • Spanish Rice
  • Cheddar Cheese Grits with Green Chilies
  • Savory Beans & Rice
  • Buttery Herb Pasta
  • Creamy Rice Pudding
  • Hobo Stew
  • Cheddar & Broccoli Rice
  • Hearty Potato Stew
  • Breakfast Drink Mix
  • Meal Extender Long Grain Rice
  • Meal Extender Beans


The Ready Project 14-Day Bucket is an all-in-one solution designed to provide 1 person 2000 calories daily for two weeks. This food bucket contains a variety of dehydrated meals and snacks, carefully selected to ensure nutritional balance.


Nutristore Freeze-Dried Garden Vegetable Bucket


60 1/2 cup servings of the following freeze-dried vegetables. That’s 12 servings of each:

Broccoli

Corn

Peas

Green Beans

Potatoes

For those who prioritize their daily dose of vegetables even during an emergency, the Nutristore Vegetable Bucket is an excellent choice.

Pro-tip: My children love to eat these vegetables straight out of the package! In fact, my toddlers thought these were “chips” for the first few years of their lives.

  • Long-term storage: Up to 25 years
  • Short-term storage: Each individual veggie comes packaged in re-sealable mylar pouches inside the bucket. Once opened, the pouches have a shelf life (if stored properly) up to 18 months.


Nutristore Freeze-Dried Fruit Bucket


Fruits are an important source of vitamins and natural sugars that boost your energy levels and mood during an emergency. In this bucket there is 60 1/2 cup servings of:

Apples

Raspberries

Blueberries

Strawberries

Peaches


  • Nutrient-rich options: These fruits offer a wide range of essential vitamins, fiber, and antioxidants, promoting overall health.
  • Snack-ready: The freeze-dried fruits are perfect for snacking, baking, or adding to your cereal, providing a sweet and nutritious treat.
  • Long-lasting freshness: Just like the vegetable bucket, the Nutristore Fruit Bucket can maintain its quality for up to 25 years when stored properly.
  • Short-term: Inside the bucket, the fruits each come in a resealable mylar pouch. Once opened they have a (properly stored) shelf life up to 18 months


Peak Refuel Freeze Dried Basecamp Bucket

The Peak Basecamp Bucket is designed with adventurers and outdoor enthusiasts in mind, making it an excellent choice for both emergency preparedness and camping trips. This food bucket offers a variety of meals that are lightweight and easy to prepare, making it ideal for those on the move. Key highlights include:

  • Lightweight and portable: The meals come in lightweight, compact packaging.
  • Quick preparation: With simple rehydration instructions, you can have a hot meal in minutes.
  • Extended shelf life: The meals in the Peak Basecamp Bucket have a sealed shelf life of up to 5 years.

2 Of The Following In the Bucket:

Beef Pasta Marinara

Chicken Alfredo Pasta

Chicken Teriyaki Rice

Sweet Pork & Rice

Breakfast Skillet

Strawberry Granola


Conclusion:

Food buckets are a smart choice for anyone looking to be prepared for emergencies, ensuring that you have a reliable source of sustenance when traditional food sources are scarce whether due to an emergency, or by choice (like cabin life). Have a great day!

Canadian Celiac Association GF

Emergencies can happen at any time, and being prepared is essential for everyone. However, individuals with specific dietary restrictions face unique challenges when it comes to emergency preparedness. In this article, we will explore what celiac disease is and provide valuable insights on how to be prepared for emergencies when you require gluten-free food.

Understanding Celiac Disease

Celiac disease is an autoimmune disorder that affects the small intestine. When individuals with celiac disease consume gluten (a protein found in wheat, barley, and rye) their immune system responds by damaging the lining of the small intestine. This causes the body to stop being able to absorb the essential nutrients our bodies require. This also leads to a range of digestive and systemic symptoms, including diarrhea, abdominal pain, fatigue, and skin rashes. The only effective treatment for celiac disease is a strict gluten-free diet. Even a tiny amount of gluten can trigger a reaction, making dietary vigilance necessary.

Gluten-free also refers to a dietary choice in which individuals voluntarily avoid foods containing gluten, often to address sensitivities, lifestyle preferences, or diets. Celiac disease necessitates a strict, lifelong gluten-free diet, while voluntarily gluten-free eating is typically made by those without a medical condition. Note: there is also a wheat allergy, which also differs from celiac & gluten-free preference.

  • For the sake of the article, I am writing it from the perspective of a celiac. As a mother of a child with celiac disease, I can attest to the severity of cross contamination and safety of ingredients, and have a soft spot in my heart for anyone living with this difficult disease. This article can be adjusted to fit the needs of someone choosing a gluten-free lifestyle as well!

Emergency Preparedness for a Celiac

Always Have an Emergency Supply

For individuals with celiac disease, maintaining a gluten-free diet is non-negotiable. That’s why it’s vital to have an emergency supply of gluten-free food and necessary supplies. This includes non-perishable gluten-free items such as canned fruits and vegetables, gluten-free crackers, pasta & sauce, rice, beans, or gluten-free granola bars. This link takes you to our site and you can see all of the gluten free food items we carry!

superfruit slam pro bar meal on the go


Pro-Tip: My son has taken premade meals as backup food for youth camps or even going to grandma and grandpa’s house. It provides him a food option, and it’s a safe food alternative for day-to-day use where there might not otherwise be. He has not yet travelled away on a plane, but these pre-made meals would be excellent choices to pack on vacation.

Customize Your Emergency Kit

When assembling an emergency kit, it’s important to customize to your specific needs. In addition to the standard emergency items like water, flashlight, first-aid supplies, and important documents, consider adding gluten-free items. If you rely on gluten-free snacks or meal replacements, make sure to include those in your kit. Remember to replace and update your kit regularly to ensure food safety.

Communication is Key

Inform your close friends, family, and neighbors about your dietary restrictions, so they can assist or provide support if needed. Share your medical condition and emergency plan with trusted individuals who can help advocate for your dietary needs during evacuation or sheltering.

Plan for Safe Food Storage

In the event of an emergency, you may find yourself without electricity or refrigeration. Plan for food storage accordingly. Gluten-free goodies, nut butters, and freeze-dried fruits are good options that do not require refrigeration.

Learn to Read Labels

Familiarize yourself with reading food labels to identify gluten-containing ingredients. In a crisis, you may have limited options and need to quickly assess what is safe to eat. Knowledge of label-reading is a necessary skill for anyone with celiac disease.

3 steps to reading a label

PDF: Learn-to-Read-a-Label-for-Gluten-in-3-Easy-Steps

Safe Cookware

Celiac’s must have cookware and dishes available that are not cross-contaminated and allows for safe consumption of their food. Be sure you add to these things to an emergency kit and plan to have the necessary supplies.

What is Cross-Contamination?

Cross contamination refers to the unintentional transfer of gluten from a gluten-containing food or surface to a gluten-free food. Even tiny amounts of gluten can trigger a reaction and cause harm.

Cross contamination can occur in various ways:
  • Shared Cooking Surfaces: If gluten-free foods are prepared or cooked on surfaces or with utensils that have been in contact with gluten-containing ingredients, there’s a risk of cross contamination.
      • For example, using a toaster that has had regular bread in it for gluten-free bread can lead to cross contamination.
  • Mixing Utensils: If utensils like knives, cutting boards, or stirring spoons are used interchangeably between gluten-containing and gluten-free foods, gluten particles can be transferred.
  • Fryers: Shared fryers in restaurants or at home can be a significant source of cross contamination. If gluten-free items are fried in the same oil as breaded items, the oil becomes contaminated.
  • Bulk Food Bins: Scooping gluten-free grains or flours from bulk bins that have previously held gluten-containing products introduces gluten into the gluten-free food.
  • Condiments and Spreads: Shared condiment jars, butter containers, or peanut butter jars become contaminated if used with regular bread or crackers.
  • Double-Dipping: If someone dips a regular piece of bread into a gluten-free dip, it contaminates the entire container.
To avoid cross contamination and protect those with celiac disease, it’s important to:
  • Use separate cooking utensils, cutting boards, and cookware for gluten-free and gluten-containing items.
  • Clean and sanitize surfaces thoroughly before preparing gluten-free foods.
  • Clearly label gluten-free items and keep them separate in the pantry and refrigerator.
  • Educate family members, friends, and foodservice staff about the importance of preventing cross contamination.
  • Choose certified gluten-free products whenever possible.
  • Be cautious when dining out and communicate your dietary needs to restaurant staff.

Emergencies can be unsettling for anyone, but for individuals with celiac disease, the situation can be even more challenging due to dietary restrictions. However, with careful planning, communication, and resource awareness, you can ensure that you are prepared for any unexpected event. By maintaining an emergency supply of gluten-free food, customizing your kit, and building a support network, you can confidently navigate emergency situations and continue to manage your celiac disease safely. Always remember that knowledge is your best asset when it comes to emergency preparedness, and being informed can make a world of difference when you have specific dietary needs like those associated with celiac disease.

Peak Refuel Pouches

For outdoor enthusiasts, mealtime in the wilderness often means sacrificing flavor and variety for convenience. Since Peak Refuel came on the scene in 2018, you can enjoy gourmet-quality meals that are both delicious and hassle-free. Today we are going to explore how Peak Refuel’s meal pouches combine convenience with incredible taste, elevating your outdoor dining experience to new heights (meaning quick, easy meals that taste restaurant quality).

Convenience Redefined

Lightweight and Compact: Peak Refuel’s meal pouches are the epitome of convenience. They are lightweight and designed to be compact, making them easy to pack, carry, and store in your backpack. Whether you’re on a day hike, an extended backpacking trip, a camping adventure, or even a horseback riding trip, these meal pouches won’t weigh you down.

Quick and Easy Preparation: Preparing a delicious meal with Peak Refuel is a breeze. All you need is a portable stove (like the JetBoil or Kelly Kettle) or campfire and hot water. Simply tear open the pouch, add hot water, stir, and wait a few minutes. Voilà! Your gourmet meal is ready to enjoy – even straight from the bag if you want. No need to carry pots, pans and dishes. I do however recommend packing a spoon or fork -wink-

Wide Variety of Flavors: Peak Refuel offers an extensive menu of mouthwatering options to satisfy every palate. From hearty breakfasts like breakfast skillet to savory dinners like beef stroganoff, their menu includes diverse flavors that will keep your taste buds excited throughout your outdoor journey.


As of this article in Oct 2023 – we have 18 delicious flavors of meal pouches to choose from.

Not all  are depicted here, but you can find them all on our website here!


Incredible Taste, Every Time

Real Ingredients: What sets Peak Refuel apart is their commitment to using high-quality, real freeze-dried ingredients. You won’t find artificial preservatives or yucky soy fillers in these meals. Instead, you’ll enjoy the flavors of pure real meat, vegetables, and spices, just like you would in a home-cooked meal.

Nutrient-Rich: Peak Refuel understands the importance of nutrition in the outdoors. Their meals are carefully crafted to provide the energy and nutrients you need to fuel your adventures. You’ll find a balance of proteins, carbohydrates, and healthy fats in each pouch.

Consistent Quality: Whether you’re indulging in their beef chili or their chicken alfredo, you can count on consistent quality and taste. Peak Refuel takes pride in maintaining the same great taste in every pouch, so you know exactly what to expect with each meal.

Other Fun Facts You’ll Want to Know:

High Protein Content: Peak Refuels fully freeze dried meal pouches are known for their generous protein content. Whether you’re a hiker looking to refuel after a long day on the trail or an athlete seeking post-workout recovery, these meals offer a substantial amount of protein to meet your needs.

Allergen-Friendly Options: Peak Refuel recognizes that dietary restrictions and allergies are common concerns. They offer a variety of gluten-free and dairy-free meal options, making it easier for individuals with specific dietary needs to enjoy their meals.

Allergen Experience: I have a 12 year old son who is a celiac. When he goes away to camp or even for a sleepover, a meal like Sweet Pork & Rice really saves the day as a backup food option for when he cannot find safe food to eat

Long Shelf Life: Peak Refuels meals have a long shelf life, making them an excellent choice for emergency preparedness or as a backup food source during unforeseen situations. They have a sealed shelf life of up to 5 years when stored correctly. (Cool and dry just like other freeze dried foods)

Customer Reviews: Peak Refuel has received thousands of positive reviews from outdoor enthusiasts, backpackers, and campers who appreciate the convenience and exceptional taste of their meals. Reading customer feedback can provide insights into specific meal flavors and quality.

  • Like Joey from BC says: “High protein meals that taste great.”

Customizable Portions: While the entire meal pouch is designed to be a single or double serving, you can easily split the contents into smaller portions if needed, making it versatile for individuals or groups.

Cooking Altitude: These meals are formulated to cook effectively at high altitudes with the lowest amount of fuel and water possible, so whether you’re in the lowlands or the mountains, you can enjoy a satisfying meal without any extra hassle.


But don’t just take my word for it – give them a try! 


Mealtime in the great outdoors no longer has to mean settling for bland or inconvenient options. With Peak Refuel meal pouches, you can elevate your outdoor dining experience to gourmet levels without sacrificing the ease and efficiency you need on your adventures.

These lightweight, delicious meals are a game-changer for outdoor enthusiasts who want to savor incredible flavors in the heart of nature. Say goodbye to bland trail food and hello to Peak Refuel – where convenience meets culinary excellence in the great outdoors. Happy eating!


JetBoil 230g fuel cannister for the JetBoil portable outdoor stove

When it comes to outdoor adventures, having a reliable and efficient cooking system can change your adventure from fun to amazing. JetBoil, a popular brand among outdoor enthusiasts, offers a range of innovative products designed to make cooking in the great outdoors a breeze.

JetBoil logo

How JetBoil Works

JetBoil’s core product is a compact and lightweight cooking system that utilizes a unique design to heat water or prepare meals quickly and efficiently. The primary components of a JetBoil system include:

  1. Stove Unit: It’s designed to create a powerful, focused flame that directs heat to the bottom of the pot, minimizing heat loss and improving cooking efficiency.
  2. Cooking Pot: JetBoil pots are specially designed to work with their stoves. They feature a heat exchanger on the bottom, which captures and transfers heat to the contents. The pots come in various sizes to accommodate different cooking needs.
  3. Fuel Canister: Small, lightweight canisters of compressed gas, usually propane or isobutane. These canisters are easy to attach to the stove and provide the fuel needed for cooking.
  4. Ignition System: Most JetBoil systems include a push-button ignition, making it easy to start the stove without the need for matches or lighters.

PRO TIP: The JetBoil cannister of fuel comes in 3 sizes: 100g, 230g, and 450g.

The shipping limitations: only a certain volume of fuel can be safely sent through the mail. 900g per single shipment is the max.


Here is a video link showing how this cool product works!


What JetBoil Can Do

JetBoil’s versatility makes it suitable for many outdoor activities and cooking needs, including:

  1. Boiling Water: JetBoil excels at rapidly boiling water, making it ideal for preparing hot beverages like coffee and tea, rehydrating freeze-dried meals, or cooking pasta and rice.
  2. Cooking Meals: With the right accessories, you can use JetBoil for cooking a wide range of meals, from simple one-pot dishes to more elaborate outdoor gourmet creations.
  3. Simmering: Some JetBoil models allow for precise flame control, enabling you to simmer or slow-cook dishes.

When and Where to Use JetBoil

JetBoil is versatile and  used in various outdoor scenarios, such as:

  1. Camping: Provides quick and efficient cooking solutions for breakfast, lunch, and dinner.
  2. Hiking and Backpacking: An excellent reliable cooking system without adding excess weight to packs.
  3. Climbing and Mountaineering: A favorite among climbers and mountaineers for its efficiency in high-altitude cooking.
  4. Emergency Preparedness: A valuable addition to your emergency preparedness kit, ensuring you have a reliable way to cook during power outages or other emergencies. (Make sure you are cooking outside with fresh air)

Why Use JetBoil

  1. Speed: This system can boil water in a matter of seconds, saving you valuable time and fuel.
  2. Efficiency: Its innovative design maximizes fuel efficiency, reducing the number of canisters you need to carry.
  3. Portability: JetBoil is compact and lightweight, making it easy to transport and ideal for adventures where every ounce matters.
  4. Reliability: Known for their durability and dependability in various weather conditions.
  5. Convenience: With push-button ignition and quick setup, JetBoil simplifies outdoor cooking

hiking

This innovative cooking system has revolutionized outdoor cooking. JetBoil  ensures you can enjoy hot meals and beverages wherever your outdoor pursuits take you. Elevate your outdoor (or emergency) culinary experience to new heights! Happy cooking!

Freeze dried strawberries, bananas and peas

The two popular methods of freeze-drying and dehydration have gained widespread recognition for their ability to extend the shelf life of various food products. In this article, we’ll delve into the intriguing world of food preservation, in particular the differences between freeze-drying and dehydration.

The Basics of Freeze-Drying and Dehydration

Let’s start with the basics. Freeze-drying and dehydration are both methods used to remove moisture from food, thereby preventing spoilage. But how do they work?

Freeze-Drying:

Freeze-drying, also known as lyophilization, is a sophisticated and gentle food preservation method. Here’s how it works:

  1. Freezing: The process begins by freezing the food at extremely low temperatures. This step solidifies the water content within the food, turning it into ice.
  2. Sublimation: Once frozen, the food is placed in a vacuum chamber, where the pressure is lowered significantly. Under these conditions, a fascinating phenomenon called sublimation occurs. Instead of melting into a liquid, the ice within the food directly transitions into a vapor. This process effectively removes the water content while preserving the food’s structure and nutrients.
  3. Drying: The vapor is then collected and removed, leaving behind freeze-dried food with minimal moisture content. This low moisture level inhibits the growth of microorganisms, making the food resistant to spoilage.

Freeze-drying’s advantage lies in its ability to preserve the food’s original shape, color, flavor, and nutritional content. The gentle process ensures that delicate fruits, vegetables, and even dairy products maintain their quality and integrity.

Dehydrating: The Traditional Approach

Dehydration, also known as air drying, sun drying, or simply drying, is a more traditional food preservation method:

  1. Heat and Airflow: Dehydration involves exposing the food to heat and airflow. This combination encourages the evaporation of moisture from the food.
  2. Moisture Removal: As the food loses moisture, it becomes less susceptible to spoilage, as most microorganisms require water to thrive.

Dehydration is a simpler and less energy-intensive process compared to freeze-drying, making it more accessible for home use. However, it’s important to note that the higher temperatures involved in dehydration can lead to some loss of flavor, color, and nutrients in the food. Consequently, while dehydration is effective, it may result in some alterations in the food’s characteristics.


Shelf Life

Both freeze-drying and dehydration excel in extending the shelf life of foods by reducing their moisture content. This reduction in moisture is a crucial factor because it limits the availability of water for microbial growth and enzymatic reactions that cause spoilage. Here’s a closer look at the shelf life of products preserved using these methods:

  • Freeze-Dried Shelf Life: Freeze-dried foods typically have an impressive shelf life. Depending on the specific product and packaging, they can last anywhere up to 30+ years. The extended shelf life is due to the minimal moisture content remaining in the food, which effectively inhibits the growth of bacteria, yeasts, and molds.
  • Dehydration Shelf Life: Dehydrated foods also enjoy a substantial increase in shelf life compared to their fresh counterparts. However, they generally have a shorter shelf life compared to freeze-dried foods. Dehydrated products can last for several months up to a 10 years or more, depending on factors such as moisture content, storage conditions, and packaging.

Storage Conditions

  • Freeze-Dried Food Storage: Freeze-dried foods are often packaged in moisture-resistant containers, such as vacuum-sealed pouches or cans. These containers help protect the food from moisture in the environment. To maximize shelf life, it’s important to store freeze-dried products in a cool, dark, and dry place. Avoid exposure to heat, humidity, and direct sunlight. Properly stored freeze-dried foods can maintain their quality for an long, long time.
  • Dehydrated Food Storage: Dehydrated foods are typically packaged in airtight containers, such as vacuum-sealed bags or jars. While they have a longer shelf life compared to fresh foods, they are not as moisture-resistant as freeze-dried products. To preserve the quality of dehydrated foods, store them in a cool, dry place away from direct sunlight. Proper packaging and storage can help prevent moisture absorption and lock in the product’s shelf life.

Choosing the Right Preservation Method

When selecting between freeze-drying and dehydration, it’s important to consider your specific storage capabilities and needs.

  • Freeze-dried foods often require less protective packaging and are more forgiving when it comes to storage conditions, making them suitable for long-term storage in various settings.
  • Dehydrated foods, while still effective for extending shelf life, may require more attention to packaging and storage to maintain their quality over time.

Rehydration

The usability of preserved foods is a critical aspect to consider, especially when it comes to preparing and enjoying meals. Aka, how easy is it to transform preserved foods back into their original, palatable forms?

Rehydration Process
  • Freeze-Dried Foods: Rehydrating freeze-dried foods is a quick, straightforward and hassle-free process. Most freeze-dried items can be revitalized in mere minutes by simply adding hot water, allowing them to absorb the liquid and regain their original texture, flavor, and appearance. The simplicity of this method makes freeze-dried foods an excellent choice for quick, on-the-go meals, backpacking, and emergency food supplies.
  • Dehydrated Foods: Rehydrating dehydrated foods is also relatively simple, but it can vary depending on the type of food and the intended use. Common rehydration methods for dehydrated foods include soaking in hot water, simmering, or cooking in soups and stews. While these methods are effective, they may require a bit more time and attention than rehydrating freeze-dried foods.
Taste and Appearance After Rehydration
  • Freeze-Dried Foods: When freeze-dried foods are rehydrated, they retain much of their original taste, texture, and appearance. Fruits still have their natural sweetness and shape, vegetables maintain their crispness, and meats maintain their tenderness. This preservation of freshness makes freeze-dried foods suitable for snacking, camping, and situations where you want the food to closely resemble its fresh counterpart.
  • Dehydrated Foods: Dehydrated foods, when rehydrated, may not always fully recover their original texture. Some may become softer or have slight changes in flavor. However, the adaptability of dehydrated foods shines when incorporated into recipes that already have a lot of water/moisture content or require longer cooking times. Dehydrated foods readily absorb flavors from broths, sauces, and seasonings, making them a versatile ingredient in various dishes, such as soups, casseroles, and stir-fries.

Culinary Applications: Convenience vs. Creativity

  • Freeze-Dried Foods: Freeze-dried foods are known for their convenience and are often used as standalone snacks (some freeze dried apple slices in your kids lunch), added into smoothies, or as toppings for cereals and desserts. They are also popular for quick, no-cook meals during outdoor activities. The convenience factor makes freeze-dried foods a preferred choice for hikers, campers and outdoor lovers who want lightweight, quick and easy-to-prepare meals.
  • Dehydrated Foods: Dehydrated foods, while still suitable for outdoor adventures, shine in creative culinary applications. They can add flavor and nutrition to a wide array of recipes. Dehydrated vegetables, for example, are excellent for enhancing the flavor of soups, while dehydrated fruits can be rehydrated and baked into muffins or added to oatmeal. Their versatility allows home cooks to experiment with flavors and textures.

Weight and Portability

For backpackers and travelers, the weight of food is a critical consideration. Freeze-dried foods have the upper hand here, as they are much more lightweight and easy to carry than their dehydrated counterparts. This advantage can make a significant difference when packing for extended outdoor adventures.

Cost Considerations

Cost can be a significant factor when choosing between these preservation methods. Dehydrated products are often more budget-friendly due to their simpler processing requirements. Freeze-dried foods are sometimes pricier as they have more steps to go through to get to the final product, yet offer superior flavor, texture, and nutritional benefits.

To Recap:

Pros of Freeze-Drying

  1. Preservation of nutrients
  2. Retained flavor, texture, and shape
  3. Long shelf life
  4. Lightweight and portable
  5. Quick rehydration or even edible without rehydration
  6. Minimal food waste or spoilage

Cons of Freeze-Drying:

  1. Cost
  2. Energy-intensive
  3. Complexity for home use

Pros of Dehydrating Food:

  1. Extended shelf life
  2. Portability
  3. Versatility in cooking
  4. Minimal / less expensive equipment required

Cons of Dehydrating Food:

  1. Texture and flavor changes
  2. Nutrient loss
  3. Increased rehydration time
  4. Minimal weight reduction

Conclusion

In the world of food preservation, both freeze-drying and dehydration have their unique strengths and applications. Your choice between these methods should depend on your specific needs, whether it’s for home use, outdoor adventures, or long-term storage. It’s essential to appreciate the significance of both techniques in ensuring we have access to delicious and nutritious meals throughout the year.

Give us a shout if you have any questions about either of these methods. BridenAcademy@bridensolutions.ca