self defense

Cultivating self-defense skills and being equipped with the right tools can be instrumental in ensuring one’s well-being. Whether navigating urban environments or venturing into the great outdoors, understanding self-defense principles and having the appropriate know-how can provide a sense of security. In this article, we’ll explore practical strategies and essential equipment to enhance your personal preparedness.

Before I continue, I would like to state a disclaimer that the definition of self defense is: “a set of actions or strategies taken by an individual to protect oneself from harm, aggression, or potential danger”. The key being to protect oneself. By no means do I suggest or support instigating an altercation. I do however fully support the learning of necessary skills!

Knowledge is Power: Self-Defense Basics

  • Start by understanding basic self-defense principles:
      • Situational awareness: be aware of your surroundings. Limit distractions (like excessive phone use) when walking in public spaces. Three parts of situational awareness include perception (be aware), comprehension (think about what you see), and projection (consider the possible outcomes of what you are seeing).journey of a thousand miles begins with a single step
      • De-escalation techniques: Should you find yourself in a heated situation, here are some basic considerations.
            • Active Listening
            • Empathize
            • Stay Calm
            • Body Language (ex: avoid crossing your arms, maintain distance)
            • Clarify and summarize what you’re hearing
            • Set boundaries
      • Trust your instincts: If something feels wrong or off, trust your instincts. Remove yourself from the situation calmly and quietly.
      • Enroll in self-defense classes to learn practical skills like striking, blocking, and grappling. Many communities offer classes tailored to various skill levels.

Self-Defense Gadgets and Technology

  • Safety Apps: Explore smartphone built in apps and other apps designed for personal safety. These apps often include features like real-time location sharing, emergency alerts, and quick access to local authorities.
  • Wearable Safety Devices: Consider wearable devices with built-in safety features, such as panic buttons or automatic distress signal transmission.

Home Security Measures

  • Personalized Home Defense Plans: Develop a home defense strategy with family members, including safe zones, communication methods, and emergency procedures. This may include alarms or cameras depending on your preferences.
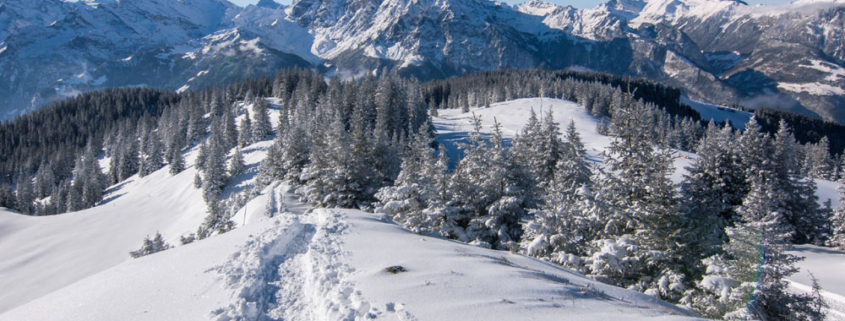
Canadian Wildlife:

Wildlife Awareness and Avoidance:

  • Understand the wildlife in the area where you’re exploring. Research the types of animals present and their behaviors to better anticipate potential encounters.
    • For example: When I am in Kananaskis Country, I am aware and as prepared as I can be to encounter bears, cats (the big kinds), moose, and depending on the time of year (mating season) other animals. I am aware of what season it is because that can affect the behavior of animals that are having their babies, or preparing for the winter. And, I am aware of the bug of choice that year. This year of 2023 in particular was a heavy tick year, so we took special precautions to check for them after each excursion.
  • Observe wildlife from a safe distance. Avoid approaching animals too closely, especially those with young or displaying defensive behaviors.
  • Store food securely to avoid attracting wildlife to your campsite. Use bear canisters or bear bags, and follow local guidelines for food storage.
  • Store food securely during a picnic and do not leave it unattended.

Personal Safety Measures:

  • Travel in Groups: When possible, travel in groups. Larger groups are often perceived as more intimidating to wildlife, and there’s increased safety in numbers.
  • Make Noise: Make noise while hiking, especially in areas known for bear or cougar presence. This alerts wildlife to your presence, reducing the likelihood of surprise encounters. Have a whistle, an airhorn and/or a flare in your pack.
  • Carry Bear Spray: In regions with bear populations, carry bear spray and know how to use it. It can be effective in deterring bears and other aggressive wildlife.

Here is a video made by Alberta Parks about how to use Bear Spray. I have been hiking for a decade, and have never encountered a bear, but still faithfully carry my spray in hopes I will never need it. I like to watch videos such as this one to re-educate myself regularly.

Navigation and Emergency Preparedness:

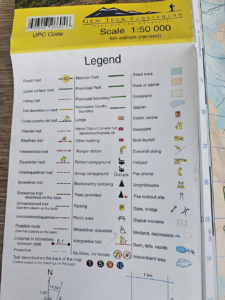
  • Navigation Skills: Develop strong navigation skills to avoid getting lost. Carry a map, compass, and/or GPS device, and familiarize yourself with the terrain.
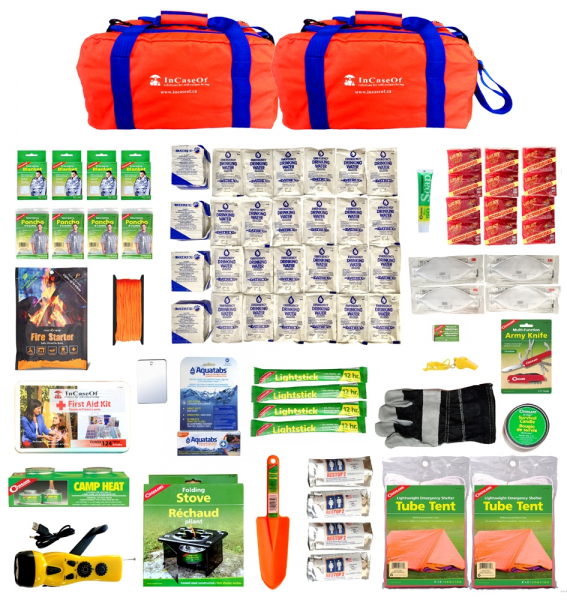
  • Emergency Communication: Carry a fully charged cell phone or satellite communication device for emergencies. Inform someone of your itinerary and expected return time.
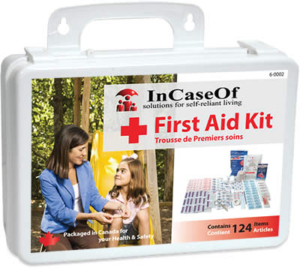
  • First Aid Knowledge: Learn basic first aid skills, including how to treat injuries common in outdoor settings. Carry a well-stocked first aid kit.

Campsite Security:

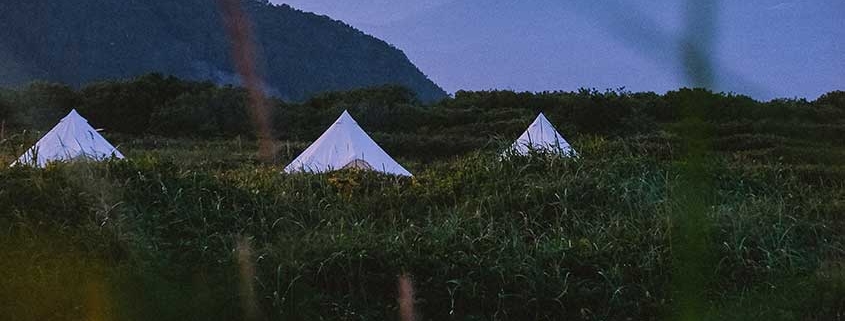
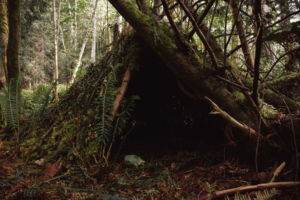
  • Select a Safe Campsite: Choose campsites with safety in mind, including proximity to water sources, visibility, and avoiding areas with signs of recent wildlife activity.
  • Secure Sleeping Area: Use proper storage for food and scented items. Tents and sleeping areas should be set up away from potential wildlife pathways.
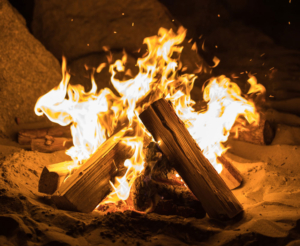
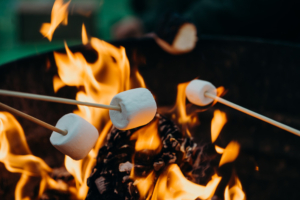
  • Campfire Safety: Follow Leave No Trace principles and practice responsible campfire safety. Keep a safe distance from tents, avoid leaving food residues, and fully extinguish fires.

Self-defense at home and in nature requires a combination of knowledge, preparation, and practical skills. By understanding the environment, adopting responsible practices, and having the right tools, you can enjoy outdoor activities with an increased sense of safety and confidence. Remember, personal safety is an ongoing journey, and staying vigilant and well-prepared contributes to a safer and more secure lifestyle.

hiking in the winter

This blog post is a little different, written in the form of a story, touching on the various aspects of being ready for a winter hike, ski, or snowshoe adventure. I hope you enjoy it, and it sparks some joy into your life thinking about how lovely (even with challenges) a winter adventure can be, especially when prepared!

winter boots

WINTER ADVENTURE

As the first snowflakes gently blanket the world outside, a thrilling sense of anticipation sets in—a winter wonderland adventure awaits. Whether you’re gearing up for a snowshoeing escapade, cross-country skiing exploration, or a cozy winter hike, careful preparation turns your snowy dreams into a reality.

Packing for the Chill

The journey begins at home, surrounded by gear and excitement. As I carefully select my clothing, layers become my allies—thermal base, insulating mid-layers, and a waterproof outer shell to repel the winter chill. Wool socks, gloves, and a trusty toque find their place in my pack.

Next comes the gear—snowshoes, cross-country skis, or winter hiking boots and trekking poles. I like to have ice cleats as well. A thermos of hot chocolate, energy-boosting snacks, my meal pouch & JetBoil, and a compact first aid kit join the well equipped backpack. I double-check the weather forecast, ensuring my preparations align with the whims of winter.

Embarking on the Trail

With the car packed and excitement bubbling, I embark on the journey to the winter wonderland. The drive through snow-covered landscapes is a prelude to the adventure that awaits. Arriving at the trailhead, I feel a mix of anticipation and tranquility—a snowy trail leading to unexplored beauty.

Boots crunch on fresh snow as I take the first steps, the winter wilderness unfolding before me. The air is crisp, and the only sound is the gentle whisper of the mountains. The preparation pays off—the layers keep me warm, the gear proves reliable, and the trail beckons with every twist and turn.

Midday Meal in the Snowy Silence

mountain house spaghetti

As the midday sun hovers above, it’s time to refuel and recharge. Finding a sheltered spot, I retrieve my trusty Jetboil from the backpack—a compact stove that promises a warm meal in the heart of the winter wilderness. A Mountain House pouch, carefully chosen for its simplicity and hearty flavors, transforms into a steaming feast. The snow-covered surroundings become my dining room, and the hot meal provides a comforting break, fueling me for the afternoon adventures. A cup of rich hot chocolate, prepared on the Jetboil, adds a sweet touch to the snowy feast, warming not just my hands but also my spirit.

Navigating the Winter Wilderness

As I delve deeper into the winter wonderland, nature’s artistry reveals itself. Snow-laden branches create archways, and the landscape sparkles in the soft winter light. Navigating the trail becomes a dance, whether on snowshoes, skis, or foot, each step a celebration of the winter beauty.

The trek is not without its challenges—a steep ascent tests my endurance, and icy patches require careful navigation. Yet, with every challenge conquered, the winter wonderland rewards me with panoramic views and a sense of accomplishment.

Facing the Unexpected: A Test of Preparedness

snowstorm in winter
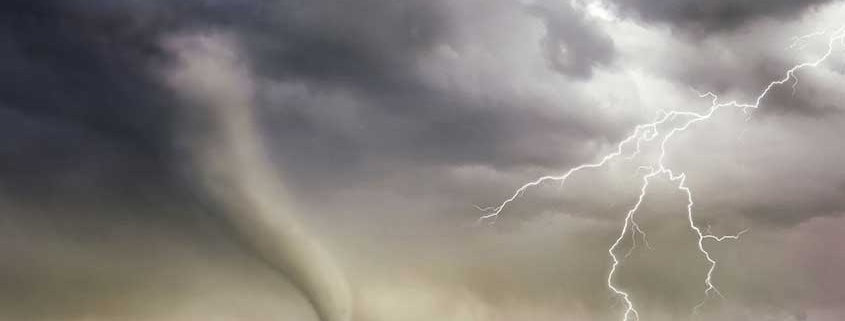
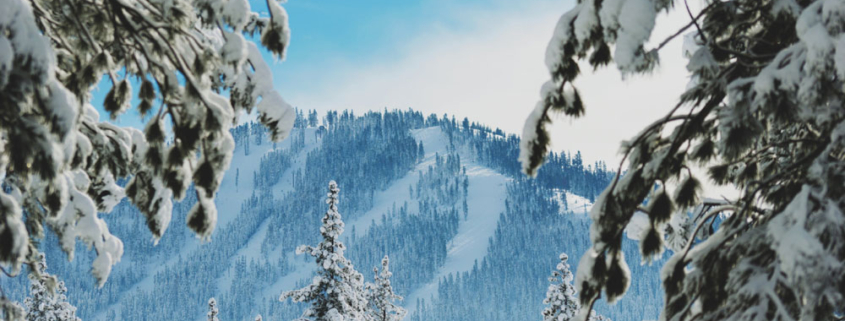
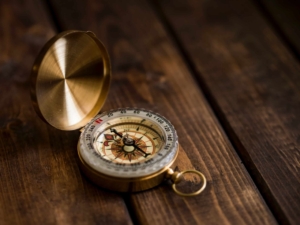
As the afternoon unfolds, a sudden shift in weather brings unexpected challenges. Dark clouds gather, and the serene snowfall turns into a relentless storm. The once familiar trail becomes obscured, and visibility diminishes rapidly. In this moment, the importance of emergency preparedness becomes vividly clear. Instinctively, I reach for the map and compass, skills honed in preparation for unforeseen circumstances.

Navigating through the now challenging conditions, I deploy the trekking poles for stability and reassurance. The winter wonderland, once serene and welcoming, now demands a different kind of respect. The preparedness pays off as I navigate through the unexpected challenge, finding solace in the knowledge that each step is guided by a blend of experience, gear, and the ability to adapt.

In the face of adversity, the winter wilderness reveals its untamed nature, and the journey becomes a lesson in resilience. The snowstorm, though challenging, becomes an unexpected highlight—a chapter in the winter adventure story, reminding me that the prepared mind and well-packed backpack are the greatest companions in the unpredictable dance of nature.

The Reward at Journey’s End

After hours of snowy exploration, the destination comes into view—a pristine snowy vista, adorned in white. The effort and preparation culminate in a moment of awe. A thermos of hot chocolate and a well-deserved snack become a feast in the winter wilderness—a celebration of nature’s wonders and personal triumph.

As I sit, surrounded by the hushed beauty of winter, I reflect on the journey from preparation to realization. A winter wonderland adventure is not just an escape; it’s a testament to the joy of embracing the season’s magic with careful planning and a spirit of exploration.

In the end, the snow-covered trail becomes a pathway to memories, and the winter wonderland transforms into a playground for those prepared to answer its call. With a heart full of gratitude and a camera full of snowy snapshots, I begin the journey back, knowing that the winter wonderland will always be there, patiently waiting for the next adventure.


winter mountain scene

Winter is a frosty time with snow layered forests and frozen lakes. All beautiful and stunning to behold, but also create a situation where proper winter adventure safety and etiquette is necessary. Lets discuss some of these clothing and gear essentials:

Essential Clothing Layers:

Thermal Base: Start with a moisture-wicking base layer to keep your body dry and regulate temperature. This is usually made out of nylon and polyester materials. Synthetic materials pull sweat and moisture away from the body. Cotton is not an ideal material choice for a base layer as it is more absorbent, no longer providing as an insulator.

Insulating Mid-Layers: Layer up with fleece or down to trap heat and provide additional warmth in freezing

winter time

temperatures.

Waterproof Outer Shell/Jacket: Shield against snow and wind with a durable, windproof and waterproof outer layer to stay dry and protected.

Wool Socks and Insulated Gloves: Keep extremities warm with high-quality wool socks and insulated, waterproof gloves.

    • Wool has natural insulating properties, even when wet. This means that even if your feet sweat or if the socks get damp, they will still retain some of their insulating ability, helping to keep your feet warm in cold temperatures.
    • Wool is excellent at wicking moisture away from the skin. This is crucial during winter hikes when your feet may sweat or if you encounter snow. By keeping moisture away from the skin, wool helps prevent discomfort, blisters, and the chilling effect of wet socks.
    • Wool is breathable, allowing air circulation around the feet. This helps regulate temperature, preventing overheating during periods of high activity and providing warmth during rest breaks or colder conditions.
    • Wool is soft and comfortable against the skin, reducing the likelihood of chafing or irritation during prolonged wear. The natural elasticity of wool fibers also provides a snug fit, preventing the socks from bunching up or sliding down.Toque and Neck Gaiter: Cover your head with a warm hat and protect your neck from the cold with a snug gaiter.

Gear Essentials:

Trekking Poles: Ensure stability and aid balance in challenging winter conditions. Along with some poles, some ice cleats (or crampons,  orice grips, or micro-spikes) are wonderful to have along a winter adventure hike.

Backpack with Essentials: Pack a well-organized backpack (ex: spare socks, spare gloves, map, compass, food & snacks, first aid, hydration, emergency blanket, multi-tool, rope, headlamp, cellphone & battery pack)

Portable Stove: Enjoy a hot meal midday with a compact foldable stove, a Kelly Kettle, a Jetboil or your favorite stove of choice. Nothing better on a winter day than to be able to have a hot meal.

Navigating Winter Trails:

Check Weather Forecast: Stay informed about changing weather conditions before embarking on your winter adventure. Regardless what the weather report says, be prepared for a storm. The mountains have an ever-changing weather pattern.

Map and Compass Skills: Hone your navigation skills for trailblazing through snowy landscapes, ensuring youFossil Falls, Aster Lake, Kananaskis can find your way in challenging conditions.

    • Take some time to familiarize yourself with how to read and use these seemingly archaic tools. Orient the map and understand the basics of contour lines. Consider having a route already mapped out, and mark your progress as you go.

Adaptability and Awareness: Embrace the unpredictable by staying alert and adapting to the evolving winter environment.

    • Be  ready to adapt to, and be aware of trail markers, animal tracks & animal signs, time of day/daylight, and the state of those you may be travelling with.

With these winter adventure essentials in your arsenal, you’re ready to traverse from frosty forests to frozen lakes. The beauty of winter awaits—layer up, pack smart, and immerse yourself in the breathtaking landscapes that the season has to offer. But first! Here are some additional essentials to consider.

Additional Winter Adventure Essentials:

Sunglasses and Sunscreen: Shield your eyes from the bright winter sun and protect your skin from its reflective rays on snow.

Portable Shelter: Be prepared for unexpected weather changes with a lightweight shelter or emergency bivy.

Extra Clothing Layers: Pack additional clothing layers to adjust to changing temperatures or in case of

Windproof, waterproof matches 20 pcs 
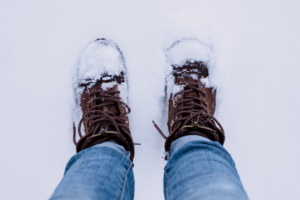
unexpected wet conditions.

Fire Starter Kit: Include waterproof matches or a reliable lighter for starting a fire in emergency situations.

High-Energy Snacks: Keep a stash of high-energy snacks like trail mix, energy bars, and dried fruits to stay fueled throughout the day.

Hydration System: Stay hydrated even in cold weather by carrying a hydration bladder or insulated water bottles. In winter, water becomes frozen, and finding water sources can be challenging. However, keeping a water-straw can also be handy to have in your pack.

Emergency Whistle: Ensure you have a loud, easily accessible whistle for signaling in case of an emergency.

Spare Batteries: Pack extra batteries for your headlamp, GPS, or any electronic devices you may be carrying.

Snow Probe and Shovel: If venturing into avalanche-prone areas, carry a snow probe and shovel for safety.

Communication Device: Bring a fully charged cellphone, a satellite communicator, or a two-way radio for communication in remote areas.

Know Your Limits: The most essential of all—know your personal limits and be willing to turn back if conditions become too challenging.

Remember, the key to a successful winter adventure lies not just in the gear you carry but in your ability to adapt, stay informed, and respect the dynamic nature of winter environments. Stay safe, enjoy the winter wonderland, and create lasting memories in the heart of the frosty wilderness!

winder scape of mountains reflecting in the lake

Briden Academy

In the wild, having the ability to create shelter is a fundamental skill. Whether you’re an avid outdoors enthusiast, a camper, or find yourself unexpectedly stranded, knowing how to construct a suitable shelter is vital.

Shelter Typesshelter

Lean-To Shelter:

  • To build a lean-to shelter:
    • Find a long, sturdy branches, logs or poles and prop against a horizontal support.
    • Secure the ridgepole with cordage, vines, or even shoelaces.
    • Create a roof by using a tarp, leaning smaller branches, or sticks against it. Cover the frame with leaves, grass, or branches for insulation.

Tarp Shelter:

  • If you have a tarp or a waterproof piece of fabric, you can create a tarp shelter. Secure the corners of the tarp to trees or use improvised supports, creating a simple, waterproof roof. From here you can use branches, logs, and natural supplies to create walls or wind breaks.

Tents and Other:

Briden Academy

  • Carrying a portable tent or something as simple as a tube tent (which can be stored in a vehicle, backpack, or 72 hour kit) can provide you an emergency shelter. Another option could be a hammock. Offering some shelter and off-the-ground comfort. The goal is being as much out of the elements as possible to stay safe and warm.

Site Selection

Proximity to Water:

  • When selecting a shelter site, prioritize proximity to water. Access to water is vital for drinking, cooking, and hygiene. However, avoid low-lying areas and flood-prone zones.

Natural Windbreaks:

  • Look for locations with natural windbreaks, such as rocks, cliffs, or dense vegetation. These features can provide additional protection from harsh winds and elements.

Avoid Hazards:

  • Ensure your chosen site is safe. Avoid areas with dead trees or overhanging branches that could fall. Steer clear of areas with wildlife activity like game trails or animal dens.

Staying Warm and Dry

Insulation:

  • If you do not have a ground cover, lay insulating materials, like leaves or grass, between you and the ground to prevent heat loss through conduction.

Keep It Cozy:

  • The smaller and more enclosed your shelter, the easier it is to retain warmth. Use your own body heat to your advantage.

Use a Fire:

  • If resources permit and it’s safe to do so, build a fire near your shelter for warmth and protection. Ideally you will have matches, a flint n steel, or other fire starting tools. More difficult but do-able: using solar reflection from a magnifying glass or your emergency mirror. Or the “bow and spindle” method of rubbing two sticks together.

Signal for Rescue:

  • In a survival situation, creating a signal fire near your shelter can help rescuers locate you. Use damp leaves, green vegetation, or rubber from a bicycle tire to create excess smoke for visibility. Universal sign for help is waving both hands over your head, and of course SOS.


Wilderness shelter-building skills are important for anyone who spends time in the great outdoors. Whether you’re on a camping trip or facing an unexpected survival scenario, knowing how to create shelter can keep you safe, warm, and dry. Practice these techniques and always carry the knowledge of shelter-building as one of your most valuable wilderness survival skills.


Upper Kananaskis Lake

Navigating in the wilderness is a fundamental skill that can mean the difference between getting lost and finding your way to safety. Understanding navigation techniques is important for your safety, so let us discuss various skills necessary:

1. Using Maps and Compasses

Topographic Maps:
  • When venturing into the wilderness, always carry a topographic map of the area. These maps provide detailed information about terrain, landmarks, and elevation.
Understand the Basics:

Start by looking at the map’s title and the legend (key) to understand what symbols and colors mean. This will help you make sense of the map’s details.

map Legend

This is the legend of my Kananaskis Lake map:

You can read on a map’s Legend details such as solid black lines mean paved roads, dotted red lines show a hiking trail, while a block dotted line will show a snowshoe trail.

Determine Elevation:

Fossil Falls, Aster Lake, KananaskisContour lines are the squiggly lines on the map. They represent the shape of the land. Closely spaced lines mean steep terrain, while widely spaced lines show flat or gently sloping areas.

Each contour line has a number indicating its elevation above sea level. Read these numbers to figure out how high or low the land is. Lines closer together mean you’re going up or down a steep hill or mountain.

Identify Features: Look for natural and man-made features like rivers, lakes, roads, and buildings. They are usually marked with symbols and labels on the map.

Use the Scale: The map has a scale that tells you how far distances on the map are in the real world. For example, if the scale is 1:24,000, it means that one inch on the map equals 24,000 inches (or about 2,000 feet) in real life. This helps you estimate distances.

Check Grid Lines: Grid lines, like latitude and longitude or UTM, help you find your exact location. Think of them as a big grid system that you can use to pinpoint where you are on the map.

Orient the Map:

Make sure your map is oriented in the right direction. You can use a compass to align the map with the real world so that north on the map matches north in reality.

Plan Your Route: If you’re hiking or exploring, use the map to plan your route. Follow the contour lines to see if you’ll be going uphill or downhill. Use landmarks and grid lines to stay on course.

Practice: Reading topographic maps takes practice. The more you use them, the better you’ll get at understanding the landscape and making informed decisions. I suggest using a map on a trail you’re very comfortable and familiar with, and follow the markings on the map to learn how to navigate.

compass to figure out what direction to go

Compasses: A reliable compass is an important tool. To use it effectively:

  • Hold the compass flat and ensure the magnetic needle aligns with the “N” on the compass.
  • Rotate your body until the needle points north. Now, you know which way is north and can determine other directions accordingly.

2. Orienting Yourself

Find a Prominent Feature:

  • Start by locating a prominent feature on your map that is also visible in your surroundings. This could be a mountain, lake, or any distinctive terrain feature.

Compare Locations:

  • Compare the feature’s location on the map with its actual location in the wilderness. This will help you pinpoint your current position.

3. Using the Sun and Stars

Daytime Navigation: Use the sun’s position during the day to identify east and west. Remember that the sun rises in the east and sets in the west.

Nighttime Navigation: In the Northern Hemisphere, locate the North Star (Polaris) at night. It’s a fixed point in the northern sky and can help you find true north.Here’s a simple way to locate the North Star:

    1. Locate the Big Dipper:big dipper at night
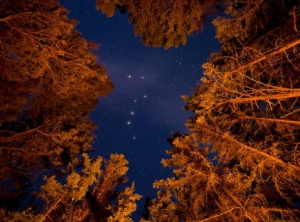
The Big Dipper is a well-known constellation and is part of the Ursa Major (Great Bear) constellation. It looks like a ladle or a saucepan with a long handle. It’s usually visible in the night sky, and its shape makes it easy to recognize.
    2. Identify the “Pointer Stars”:
      • Two stars at the end of the Big Dipper’s ladle or bowl are called “Pointer Stars” because they point the way to the North Star. These two stars are Merak and Dubhe.
    3. Draw an Imaginary Line:
      • Imagine a line that connects the two Pointer Stars, Merak and Dubhe, extending away from the Big Dipper’s bowl.
    4. Extend the Line Approximately Five Times:
      • Extend the imaginary line from the Pointer Stars approximately five times its length beyond the Big Dipper.
    5. You’ve Found Polaris (the North Star):
      • The point where your extended line leads to is the location of the North Star, Polaris. It’s the only relatively stationary star in the northern sky and remains nearly directly above the North Pole.

4. Landmarks and Tracking

  • Natural Landmarks: Pay attention to natural landmarks, such as distinctive trees, rock formations, or water bodies. These can help guide your way and serve as reference points.
  • Game Trails and Animal Tracks: Game trails and animal tracks often lead to water sources. Following these paths can be a reliable way to find water, a critical resource for survival.

5. Staying Put When Lost

  • Safety First: If you become disoriented or lost, prioritize safety. Avoid wandering further, as it can lead to more confusion.
  • Build a Signal: Create a prominent signal fire near your location. Gather dry wood and light it with matches, a lighter, or a fire starter. Use damp leaves, green vegetation, or rubber from the inner tube of a bicycle tire to create smoke for visibility.
  • Shelter and Water: While waiting for rescue, build a shelter to protect yourself from the elements. Collect and purify water, and conserve your resources.

Lesson Learned:

Upper Kananaskis Lake
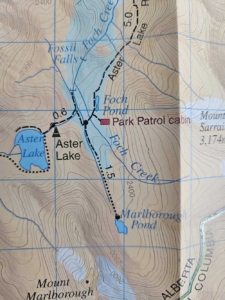
Let me tell you a personal experience that resulted in the starting of my journey learning to read a map! My friend Amanda and I were hiking from the Kananaskis Lakes parking lot, in search of Fossil Falls (as we are waterfall enthusiasts). I had done some pre-planning in the sense that I had read and studied the description in the Gillean Daffern’s guidebook.

We reached all the described landmarks, and were on a trail (that in hindsight may or may not have been an animal trail) heading onward. Eventually we hit a junction, crossing onto a very populated hiking trail. We sat down for a bite to eat, and when the next human passed us by, we asked him how much farther to the waterfall.

It was at this point that we knew we had done something wrong, because the look on this fellows face was priceless. “What waterfall?” he replied. He pulled out his map for us to look at and show us where we actually were. As our luck would have it, we had actually hiked approximately 5-6kms WEST towards Three Isle Lake from Upper K (having overshot our turn off trail by about 1km), instead of heading SOUTH towards Fossil Falls.

Since then, I always carry a map and download my map on my AllTrails map.  Out of sheer honesty, this has not been the first nor the last time we have ended up in a different location than we originally planned, but we have always been prepared and gotten ourselves back on track!

On another trip we did manage to get to Fossil Falls. We had plans to go all the way to Aster Lake, but the time of year had some snow passages that didn’t look safe to cross, so we didn’t get all the way to the lake:

Conclusion:

Mastering wilderness navigation skills is essential for your safety and well-being in the great outdoors. Whether you’re hiking, camping, or finding yourself in a survival situation, knowing how to use maps, compasses, natural navigation, and staying oriented can mean the difference between getting home safely or becoming lost. Always prepare for your wilderness adventures with the right tools and knowledge, and practice these navigation techniques to build your confidence and ensure a safe journey. Happy adventures!

rope work out

Are you ready for any emergency or disaster that might come your way? Whether it’s a natural disaster, power outage, or unforeseen crisis, being prepared is helpful. Welcome to “Mastering Preparedness: A 30-Day Home Prepper Bootcamp,” a challenge to transform your home into a fortress of self-sufficiency and resilience.

The path to preparedness might seem daunting, but we’ve designed this bootcamp to be accessible and engaging. Each day’s activity is carefully crafted to ensure you make measurable progress while learning new skills and reinforcing old ones. Whether you’re a seasoned prepper or new to the concept, this bootcamp is your opportunity to fine-tune your preparedness efforts and elevate your level of readiness.

Are you up for the challenge? Let’s begin!

Have a notebook and/or a binder with loose-leaf to make notes and track progress, plus please feel free to peruse the Academy for related articles from day to day!

Week 1: Food and Water

Day 1: Take an inventory of your current food and water supplies. Make a list of what you have and their expiration dates.

Day 2: Research and create a basic emergency food supply plan. Calculate the amount of food your household needs for one week and make a shopping list.

Day 3: Go grocery shopping for your emergency food supply. Focus on non-perishable items like canned goods, freeze dried or dehydrated foods, and grains. We have you covered here!

Day 4: Purchase a water purification system or additional water storage containers. Ensure you have at least 2-4 liters of water per person per day for a week.

Day 5: Create a water purification plan. Learn how to use water purification tablets or filters effectively.

Day 6: Research and prepare a list of recipes that can be made from your emergency food supply. Include cooking instructions.

Day 7: Organize your food and water supplies in a dedicated storage area, keeping the oldest items up front for easy rotation.

Week 2: Shelter and Warmth

Day 8: Assess your home for potential shelter and heating needs during an emergency. Identify weak points and drafty areas.

Day 9: Make a list of necessary shelter and warmth supplies such as blankets, sleeping bags, or a portable heater.

Day 10: Purchase or gather the shelter and warmth supplies you identified, if lacking.

Day 11: Create an emergency heating plan, including safe use of any heating devices.

Day 12: Practice setting up a temporary shelter or insulation in your home, such as a tent or tarp.

Day 13: Learn how to start a fire safely, both indoors (if you have a fireplace) and outdoors.

Day 14: Review your emergency heating and shelter plans with your household members.

Roasting over the fire

Week 3: First Aid and Health

Day 15: Check your first aid kit for expiration dates and restock any missing items.

Day 16: Sign up for a basic first aid and CPR course or review your existing skills.

Day 17: Create a list of essential medications for your family and check their expiration dates.

Day 18: Refill any necessary prescriptions and purchase over-the-counter medications for common ailments.

Day 19: Learn basic home remedies and herbal remedies for common health issues.

Day 20: Organize your medical supplies and first aid kit in a clearly marked and accessible container.

124 piece First Aid Kit

Day 21: Teach your household members basic first aid skills and ensure they know where the first aid supplies are located.

Week 4: Communication and Security

Day 22: Establish a communication plan with family or household members during an emergency. Ensure everyone has a list of emergency contacts, or access to them.

Day 23: Invest in a battery-operated or hand-crank emergency radio for staying informed during power outages.

Day 24: Create a list of important documents and gather them in a waterproof container.

Day 25: Practice safe firearm storage and handling if you have them. Make sure appropriate licenses or permits are in place.

Day 26: Set up a neighborhood watch or community emergency response group. Alternatively, have a conversation with neighbors about an emergency response plan.

Day 27: Develop a security plan for your home and review it with your household members.

Day 28: Revisit your overall preparedness plan and make any necessary adjustments.

Day 29: Conduct a emergency drill to test your preparedness efforts.

Day 30: Reflect on your progress over the past 30 days and create a long-term preparedness plan to continue improving your readiness.

Triathlon finish


CONGRATULATIONS! You did it! Feel free to reach out to BridenAcademy@bridensolutions.ca and tell us all about your experience going through the challenge. We would love to hear how it went!

flower

Lets use the following 7 tips to stay calm during a crisis to better understand the human mind and enhance our resilience and adaptability. This article explores the psychology of preparedness and provides insights on how to remain calm during a crisis.

First lets start with 2 examples:

Example 1 – Getting Lost While Hiking:

Imagine you are hiking in a remote forest, and you suddenly realize you have lost your way. Panic starts to set in as you feel disoriented and anxious. You take a deep breath to calm your racing heart then remember that you brought a map and a compass, which you carefully pull out of your backpack. You sit down, study the map, and determine your approximate location by identifying nearby landmarks.

Then you use the compass to orient yourself and find the right direction. As you begin to continue your trek, you also notice your GPS communicator you packed, reassuring your safety. With a clear plan in mind, you regain your composure and continue your hike with confidence, ultimately finding your way back to safety. Staying calm and relying on your preparedness skills helped you navigate the crisis effectively.

compass to figure out what direction to go

Example 2 – The Storm:

You live in an area prone to hurricanes, and a powerful storm is approaching. As the winds howl and the rain intensifies, you hear the sound of breaking glass. A tree branch crashes through one of your windows, and water starts pouring into your home. Instead of panicking, you remember your emergency plan. You guide your family to a safe, designated area within the house and use a sturdy board and some heavy-duty plastic to quickly secure the broken window.

You’ve also prepared an emergency kit with essentials like flashlights, food, and first-aid supplies. As you wait for the storm to pass, you keep everyone calm by playing games and sharing stories. When the hurricane subsides, you’re relieved to find your home mostly intact. Your preparedness and calm, collected response ensured the safety and well-being of your family during the natural disaster crisis.

  1. Understanding the Stress Response: Fight or Flight

When confronted with a crisis, our bodies undergo a stress response commonly referred to as “fight or flight.” This physiological reaction involves the release of stress hormones like adrenaline and cortisol. While this response is essential for survival, it can also lead to heightened anxiety, panic, and irrational decision-making if not managed.

This stress response can be understood as a physiological alarm system. It serves to sharpen our senses, increase alertness, and prepare the body for rapid action. The heart rate accelerates, blood pressure rises, and energy is directed towards the muscles, readying us to either confront the threat or escape from it. This is a response that has served our ancestors well in the face of physical dangers or life-threatening situations.

Understanding of the Stress Response Continued…

Today’s crises often do not require physical confrontation or flight. Instead, they demand reasoned and well-thought-out responses. The stress response can trigger heightened anxiety, clouded thinking, and a tendency to make impulsive decisions.

One aspect of understanding the stress response is recognizing that it is a natural and automatic reaction to perceived danger. It is not something to be suppressed but rather managed. In a crisis, it is not about eliminating stress but navigating it effectively. When individuals are aware of the stress response, they are better equipped to recognize when they are in its grip, allowing them to take steps to regain control.

Furthermore, understanding that the stress response is a universal human experience helps build empathy and connection during crises. Recognizing that others may be feeling the same physiological reactions can foster a sense of shared experience and solidarity. This sense of unity can be a powerful source of support and comfort in challenging times.

meditation, quiet

  1. The Role of Preparedness

One of the most effective ways to counteract the stress response is through preparedness. When individuals are well-prepared for a crisis, they are more likely to remain calm and rational. Preparation includes having a plan, knowing what to do, and having essential supplies on hand. The psychological security provided by preparedness can significantly reduce stress levels.

This has been a thought pattern in my own life. Have you ever heard an experience someone had and thought “I could never have done that”? It dawned on me that when those thoughts cross my mind, I spend time considering how I would like to handle it, and how I would respond should those unforeseen (and sometimes seemingly unforgiveable) situations came to pass. This has prepared me for countless difficult scenarios!

  1. Information Management

During a crisis, there is often a flood of information, some of which may be contradictory or confusing. Managing information effectively is a key aspect of staying calm. To do this, limit exposure to sensationalized or unreliable sources, focus on trusted information, and stay informed without becoming overwhelmed.

How do you know which sources are correct? A few tips include: Cross-check with multiple sources, look at citations and references, or check government websites for official statements.

  1. Mindfulness and Emotional Regulation

Mindfulness practices, such as meditation and deep breathing exercises, are powerful tools for maintaining emotional balance. These techniques help individuals stay present in the moment, reduce anxiety, and make moremeditation, quiet rational decisions. Emotional regulation is a skill that can be developed over time, allowing individuals to manage fear, anger, and panic effectively.

Before there is an emergency: Familiarize yourself with meditation and deep breathing, stay connected, have a support system, and practice accepting the unexpected. By doing this you will find yourself better equipped to handle the fight or flight response.

  1. The Power of Positive Thinking

Optimism and positive thinking can be powerful allies during a crisis. While it’s essential to acknowledge the seriousness of the situation, maintaining a hopeful outlook can help individuals stay motivated and focused on problem-solving. Emphasizing strengths and resources rather than dwelling on limitations can also be empowering.

Pro-tip: Try to avoid telling someone else who is in the middle of their own fight-flight cycle to think positive. Focus solely on yourself in stressful situations. Those conversations can happen during a debriefing after the situation is over.

  1. Community and Social Support

Human beings are social creatures, and community support is helpful for psychological preparedness. A strong social network provides a sense of security and shared responsibility. Connecting with others who are experiencing the same crisis can help individuals feel less isolated and more resilient.

Pro-tip: Find your tribe!

  1. Adaptability and Flexibility

Preparedness doesn’t mean rigidity; it also involves adaptability. Understanding that situations can change rapidly and that adjustments may be necessary is essential. A prepared individual is more likely to stay calm when they can adapt to new information and circumstances. This will be harder for some than others, but my advice to you is that being prepared for flexibility will actually bring more calm to the rigid thinker.

Conclusion

The psychology of preparedness is an essential component of staying calm in a crisis. While it’s impossible to predict every crisis, the skills and mindset developed through preparedness and psychological resilience can make a significant difference in how we respond and recover from challenging situations.

Briden Academy Tornado Information

To determine if you are ready for a disaster, ask yourselves these 10 questions.

#1 Do You Have a Family Emergency Plan in Place?

The foundation of disaster preparedness is a well-structured family emergency plan. Ask yourself if your family has a plan that includes communication strategies, designated meeting points, and evacuation routes. Are all family members familiar with the plan, and have you practiced it recently?

#2 Is Your Emergency Kit Complete and Up-to-Date?

A well-stocked emergency kit is a vital component of preparedness. Ensure that your kit contains non-perishable food, water, first aid supplies, flashlights, batteries, essential tools, and personal hygiene items. Regularly check and update the contents to meet your family’s specific needs.

Personal Experience: Just today I was cleaning out my laundry room, and I sifted through our family’s 72 hour kit. As I was going through the clothing items, I was able to pull out the items that are too small. I do not have full outfits for each person, but I do have clean sets of underwear, socks, and shirts for everyone. While in there I checked the expiration dates/ best before dates, and I am still set until 2025 before I need to replace any items.

Did you know that you can purchase our 4 personal basic or deluxe kits, and request additional items to modify to be a 5 person kit?

#3 Are You Informed About Local Hazards and Warnings?

Staying informed about potential hazards and current events in your area is crucial. Ask yourself if you receive up-to-date information through weather apps, emergency alerts, and community notifications. Being aware of local risks is essential for making informed decisions during an emergency.

#4 Have You Secured Your Home Against Disasters?

Your home should be a safe haven during a disaster. Assess whether you’ve taken steps to make your home disaster-resistant, such as reinforcing its structure, securing heavy furniture, or installing protective measures like storm shutters in hurricane-prone regions. Other ways to secure your home:

  • Install smoke & CO detectors
  • If your home is on a flood plain, keep sandbags accessible
  • Insulate and weatherize
  • Have a safe room, particularly if you live in an extreme storm area

#5 Is Your Financial Safety Net Established?

Financial preparedness often goes overlooked. Evaluate whether you have an emergency fund to cover unforeseen expenses and whether you possess insurance policies that adequately protect against disasters like floods, earthquakes, or wildfires. Ensure that essential financial documents are documented and stored securely.

#6 Are You Prepared for Evacuation?

In some circumstances, you may need to evacuate your home quickly. Evaluate whether you have a “go-bag” packed with essential items, clothing, important documents, and your emergency kit. Make sure your vehicle is in good working order and always has a full tank of gas.

Success favours the prepared

#7 Is Your Family’s Health a Priority?

Good health is a valuable asset during a disaster. Ask yourself if your family maintains a healthy lifestyle, receives regular check-ups, and has an adequate supply of essential medications. Familiarize yourself with local health resources, such as clinics and hospitals, and have a first aid kit ready.

#8 Do You Engage with Your Community in Disaster Preparedness?

Community support is invaluable in disaster scenarios. Consider whether you collaborate with neighbors and local organizations to enhance disaster resilience. Building a support network that can assist during an emergency is essential.

#9 Have You Educated Your Family About Disaster Preparedness?

Education is empowering and can significantly impact your family’s preparedness. Determine whether your family members are knowledgeable about emergency equipment, basic first aid, and how to administer CPR if necessary. Consider practicing fire drills, mock-evacuations, and tornado protocols.

#10 Do You Regularly Review and Update Your Preparedness Measures?

Disaster preparedness is an ongoing process. Evaluate, review and update your emergency plan, kit, and evacuation routes. As your family’s needs and circumstances change, adapt your preparedness measures accordingly, just as I did with my families clothing (though, maybe wearing flood pants in a flood situation would be a win?).

Conclusion

Ask these ten essential preparedness questions to ensure that your family is truly ready for a disaster. By assessing your level of preparedness and making necessary adjustments, you can enhance your family’s ability to respond effectively in emergency situations. Remember, disaster preparedness is not just a choice; it’s a responsibility.

bills and coins

Sometimes we find ourselves in a time where frugal preparedness is important. However, the misconception that preparedness comes with a hefty price tag can be discouraging for those on a tight budget. The truth is, you can be well-prepared without breaking the bank. This article will explore practical tips for frugal preparedness, demonstrating that even the most budget-conscious people can safeguard their families and themselves in times of crisis.

  1. Start with a Plan

Your first step to budget-friendly preparedness is to create a plan. Identify potential risks in your area, whether it’s severe weather, power outages, or economic instability. Consider the specific needs of your family, such as dietary restrictions or medical conditions, and establish clear goals. Having a plan in place will help you prioritize your efforts and budget, ensuring you’re addressing the most relevant concerns.

Pro-tip: Make an envelope, jar, or other savings system, and put $5, $10, $20, or whatever amount factors into your budget aside each pay towards your emergency plan!

  1. Emergency Kits

Building an emergency kit doesn’t have to be expensive. Begin with the essentials: water, non-perishable foods, a flashlight, batteries, a first-aid kit, and a warm blanket. Start small and gradually expand your kit by adding items during sales and discounts. Check out our emergency kits to get you started.

  1. Couponing and Sales

coupons

The art of couponing can be a budget prepper’s best friend. Scour your local newspapers, online coupon websites, or manufacturer websites for deals on non-perishable items. You’d be amazed at how much you can save on products ranging from canned foods to hygiene supplies. And don’t forget to keep an eye out for store ends for extra discounts and promotions.

  1. DIY Preparedness

Many preparedness items can be crafted at home, which can be both cost-effective and rewarding.

  • Water Purification Methods: Instead of purchasing water filters or purifiers, learn how to make your own. DIY water purification methods, such as constructing a simple solar still, can provide you with safe drinking water during an emergency. Do thorough research for you and your households safety!
  • Emergency Lighting: Create your own emergency lighting options. For example, make inexpensive oil lamps or candles from items you already have at home. You can craft simple oil lanterns from mason jars, wicks, and vegetable oil.
  • Homemade Fire Starters: Consider making fire starters from items like cotton balls soaked in petroleum jelly, cardboard egg cartons filled with dryer lint and wax, or DIY fire starter sticks made from sawdust and paraffin wax.
  • Food Preservation: Explore food preservation methods like canning and vacuum sealing. These techniques can help you store and preserve your own food for emergency use.canning
  • Gardening: If you have a garden or access to outdoor space, consider starting a garden. Planting your own vegetables and herbs can reduce your reliance on store-bought food during an emergency or provide a way to grow your own produce to can/preserve yourself.
  • Rainwater Harvesting: Install a rainwater harvesting system to collect and store rainwater for non-potable uses like flushing toilets, watering plants, or cleaning. Building a DIY rain barrel system can be cost-effective and eco-friendly.

water barrel

  • Second-Hand Gear: Thrift stores, garage sales, and online marketplaces are goldmines for finding gently used outdoor gear, clothing, and camping equipment at a fraction of the cost of new items. Look for durable, well-maintained gear such as backpacks, sleeping bags, and sturdy footwear. Your budget will thank you.
  1. Education is Key

Investing time in learning essential skills can be just as important as accumulating supplies. There are plenty of free or low-cost courses available, both in person and online. These courses cover topics like first aid, wilderness survival, and emergency communication. For example, you can often find CPR and basic first aid classes offered through your workplace, by local organizations or online.

  1. Prioritize Essentials

When budgeting for preparedness, prioritize the most critical items first. Water, food, and a means of staying warm should be your top concerns. Start by stockpiling water by picking up an extra jug or bottles each grocery trip. then build a small stash of non-perishable foods, starting with the basics like rice, beans, canned vegetables, and pasta, again picking up an extra each grocery shop. As your budget allows, add additional items like tools, communication devices, and first-aid supplies.

  1. Group or Bulk Purchases

Consider joining forces with friends or neighbors to make bulk purchases. Buying in larger quantities can often secure lower prices per unit.

Conclusion

Prepping on a budget doesn’t mean compromising your safety and that of your loved ones. With a well-thought-out plan and strategic choices, you can achieve preparedness without straining your finances. Remember, it’s the determination and resourcefulness of individuals that make them truly prepared, and this holds true regardless of the budget constraints. Sensible, cost-effective preparedness is an empowering journey toward resilience, and it’s within reach for everyone. By being mindful of your budget and making smart choices, you can confidently navigate the uncertainties of life and ensure you’re well-prepared for whatever challenges may come your way.

completing your education

Welcome to the ultimate College Survival Guide! College life is a whirlwind of independence, fun, and, let’s face it, chaos. But fear not, because this guide is your secret weapon to staying ahead of the curve and thriving during your academic journey. We’ll dive into essential tips and tricks, geared towards students like you who want to master the art of preparedness while still having a blast.

Section 1: The Art of Time Management

  • Meet Joe, the ‘Procrastination Prince.’ Every Sunday, he schedules his week, allocating study hours and relaxation time. By sticking to a schedule, Joe enjoys the best of both worlds, acing exams and parties.

Section 2: Budgeting Like a Boss

  • Sarah is a student entrepreneur who knows that budgeting will keep her debt load down. She tracks her expenses, uses student discounts, and seeks part-time jobs outside of class time. As a result, she’s financially secure and still indulges in her favorite morning hot chocolate and bagel.

Section 3: Meal Prep Hacks

  • Hungry Hannah finds cooking a drag, so she preps her meals every Monday. Sometimes she uses pre-made meals from a food bucket that her parents gave to her, as they are easy to prepare in her dorm room, especially without full kitchen access. It saves time and ensures she doesn’t resort to pricey fast food options during late-night study sessions. Hannah budgets 1 lunch and 1 dinner out a week to keep the spark in her college experience!

14 day emergency food supply 2000 cals per day

Section 4: Study Smarter, Not Harder

  • Jack, the ultimate study guru, relies on productivity apps like Cozi or other calendaring apps, to keep organized. He also utilizes limit settings on his phone (like digital wellbeing and parental controls) to be sure he doesn’t waste unnecessary time on Netflix binges, without compromising his grades.

Section 5: First Aid Kits for the Clumsy

  • Lucy’s notorious for her clumsiness. So, she carries a mini emergency kit with band-aids, pain relievers, and stain removers in her bag. This makes her the go-to person with her classmates too!

Section 6: Emergency Preparedness

  • Lucy, Jack, Hannah, Sarah & Joe all have 72 Hour Kits. These kits are perfect for students because:
        • they take up very little space
        • they are portable
        • they bring a sense of peace to parents knowing their kids have a plan in place

Pro-Tip: If the dorm runs emergency evacuation or fire drills, practice bringing your 72 hour kit along. Also, pack the kit when travelling to and from home because it doubles as an emergency car kit!

72 hour kit 4 person deluxe

Conclusion: College is about more than just textbooks and exams; it’s a real time lesson in preparedness and independence. By following the advice in this College Survival Guide, you’ll graduate with the invaluable life skills of adaptability, resourcefulness, and resilience, plus a head start on building the habit of being prepared. Embrace the journey, and enjoy your college years. May you conquer every challenge that comes your way!